How to Draw Drift’s Mask
This step-by-step tutorial will show you how to draw Drift’s Mask. Also I will show you how to make your artwork more unique and add details.
How to Draw Drift’s Mask: Basic Information
Today, I’ve got a super cool tutorial for you: here we are going to learn how to draw Drift’s mask. Like all my drawing tutorials, this guide will not only show you how to draw Drift’s mask, but will also train your artistic skills.
The Drift’s mask features intricate patterns that add to its unique design. This tutorial will show you how to experiment with patterns and incorporate them into your drawings. Practicing pattern work helps you develop a sense of rhythm and repetition.
The Drift’s mask features a mix of curved and angular lines, providing an excellent practice ground for mastering both types of lines. Curved lines can be challenging to draw smoothly, while angular lines require precision and sharpness. This tutorial will help you become proficient in drawing both.
Drawing the details of the Drift’s mask will help you train your ability to work with fine details. As you become more comfortable with adding details, you’ll find it easier to incorporate them into your other artworks, making your drawings more complex and interesting.
Drift’s Mask Drawing Tutorial
Materials
- Pencil
- Paper
- Eraser
- Coloring supplies
Time needed: 35 minutes
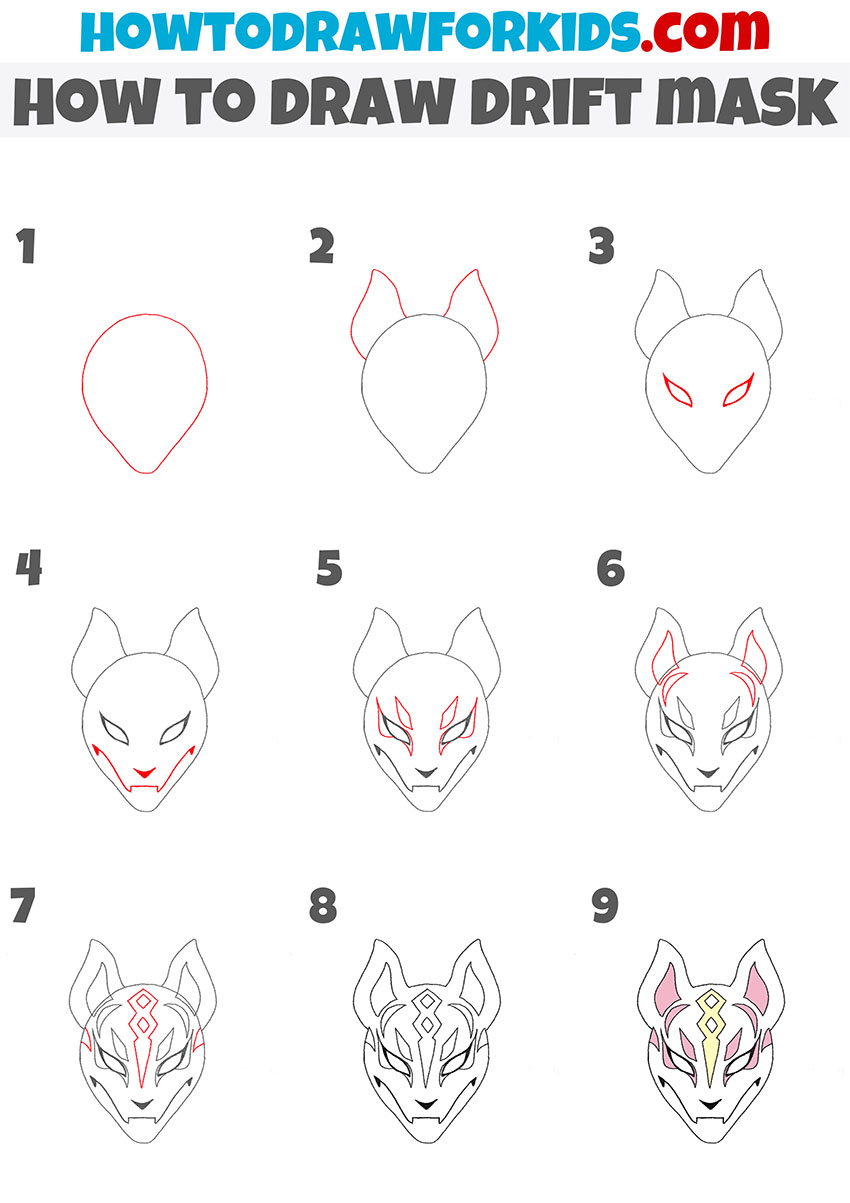
How to Draw Drift’s Mask
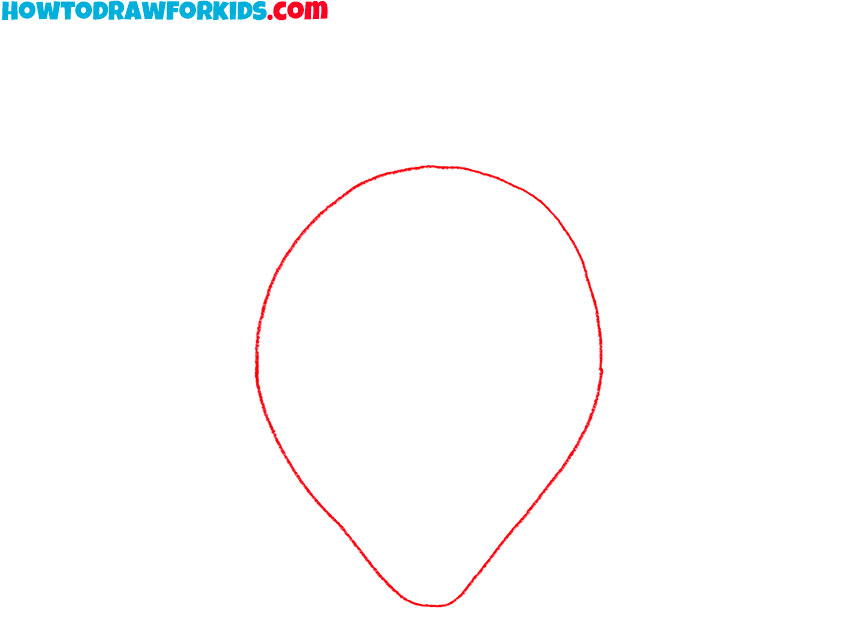
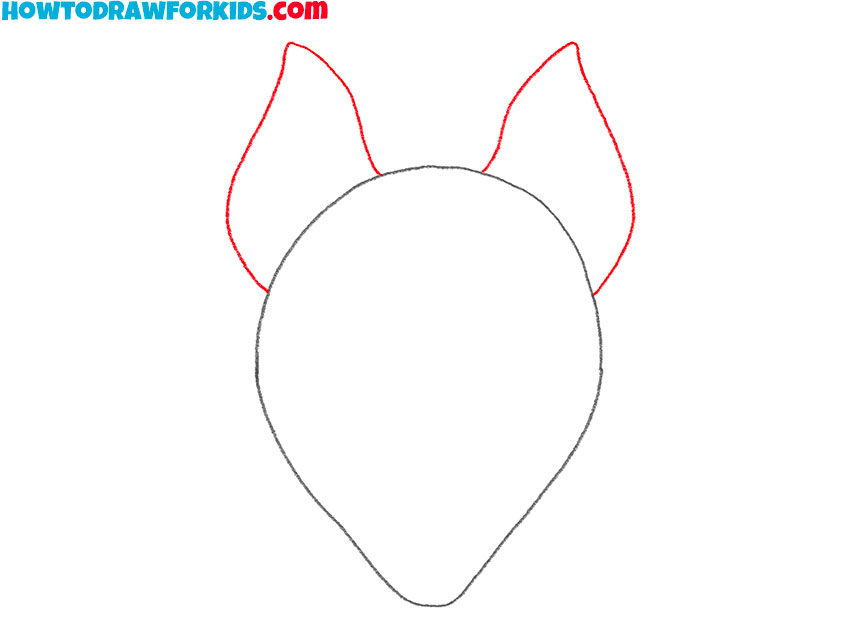
- Draw the outline of the Drift’s mask.
Start by drawing the basic outline of the mask’s head. Create an oval shape with a slight point at the bottom to form the chin. This will serve as the foundation for the mask. Make sure the shape is symmetrical, as this will ensure the mask looks balanced.
- Adding the ears of the Drift’s mask.
Draw two triangular shapes on each side of the top of the head. These ears should be large and slightly curved to give the mask a more recognizable appearance. Ensure that the ears of the Drift’s mask are proportional and symmetrical. Aim to replicate the outline accurately.
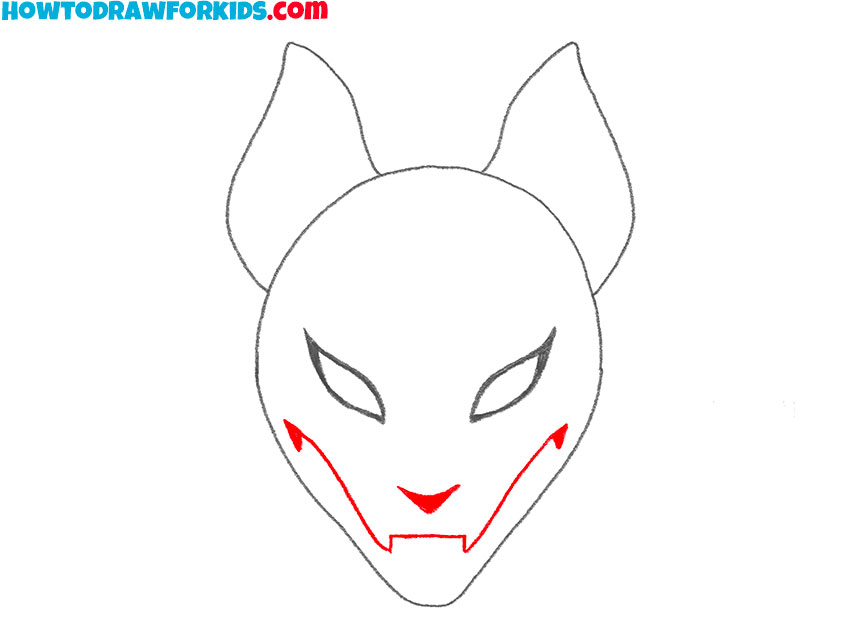
- Sketch the eyes.
Position the eyes of the drift mask slightly above the midpoint of the head. Create almond-shaped eyes with sharp, angled edges to give the mask an intense, focused expression. This step requires careful attention to detail as the eyes are an important feature of the appearance.

- Outline the nose and mouth.
Now, outline the mouth and add lines to the cheeks. Draw a small, sharp line at the bottom center of the head for the mouth, giving it a stern look. Then draw the nose as a triangle below the eyes. Add two curved lines extending from the outer corners of the mouth, creating cheek structure.
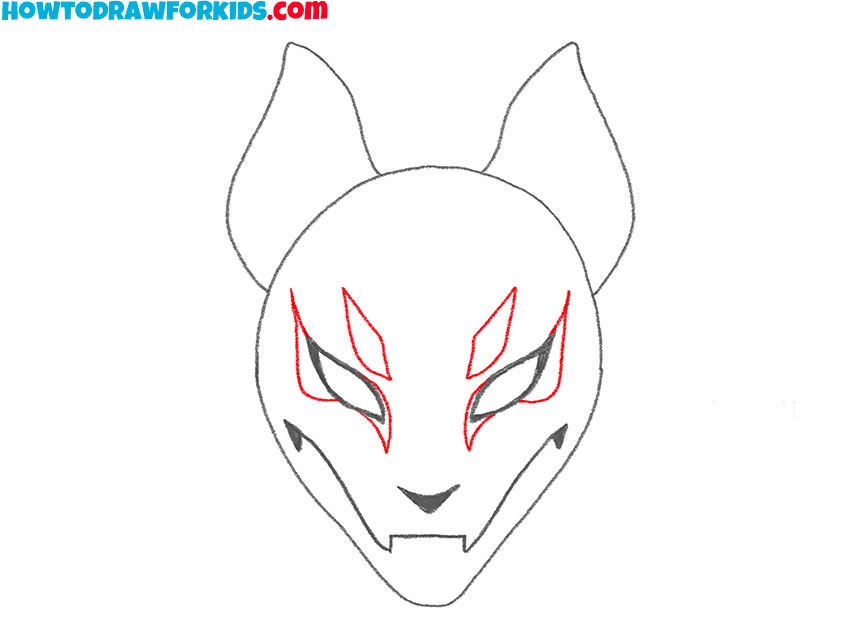
- Add the patterns around the eyes.
Correct the facial details by adding more lines and shapes around the eyes. Draw two curved lines above each eye, following the eye’s shape to create an eyebrow-like effect. These lines should give the mask a more detailed and recognisable look.
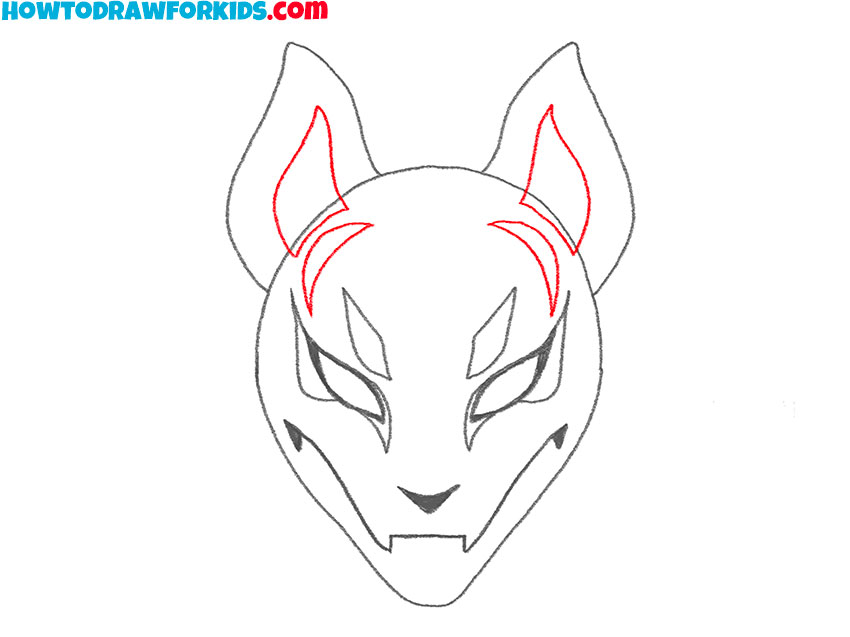
- Add the patterns to the ears.
Add details to the ears to make them more defined and interesting. Draw inner lines within the ears, following their outer shape but slightly smaller. These lines should create a layered look, adding complexity to the ears. Ensure these inner lines are symmetrical and proportionate to the ears.
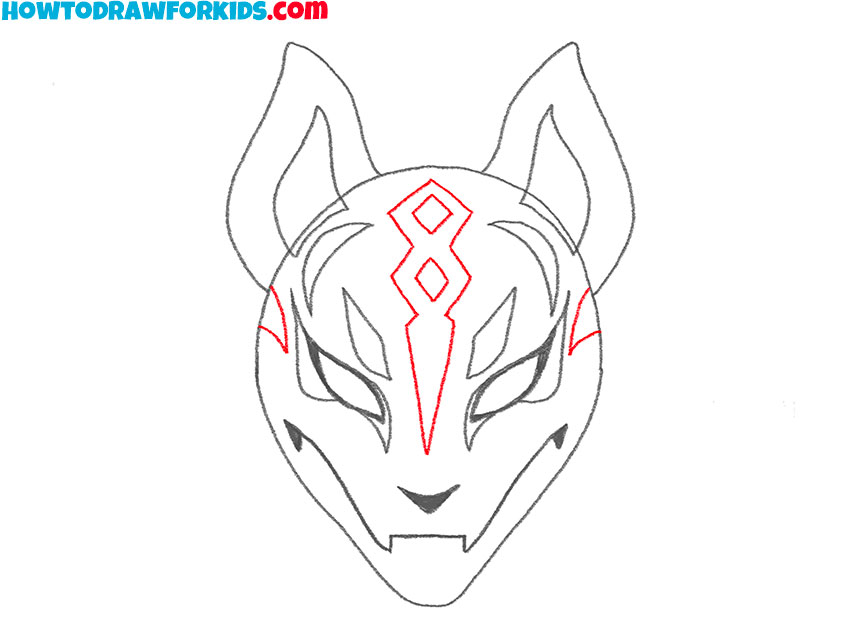
- Add details to the forehead.
Now, add intricate details to the forehead area. Draw a series of geometric shapes and lines in the center of the forehead. Start with a diamond shape in the middle, and then add smaller lines and shapes around it, creating a complex pattern.
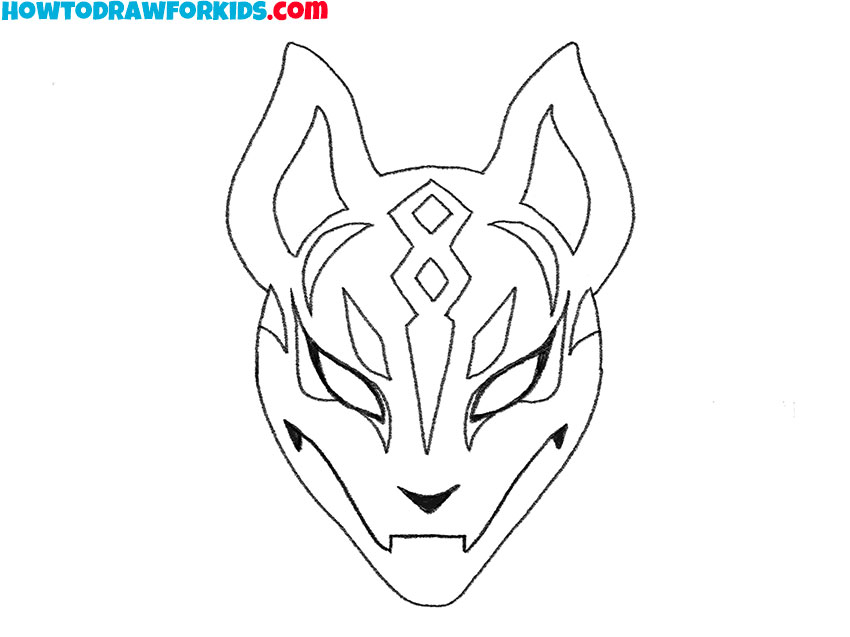
- Erase the guidelines from Drift’s mask.
Refine and correct all the details you’ve added so far. Go over the lines to make them more detailed and bold. Add any additional lines or shapes to areas that need more detail, such as around the eyes, mouth, and ears. Ensure all features are symmetrical and authentic.
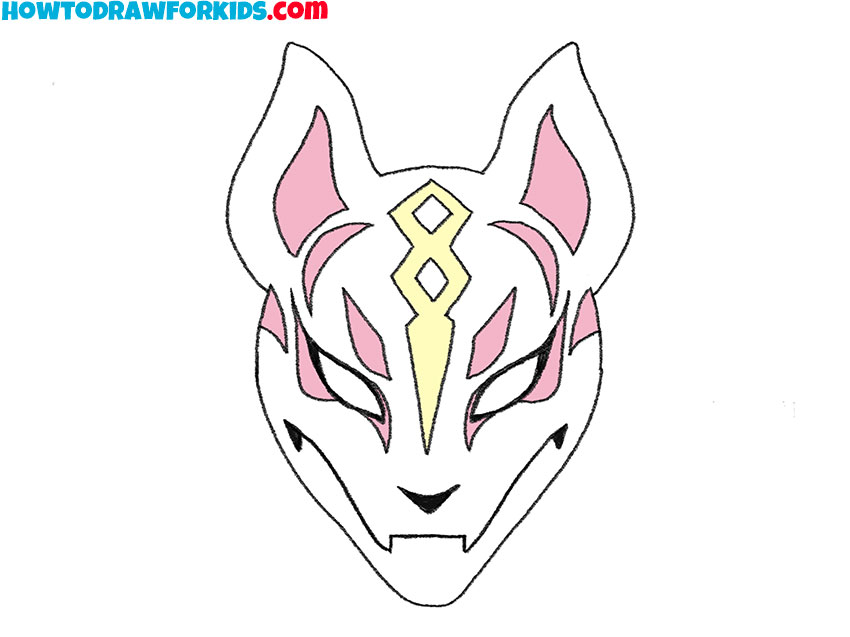
- Color your Drift’s mask.
Use shades of white, pink, and gold to highlight different areas. Color the main part of the mask white, the inner ear and cheek details pink, and add gold accents to the forehead. To make your Drift mask more natural add shadows and highlights.

Additional Content
I’ve prepared a really cool PDF file. This PDF includes detailed illustrations, allowing you to follow along with ease. Additionally, you’ll find a coloring page to paint your Drift mask with vibrant colors, a tracing worksheet to help train your line and shape drawing, and a grid drawing worksheet to improve your proportions and accuracy understanding.
Download this resource to practice at your convenience, and use these tools to develop your skills further.
Tips & Tricks for Drawing the Perfect Drift Mask
You can begin by dividing your paper into equal sections to keep the mask’s features symmetrical. Use a ruler to draw vertical and horizontal lines, creating a grid that helps you maintain balance in your drawing. This foundational step ensures that both sides of your mask match perfectly.
Before drawing the details of your Drift mask, draw a vertical line down the center of your drawing space. This central line acts as a guide to ensure both sides of the mask are symmetrical, helping you place features accurately and maintain proportion.
You can fold the paper in half to press and lightly transfer the outline of one side to the other. This technique helps create a perfectly symmetrical design by replicating the features from one side of the mask to the other, ensuring uniformity.
Regularly step back from your work to view it from a distance. This practice allows you to see if one side is becoming larger or more detailed than the other, helping you correct any imbalances in your drawing early on.
Use light pencil strokes for the initial sketch. Light lines are easier to erase and adjust without leaving marks on the paper, giving you the flexibility to perfect the mask’s shape and details before committing to darker, more permanent lines.
Pay close attention to the unique patterns and shapes that give the Drift mask its character. Focus on accurately capturing these elements, as they are essential to the mask’s distinctive look. Details like the eye shapes and decorative lines are really important for an authentic drawing.
Go over your drawing multiple times, refining and correcting lines with each pass to gradually improve symmetry and shape. Each refinement pass helps you correct the precision of your lines and the overall balance of the mask’s features.
Take your time with each step, ensuring every line adds to the mask’s mystique. Avoid rushing, as careful, deliberate strokes contribute to a more polished and detailed final drawing. Patience allows you to notice and correct small errors, leading to a better result.
Conclusion
You’ve just mastered the art of drawing the legendary Drift mask! But don’t forget that this is just a piece of the whole collection of my drawing tutorials.
Want to draw the Marshmallow from Fortnite, or sketch the Kit? I’ve got you covered with fun, easy-to-follow tutorials that will have you drawing like a pro in no time.