How to Draw Ender Dragon
I invite you to explore my detailed tutorial on how to draw the Ender Dragon, where I distill its grandeur into approachable steps, enabling artists to recreate Minecraft’s iconic beast. This guide is tailored to imbue your drawings with the dragon’s formidable presence, ensuring that each line contributes to a masterpiece brimming.
How to Draw Ender Dragon: Basic Information
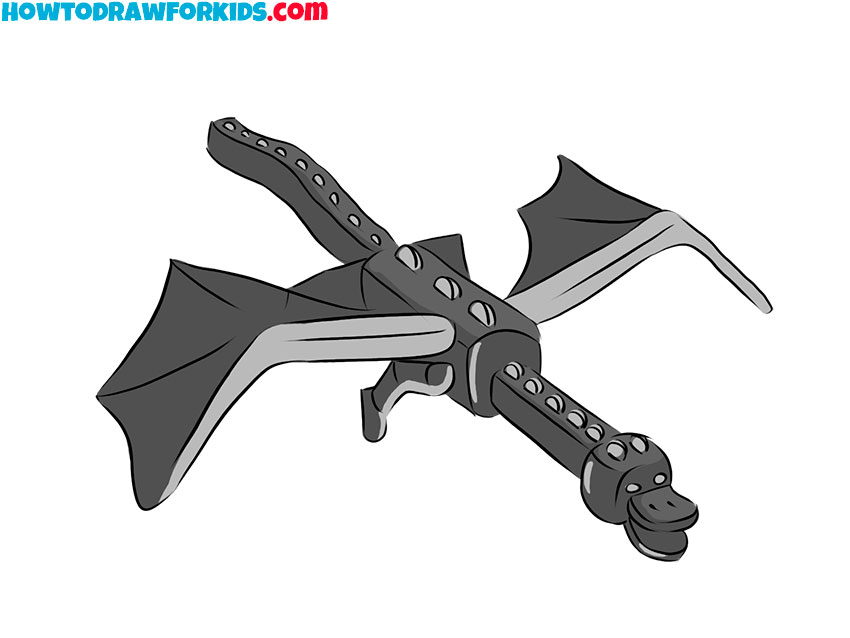
Welcome to my step-by-step journey on how to draw the Ender Dragon, a creature that captivates the imagination of gamers and artists alike. My approach breaks down the dragon’s formidable form, offering a simple yet effective way to depict its grandeur.
The Ender Dragon’s majestic wings and segmented body are the stars of this lesson. I’ve focused on the flow of lines and the balance of proportions to guide you smoothly through each phase. As the artist, you’ll find joy in adding the spikes, the tail, and the dragon’s fearsome head, bringing it to life with every pencil stroke.
To draw the Ender Dragon, patience and attention to detail are your allies. Following my method, you’ll piece together the dragon’s fearsome silhouette and intricate scales. By the end of this lesson, not only will you have learned to sketch the Ender Dragon, but you’ll also carry with you the confidence to tackle even more complex subjects.
Ender Dragon Drawing Tutorial
Materials
- Pencil
- Paper
- Eraser
- Coloring supplies
Time needed: 35 minutes
How to Draw Ender Dragon
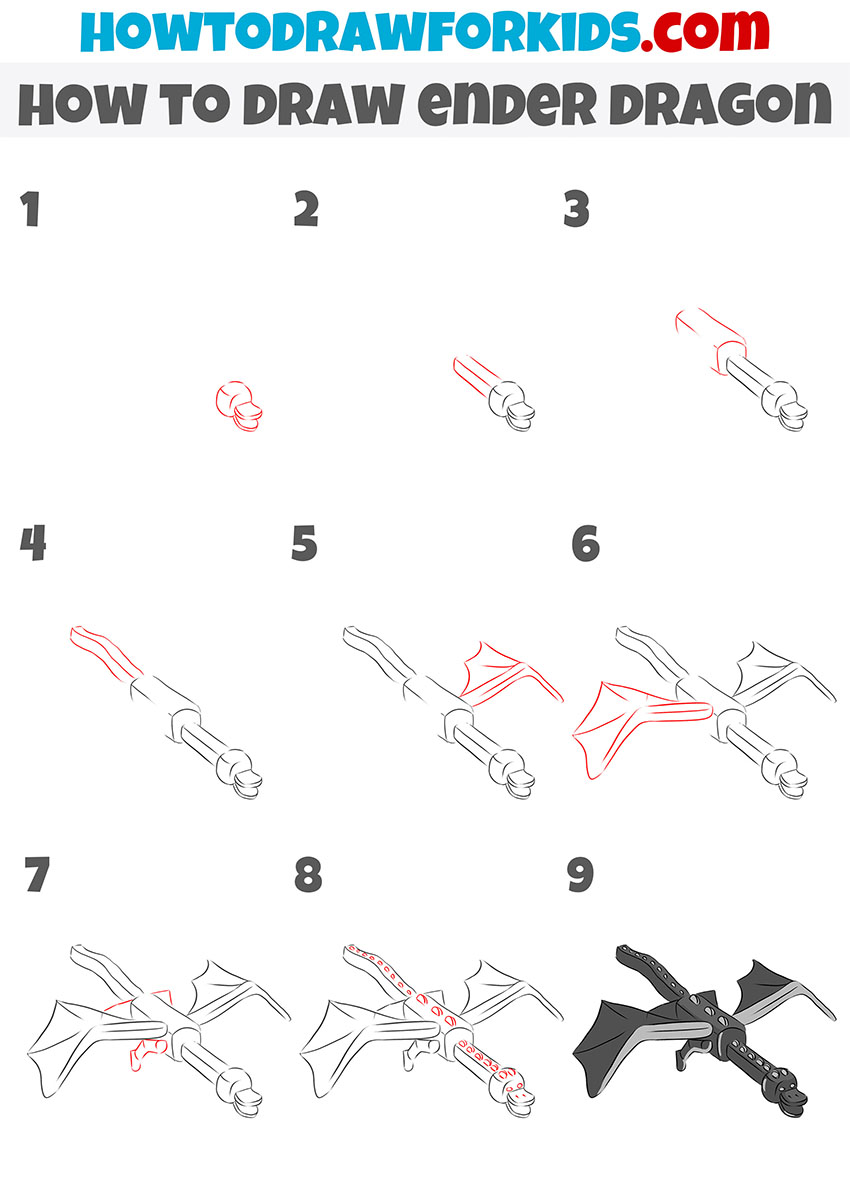
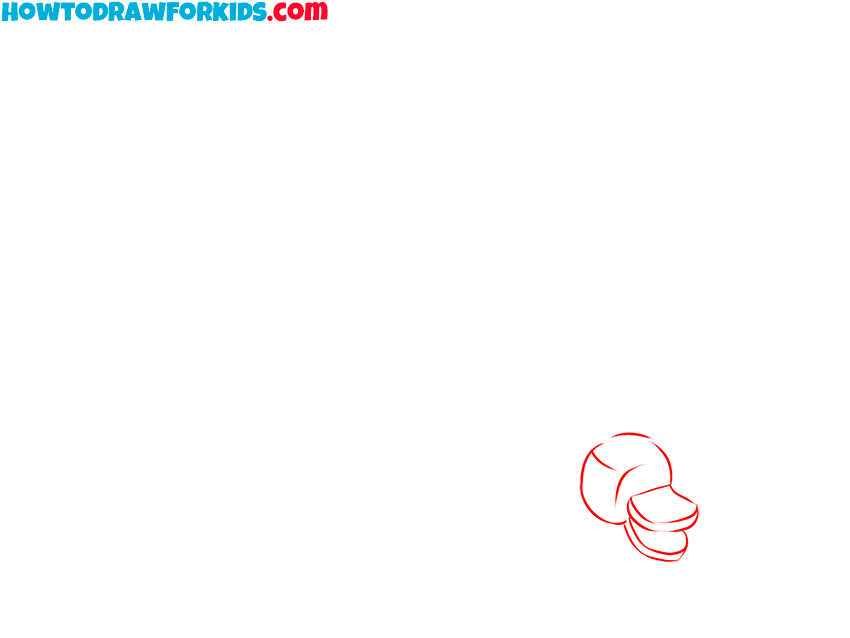
- Draw the head.
The head has a rounded shape. With the help of a few smooth lines depict an open mouth.
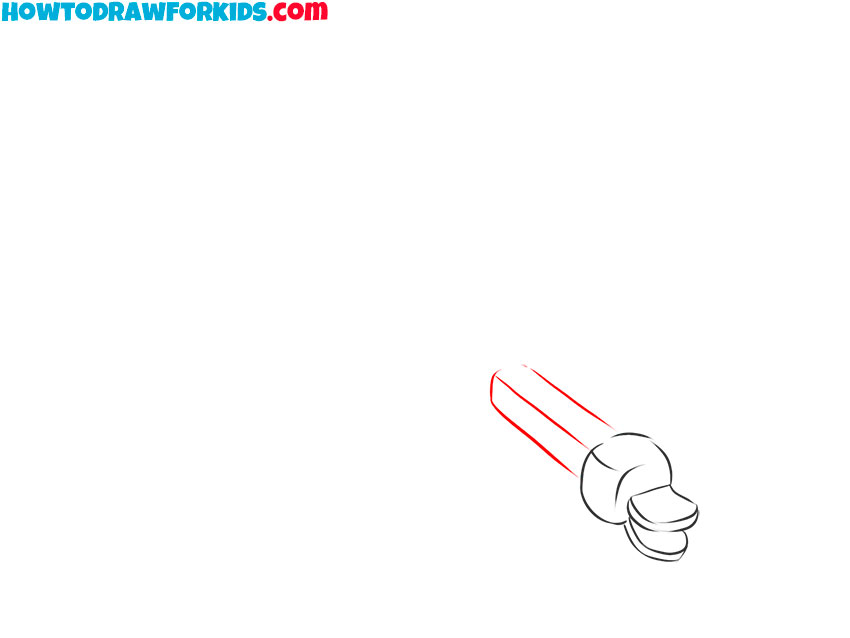
- Depict the neck.
Sketch out three straight lines.
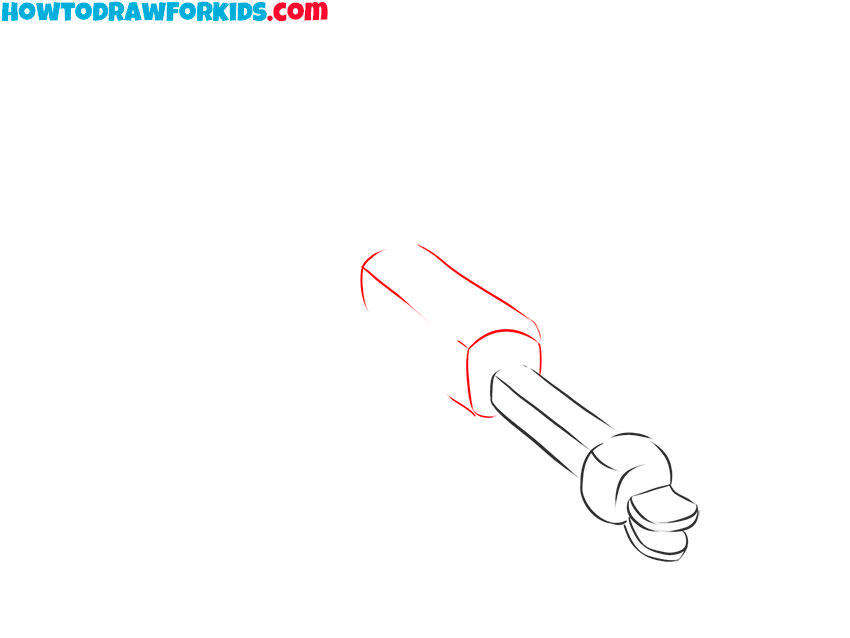
- Add the torso.
Draw several smooth lines of the same shape as shown in the example.
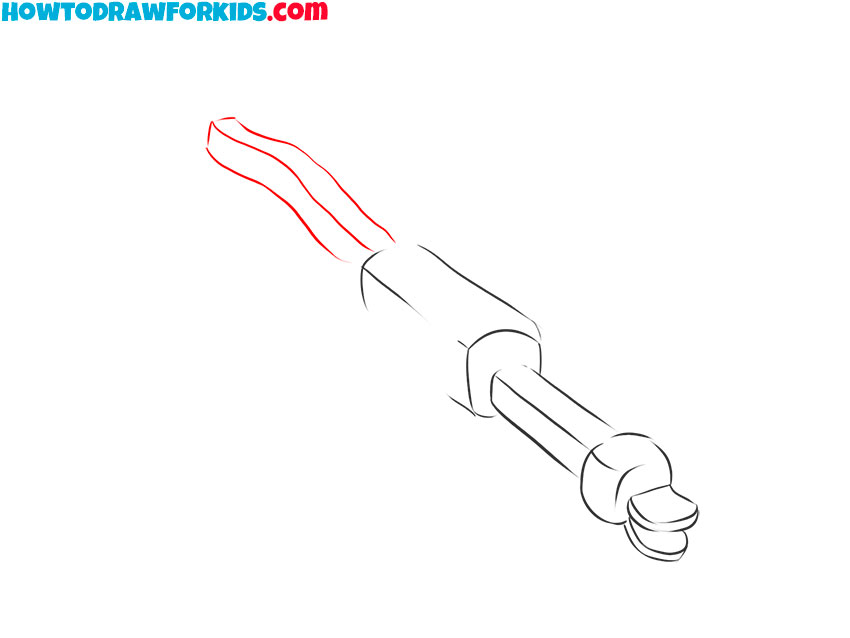
- Draw the tail.
Depict three parallel curved lines and connect these together with short lines.
- Sketch out one wing.
On one side, draw a large wing, as in the example.
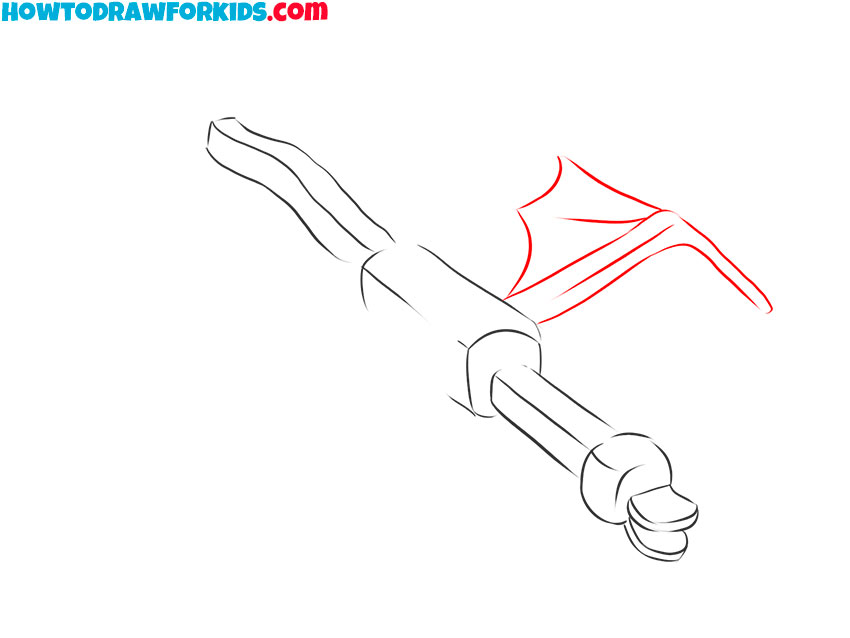
- Add the second wing.
On the other side, draw the second wing
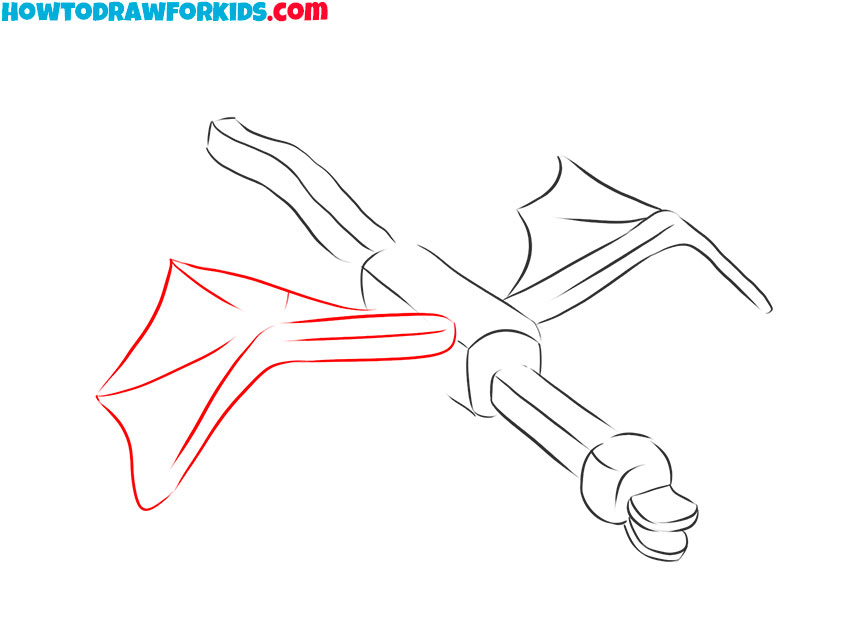
- Depict the paws.
With a smooth line draw small paws on the sides.
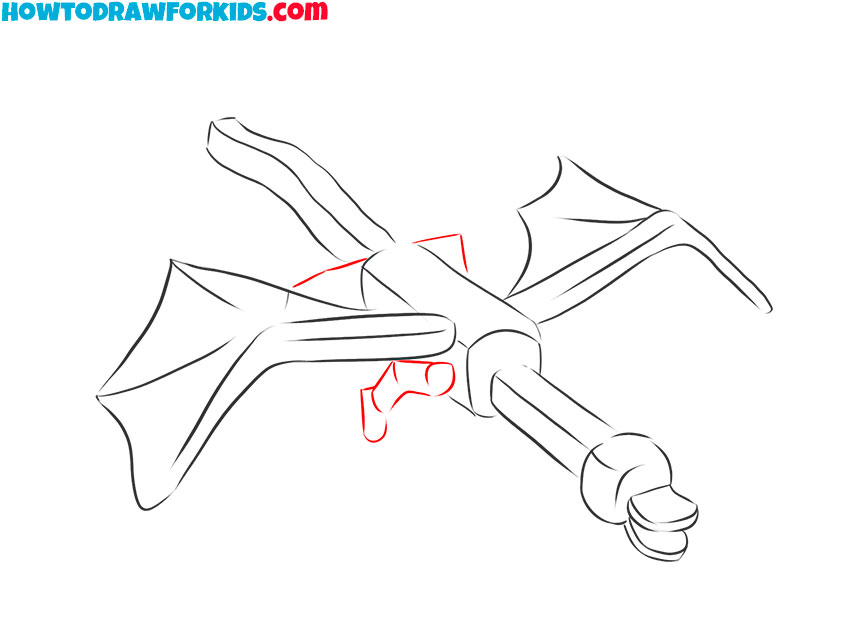
- Add details.
Draw small raised elements on the neck, on the back, and on the tail.
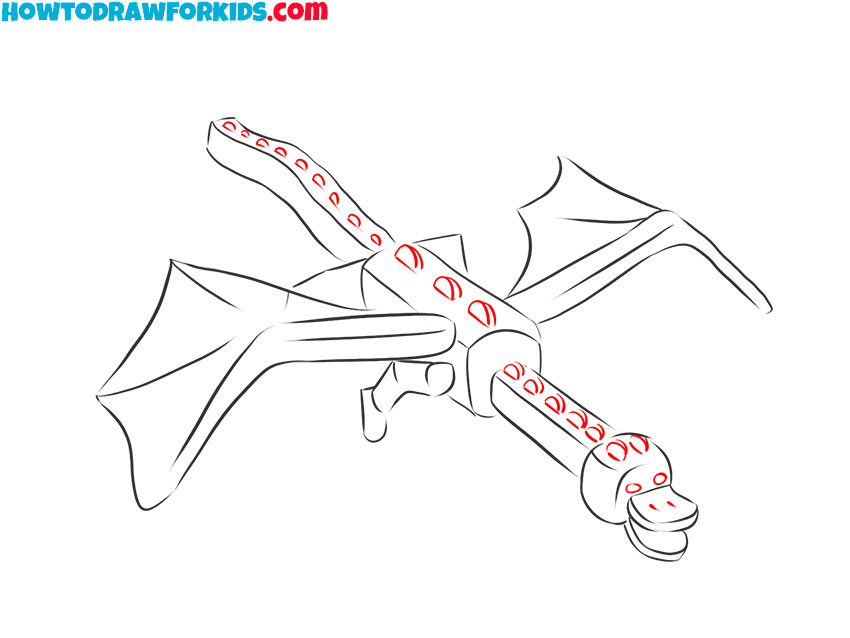
- Color the drawing.
Use black as the main color. Color in gray curly elements, some parts of the wings and paws.

Additional Content
To enrich your experience and ensure you have all the tools you need to succeed, I’ve carefully prepared a free PDF file to accompany our Ender Dragon drawing lesson. This file is a succinct version of our full tutorial, capturing the essential steps and tips in a format that’s perfect for on-the-go learning.
Whether you find yourself without internet connectivity or simply prefer having a physical copy to reference, this downloadable guide is your ticket to artistic progress.
Alternative Drawing Technique
Recognizing the importance of practice in the evolution of your artistic abilities, I’ve created an alternate technique for drawing the Ender Dragon. This new approach invites you to see the creature from a different perspective and to tackle its intricate details with a fresh set of eyes.
The goal is to offer you a path that not only broadens your skill set but also instills a deeper confidence in your ability to capture the Ender Dragon’s might and mystique.
Drawing the Ender Dragon Flying in a Different Direction
The alternative method focuses on a more detailed assembly of the Ender Dragon’s body parts, reflecting its flight in a different direction. Unlike the first method, where the dragon’s form is outlined in broader strokes, this approach builds the dragon piece by piece.
Starting with the head, we move on to construct the body with precise geometric shapes, ensuring each segment – from the neck to the tail – is proportionally accurate and detailed. The wings are sketched with particular attention to the individual wing bones, providing a clearer structure before fleshing them out.

Answers to Your Ender Dragon FAQs
As our adventure through the skies with the Ender Dragon comes to a close, you may find yourself curious about the finer details of this artistic quest. To quench your thirst for knowledge, I’ve compiled a list of FAQs that might echo in the corridors of your mind.
- How can I make my dragon look more three-dimensional? Practice shading techniques that reflect light and shadow. Imagine a light source and consistently apply shadows opposite to it.
- What if my proportions don’t look right? Don’t worry! Proportions can be tricky. Use guiding lines and compare each part to another to check their relative sizes.
- How do I capture the texture of the dragon’s scales? Small, repeating patterns and careful shading can create a scaly texture. Remember, consistency is key.
- Is it okay to deviate from the steps if I have a different style? Of course! The steps are a guide; your personal style is what makes your dragon unique.
As the pages of our lesson turn to rest, remember that every question you ask is a step towards becoming the artist you aspire to be. Let your curiosity lead the way, and should you find yourself pondering yet unanswered questions, feel free to leave them in the comments.
Conclusion
With the flourish of your final stroke, the Ender Dragon soars off the page, and into the annals of our collective creativity. But dear artists, this is merely a single shade in the spectrum of our artistic journey. My digital atelier is alive with an array of lessons, from the tropical twist of an pineapple or the soft serenade of a flower bouquet.
Yearn for more? Join our circle on social media, where the muse of inspiration visits daily. Your visions and wishes are the seeds from which our next lessons grow – share them in the comments, and let’s cultivate a garden of artistic wonders together.

