How to Draw Fire
In this lesson, I’d like to show you a simple yet detailed method that will help you learn to draw fire like a true professional artist.
How to Draw Fire: Basic Information
Fire may seem like a simple subject to draw, but there are many hidden challenges in depicting this phenomenon. In this lesson on how to draw fire, we’ll go over these challenges together. I’ll show you the simplest and most effective way to create a convincing fire drawing without overcomplicating it with excessive details or intricate shapes.
By the end of the course, you’ll have a strong grasp of how to draw fire effectively. Whether you’re aiming for a simple flame or a more detailed and complex fire illustration, this tutorial will provide the knowledge and techniques you need to improve your work and create realistic fire drawings with confidence.
Before you begin this lesson on how to draw fire, it’s important to keep a few basic rules in mind. If you’re drawing a large fire or flame and want to make it look more realistic, use varied and irregular lines, as fire burns in a chaotic manner. In contrast, thinner sources of fire, such as a candle or a match, will appear more uniform and controlled.
Additionally, remember that fire does not burn in empty air – it always has a source. There is always an object from which the flame emerges. Once you’ve learned to draw fire using this lesson, it can be helpful to experiment with more complex compositions that incorporate fire interacting with different elements.
Fire Drawing Tutorial
Materials
- Pencil
- Paper
- Eraser
- Coloring supplies
Time needed: 30 minutes
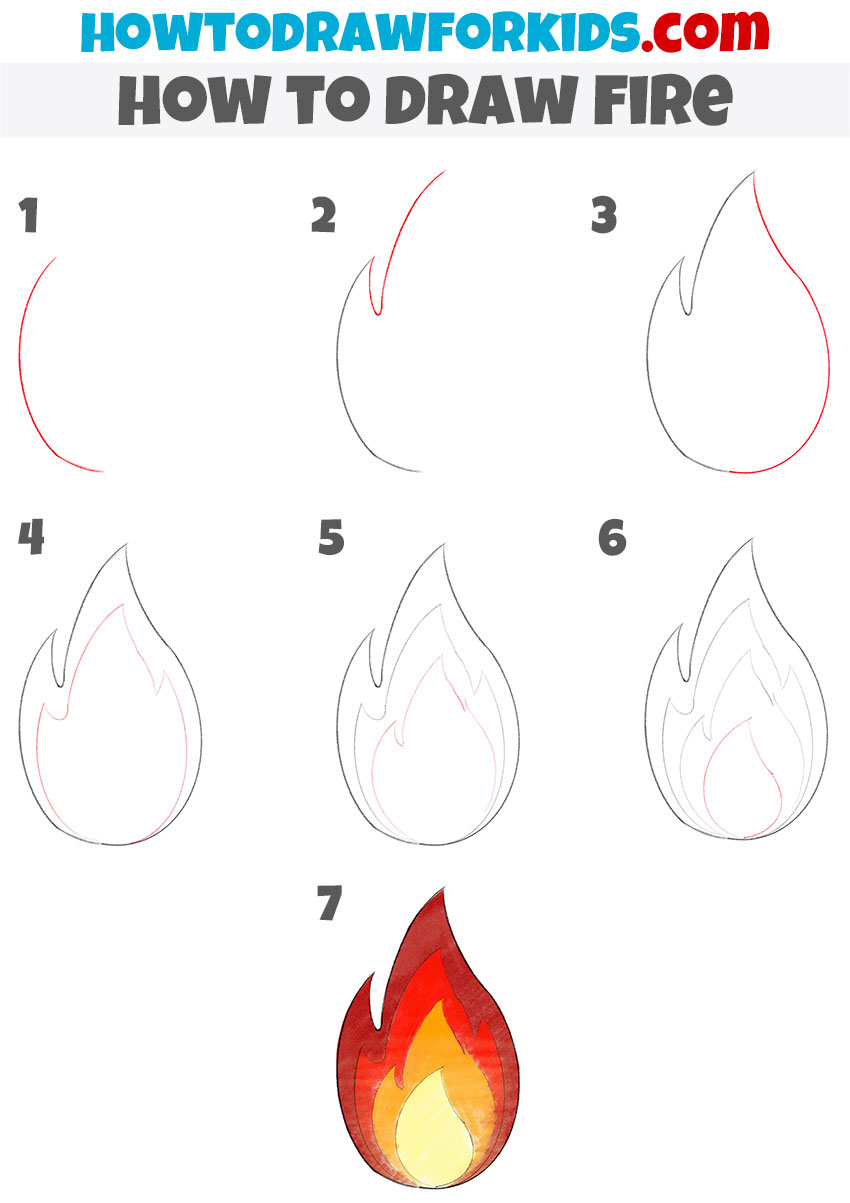
How to Draw Fire
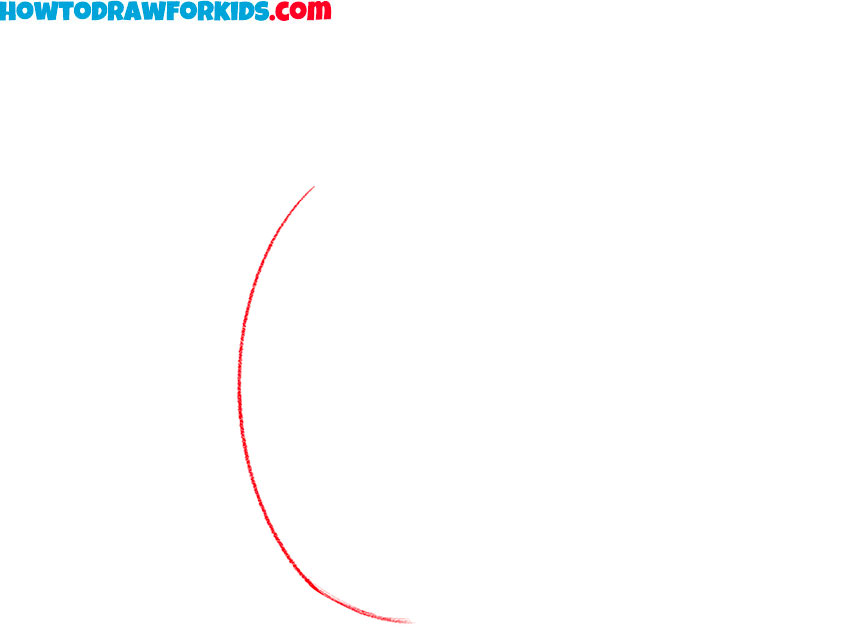
- Draw the left border of fire.
To start learning how to draw fire, begin by sketching a smooth, curved line on the left side. This will form the outer contour of the flame. The curve can be slightly irregular to mimic the natural movement of fire. Keep the shape flowing upward, as fire always rises.
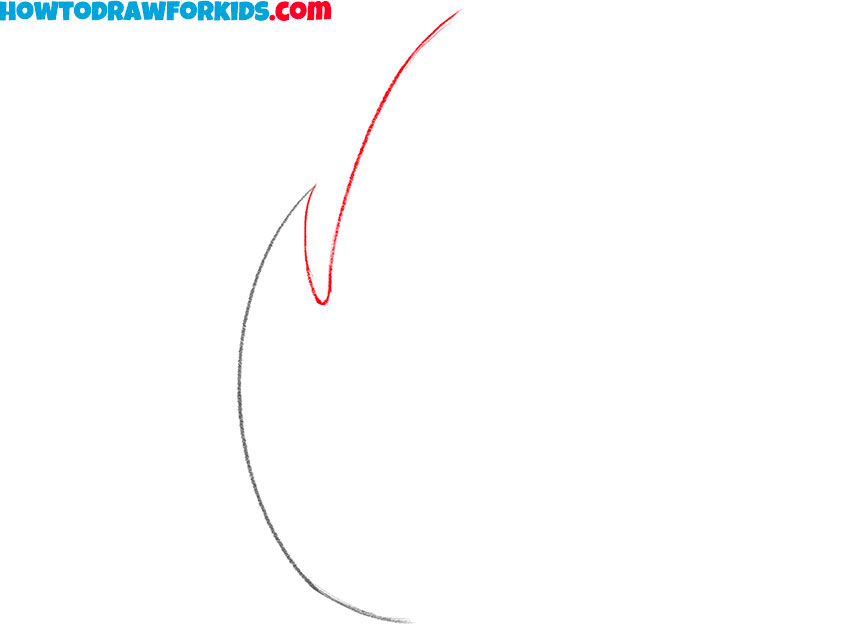
- Draw the tip of the fire.
Now that you have the first curve, extend it by drawing a pointed flame tip at the top. This step in how to draw fire helps define the natural flickering effect of flames. The tip should be sharp but not overly rigid – fire moves chaotically, so a slight curve at the top makes it more realistic.
- Complete the main outline.
At this stage, complete the primary outline of the flame by drawing the right side. The curve should flow smoothly and naturally, mirroring the left side but with enough variation to keep it from looking too uniform. The bottom should be slightly rounded, as fire often expands from a central point.

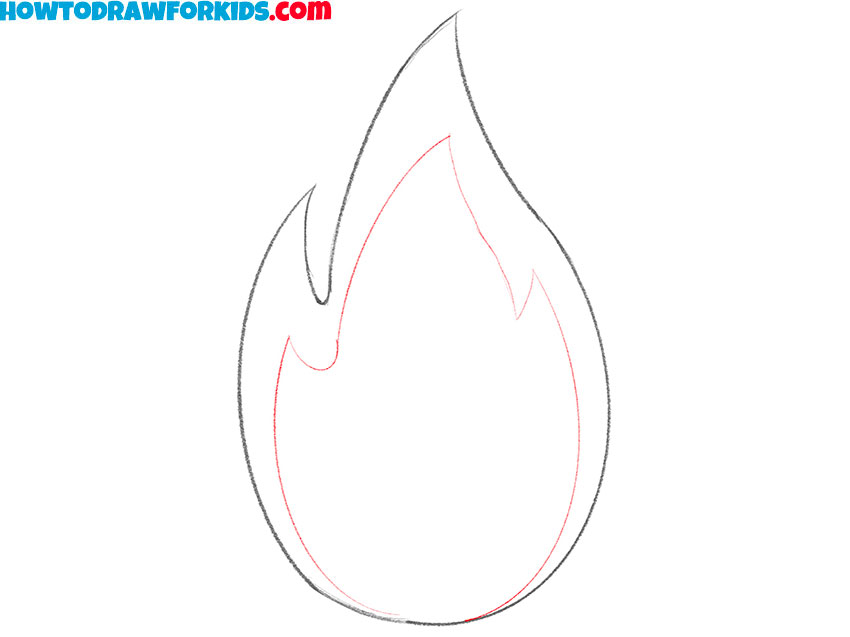
- Add the first inner layer.
Now that the outer shape is complete, it’s time to add the inner flames. Fire consists of multiple layers, with smaller flames flickering inside the main body. Start by sketching a few curved lines within the larger flame, following a similar upward flow. These lines should resemble smaller tongues of fire.
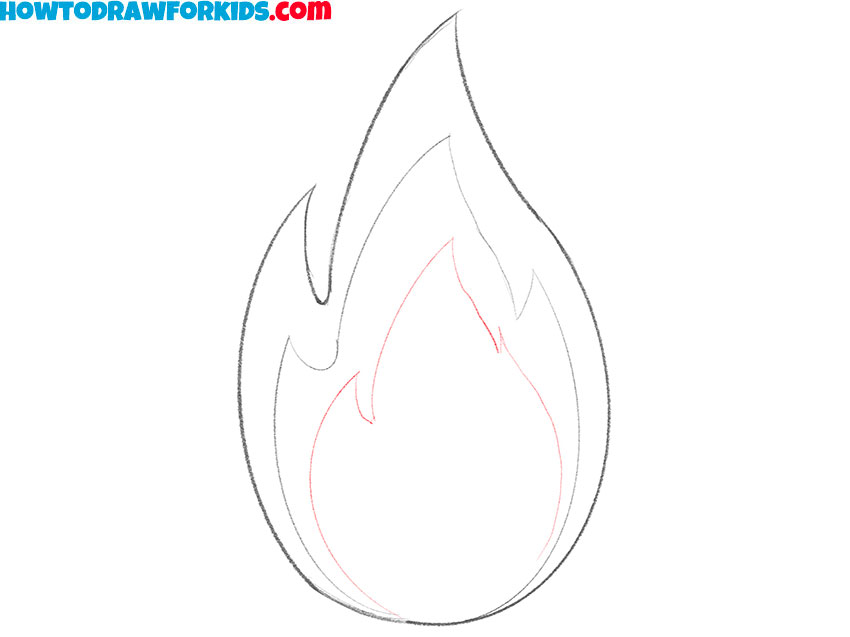
- Draw more fire layers.
To make your fire drawing more realistic, add additional layers of flames within the existing structure. This step helps create a sense of movement, as fire has multiple overlapping sections. Draw another smaller flame shape inside the ones you previously sketched, keeping the lines varied.
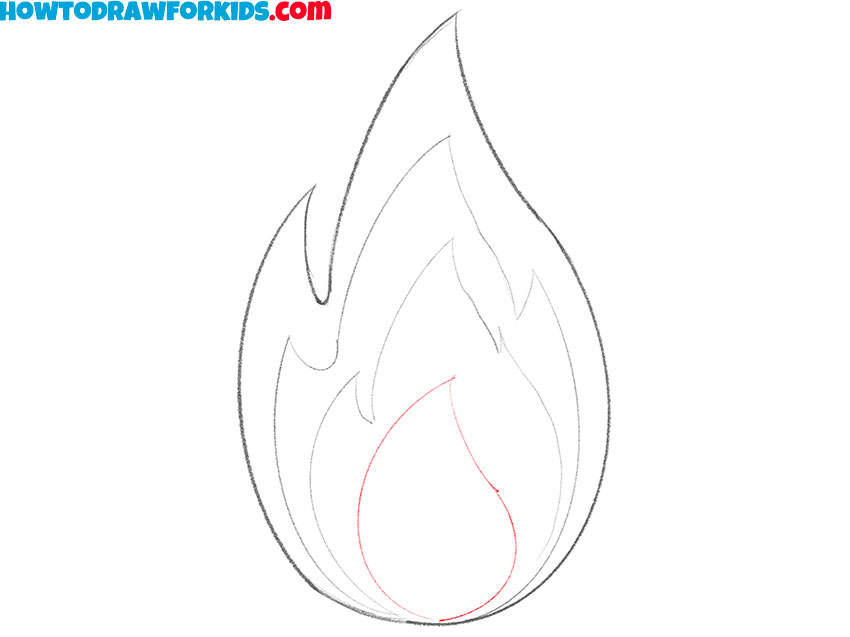
- Add the final inner layer.
For the last detail before coloring, add a small, central flame at the base of the fire. This represents the hottest part of the flame, which often appears brighter in real fire. The inner flame should follow the same curved, upward motion as the others but be much smaller in size.
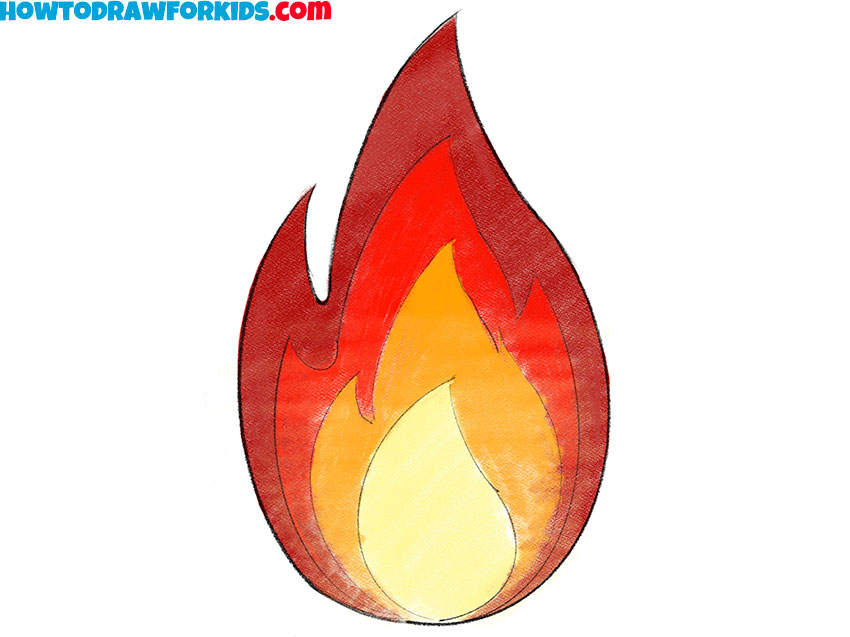
- Color the fire.
Start by filling the innermost flame with a bright yellow, as this represents the hottest part of the fire. Then, use an orange shade for the middle flames, blending it smoothly into the yellow to create a natural transition. Finally, apply red to the outer edges to complete the fiery effect.

Additional Content
Unlock the secrets of drawing fiery illustrations with our free PDF guide. This concise version of my full lesson is downloadable and accessible offline, ensuring you can practice your art anytime, anywhere.
Perfect for artists on the go, this guide ensures that your learning never has to pause, even when you’re away from the internet. Grab your copy today and start mastering the dynamic art of drawing fire at your own pace.
How to Draw Fire: Common Mistakes
One of the biggest mistakes in drawing fire is making the flames look too even or symmetrical. Real flames are unpredictable, with irregular shapes and varying heights. If both sides of the flame mirror each other perfectly, the drawing will look artificial. Instead, vary the size and shape of the flames to create a more natural effect.
Fire moves fluidly, so using straight or stiff lines makes it look unnatural. Flames should have smooth, flowing curves that reflect the movement of real fire. When sketching, use loose, wavy strokes instead of harsh, angular lines.
Fire has multiple layers, with the hottest part in the center and cooler flames surrounding it. A common mistake is drawing fire as a single, solid shape. To make it look realistic, add smaller flames within the larger ones, creating more realistic look.
Fire isn’t just one solid color. Many beginners make the mistake of using only red or orange. Real fire has a gradient effect, with yellow and white at the hottest points, transitioning into orange and red at the edges. Sometimes, blue or purple tones appear at the base, depending on the fuel source.
Conclusion
This lesson has shown you how to draw fire using a few truly easy steps. Your feedback is always important to me, so I look forward to your comments, suggestions, and critiques. Let me know what drawing tutorials you’d like to see on my website in the future.
To further develop your skills, try incorporating fire into a more complex composition. For example, you can draw a campfire and draw trees around to create a camping scene. You could also draw a person lighting a fire to practice creating more detailed compositions.
Don’t forget to share this lesson with your friends and anyone who might find it useful. And of course, make sure to follow me on social media to stay updated with new tutorials and lessons as soon as they are released.


Like💗💗
Thanks, Wesley. Appreciate that you liked it.
W art thanks for the help getting paid 1 cent/hour lamfo🤣🤣 for the 4 elements
Glad it was useful for your project.
thank you for this very helpful
Thanks, Avi!