How to Draw Forky
This character is probably one of the simplest on the pages of my site, I suggest you check it out and learn how to draw Forky.
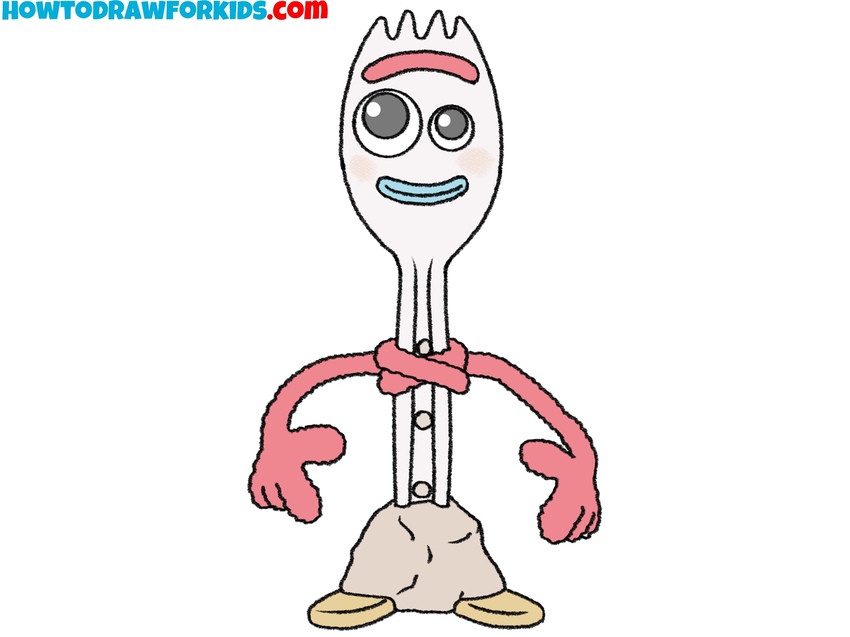
Now you will learn one of the options for how to draw Forky. It is a fictional character in the Toy Story franchise created by Disney and Pixar in the shape of a fork.
A fork is cutlery that we use all the time. A fork can be drawn in a variety of ways. In this tutorial, the fork is presented in a cartoon style. Here the fork is a character and is depicted as an animated object that has arms, legs, and facial features. It’s not realistic at all, but it’s very funny.
I hope you enjoy this lesson and enjoy your time. In this lesson, you will need the ability to draw smooth rounded lines. Be careful at every stage of drawing to get a great result. This lesson is suitable for every child and aspiring artist.
Materials
- Pencil
- Paper
- Eraser
- Coloring supplies
Time needed: 30 minutes
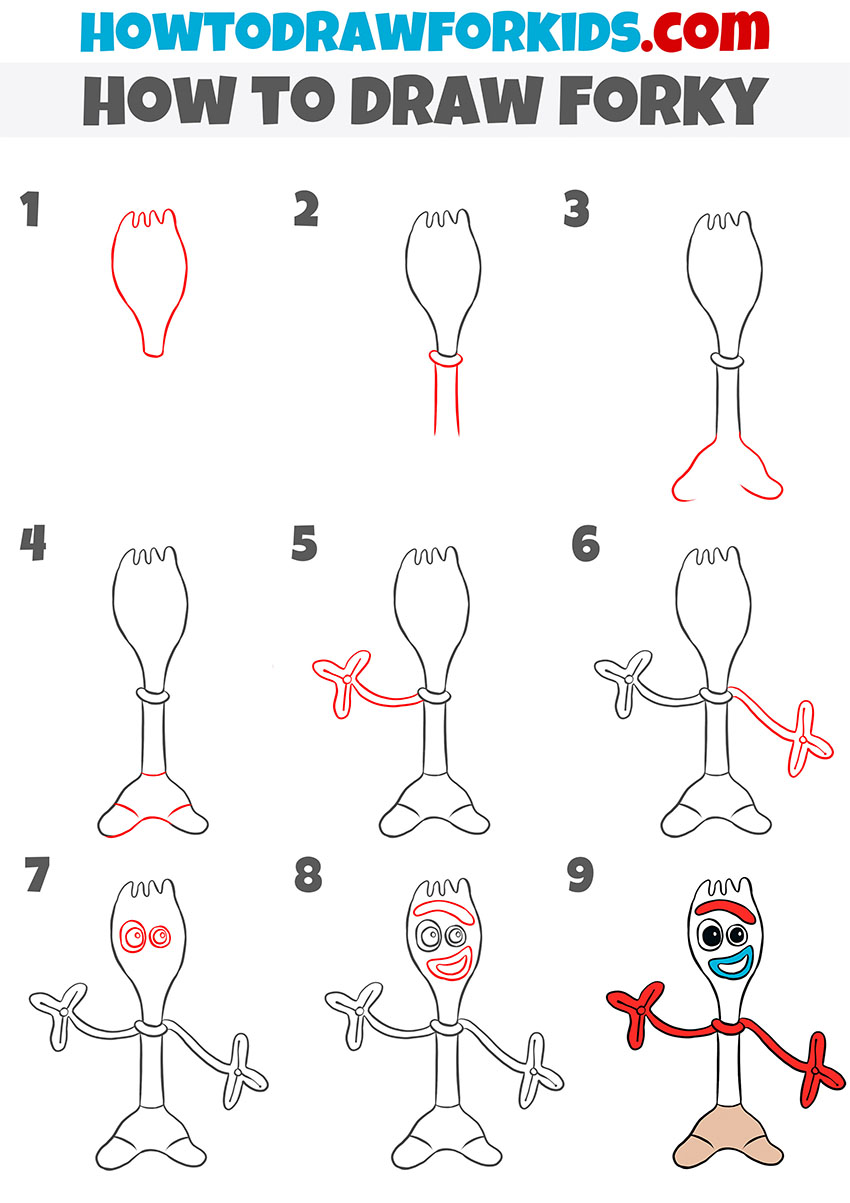
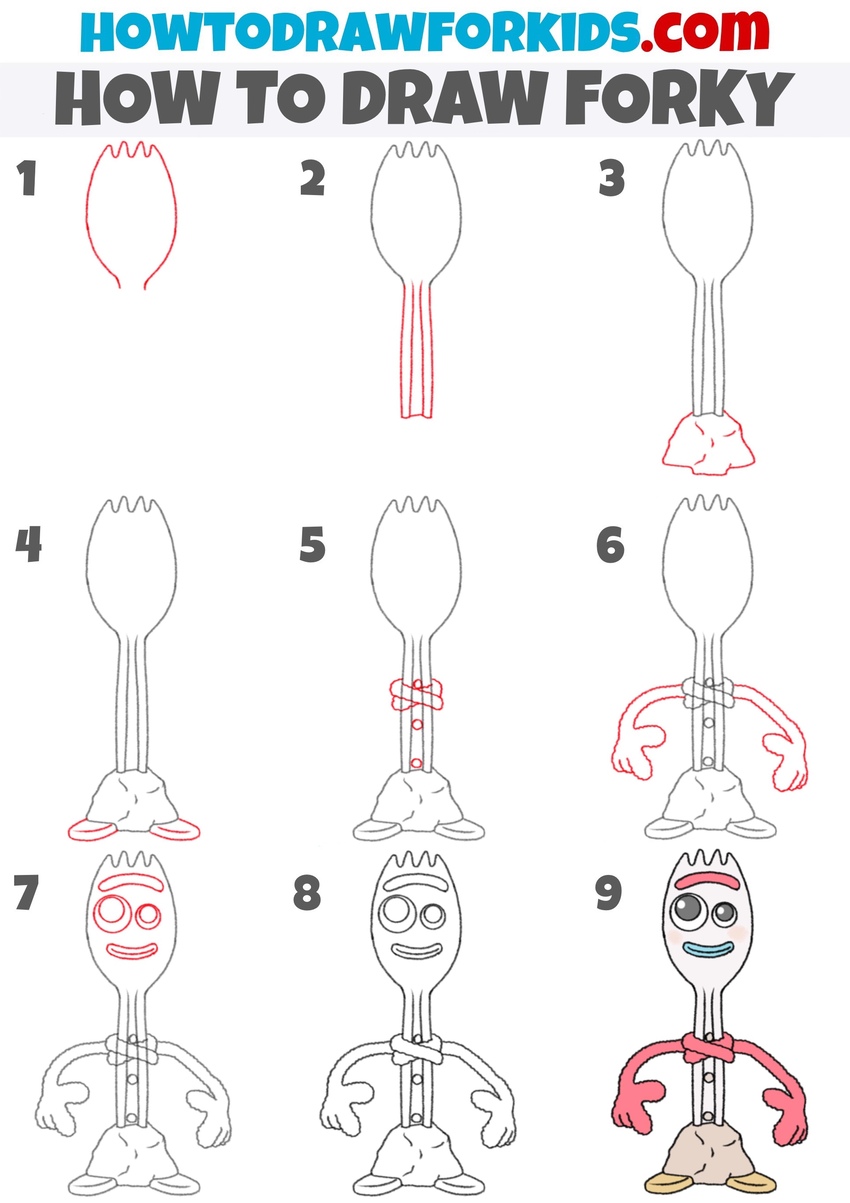
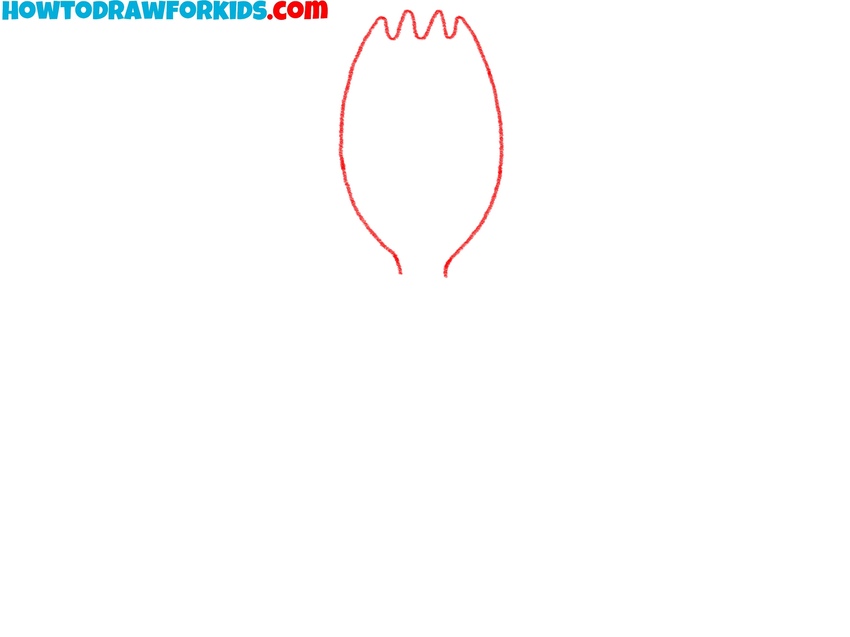
- Sketch the rounded spork head.
Create a smooth shape that narrows at the bottom. At the top edge, add several short triangular notches that represent the tines of the spork. The shape should look smooth but uneven to keep the handmade look of the Toy Story character. Don’t try to make the outline too symmetrical.
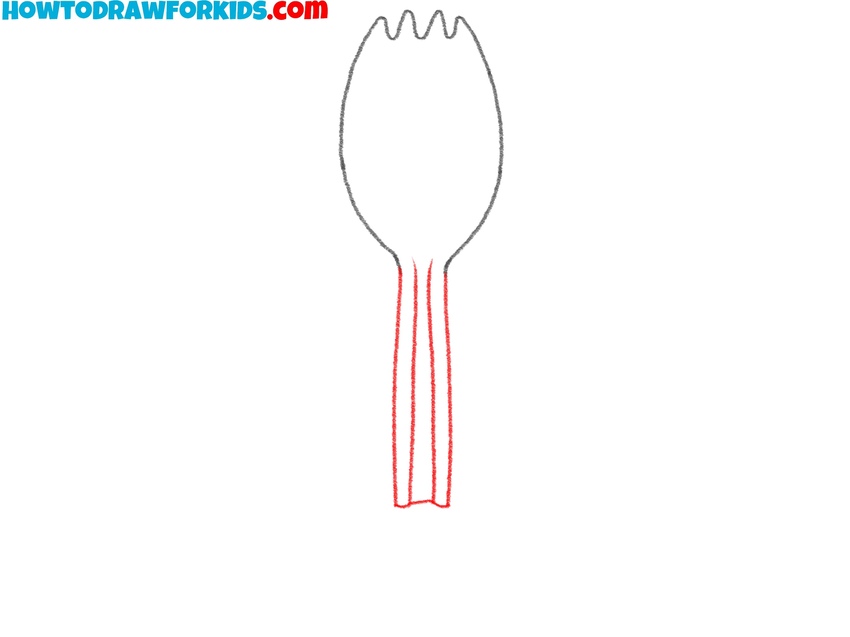
- Draw the narrow body of Forky.
Before adding smaller parts, it’s important to illustrate Forky’s body. Extend two smooth, parallel lines downward from the head to form the spork handle. Then, double these lines to show the edges of the utensil and give it volume.
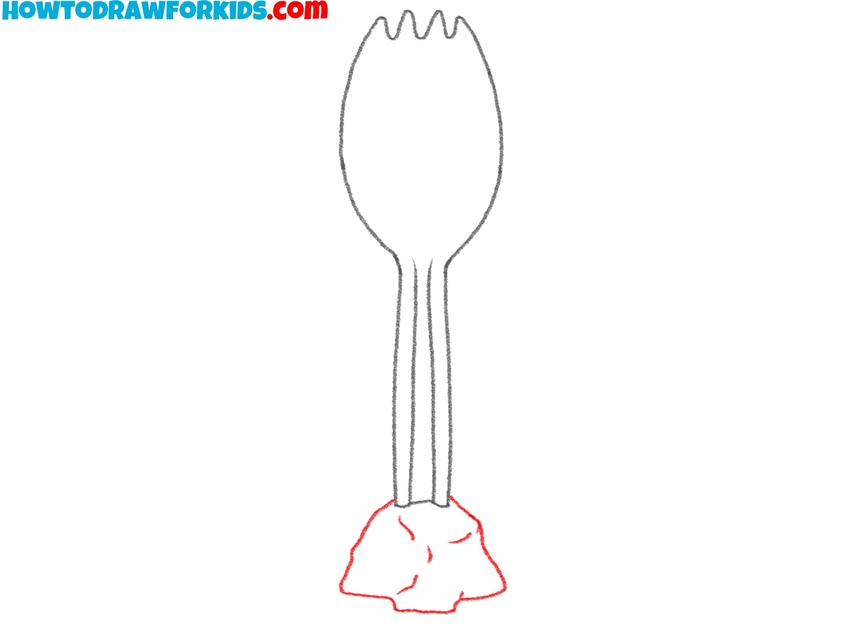
- Illustrate the uneven clay support.
At this point, draw the modeling clay that holds Forky upright. Create a rounded, uneven shape at the bottom of the handle. This represents the handmade lump of clay or putty. Keep the contours simple and irregular, avoiding perfect symmetry.
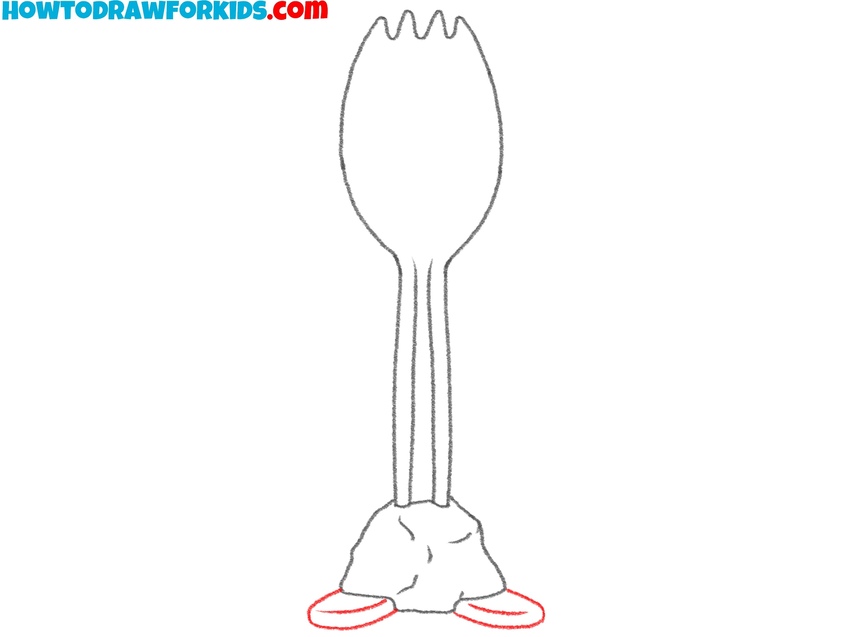
- Draw the popsicle-stick feet of Forky.
Now complete the base and draw Forky’s wooden feet. Add two overlapping popsicle sticks extending from the clay base. Each stick should be flat and rounded at the ends. Also, check the proportions of your Forky drawing, before moving to the next step.
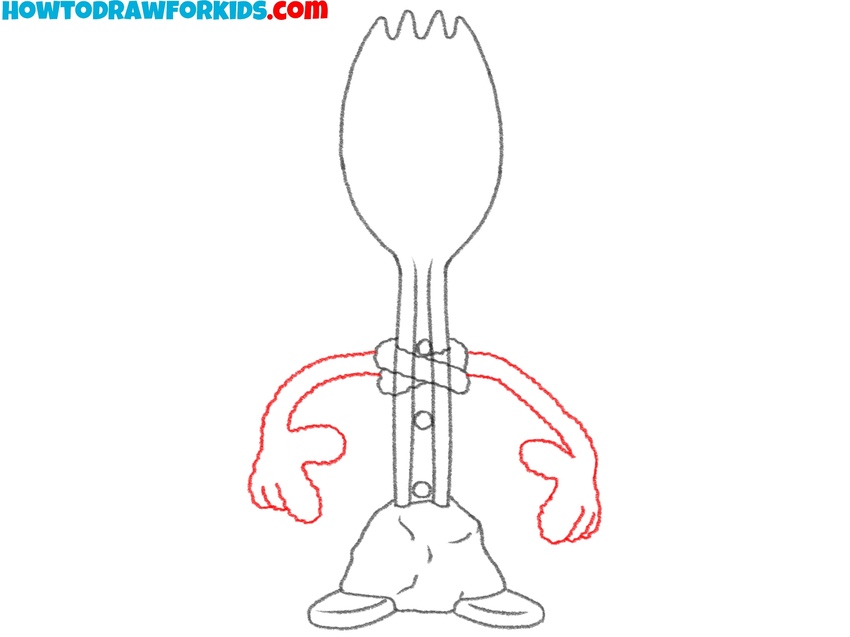
- Create the buttons and arm base with small loops.
Lightly sketch two curved, twisted loops near the middle of the handle to form the center knot of the pipe cleaner. Below that, mark two small circles vertically aligned on the handle to represent the clay dots that represent buttons.

- Sketch the uneven pipe cleaner arms.
Extend the pipe cleaner on both sides to draw Forky’s arms. Create two long, flexible shapes to illustrate the cartoon arms and hands. The arms should look uneven and wavy. Each hand can be drawn with three rounded “fingers” at the end, simple and cartoonish.
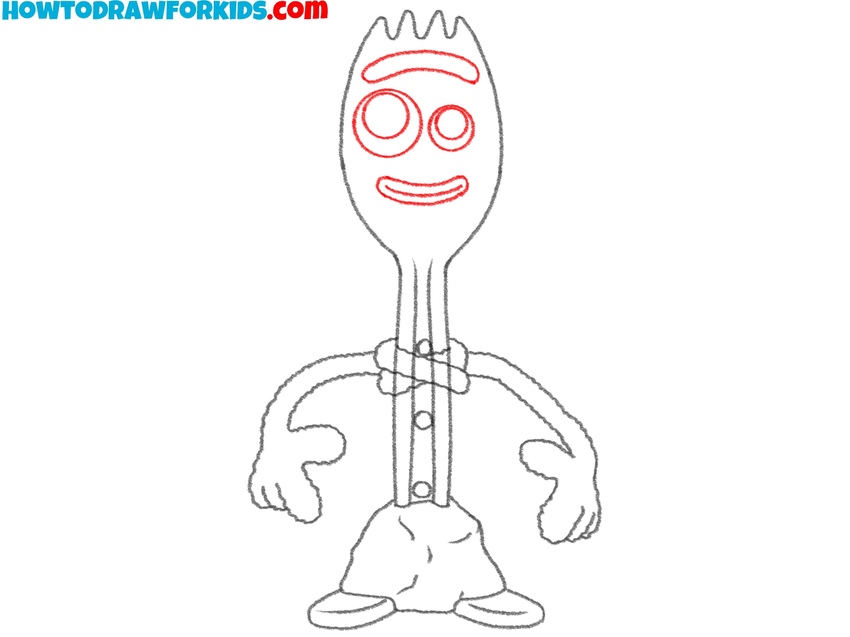
- Draw Forky’s uneven face.
On the upper portion of the spork, draw two large circles for his mismatched eyes. Make one slightly bigger than the other for an uneven effect. Below them, add a wide curved shape for the mouth, making it simple and crooked. Above the eyes, draw a short horizontal rectangle for the red eyebrow, raised on one side to enhance his quirky expression.
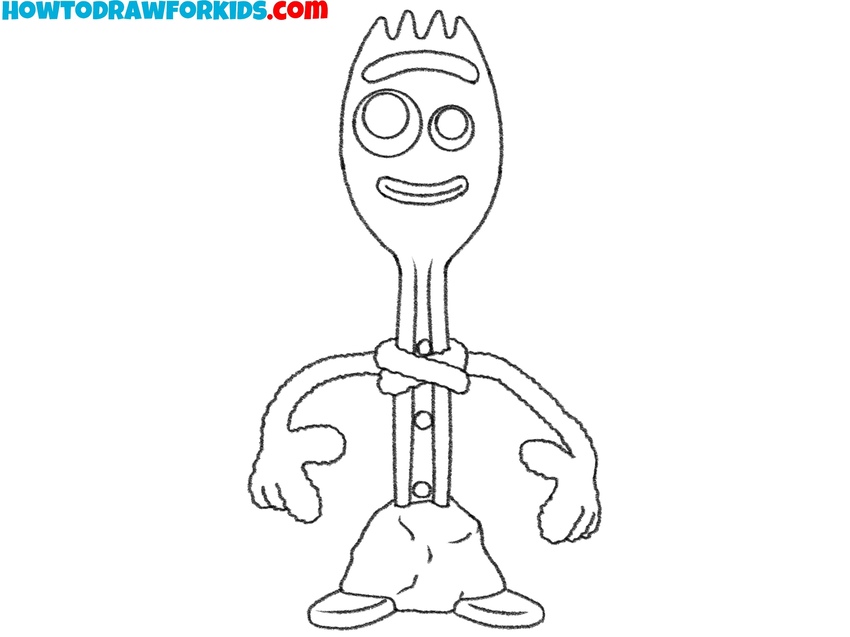
- Remove extra lines from the Forky drawing.
Erase all extra guidelines that were used to shape the head, handle, and base of the cartoon character. Remove any overlapping or unnecessary construction lines, especially where the arms connect to the handle. Using smooth, confident strokes, adjust any uneven edges to make the form completed. To make the sketch look more cartoony, trace in with darker lines.
- Add colors to the Toy Story character.
Complete the illustration by adding color Toy Story character. Fill Forky’s head and handle with a white or light gray tone. Color the eyebrow bright red, the eyes white with black pupils, and the mouth a light blue. The pipe cleaner arms should be a bold red, and the clay base a beige or light brown shade. The popsicle-stick feet can be a warm yellow or tan color.

Easy Forky Drawing Tutorial
To draw this, more simplified version of Forky, outline the head as an elongated oval with three short spikes on top, imitating the shape of a spork.
Create a ring shape on the check and extend two smooth lines downward for the handle. Add the wide, rounded feet by joining two mirrored curved forms at the bottom.
Sketch the arms as flexible, looping shapes extending from both sides, ending with three rounded “fingers” on each. Inside the head, draw the cartoon eyes and two circles, one slightly smaller, and a curved shape for the smiling mouth.
Above the eyes, add a thick wavy eyebrow to complete the facial details. For coloring, use red for the arms and eyebrow, blue for the mouth, beige for the base, and light gray for the head.