How to Draw Goku
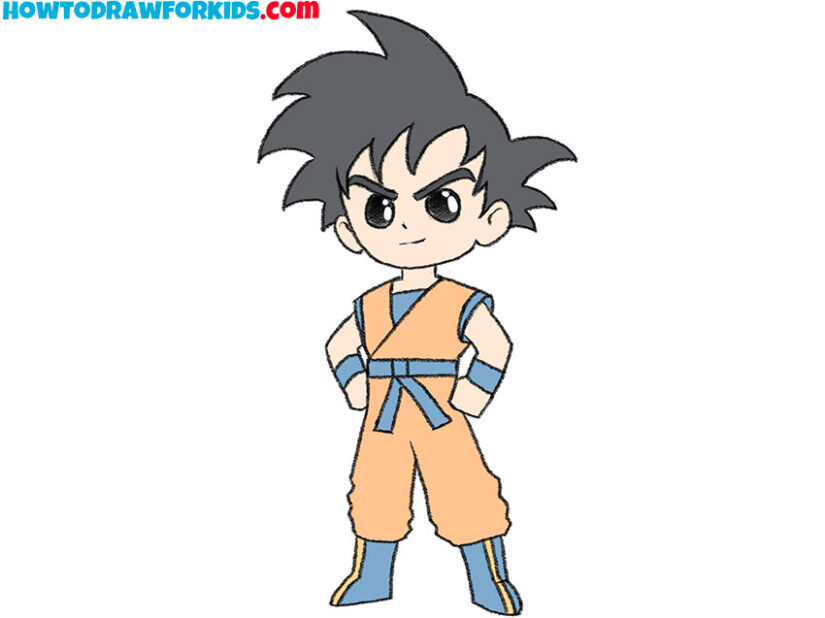
This lesson is created especially for anime lovers, as here we will learn how to draw Goku, the most recognizable character from Dragon Ball.
How to Draw Goku: Basic Information
So, as you already understood, today we will learn how to Goku from Dragon Ball, who happens to be one of the most famous anime characters in the world.
Goku is well-known for his iconic appearance, making him a favorite among anime fans of all ages. However, for this lesson, we will approach the drawing in our recognizable style, simplifying the details to make it more accessible and enjoyable to follow for kids.
In this tutorial, we will also cover the basic techniques for drawing anime and chibi in a simple and enjoyable way. I will explain how to give your characters an authentic anime look and how to draw them in a way that makes them easily recognizable.
To achieve this, I have created a detailed basic lesson on drawing Goku, along with several additional guides just for you. The first lesson will teach you how to draw this iconic anime character, while the following tutorials will help you reinforce the skills you’ve learned.
Drawing Tutorial
Materials
- Pencil
- Paper
- Eraser
- Coloring supplies
Time needed: 35 minutes
How to Draw Goku
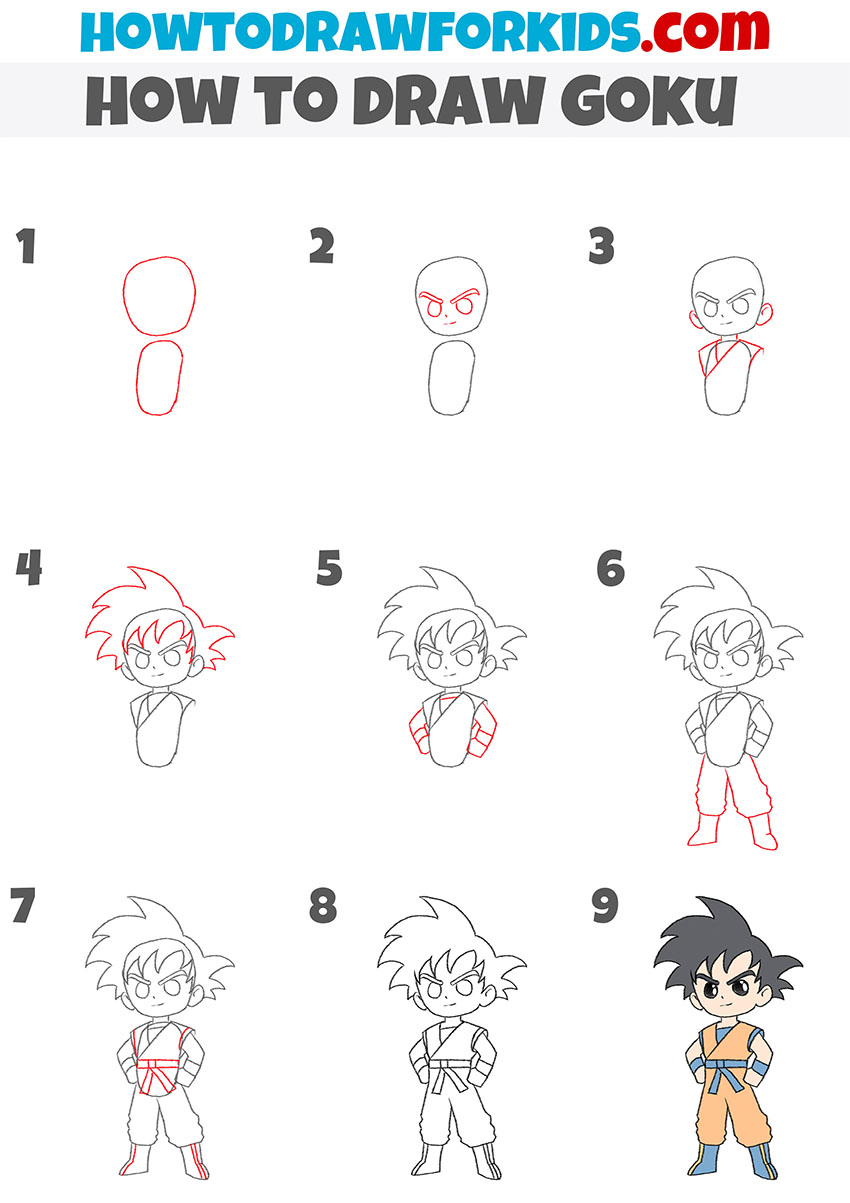
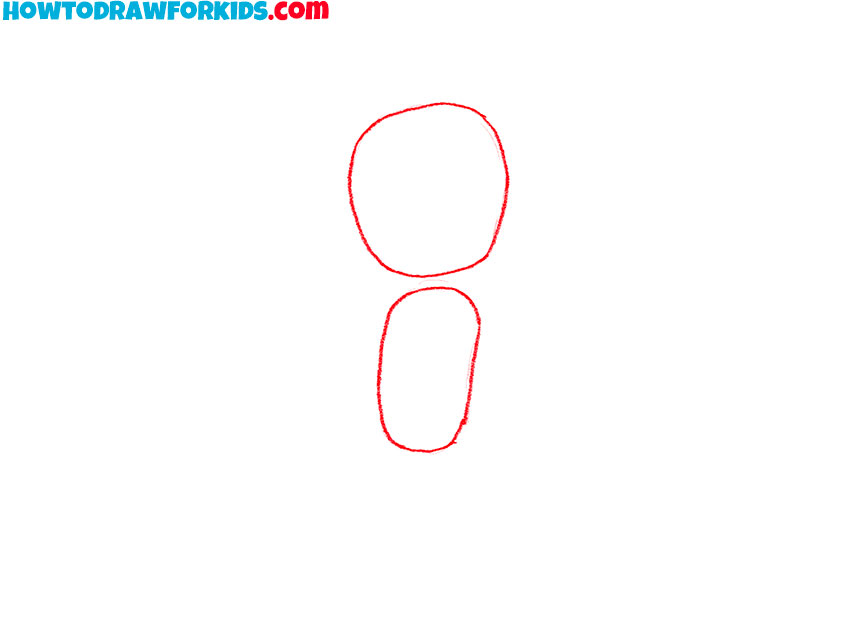
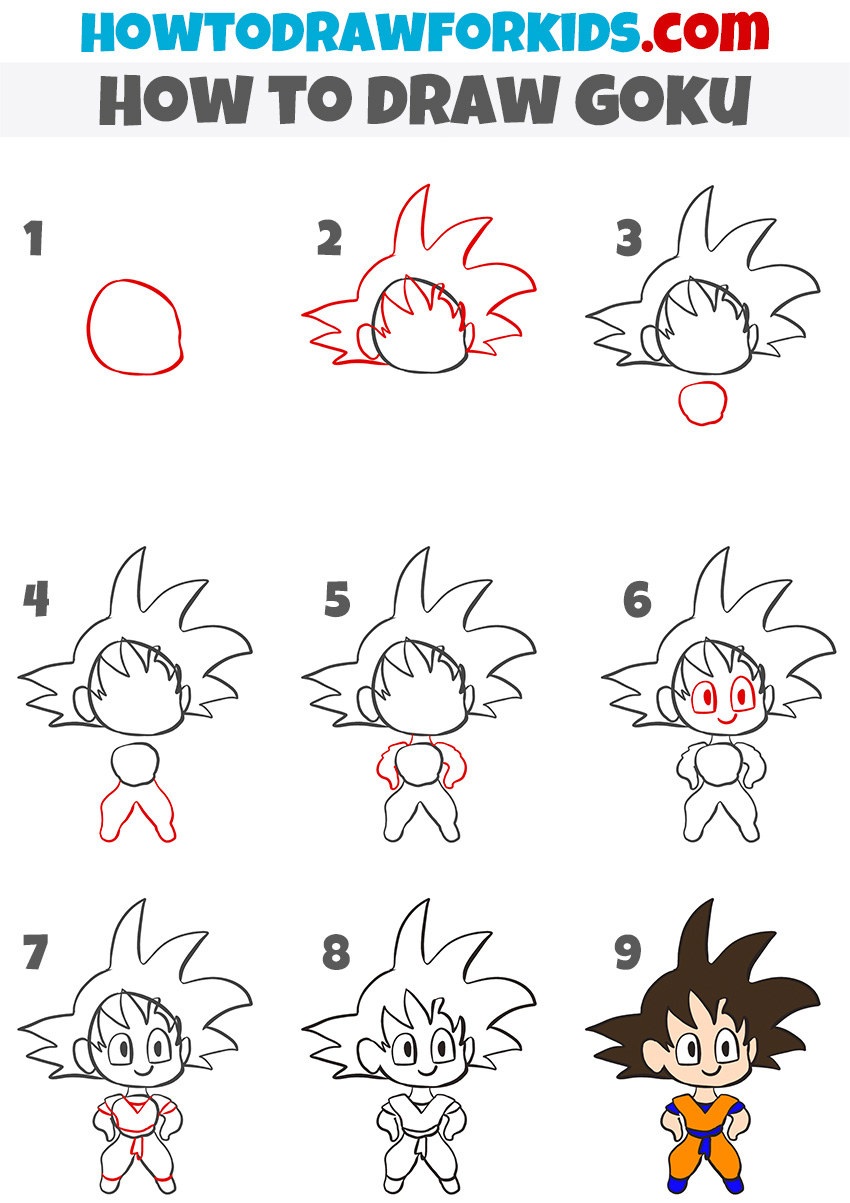
- Draw the basic shapes of Goku.
Draw an oval shape for the head of Goku and a smaller oval for the body just below it. This is the basic shapes for Goku’s figure, helping you keep the proportions symmetrical and natural. Make sure the head is slightly larger than the body, as this will give the drawing a chibi or simplified look.
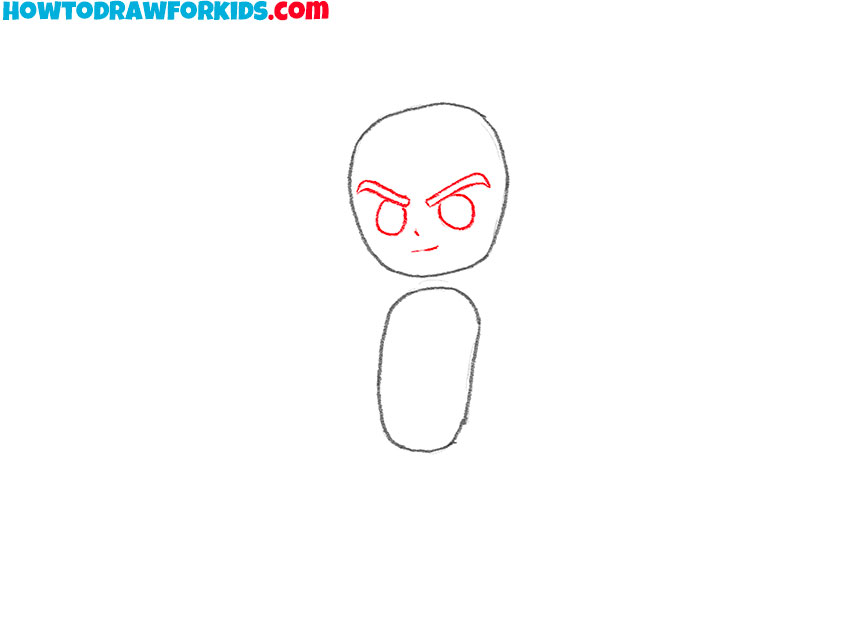
- Add facial features.
Draw the eyes of Goku as two slanted almond shapes. Add the pupils and thick eyebrows above the eyes. Draw a small curved line for the nose, just below the eyes, and a simple curved line for the mouth. You can alter the expression by slightly adjusting the position of the eyebrows and mouth.
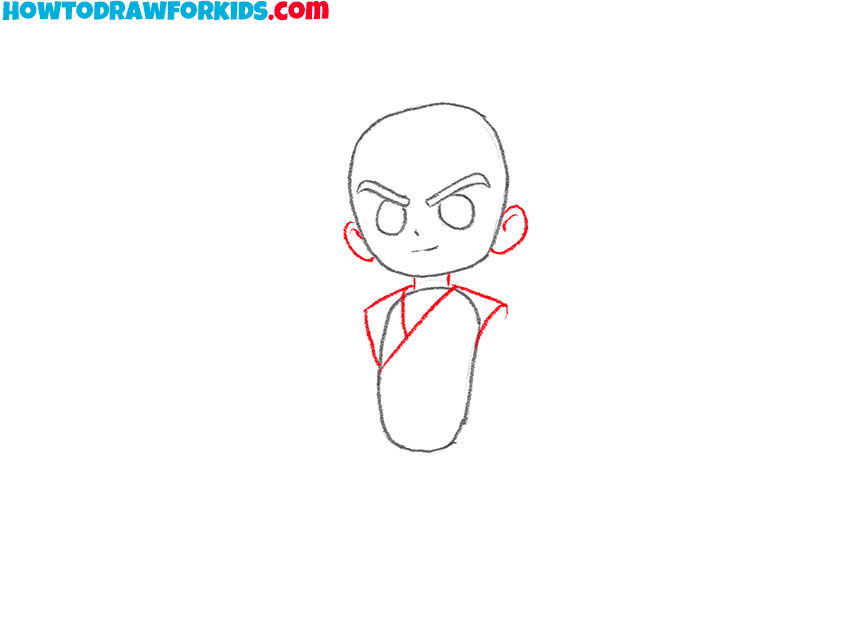
- Add the ears and start drawing the gi.
Draw the ears of Goku on both sides of his head, making sure they align with the eyes. Next, sketch the upper part of his clothes, starting with the neckline and the folds of his gi. As you draw the clothes, shape the shoulders by extending the lines outward from the neck area, keeping the design simple.
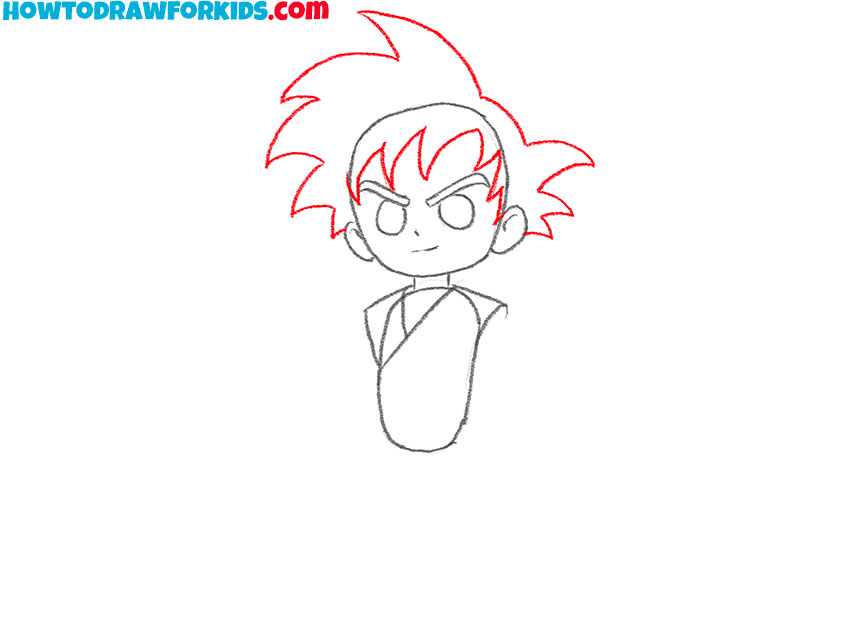
- Draw Goku’s iconic hair.
Goku’s hair is one of his most defining features. Draw large, spiky sections starting from the top of his head. The spikes should be uneven, pointing in different directions, giving it a recognizable look. The hair should frame his face but not obscure his facial features.
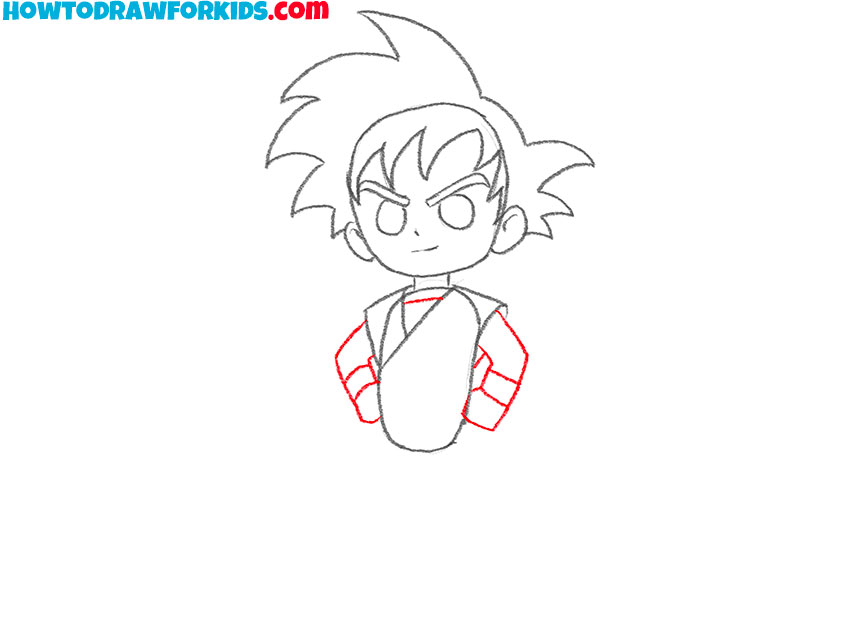
- Add the arms and hands.
Now, draw Goku’s arms extending downwards toward his waist, making sure the hands rest confidently on his hips. The arms and hands should be performed in really simple way. To add some details to the drawing, draw the wristbands on Goku’s hands using simple lines.
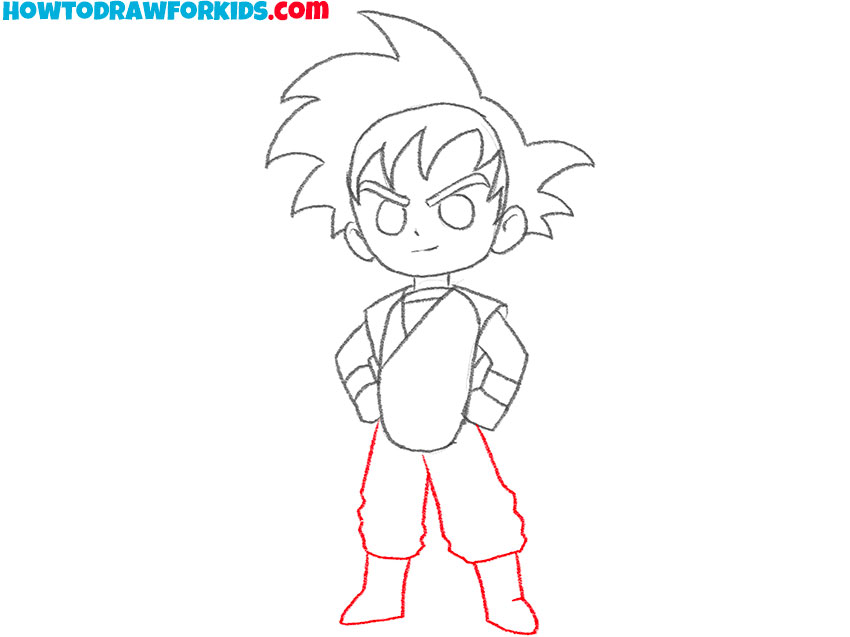
- Draw the lower body.
Let’s sketch Goku’s legs and boots. Start by drawing his pants, making them slightly loose and baggy to reflect the martial arts style. Add the folds and creases to the pants, especially around the knees. Then, draw his boots, which are an important part of Goku’s outfit.
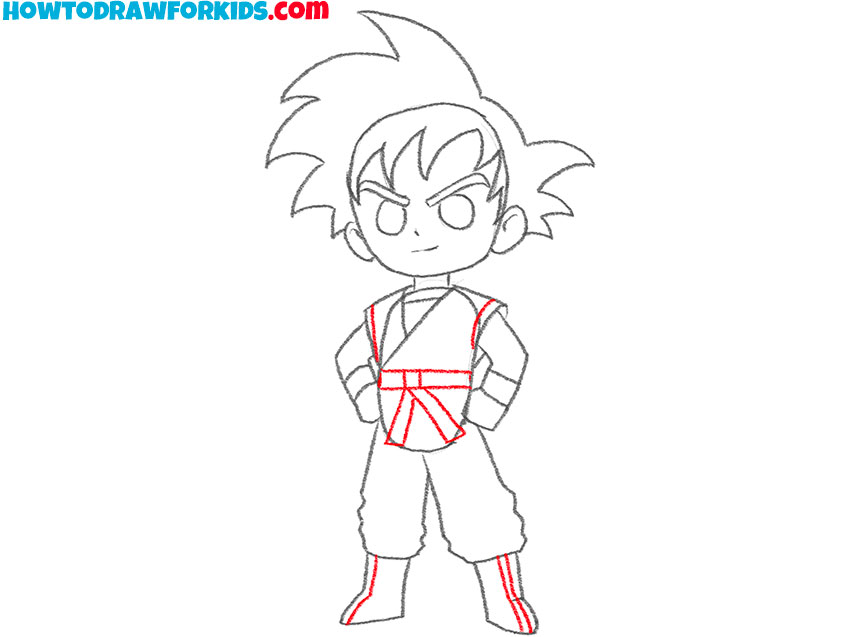
- Detail the gi and boots.
Draw the belt around Goku’s waist with simple horizontal and vertical lines, making sure to include the knot at the center. Next, add details to the gi by drawing lines at the shoulders. Finally, move on to the boots. Sketch additional lines along the front to indicate the structure design of the boots.
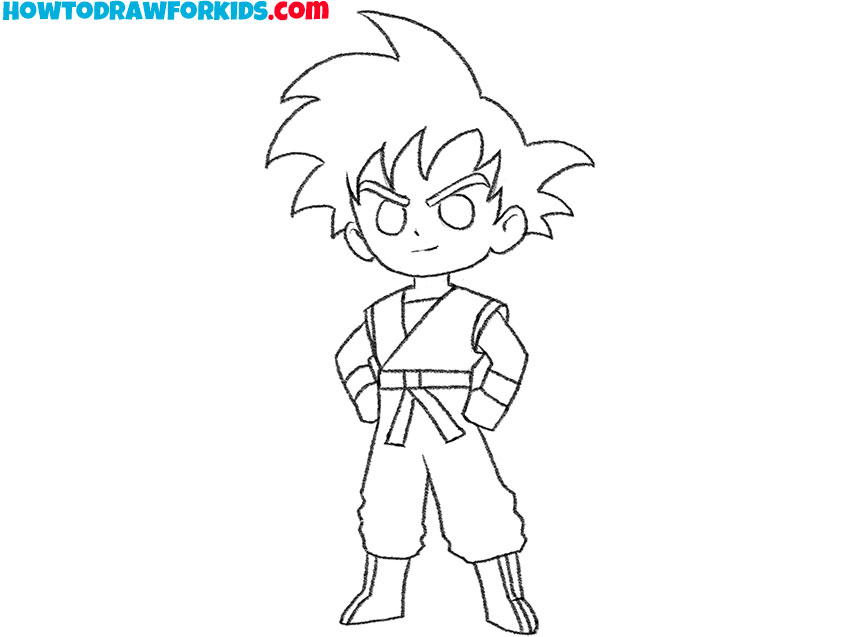
- Finalize the details.
In this step, finalize your Goku drawing by adding small details and making sure everything looks clean. Add additional lines to the clothing, if it’s needed, and smooth out any rough edges in the sketch. Double-check the proportions and make any last adjustments before moving on to coloring.
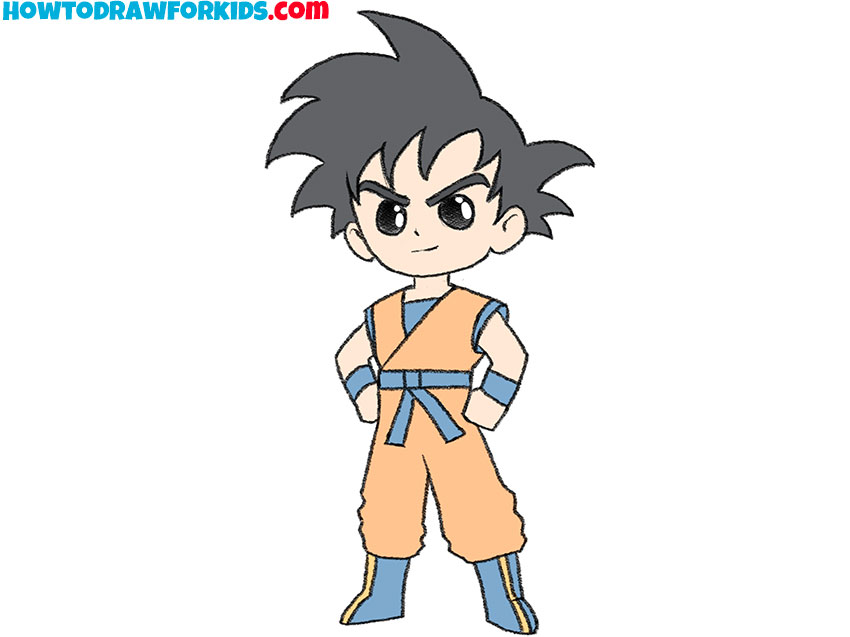
- Color the Goku drawing.
Use orange for Goku’s gi and blue for his belt, wristbands, and boots. His hair should be a bold black, with his skin a light peach tone. Additionally, you can add shading to different parts of the drawing to give it more dimension, especially around the folds of the clothing and the spikes in his hair.
How to Draw Goku: Video Tutorial
Additional Content
I have prepared a simple PDF file to go along with this lesson. This guide is useful for learning on the go, allowing you to download and refer to the basic steps of drawing Goku without needing internet access. It is meant to complement the tutorial and is best used once you are familiar with the basic steps.
In the PDF, you will find some additional materials to help you improve your drawing skills. After getting comfortable with drawing anime and chibi characters, these extra materials will assist in refining your lines, improving character expressions, and adding more detail to your drawings.
How to Draw Goku: Alternative Methods
To complement the main lesson, I’ve prepared several alternative techniques for drawing Goku. These methods offer more variety for practice, helping to improve your drawing skills. By working with different styles, you can better understand character recognizable features.
Simple Goku Drawing Tutorial
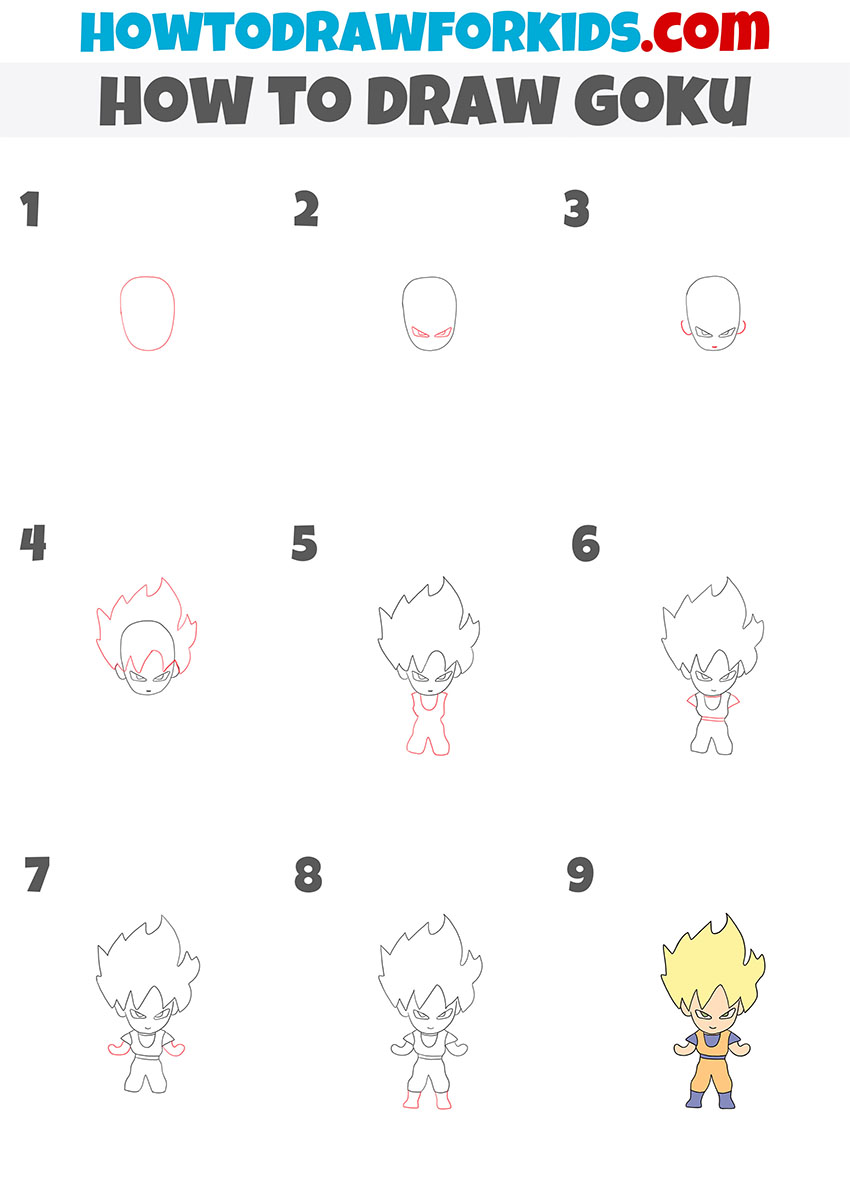
This alternative drawing method is made for younger artists, showing Goku in a simple battle stance. The design is kept easy, making it suitable for kindergarteners or beginners, while still illustrating the important elements of Goku’s appearance.
First, draw an oval shape for Goku’s head. Next, add the eyes, which should be slanted and sharp. Then, sketch his small nose and simple mouth. Draw the ears on both sides of the head, ensuring they are level with the eyes.
After that, focus on drawing Goku’s spiky hair. Create large, jagged spikes that extend outward, covering the top and sides of the head. Move on to sketching the body by drawing a small torso and slightly wider pants. Add the arms, bent at the elbows with fists resting on the hips.
Draw Goku’s shoes by adding simple shapes for his feet. Finally, go over the entire drawing, refining the outlines, and erase any unnecessary guidelines. Once the outline is complete, add color to finish the Goku drawing.
Chibi Goku Drawing Tutorial
In this tutorial, the drawing of Goku is created in a more noticeable Chibi style, where the proportions are even more simplified and stylized. The head is drawn significantly larger than the body, and the overall look is cuter and more exaggerated to fit the Chibi style.
Start by drawing a large, rounded shape for Goku’s head. Next, add his icpnic spiky hair, keeping the spikes large and simplified. Draw the ears at the sides of the head. Then, sketch a small circle for the body underneath the head.
Add the limbs by drawing simple, short shapes for the arms and legs. The arms should be bent at the elbows, and the legs spread slightly apart. Draw large, rounded eyes, and add simple curved lines for the mouth and nose. Once the basic shapes are in place, go over the lines and clean up the drawing. Finish by adding color to complete the Chibi Goku.
Conclusion
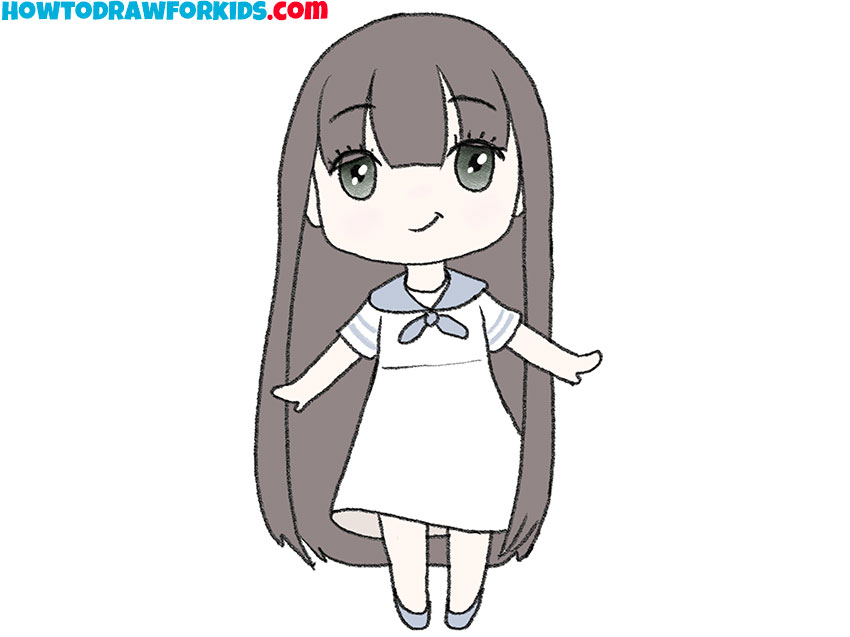
So, the tutorial on how to draw Goku in a simplified and chibi style is over. You can find more tutorials on my website, including guides on drawing different anime and chibi characters. The website contains a range of topics for those interested in different drawing exercises.
To stay updated with the latest tutorials and tips, follow my social media profiles. If you have any suggestions or ideas for future lessons, feel free to leave a comment below. Your feedback is really helpful.

I love your goku drawings