How to Draw Hair
In this guide, I’ll show you how to draw hair using four different methods. With these easy steps, you can create various hairstyles to match your style.
How to Draw Hair: Basic Information
In this guide, I will tell you how to draw hair. These are a few basic steps that you can use to draw many different hairstyles for your taste.
The process of drawing hair involves numerous subtleties and intricate details that must be understood and carefully applied. There are also several common mistakes that artists should be aware of and avoid in order to produce convincing and lifelike hair drawings. By training this skill, an artist can significantly boost the overall quality and believability of their work.
It’s important to recognize that in most situations, you’ll rarely find yourself needing to draw hair in isolation, separate from the rest of the head. Because of this, understanding the concepts in this lesson becomes essential for anyone who wants to develop the skills necessary to create high-quality portraits.
On this page, I’ve put together a few very simple tutorials for you that will show you how to draw different hairstyles. These lessons will also help you understand all the nuances and avoid common mistakes. So, gather your art supplies, and let’s get started with the drawing process.
Hair Drawing Tutorial
Materials
- Pencil
- Paper
- Eraser
- Coloring supplies
Time needed: 30 minutes
How to Draw Hair
- Draw the outline of the front of the hairstyle.
In this initial step, start by sketching a basic framework for the hair’s shape. Begin with a curved line that sweeps down from the left to the right, representing the main bulk of the hair. Add more pointed shapes if you want to create large, noticeable bangs.

- Create the hair parting.
To establish a natural hair parting, draw two lines to the side of the previous outline, dividing the hair into two sections. Please note: these are not two parallel lines. The parting lines form an angle that widens slightly downward.

- Add the side hairline.
To define the side part of the hairstyle, begin by drawing a small angular line from the main curve of the hair, just above the parting, extending it outward. While drawing this figure, create a smooth bend from the parting towards the intended ear.

- Draw the top of the hairstyle.
To complete the hairstyle’s overall shape, draw a smooth curve along the top, starting from the left side and sweeping rightward. This line connects the upper segment to the side part, establishing the hairstyle’s crown and completing the contour.

- Add another side part.
To balance out the hairstyle, draw another curved line extending downwards from the top part, outlining the side part that is farther away. This curve should mirror the general shape of the closer side part, providing symmetry.

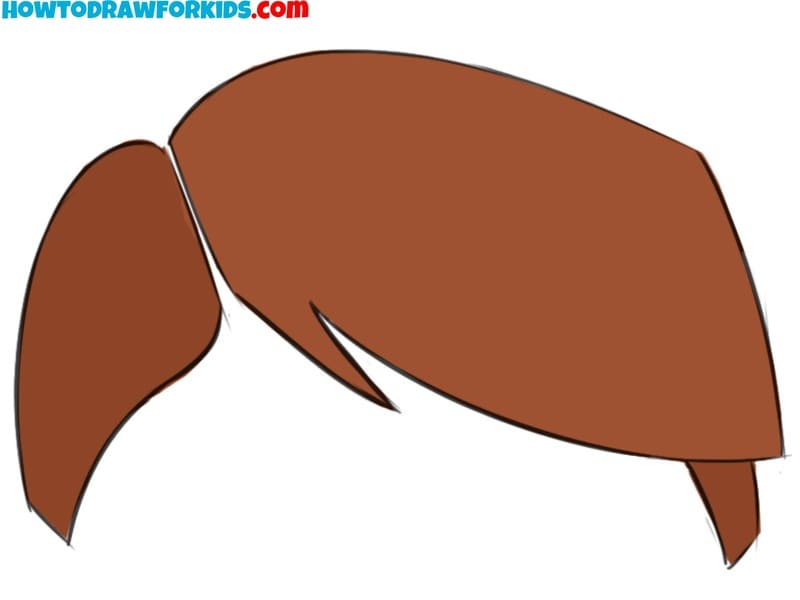
- Add some colors.
For a basic and straightforward finish, choose a single solid color for the entire hairstyle. This color can range from natural hues like brown, black, or blonde to more vibrant options like blue or pink, depending on the desired style.

How to Draw Hair: Alternative Methods
Now that you’ve mastered the main tutorial on how to draw hair, it’s time to explore additional techniques to further train your skills. These extra tutorials offer different sequences and approaches, allowing you to experiment with various styles and textures. Whether you want to draw more realistic hair or try out new shapes, these guides will help you diversify your drawing abilities.
Alternative Method 1
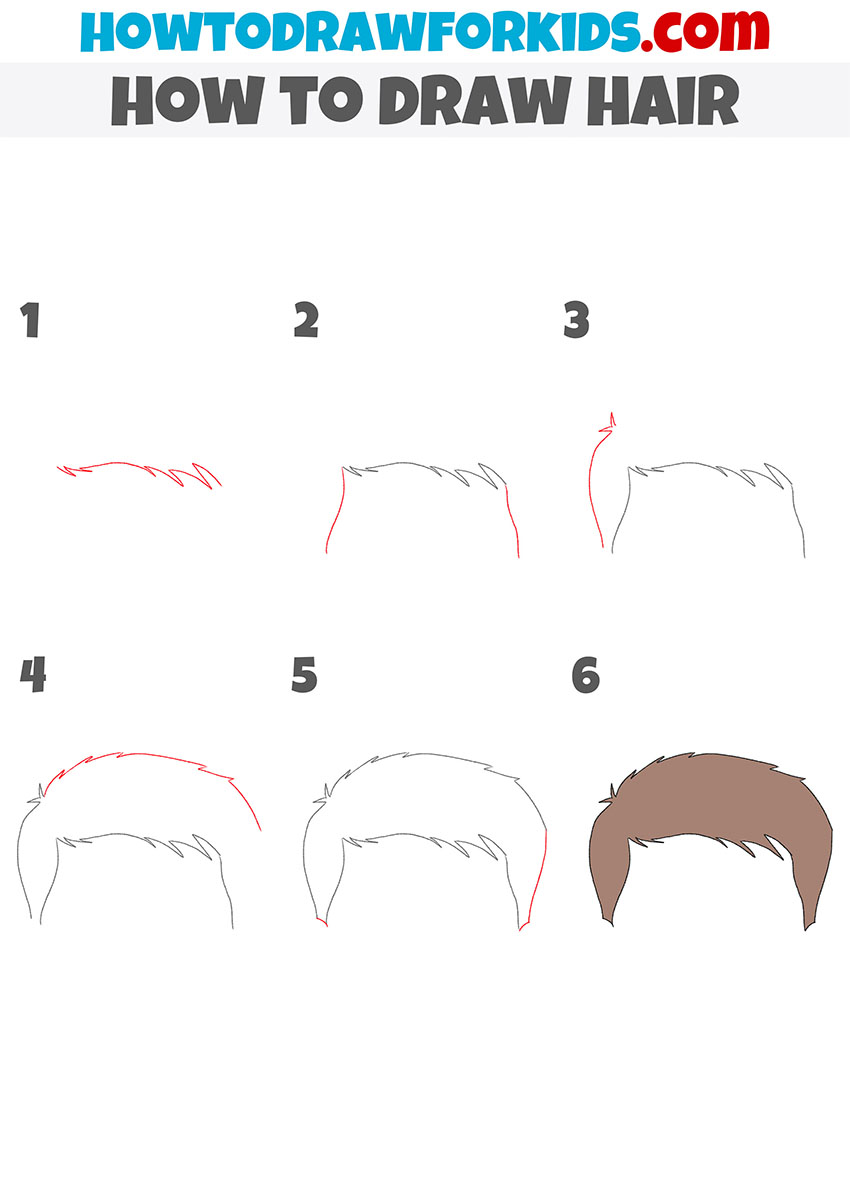
To draw hair using this method, begin by sketching the hairline with a jagged, slightly curved line to define the front edge. Then, extend lines downward from both ends of the hairline to create the sides of the hair, adding a small upward flick on one side for extra detail. Connect the sides by drawing a curved line across the top to outline the full shape of the hair.
To add realism, you can incorporate additional lines within the outline, following the flow and direction of the hair strands. These lines should mimic the natural texture and movement of hair. Finally, finish your drawing by coloring the hair. This method can be adapted to various hairstyles and lengths, so feel free to experiment with different shapes and details to match your desired style.
Alternative Method 2
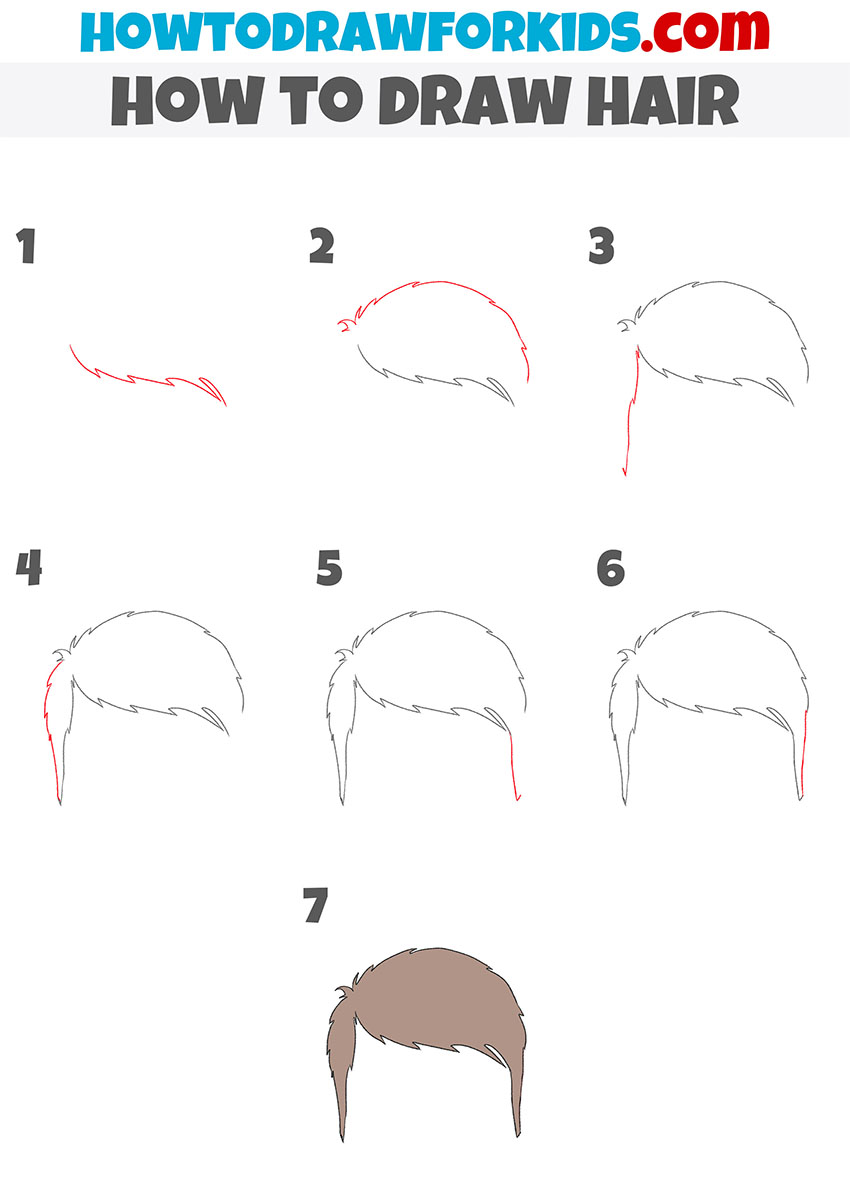
Here’s another additional hair drawing tutorial. Start by drawing a jagged line to create the front section, suggesting the bangs or fringe. From there, extend a curved line upward and then downward to outline the top and side of the hair, illustrating its natural flow. Add more lines on the side to represent strands falling and creating volume.
Complete the outline by extending the opposite side downward, forming the overall hair shape. You can improve the drawing by adding fine lines that follow the hair’s direction, giving it a more natural appearance. Once satisfied with the outline and texture, finish the drawing by coloring the hair. You can pay close attention details and shade the hair for a realistic effect.
Alternative Method 3
Ad the last additional hair drawing tutorial with a different sequence of steps and lines. As in the previous instructions, start by sketching a short, jagged line to form the front edge of the hair. Next, draw a sharply curved line downward from one side of this initial sketch to create the side of the hair, illustrating the curve around the temple. Then, mirror this on the opposite side, creating symmetry.
Moving on, connect the top edges of these lines with a sweeping curve to outline the crown and top portion of the hair. Add slight jagged details at the connection points to simulate a natural hair flow. As in the previous guides, you can add more lines into the outline of the hairstyle for more realism. Finally, color in the hair using desired colors.

How to Draw Hair: Conclusion
Congratulations on completing this hair drawing tutorial! With the help of my four guides, you have now learned how to create different hairstyles and are ready to apply your knowledge to more complex artworks. Practice regularly to refine your techniques, and don’t hesitate to experiment with different styles.
If you found this tutorial helpful, please consider subscribing to my social media for more drawing tips and tutorials. Sharing this tutorial with friends can also help them improve their drawing skills.
I can’t draw it
Why you can’t draw it?
It must be hard to leave her alone