How to Draw Keroppi
This step-by-step tutorial on how to draw Keroppi helps you sketch the popular Sanrio frog character with very simple shapes and lines.

How to Draw Keroppi: Introduction
Keroppi is one of the most recognizable Sanrio characters, made up of very simple shapes, which makes him a great subject for stylized drawing practice. This simple step-by-step tutorial shows you how to draw Keroppi in a cartoon style using just a few basic shapes.
The most important thing to focus on is keeping the drawing symmetrical. The face is wide, and the eyes are oversized, so small changes in spacing or size can shift the whole drawing. It helps to build the head shape first, then align the eyes evenly across the top.
Avoid adding extra lines or textures – Keroppi’s design is minimal. The limbs are placed simply and don’t require any detailing. The arms and feet should stay close to the body so the silhouette remains compact.
You can draw Keroppi with different props, change the clothing style, or add background shapes like bubbles or lily pads. Or try to pair this figure with other Sanrio drawings in the same simplified style, for example drawing Hello Kitty on the background. You can also easily change the pose, draw Keroppi sitting, or match the color scheme to seasonal palettes.
Keroppi Drawing Tutorial
Materials
- Pencil
- Paper
- Eraser
- Coloring supplies
Time needed: 35 minutes
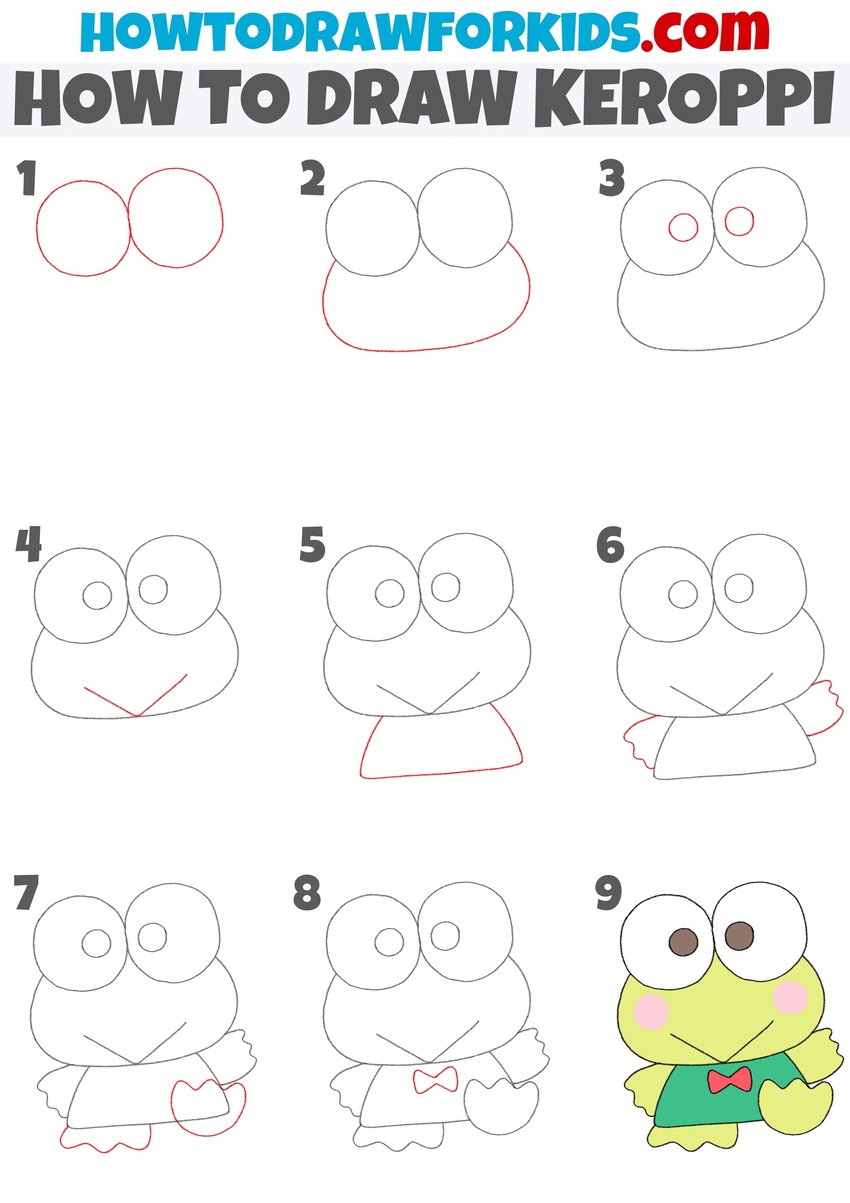
How to Draw Keroppi
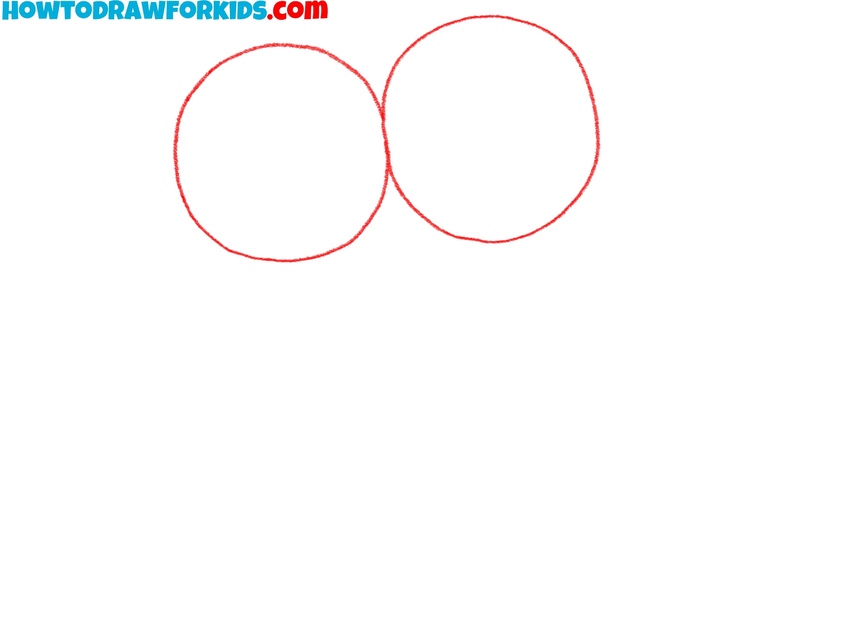
- Draw the eyes of Keroppi.
First, sketch two large, round eyes. These should be slightly overlapping or touching in the center, placed near the top of your paper. Keep the circles the same size and shape to maintain symmetry. The eyes are one of Keroppi’s most recognizable features and take up a large portion of the head area.
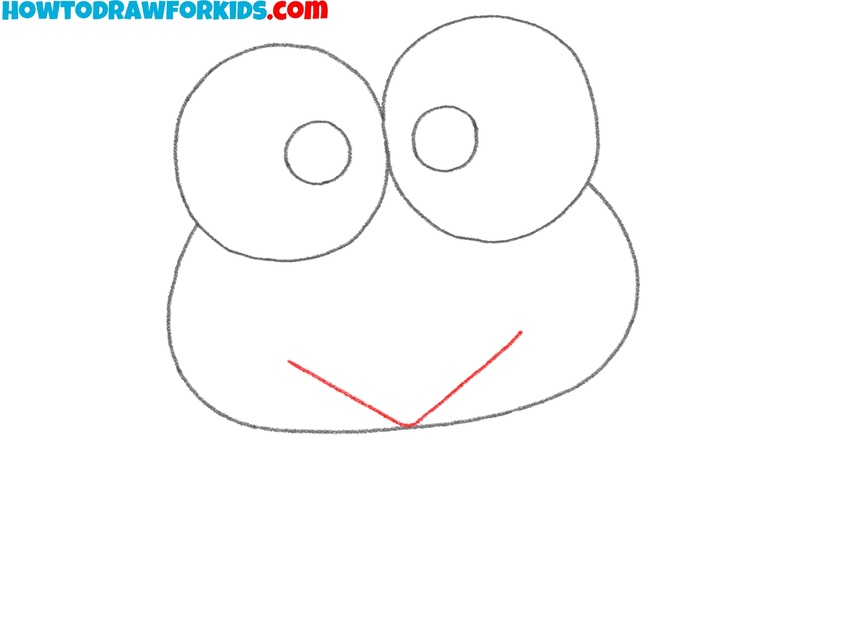
- Complete the outline of the head.
Now draw Keroppi’s head shape by connecting a wide curved line beneath the eyes. Start from the left edge of the left eye and curve down and around to the right edge of the right eye, forming a soft oval or rounded U shape. This creates the bottom of the head and gives Keroppi his frog-like face.

- Sketch the pupils inside the eyes.
Now, add two small circles inside the large eye shapes you created earlier. Place each circle toward the central line. These are the pupils, so try to sketch them as circular as possible, making both circles the same size and position them symmetrically. To change the direction of the gaze, adjust their position.

- Sketch the mouth under the eyes.
Next, draw Keroppi’s mouth by adding two short diagonal lines that meet in the middle, forming a wide V shape. Place the mouth centered just beneath the eyes and right on the lower curve of the head. The lines should be clean and simple. The V shape is easy to draw but must be well-centered.
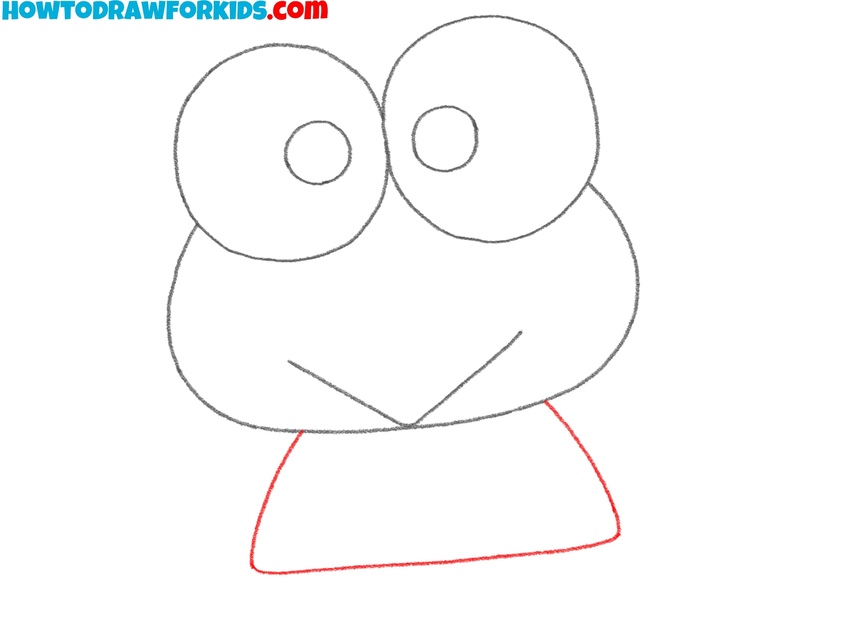
- Create the torso below the head.
Sketch a wide trapezoid or slightly curved rectangle below the chin. This will form his torso and provide a base for placing his arms, legs, and clothing details. Avoid adding any detail at this stage, just try to get the shape and placement right.
- Draw the arms of Keroppi.
Each arm of the character looks like a small rounded rectangle with a wavy edge to illustrate the fingers. Draw the left arm first, starting near the shoulder area, then mirror the shape on the right side. Keep both arms equal in size. Adjust the position of the arms as desired.
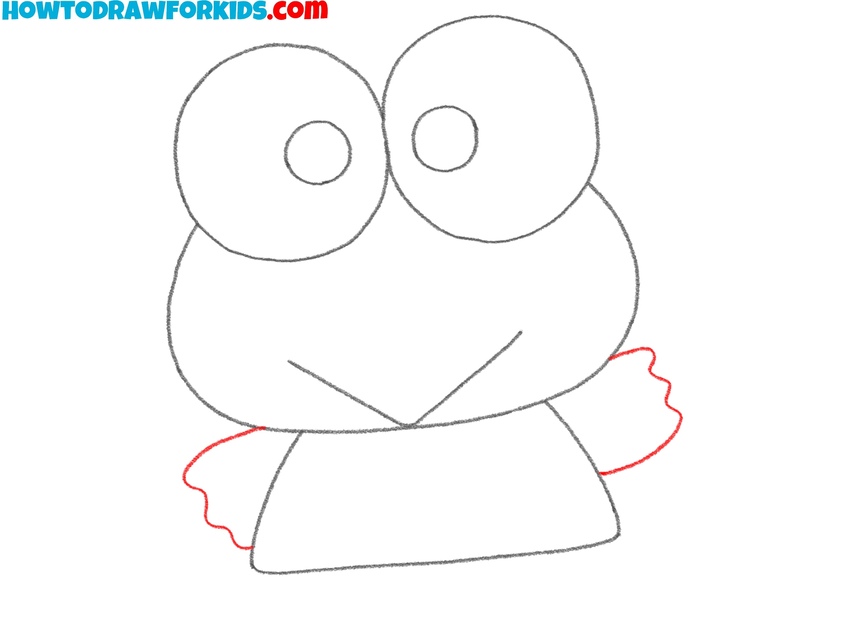
- Sketch two small legs.
Now draw Keroppi’s legs and feet, using rounded shapes with wavy edges at the bottom of the body. One leg is lowered down and the other is raised, which, together with the position of the arms, creates the impression that Keroppi is walking. When you draw Keroppi, keep the limbs simple.

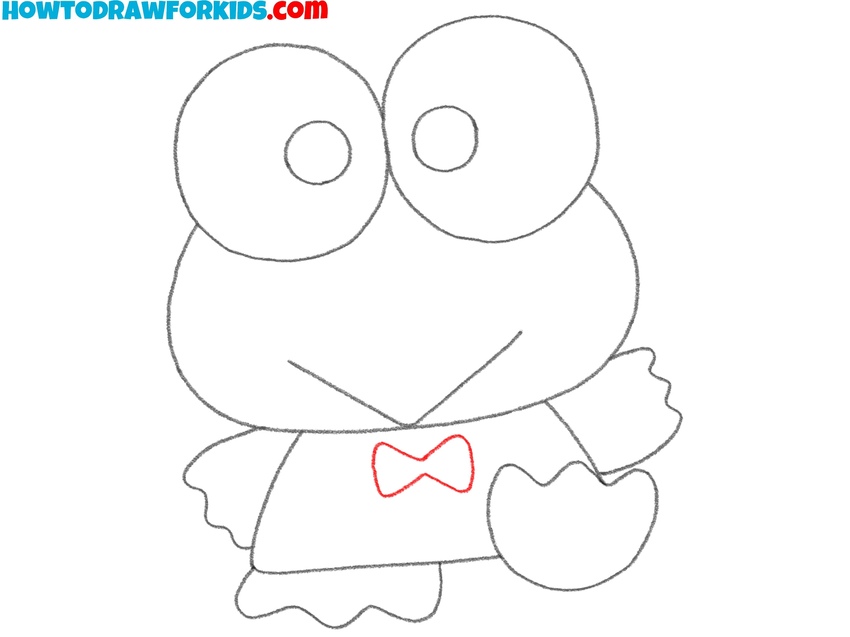
- Draw Keroppi’s bow.
Draw Keroppi’s bow tie at the center of his chest, just below the mouth. To illustrate this part, sketch two small triangle-like shapes, and connect them in the middle. In this example, we’re drawing Croppy in a solid suit, but you can draw him in a striped suit by simply drawing a series of vertical lines on his torso.
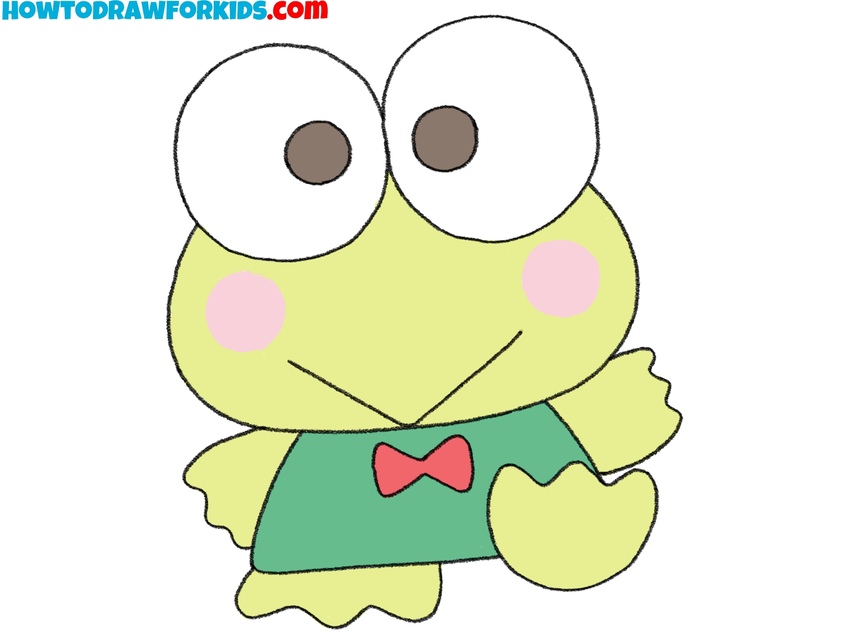
- Complete Keroppi with simple coloring.
Color the face, arms, and legs in a light green color, and fill in the pupils with black or dark gray. Add light pink circles to the cheeks. The shirt can be colored in a solid green, and the bow tie a bright red. Sanrio characters are colored using very simple tones, so use a minimum number of colors.
Conclusion
This Keroppi drawing tutorial is a helpful way to practice working with basic character proportions and simple facial features. It also offers a good introduction to adding small character details, like a bow tie, without making the process too complex.
If you want to continue drawing other simple and recognizable characters, try My Melody drawing tutorial or my very simple and cute Kuromi drawing tutorial. These will go well with Keroppi and follow the same easy-to-understand approach.
To get more tutorials like this, you can follow the Pinterest page where all shortened versions are posted, or subscribe on YouTube for regular step-by-step videos. Both platforms are updated with new drawings created to support practice with fun and familiar characters.