How to Draw Lilo
This simple step-by-step drawing lesson will show you how to draw Lilo from the incredibly popular animated series Lilo & Stitch by Disney.

How to Draw Lilo: Introduction
In one of my previous drawing lessons, I showed you how to draw Stitch, one of the main characters from this animated series. However, your knowledge wouldn’t be complete without knowing how to draw Lilo as well. To fill that gap, I created this step-by-step tutorial.
Just like the Stitch lesson, this Lilo drawing tutorial will be truly simple, using only basic lines and shapes. Despite its simplicity, by the end, you’ll have an authentic drawing of Lilo that closely resembles her appearance in the animated series. To achieve this, it’s important to pay attention to the stylistic choices used by the show’s artists and try to replicate them as closely as possible.
A key aspect of this style is the strong stylization of facial features and body proportions, which is common in many animated series. To sketch these details accurately, observe the shapes and techniques I used in my example. Pay close attention to the outlines and proportions, and do your best to replicate them. But even if you make a mistake, don’t worry – just try again.
Even the most skilled artists responsible for some of the most famous animated films in history spent years practicing their craft. They didn’t create masterpieces on their first try, and you don’t have to either. Keep practicing, and with time, you’ll improve your ability to draw Lilo and many other characters!
Lilo Drawing Tutorial
Materials
- Pencil
- Paper
- Eraser
- Coloring supplies
Time needed: 40 minutes
How to Draw Lilo
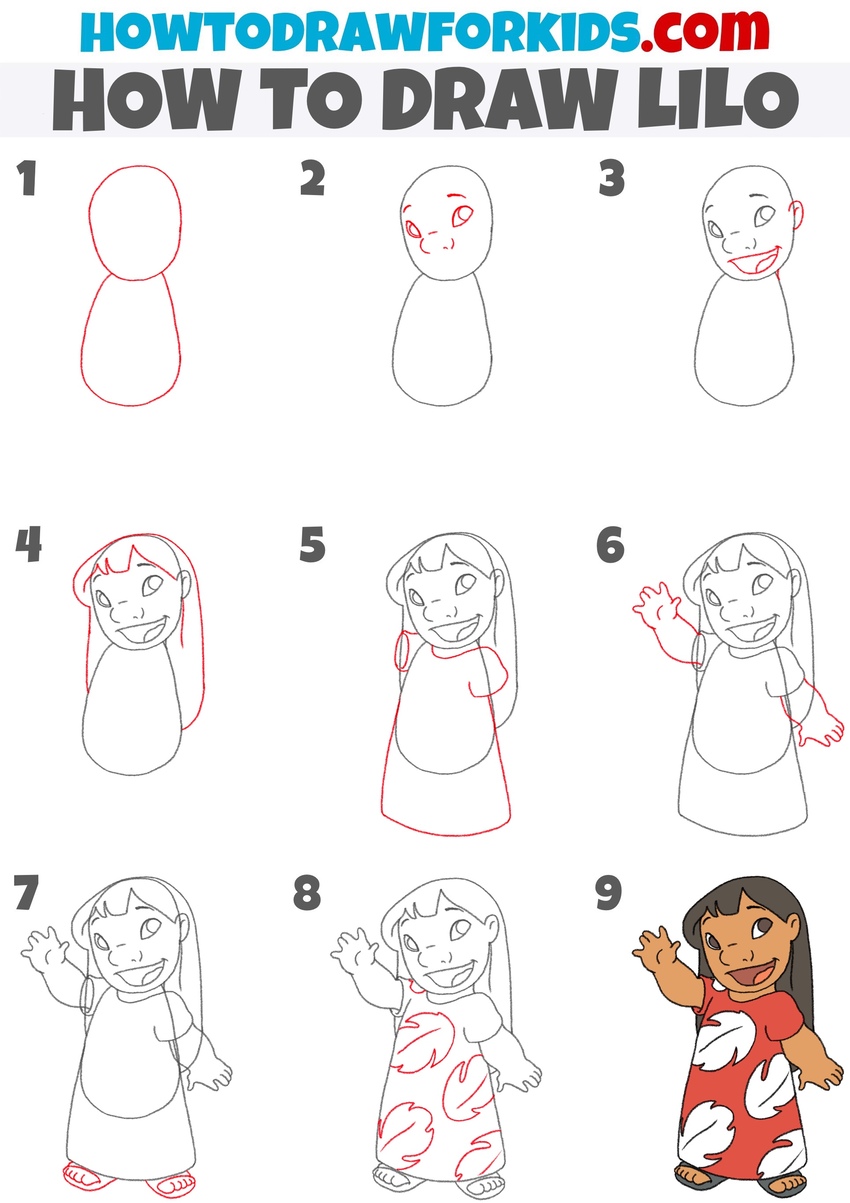
- Sketch the basic outline.
Sketch the basic structure of Lilo’s body using simple shapes. Draw an oval for her head and a larger teardrop-shaped form for her torso. Keep your lines light at this stage, as you will adjust them later. Since this is just a guideline, don’t worry about perfect curves.

- Draw Lilo’s facial features.
Lilo’s eyes are large and cartoonish, with a slightly rounded almond shape. Position them slightly above the middle of the head. Draw small, curved lines for her eyebrows. Her nose should be small and simple, just a slight curve or two to indicate its shape.
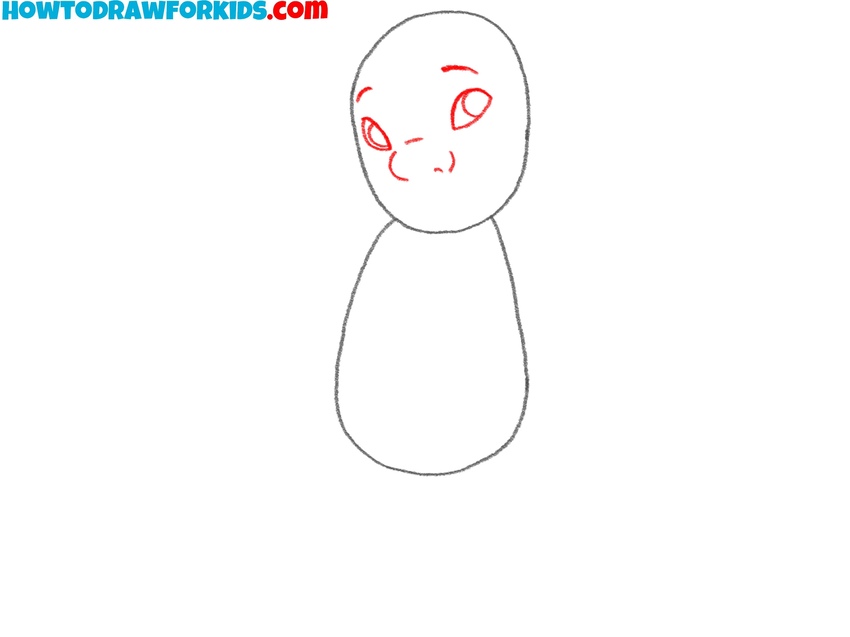
- Draw the mouth and ears.
First, draw Lilo’s upper lip as a long and curved line. Then, add the lower lip as a line with a more pronounced curve. After that, draw the tongue inside the mouth. Next, add her ears, which should be positioned slightly lower than her eyes. Finish the step by sketching her neck.

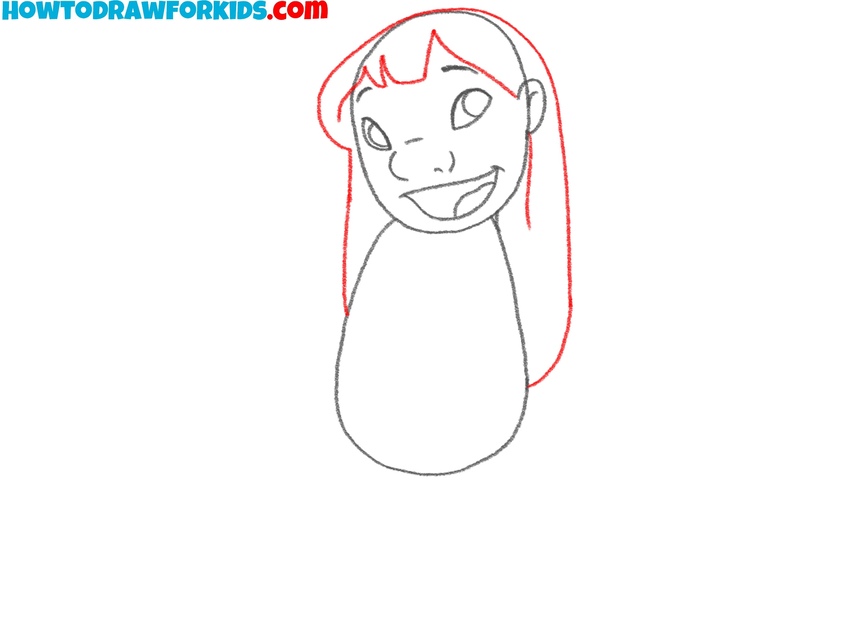
- Draw the hair of Lilo.
First, sketch the outline of her bangs, which have a slight zigzag pattern at the front. Then, extend two long, curved lines from the top of her head down to her shoulders to form the sides of her hair. When drawing hair of Lilo, use long and continuous lines.
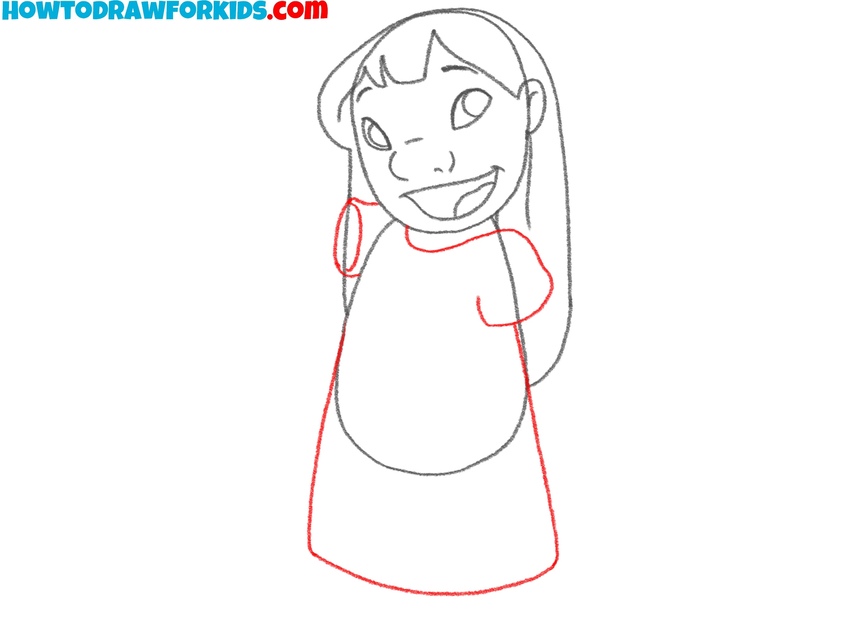
- Sketch the dress.
Do draw the dress of the character, create a curved line near her shoulders to define the neckline. Then, draw the short sleeves at the sides. After that, extend lines downward to shape the dress. Lilo’s dress is simple, so don’t add too many details at this stage. The dress should widen toward the bottom.
- Add the arms and hands.
First, draw Lilo’s arms using smooth lines, making the upper arms slightly narrower than the forearms. Then, draw the hands by first outlining the palms and then adding the fingers with short, curved lines. To make the hands look more realistic, add a small line inside the open palm to create texture.

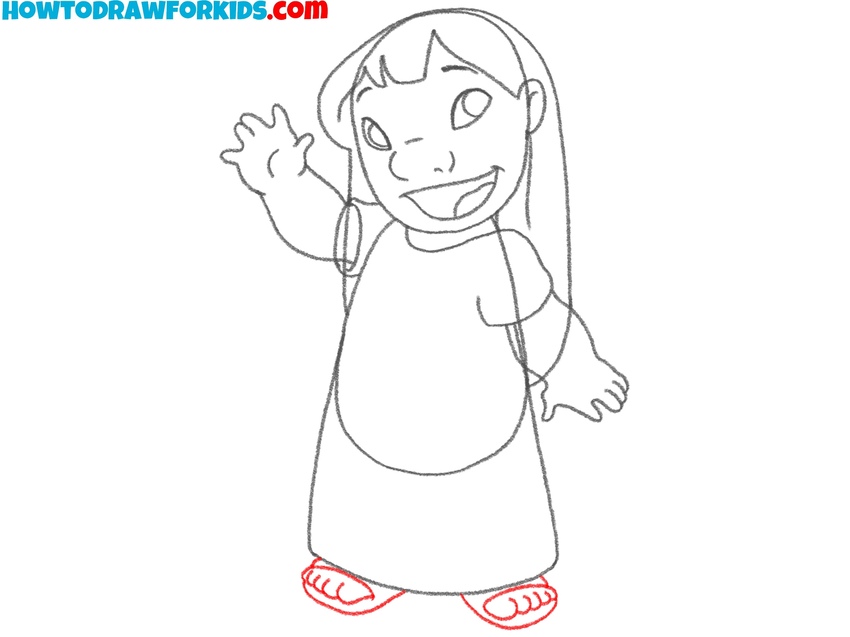
- Sketch the feet and sandals.
Since Lilo wears a long dress, only her feet are visible beneath the fabric. To draw them, first lightly sketch the main shape of each foot, then the short, rounded toes at the front. Sketch the signature sandals. Using a few basic lines, outline the visible part of the soles first, then add curved lines to represent the straps on top.
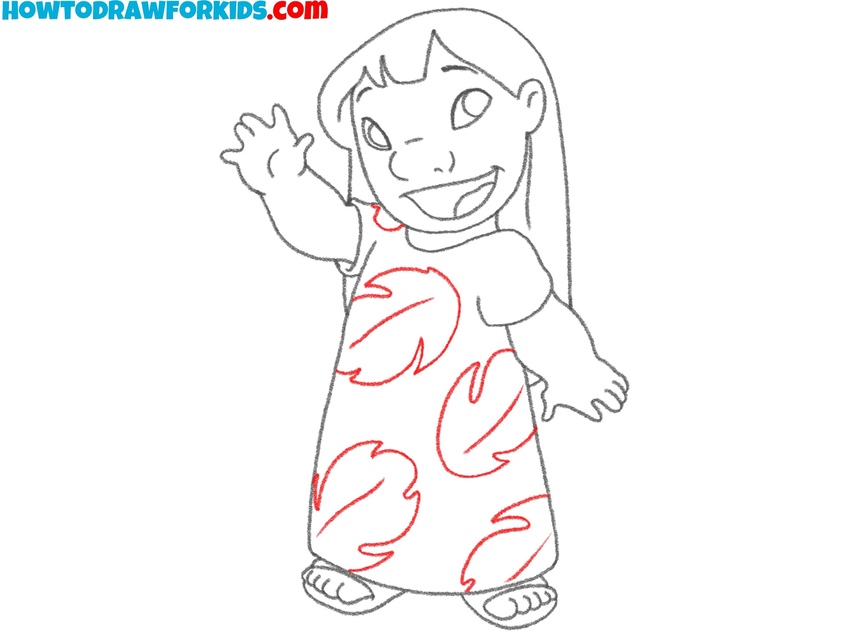
- Add the dress pattern.
Now decorate Lilo’s dress with its signature tropical leaf pattern. Draw several large, simple leaf shapes scattered across her dress. Keep each leaf curved and natural. Vary their positions and angles slightly to create the tropical design style clearly seen in Lilo’s original look.
- Color the drawing of Lilo.
Complete your drawing by coloring Lilo accurately. Use a warm, medium tan shade for her skin tone and a deep brown color for her hair. Fill her dress with a rich, bright red, leaving the leaf patterns pure white. Use dark brown or black for the eyes, adding a small white highlight to create reflection.

How to Draw Lilo: Backgrounds
If you’ve completed the steps on how to draw Lilo, place her in a detailed beach scene that reflects her home in Hawaii. Draw a gently curving shoreline with soft sand, scattered seashells, and small tropical flowers near her feet. Add palm trees bending gracefully in the background, along with gentle waves lapping against the shore. You can also sketch distant islands and fluffy clouds drifting across a clear blue sky.
To complement your drawing of Lilo, sketch her in front of a surf shop. Include surfboards leaning against the building, a straightforward shop sign, and perhaps some beach-related items visible inside the shop windows.
Place your Lilo drawing in front of an ice cream shop. Add simple signs, a basic menu, and sketch ice cream cones or customers in minimal detail to set the scene clearly.
To match your completed Lilo drawing, sketch a basic home interior. Include simple furniture, family pictures on the wall, a small bookshelf, and standard household items typical of Lilo’s environment.
Conclusion
If you followed each step of this tutorial on how to draw Lilo carefully, paid close attention to my instructions, and did your best to recreate every detail accurately, your drawing should now look correct and complete. To continue improving your skills, try repeating this drawing, but each time challenge yourself by slightly changing something—like the character’s pose, facial expression, or even adding extra elements. For instance, you might include additional characters like Stitch to make your drawing more interesting.
Also, consider visiting the “Cartoons” category on my website, where you can find more drawing lessons featuring your favorite animated characters. Each time you practice, make it slightly more challenging by altering poses, facial expressions, or adding new details to your illustrations.
Don’t forget to follow me on Pinterest, where I regularly post new updates and creative collages, and subscribe to my YouTube channel for step-by-step video lessons and a behind-the-scenes look at how I create my coloring pages and drawing tutorials.