How to Draw Link
In this lesson, I will show you how to draw Link using two different methods. I’ll also highlight the most common mistakes and provide tips on how to avoid them.
How to Draw Link: Basic Information
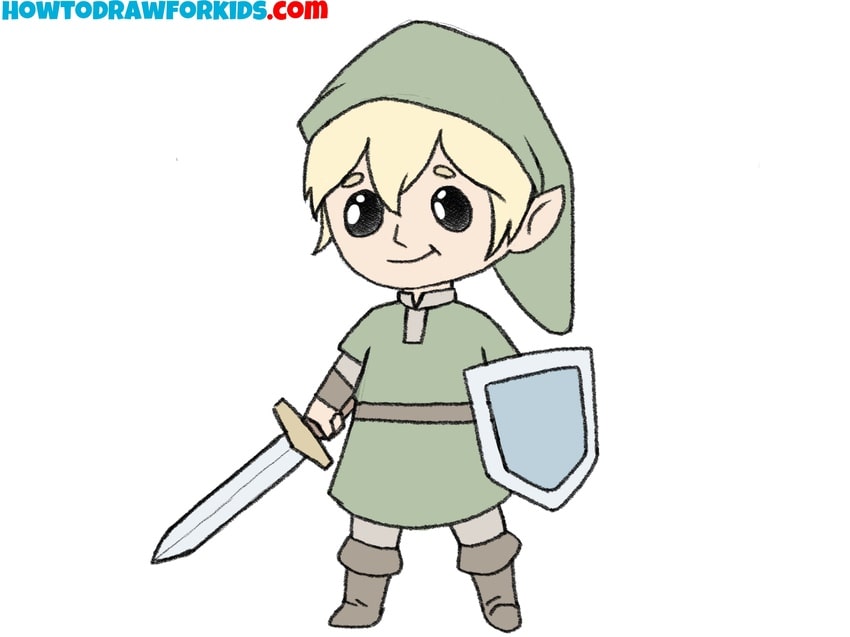
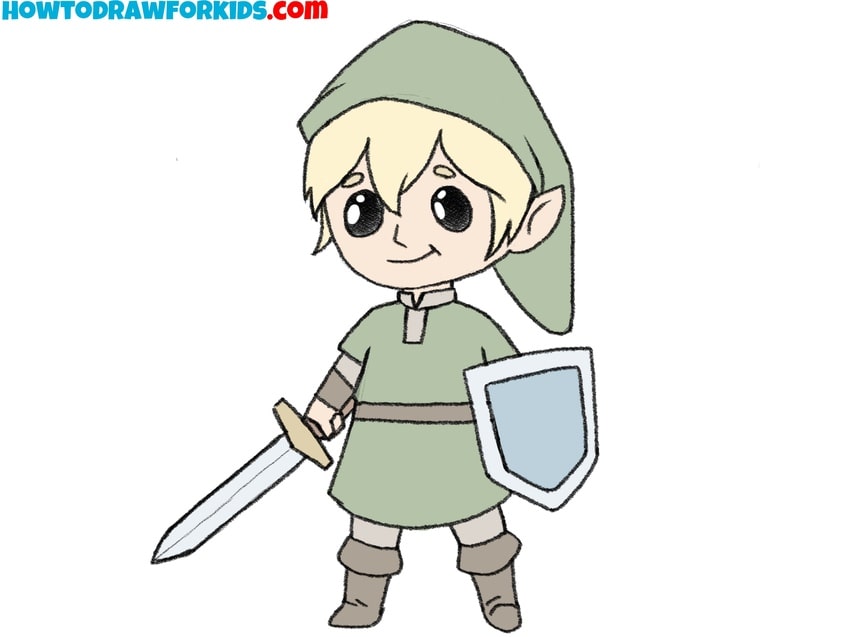
This tutorial on how to draw Link will be really simple. I intentionally simplified this character so that the young artist would not have any difficulties.
As you can see, Link in this tutorial is drawn in really simple cartoon style. This is a style in which the character is greatly simplified and has unrealistic proportions.
If you want to make your Link drawing more realistic, and similar to the original, then just slightly change the proportions. That is, you just need to make the body a little larger and the head a little smaller.
If you’re ready, let’s get started!
Link Drawing Tutorial
Materials
- Pencil
- Paper
- Eraser
- Coloring supplies
Time needed: 50 minutes
How to Draw Link
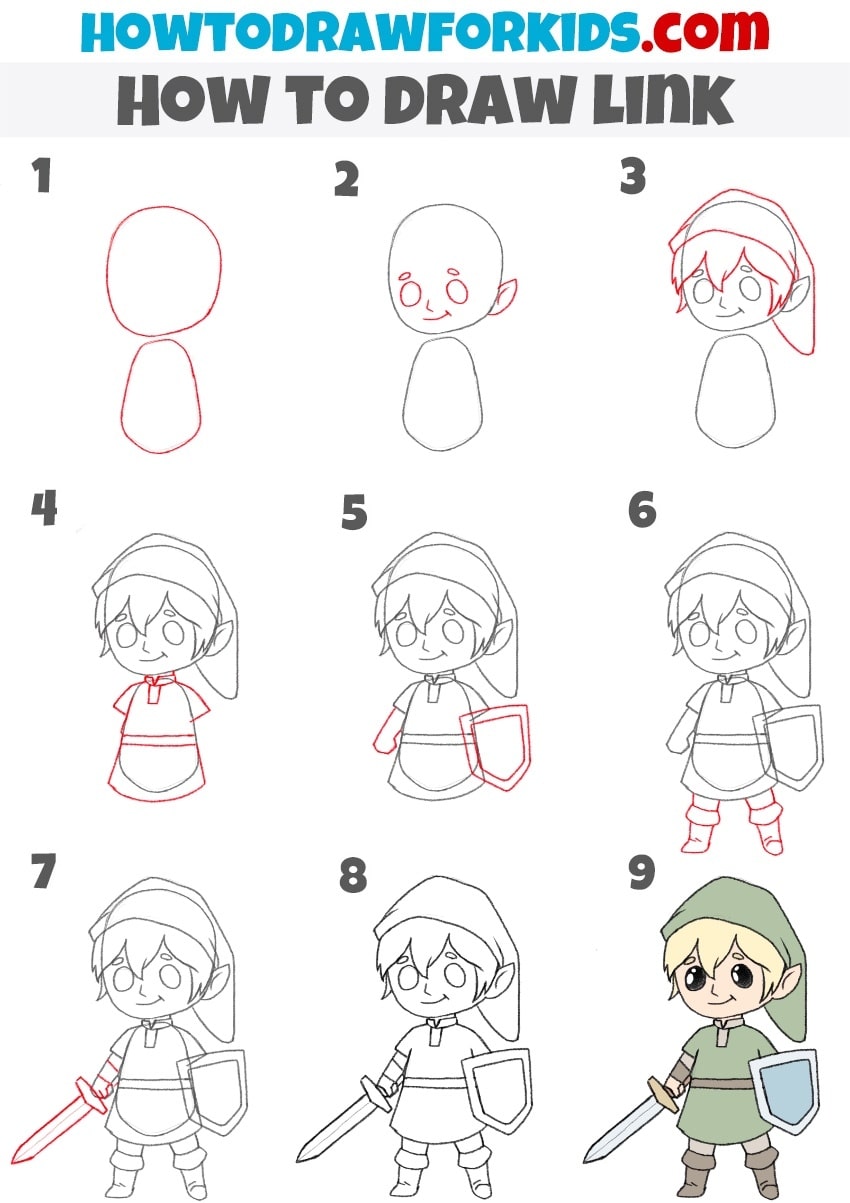
- Sketch the head and torso of Link.
Start by sketching a simple outline for Link’s head and body. Draw an oval for the head and a rounded trapezoid for the torso. The head should be slightly larger to accommodate the facial features later. These basic shapes will serve as the foundation for Link’s proportions.
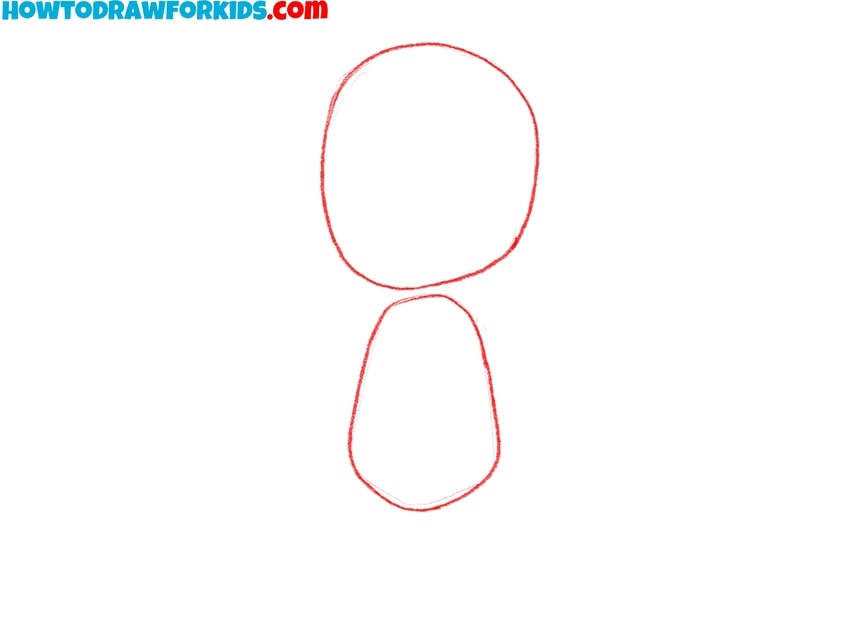
- Add the facial features.
Begin by sketching two large, rounded eyes towards the middle of the head, and a small, curved smile beneath them. Place the eyebrows above each eye. Then, draw an ear on the right side of the head, slightly pointed at the top to reflect Link’s iconic elf-like appearance.
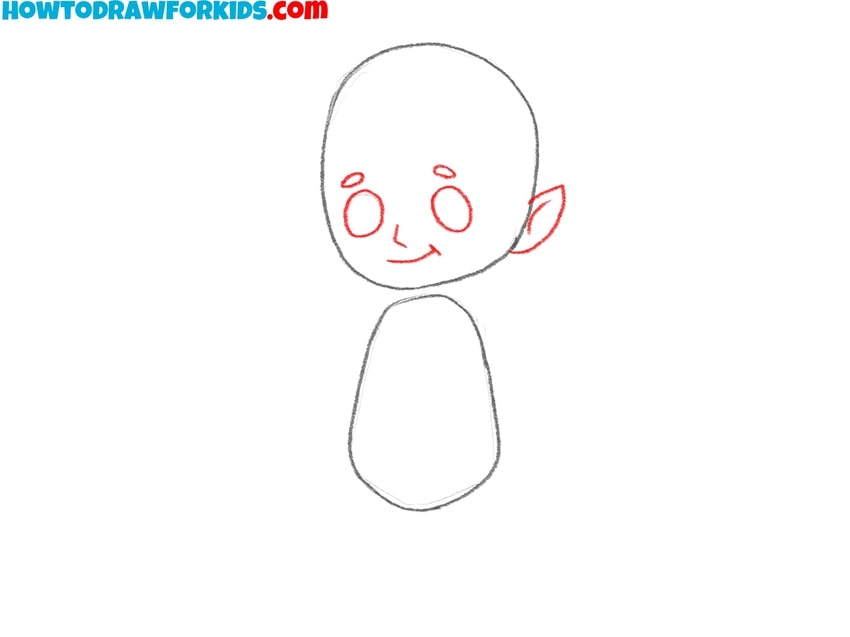
- Illustrate the hair and hat.
Now, it’s time to give Link his distinctive hair and hat. Start by drawing his bangs, which are a series of pointed, irregular spikes that fall over his forehead. Then, sketch the rest of his hair peeking out from under his hat. Next, add his hat, which droops down from the top of his head and hangs slightly to the right.
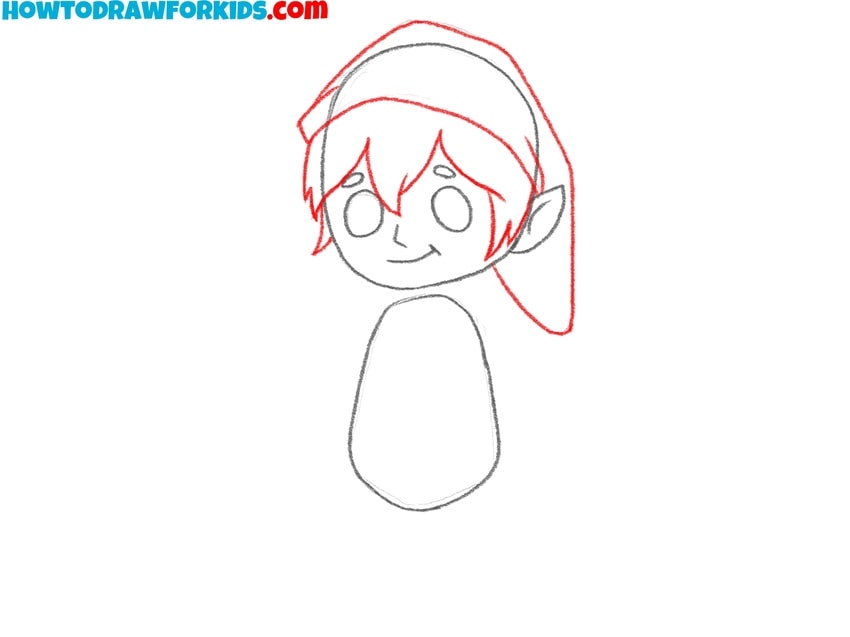
- Illustrate the clothes.
Begin drawing Link’s iconic tunic by refining the trapezoid shape of his body. Add a neckline to his tunic by drawing a curved line at the top of the torso. Then, extend the sides of the tunic downwards. Add a simple belt just below the middle of the torso and allow the tunic to extend slightly below the belt.
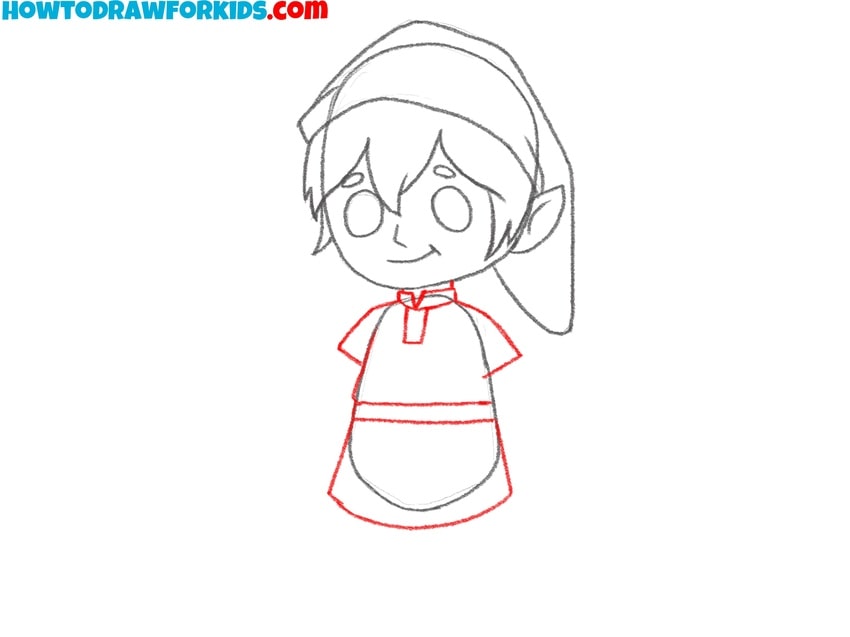
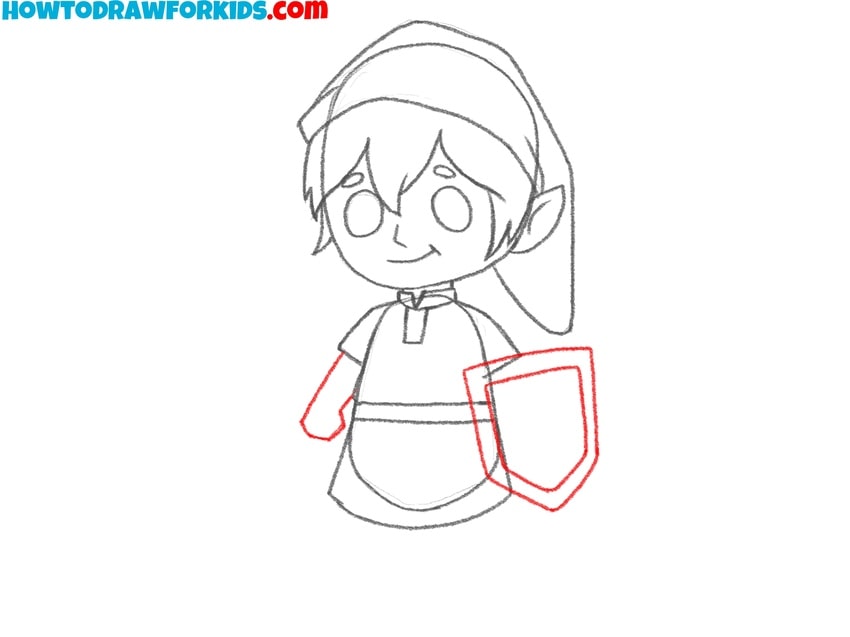
- Add the shield and arm.
To make Link’s drawing more recognizable, add his shield and arm. Start by sketching the shield on his left arm. The shield should be a simple quadrilateral shape with a slightly rounded top and bottom. Then, draw the right arm of Link using a couple of simple lines.
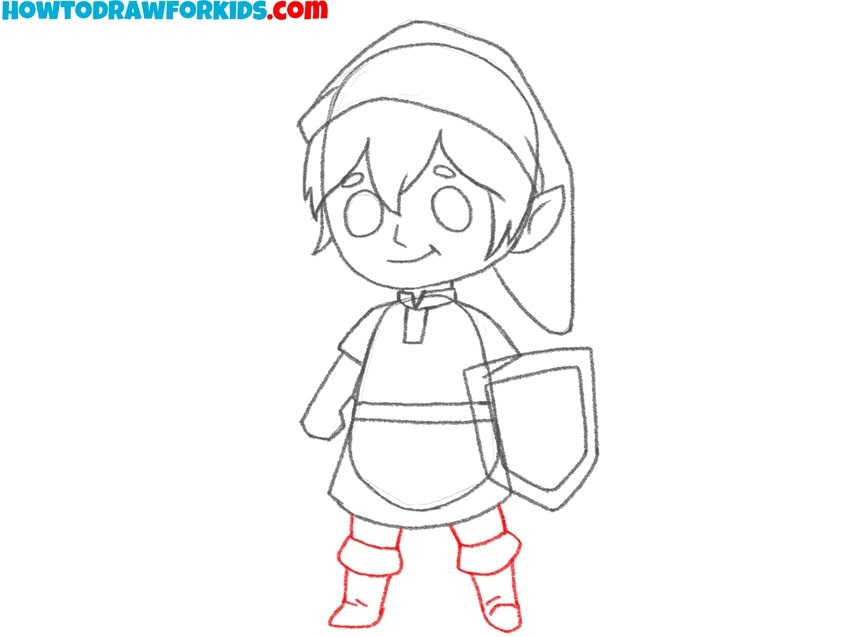
- Draw the legs and boots.
Start by sketching two short, rounded rectangles extending from the bottom of the tunic to represent his legs. Then, add his boots by drawing slightly larger, rounded shapes at the ends of his legs. The boots should have a small cuff at the top, indicating the edge where the boot meets the leg.
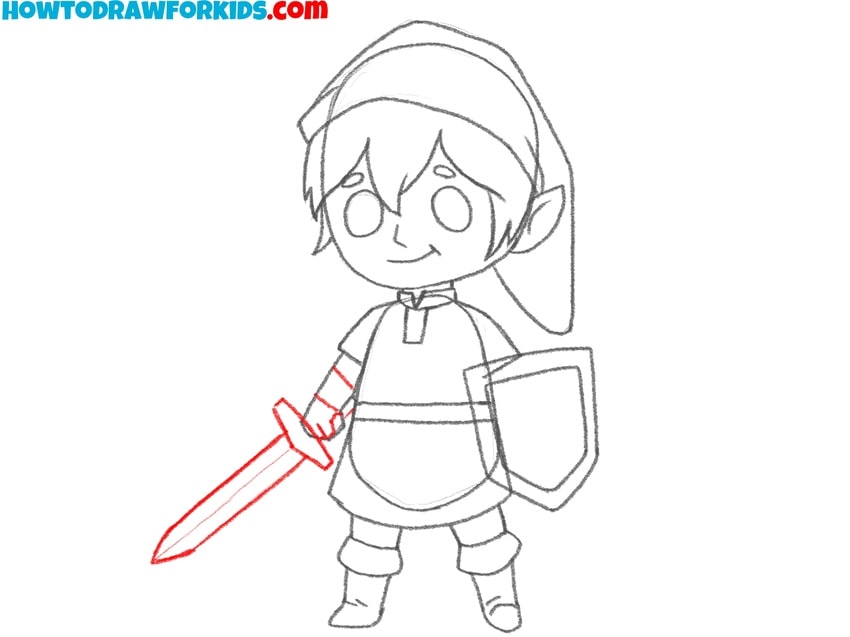
- Illustrate the sword of Link.
Now, give Link his iconic weapon by adding a sword to his right hand. Draw a couple of straight lines extending from his hand to represent the sword’s blade, and add a hilt at the base where the blade meets the hand. The hilt should be slightly wider than the blade and include a simple crossguard.
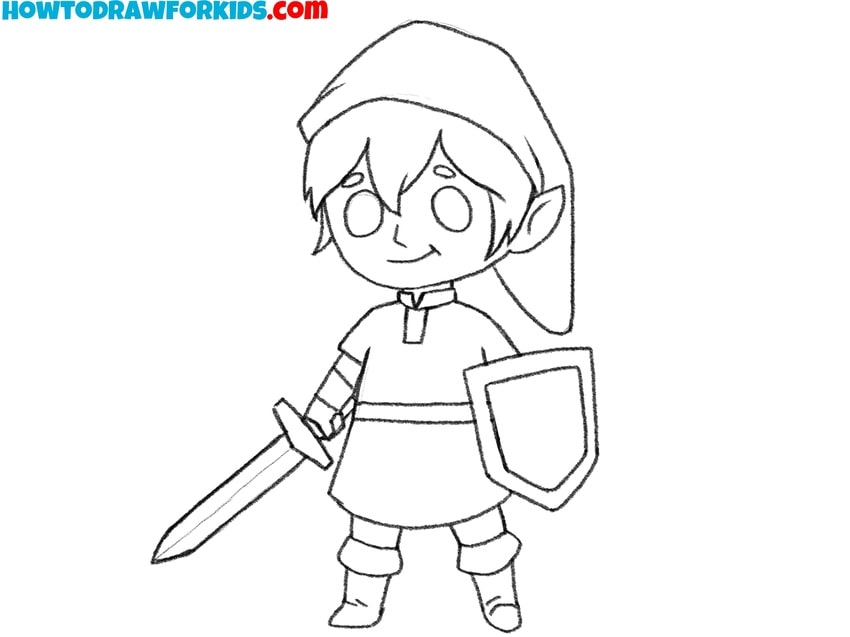
- Finalise the outlines of the sketch.
In this step, go over your Link drawing to finalize the outline. Trace over all the major lines with a darker pencil or pen to make the drawing more defined. Erase any unnecessary or overlapping lines from the initial sketch to clean up the drawing.
- Add colors to your artwork.
Use shades of green for Link’s tunic and hat, brown for his boots and belt, and silver or gray for the sword and shield. His hair should be blonde, and the skin tone can be a light peach or tan. After that you can add subtle shading to make your Illustration more realistic.
Alternative Link Drawing Tutorial
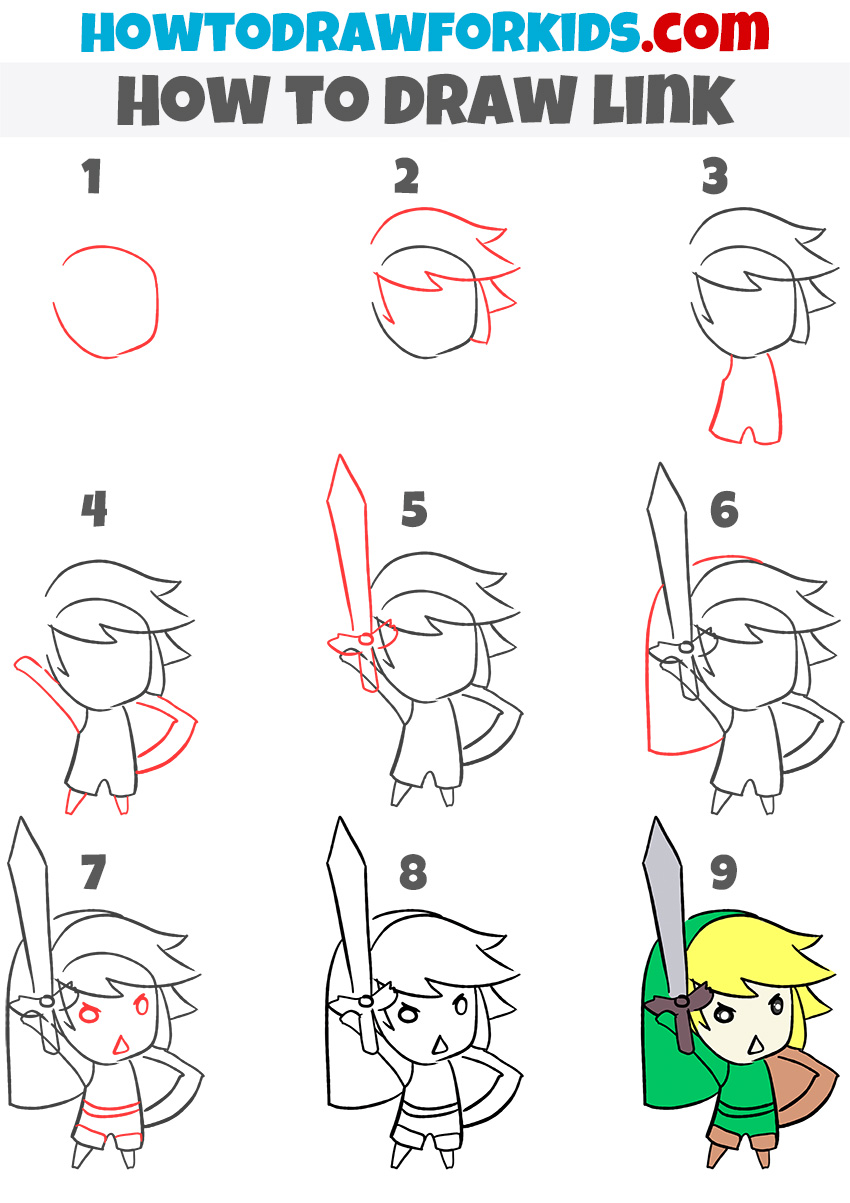
This drawing tutorial provides a different approach to illustrating Link, focusing on a more action-oriented pose compared to the previous tutorial. In this version, Link is depicted with his sword raised high above his head, ready for battle.
The character’s features are more stylized, with exaggerated hair and facial expressions. The tutorial simplifies the overall design, using broader shapes and fewer details, making it more accessible for kids.
To begin, sketch a simple oval for the head, then add spiky hair. Draw the facial outline of Link with basic shapes for the eyes and mouth. Next, outline the body with a trapezoid for the tunic, and add an extended arm holding a large, pointed sword.
Then sketch a shield in the second arm using a couple of simple lines. Add Link’s short legs and boots with simple geometric shapes. Finish the drawing by outlining everything in bold lines, erasing unnecessary sketches, and coloring Link with his signature green and brown palette.
How to Draw Link: Common Mistakes
Beginners often struggle with getting the head-to-body ratio right, either making the head too large or the body too small. To avoid this, start with basic shapes and guidelines to ensure all parts are proportionate.
Placing the eyes, nose, and mouth inaccurately can distort Link’s recognizable appearance. Use light guideline lines to map out the face and ensure symmetry and correct placement of features.
Link’s hair has a specific style that can be tricky. Adding too many strands or making it overly detailed can look messy. Focus on illustrating the overall shape and flow of his hair with simple, confident strokes.
Details on Link’s sword and shield are very important for authenticity. Skipping or simplifying these can make the drawing look incomplete. Take time to add key features, even if simplified, to represent his equipment accurately.
Conclusion
So, we’ve covered two easy tutorials on how to draw Link and also explored the most common mistakes and how to prevent them. This tutorial also showed you how to design characters from classic games using a simplified style.
If you enjoyed this tutorial, you’ll probably like my other guides on drawing computer game characters. Be sure to visit that section of my site or use the search bar to find the tutorial you’re looking for.
Also, be sure to follow me on social media, such as Pinterest or YouTube, share this and my other tutorials with your friends, and leave your suggestions in the comments below.

