How to Draw Milk
Greeting artists and daydreamers alike! You’re here to learn how to draw milk, an everyday object that you might not have thought to put on paper before. I’ve tailored this lesson to demystify the drawing process, ensuring that a seemingly simple subject like milk is just as exciting to sketch as it is essential in our diets.
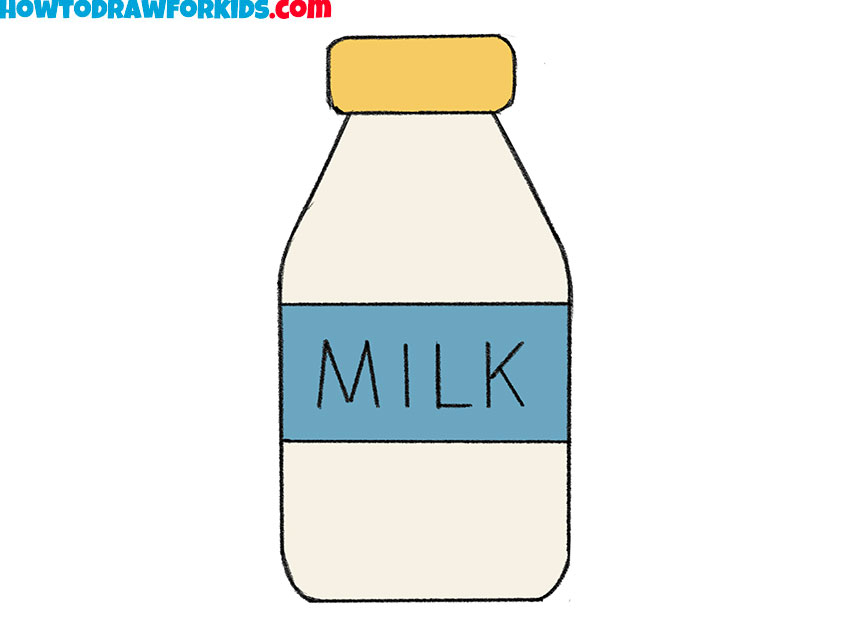
How to Draw Milk: Basic Information
Welcome to my tutorial on how to draw milk, a staple in every artist’s still life repertoire. I designed this lesson to make the process as smooth as the milk we’re about to sketch. We’ll start with simple shapes and lines, ensuring that anyone, regardless of their skill level, can pour their creativity onto paper.
Capturing the essence of milk in a drawing requires a focus on its container, and that’s what we’ll master today. I’ll show you how to give life to a common milk bottle, from its sturdy base to the gentle curves of its neck. Paying attention to the proportions is key; we want our milk bottle to look full, not ready to topple over.
By the end of this tutorial, you’ll be able to draw milk with confidence, and perhaps even add your own creative twist to it. Remember, art is about interpretation and expression, so while you follow these steps to draw milk, feel free to add your own style to it. Let’s grab our pencils and create something refreshing!
Milk Drawing Tutorial
Materials
- Pencil
- Paper
- Eraser
- Coloring supplies
Time needed: 20 minutes
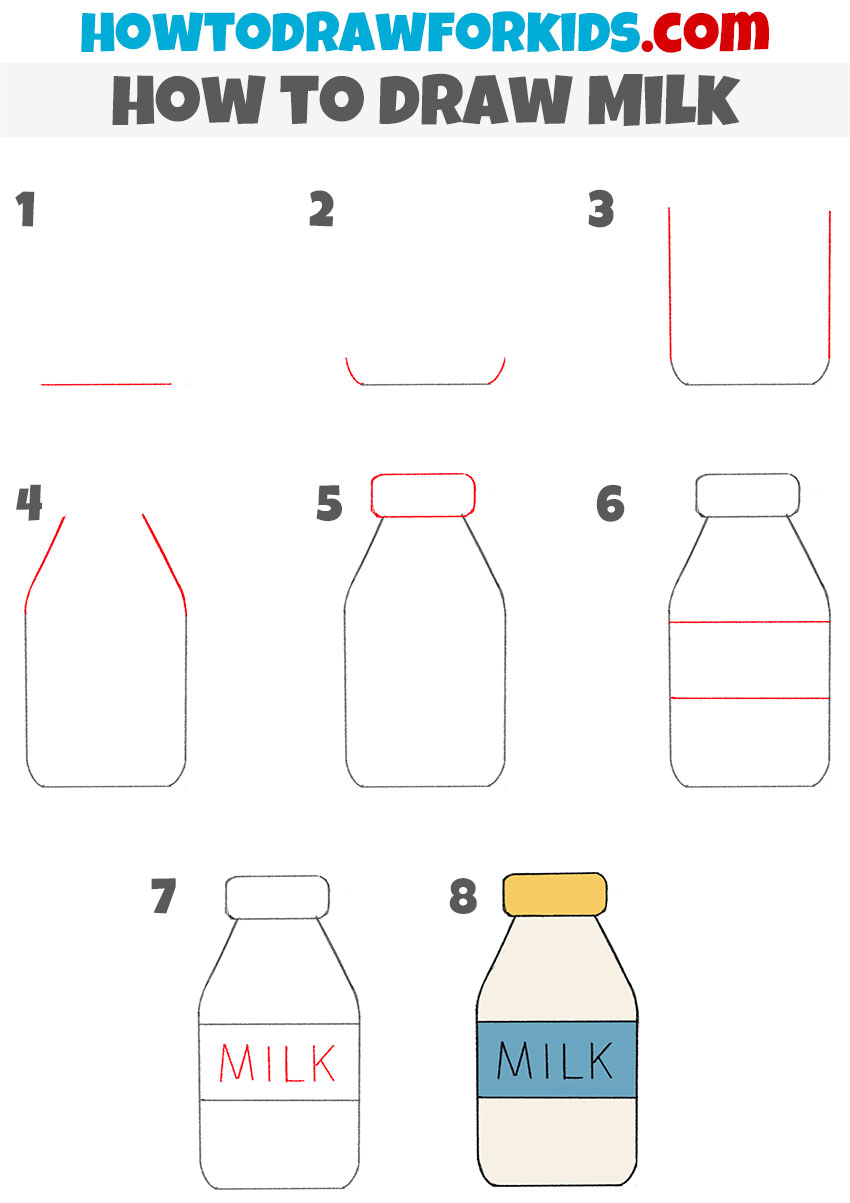
How to Draw Milk
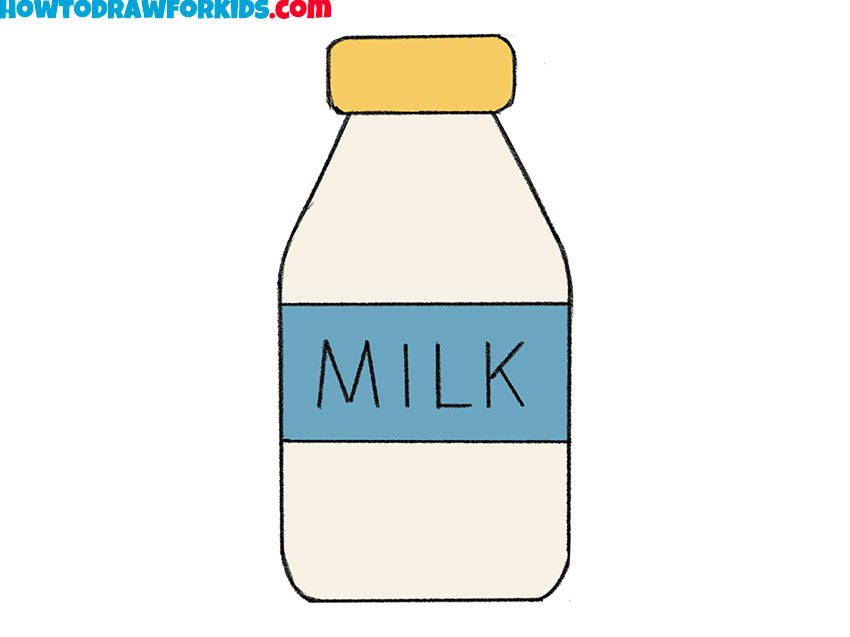
- Draw the bottom of the bottle.
To do this, you need to draw one straight horizontal line at the bottom of the sheet of paper.

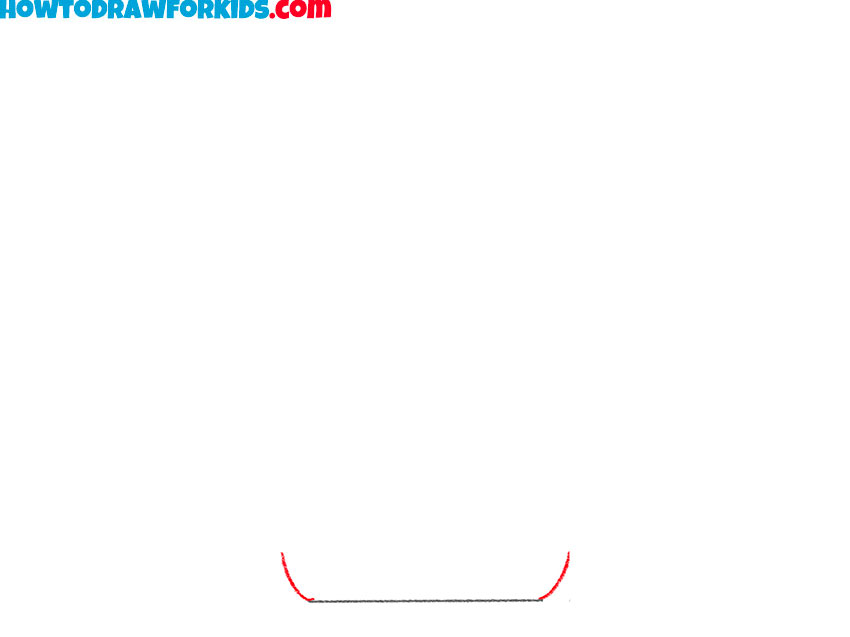
- Add the edges of the bottle bottom.
Draw two identical rounded lines on the sides of the previously drawn line.
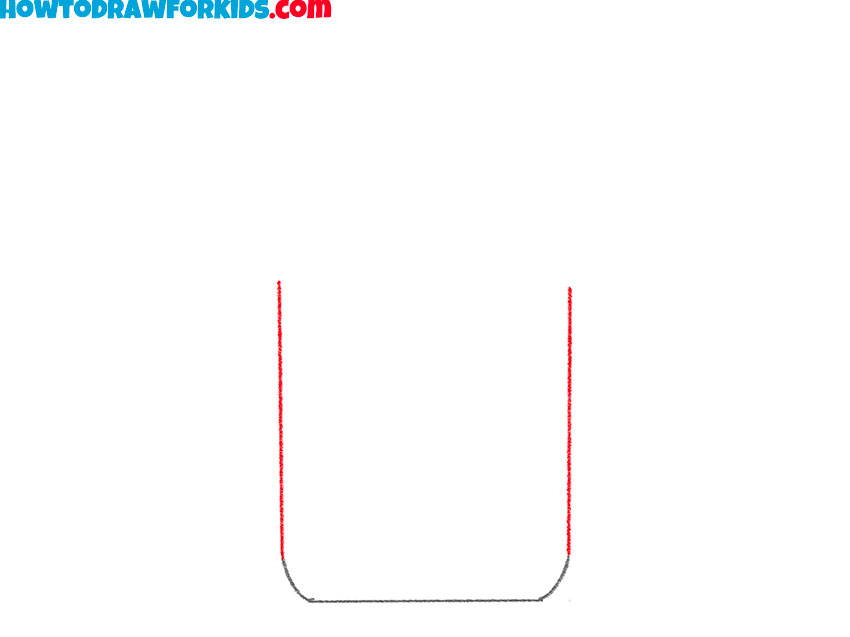
- Outline the sides of the bottle.
Add two same straight vertical lines continuing the previously drawn lines.
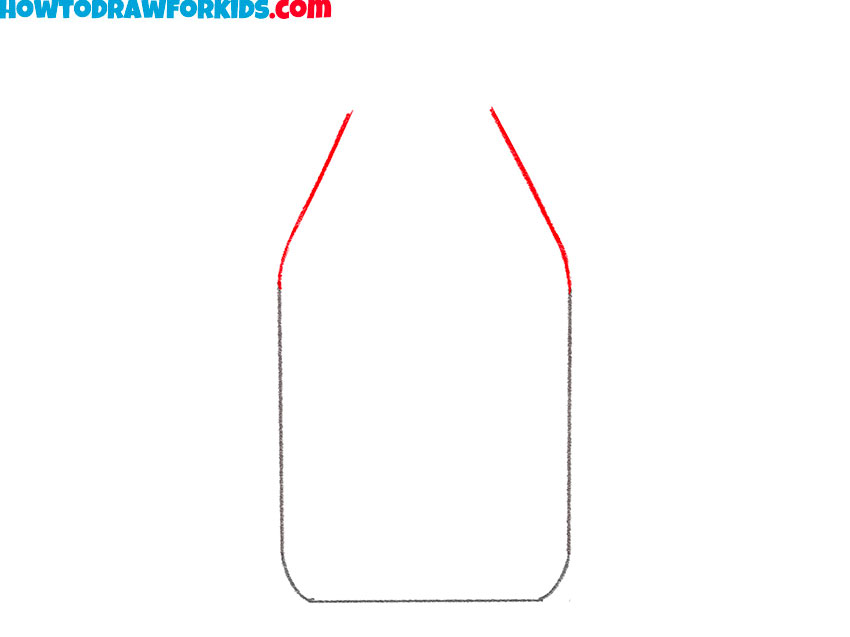
- Depict the top of the bottle.
Outline two lines that depict the bottleneck of the bottle.
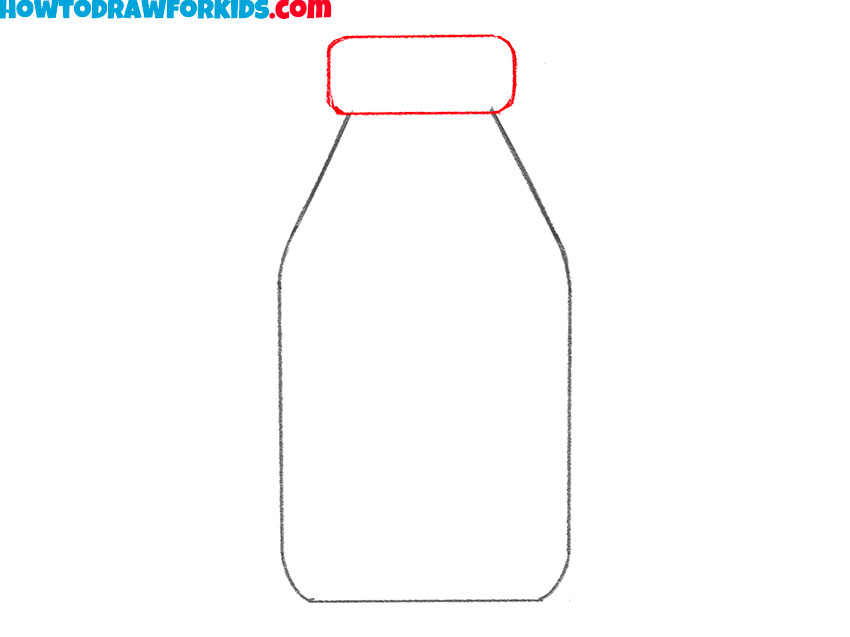
- Add the bottle lid.
Draw this detail as a rectangle with rounded corners.
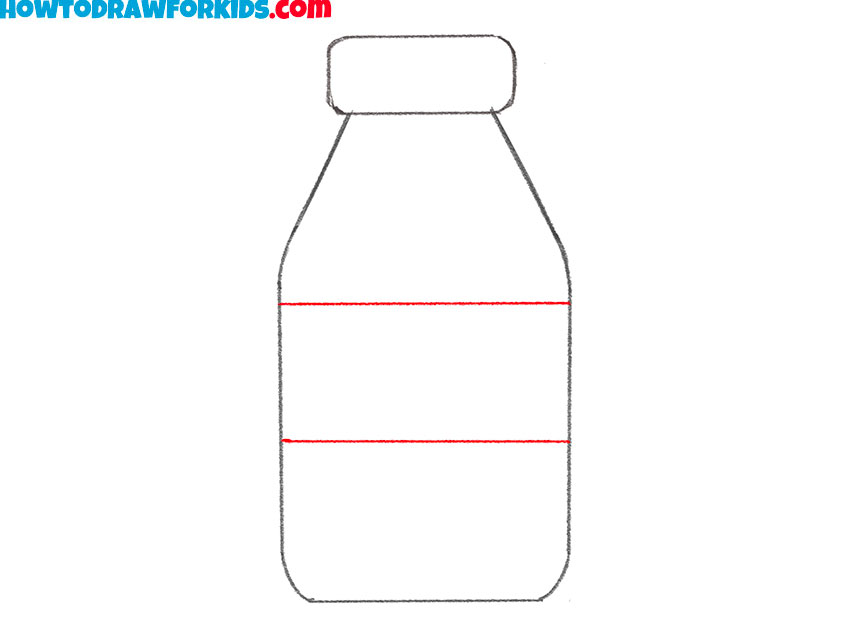
- Draw a label on the milk bottle.
Outline two same straight horizontal lines in the middle of the bottle.
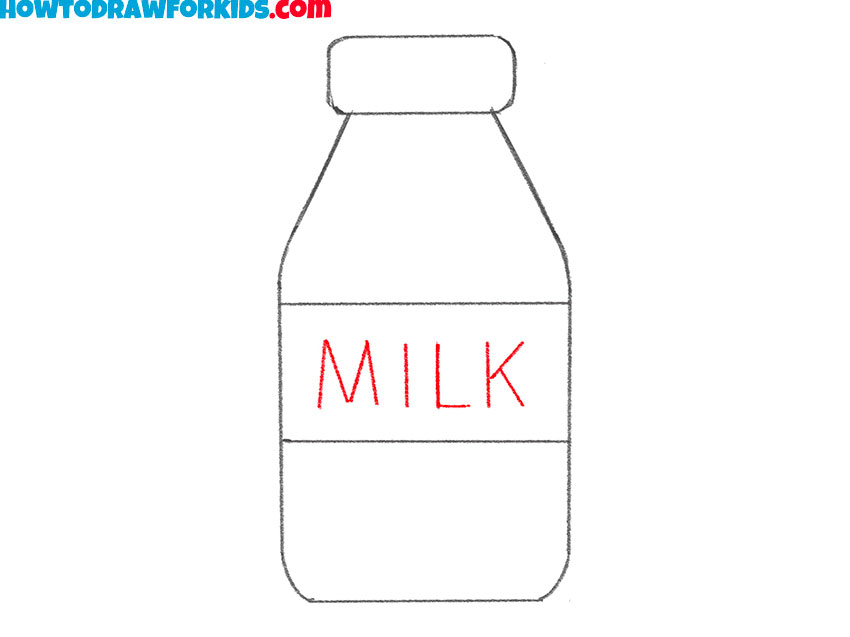
- Add the inscription.
Write the word «milk» on the label of the bottle.
- Color the drawing.
To color the milk bottle, use grey, yellow and blue.
Additional Content
To complement your learning process, I’ve crafted a free PDF file that serves as a concise version of this lesson. It’s designed to be a handy reference you can download and utilize anytime, even when the internet is out of reach.
While it doesn’t include the steps or tips, it’s filled with supplementary materials to further refine your drawing skills once you’ve grasped the fundamentals. Consider this PDF an artistic ally, there to help consolidate the knowledge you’ve gained from the main lesson.
With practice templates and additional practice projects, it will help cement your skills and encourage you to approach drawing with a critical and creative eye. Download it, and let it be a companion to your continuous improvement and the evolution of your artistic talent.
Alternative Drawing Method
In the spirit of fostering growth and versatility in your artistic pursuits, I’ve developed an additional, more straightforward technique for drawing milk. This method is stripped down to the essentials, making it perfect for daily practice.
This new approach emphasizes ease and speed, encouraging you to engage with the subject matter more frequently. It’s particularly suitable for quick sketching sessions where the goal is to keep your drawing muscles active and your creativity flowing.
It’s a wonderful addition to your practice routine, giving you the chance to improve steadily and surely, turning simple lines into confident strokes that represent milk with clarity and charm.
How to Draw Milk for Kindergarten
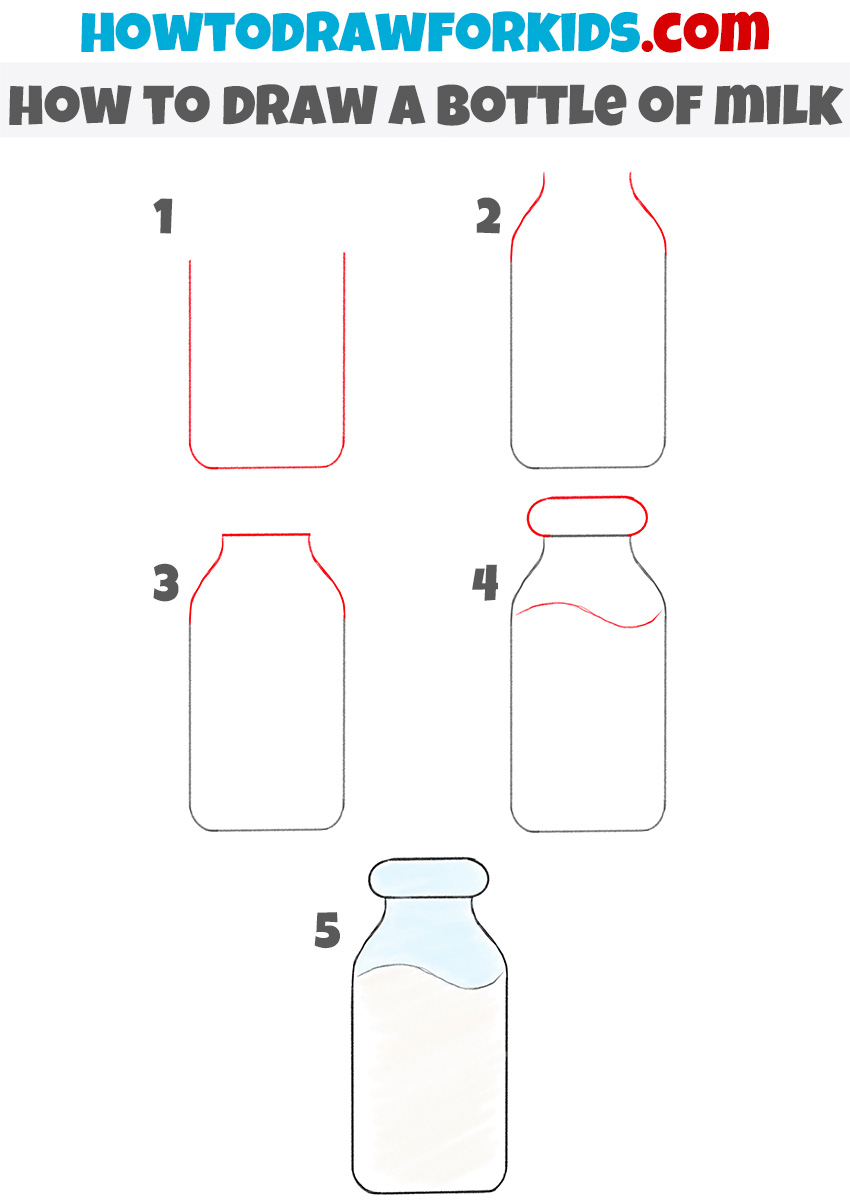
This five-step drawing method for a milk bottle is specifically crafted for kindergarteners, focusing on simplicity and fun. In the first step, they start with a basic U-shape, setting the stage for the entire bottle. It’s about getting those foundational lines just right – a critical start for young artists.
Moving to the second step, the children sketch out the body of the bottle, gently curving the lines upwards to meet at the top. Here, the importance of gentle curves and straight lines is emphasized, teaching the kids about the various shapes that come together to form everyday objects.
The final steps involve drawing the neck and cap of the bottle, and then adding a wave line to indicate the milk level inside the clear glass. This not only helps in understanding the concept of liquid inside a container but also gives them a chance to play with representing different materials.
By the end, with a splash of color to signify the milk, the children will have a complete drawing, bringing together lessons on form, space, and the basics of illustration.
Tips to Transform Your Milk Drawing Skills
As you close this chapter, consider these further tips to refine your craft and enrich your artistic skill set.
- Steady Your Hand: Practice drawing straight lines and smooth curves. A steady hand will enhance the cleanliness and precision of your drawings.
- Observe the Light: Notice how light interacts with objects. Practice shading by observing where shadows fall and how they define shapes.
- Experiment with Perspective: Try drawing your milk bottle from different angles. This will develop your ability to perceive and replicate three-dimensional objects on a two-dimensional plane.
- Add Details Gradually: Start with large shapes and work down to the small details. This approach helps manage the complexity of what you’re drawing.
- Understand Proportions: Use reference points on your object to get the proportions right. For example, the cap is usually about a third the width of the bottle.
- Play with Textures: Give your drawings a realistic touch by mimicking textures, such as the smoothness of glass or the opacity of milk.
- Use Color Sparingly: When adding color, begin with a light touch and build up as needed. Over-saturation can overwhelm the finer details.
Keep these pointers in mind as you continue to sketch and draw. They’re stepping stones to developing a richer, more detailed approach to your art. With each line and shade, you are turning simple drawings into masterpieces that tell stories and capture the imagination.
Illustrative Settings: Placing Your Milk Bottle in a Scene
To truly bring your milk bottle drawing to life, consider adding it to a setting that tells a story or sets a scene. Here are several environments you could create:
- Country Breakfast Table: Draw the milk bottle on a checkered tablecloth beside a basket of eggs and freshly baked bread to evoke a cozy morning vibe.
- Farmers Market Stall: Sketch a background of a bustling market with an array of dairy products, where your milk bottle is one of the many fresh goods on display.
- School Cafeteria: Place the milk bottle on a cafeteria tray, complete with a sandwich and an apple, reminiscent of school lunchtimes.
- Picnic Setting: Set the milk bottle on a picnic blanket in a park, surrounded by a basket, plates of food, and a sunny sky above.
In conclusion, the backdrop you choose can transform your milk bottle drawing from a simple exercise to a piece of a larger narrative. Whether it’s a serene morning scene or a snapshot of daily life, the environment you draw around your milk bottle can add depth, context, and interest to your work.
Conclusion
We’ve reached the end of our milk drawing lesson, and I hope you found it as educational and enjoyable as I did creating it. But this is just the beginning! On my website, you’ll find many other exciting lessons – from capturing the elegant lines of a rabbit to sketching the sturdy elements of a house, there’s always something new to learn and create.
I invite you to follow my social media pages so you don’t miss out on new materials and updates. And if you have specific ideas or interests, please leave a comment under the lessons. Your feedback and requests determine what we will explore next.




I just couldn’t this page
It’s very engaging. So much to learn and practice. My 12, 11 and 9 years old kids will have so much to learn and do. Any on shading for this age group. Nothing near this is taught in their schools.