How to Draw Sushi
Creating a visual feast is as delightful as preparing a culinary one. This drawing guide on how to draw sushi simplifies the intricate shapes and textures of this Japanese delicacy into a few accessible steps. Each curve and line brings us closer to capturing sushi’s essence on paper.
How to Draw Sushi: Basic Information
Embark on a visual feast as we translate the savory art of sushi into simple strokes and shades. With my tailored guidance, you’ll learn to draw sushi that almost tempts the taste buds, all the while deepening your skills with every curve and contour. This lesson is a blend of culinary art and sketching skill, perfect for foodies and artists alike.
We’ll start with the sushi’s silhouette, capturing the lush, organic shape of the fish laid atop the rice. Our focus will be on the delicate play of light and shadow that gives the fish its lustrous appearance. The rice underneath, textured and inviting, requires a softer touch, hinting at its sticky consistency without overwhelming the star of the show.
By the conclusion of this how to draw a sushi session, you’ll be equipped to bring not just sushi, but a full spread of gastronomic delights to life on your canvas. This exercise isn’t just about capturing what’s on the plate; it’s about conveying the freshness, the burst of flavors, and the culinary craftsmanship that sushi represents.
Sushi Drawing Tutorial
Materials
- Pencil
- Paper
- Eraser
- Coloring supplies
Time needed: 25 minutes
How to Draw Sushi
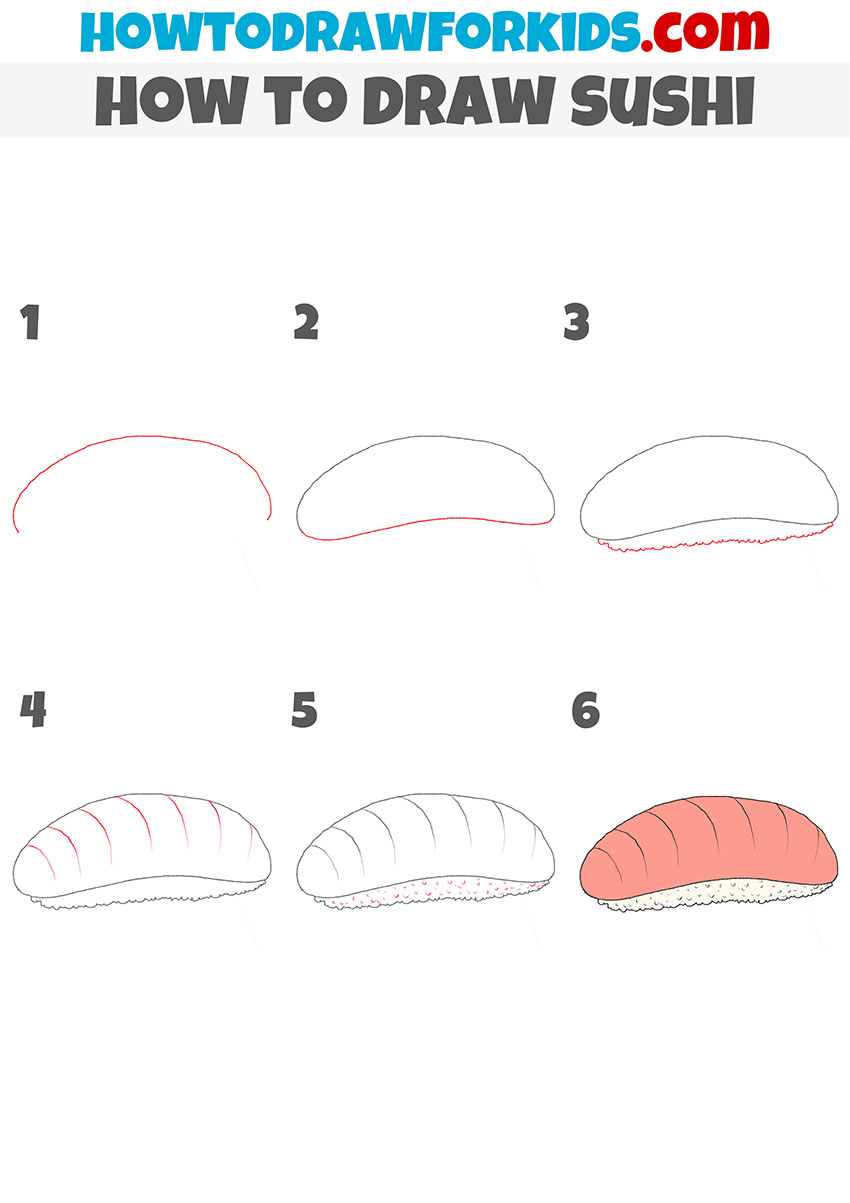
- Start drawing the outline of the fish.
To complete this simple step, you only need to draw one large, curved line.

- Add the bottom outline of the fish piece.
Connect the two ends of the previously drawn line with another curved line.

- Depict the outline of the rice.
Below the outline of the fish piece, add the rice using many small rounded lines.

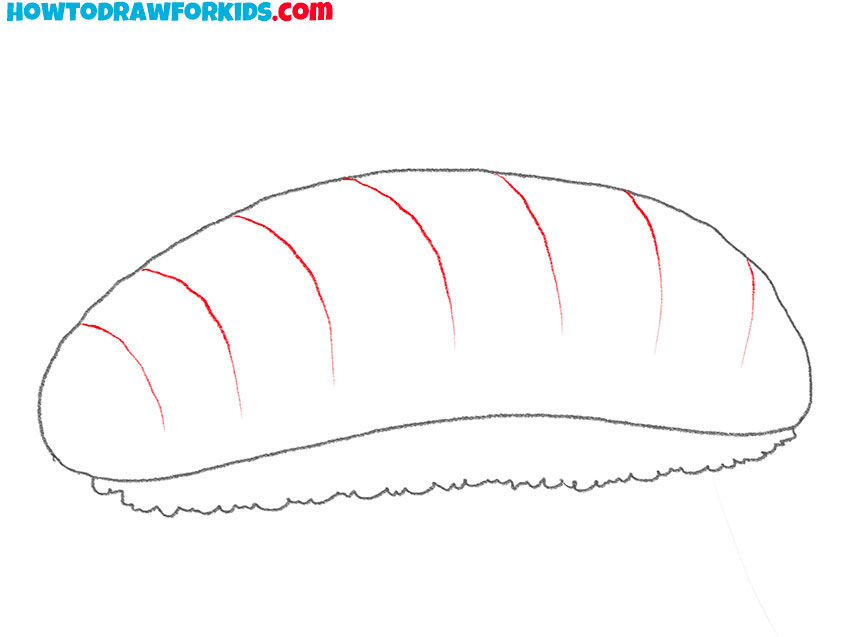
- Add details.
At the top of the previously drawn fish piece, add some curved lines.
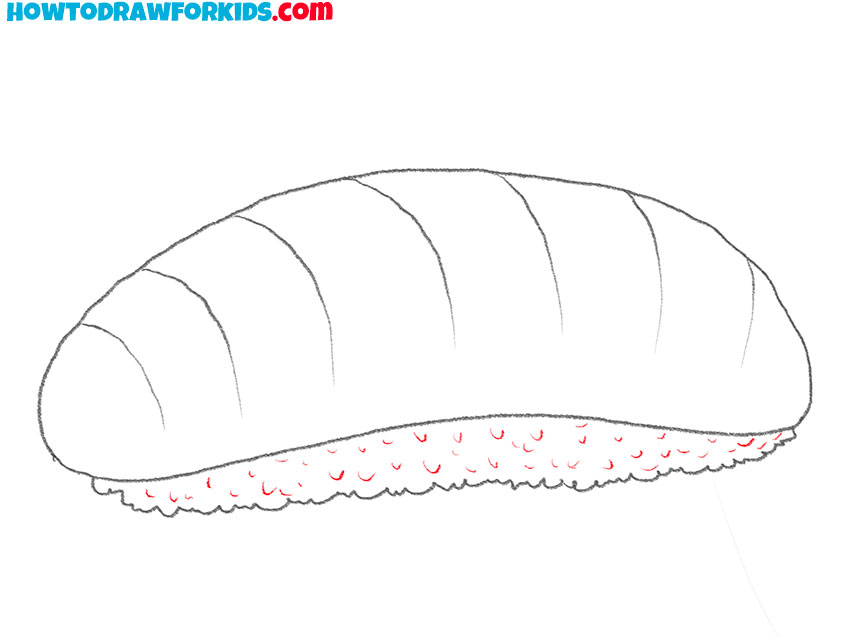
- Draw the figure in more detail.
To draw many small grains, use short rounded lines of different sizes.
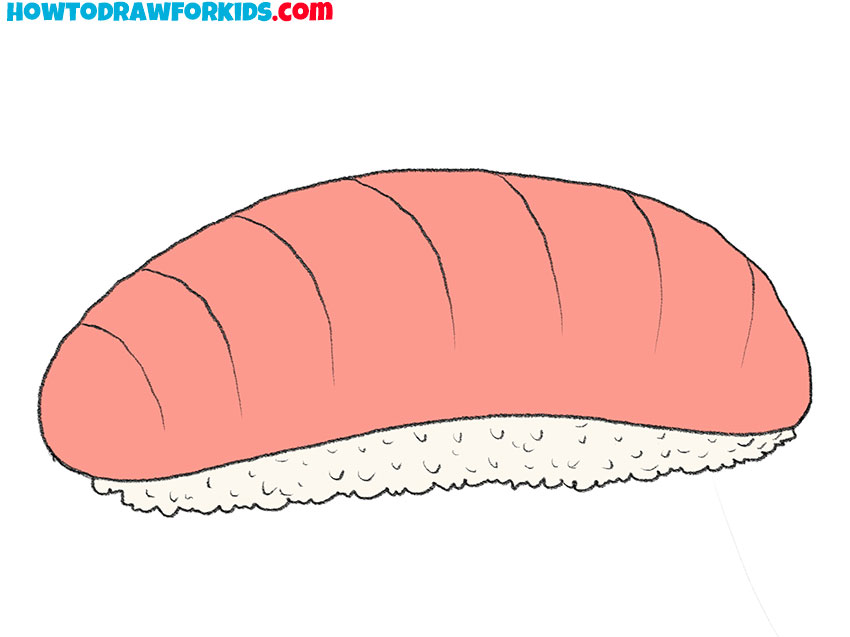
- Color the drawing.
To color the sushi, use pink for the fish and light gray for the rice.
Additional Content
Going beyond the basics, I’ve created a free PDF file as an extra for this drawing lesson. It’s a summarized version, perfect for those times when you’re away from the internet. This PDF isn’t a step-by-step guide; instead, it’s filled with additional materials crafted to sharpen your drawing skills after you’ve grasped the core aspects of the lesson.
This downloadable resource is tailored to supplement your learning, offering a curated selection of exercises and tips. It’s an art enrichment tool designed to help you delve deeper into the world of drawing, providing the next steps for your artistic development.
This PDF is your silent mentor, accessible anytime, aiming to enhance your drawing prowess. After laying the groundwork with the main tutorial, this guide invites you to further your artistic voyage, enriching your skills and widening your creative horizons.
Alternative Drawing Techniques
In addition to the standard lesson, I’ve devised an alternative sushi drawing technique, one that simplifies the process even further, making it immensely accessible for all budding artists. This new method breaks down the art of sushi illustration into the most fundamental shapes and lines, ensuring a stress-free drawing experience.
With this innovative approach, practice becomes not just a routine but a delightful activity. It encourages you to play with shapes and textures, to feel the freedom of creating with no boundaries. This is about boosting your confidence with each stroke of the pen or brush.
As you embrace this simplified technique, your artistic skills will naturally expand. You’ll find yourself becoming more observant of the subtleties that make sushi both a culinary and a visual delight. This method is not just about drawing; it’s a pathway to a more profound appreciation of art and detail.
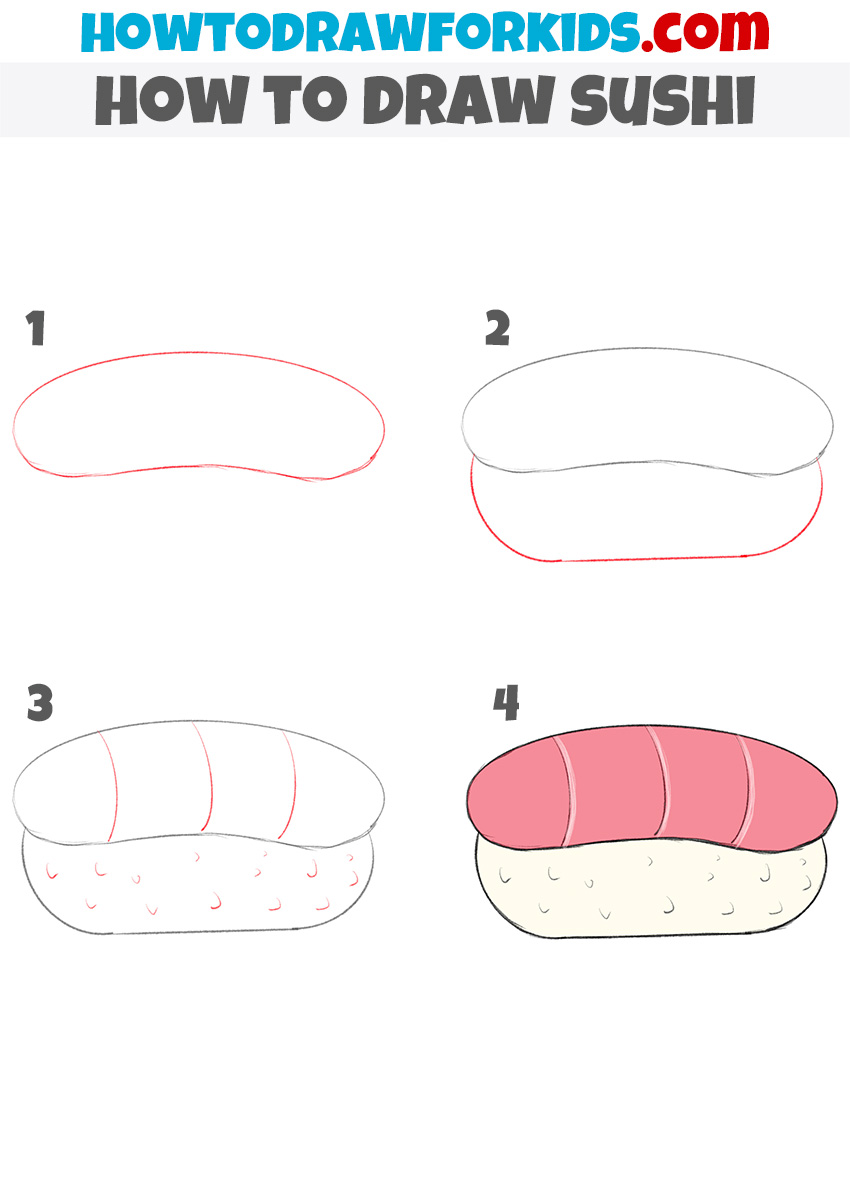
How to Draw Sushi for Kindergarten
I’m thrilled to share with you all a super simple alternative method to draw sushi, perfect for little hands in kindergarten. In just four straightforward steps, this lesson is tailored to foster the creativity of young minds, making the complex art of sushi surprisingly approachable.
Firstly, we start with a basic elongated oval for the rice base – no intricate details needed, just a simple shape. Then, we gently layer a smaller oval on top for the fish. This two-step foundation is crucial; it sets the stage for the final artwork without overwhelming the young artist.
Next, with just a few curved lines, we add the suggestion of texture to represent the rice and the fish’s delicate details. The final touch is a dash of color – soft pinks for the fish and a warm white for the rice. This method isn’t just about drawing; it’s about enjoying the process and celebrating every stroke that brings our culinary masterpiece to life.
Sushi Artistry: From Rice Grains to Full Scenes
In the journey of artistic growth, expanding your repertoire is vital. After mastering the charming simplicity of our sushi drawing, here’s how you can enhance your skills and enrich your drawings:
- Intricate Toppings: Broaden your sushi repertoire by illustrating a variety of toppings. Sketch thinly sliced lemons or delicate shrimp, paying attention to the minute details like the shrimp’s curve and the lemon’s texture.
- Textures Galore: Rice grains are tiny but detailed, so practice the art of patience by dotting each grain individually. For fish slices, observe how light plays on the surface and mimic those subtle shifts in color and texture with gentle pencil strokes or a soft watercolor wash.
- Symphony of Color: Explore the color wheel as you paint your sushi. Mix blues and greens for a vibrant nori wrap or use pinks and oranges for salmon. Understanding color theory and blending can elevate your artwork from simple sketches to realistic, mouth-watering pieces.
- Setting the Scene: Placing your sushi within different contexts can transform your piece. Sketch a wooden sushi board beneath your sushi, giving it a grounded, rustic look, or a sleek, black plate for a modern aesthetic. Each setting challenges you to consider perspective and shadow.
- Sushi Bar Dynamics: Imagine a bustling sushi bar with all its elements. The sushi chef, with a knife in hand, cutting fish with precision; customers with different expressions, adding emotion to your drawing; and the dynamic array of sushi on the conveyor belt.
Enhancing your drawing skills through these suggestions requires patience, practice, and passion. But as you delve into the details, your understanding of form, color, and composition will flourish, taking your artistic abilities to new heights. Let each sushi drawing be a step forward in your art journey.
Conclusion
With the final stroke, our sushi comes to life, a small masterpiece that’s as delightful to behold as the dish itself is to savor. But don’t let your artistic appetite stop here; my site is brimming with an array of lessons. From the structured elegance of drawing a compass to the graceful curves of a bowl, there’s a sketch for every interest.
Connect with me on social media to catch the latest updates and never miss a new twist in our artful journey. Your voice matters deeply in this creative community. I invite you to share your thoughts and suggestions in the comments below – each one is a valued brushstroke in the bigger picture of our collective learning.