How to Draw Totoro
Anime is a unique branch of visual art, and in this lesson on how to draw Totoro, we’ll sketch one of its most unusual characters.


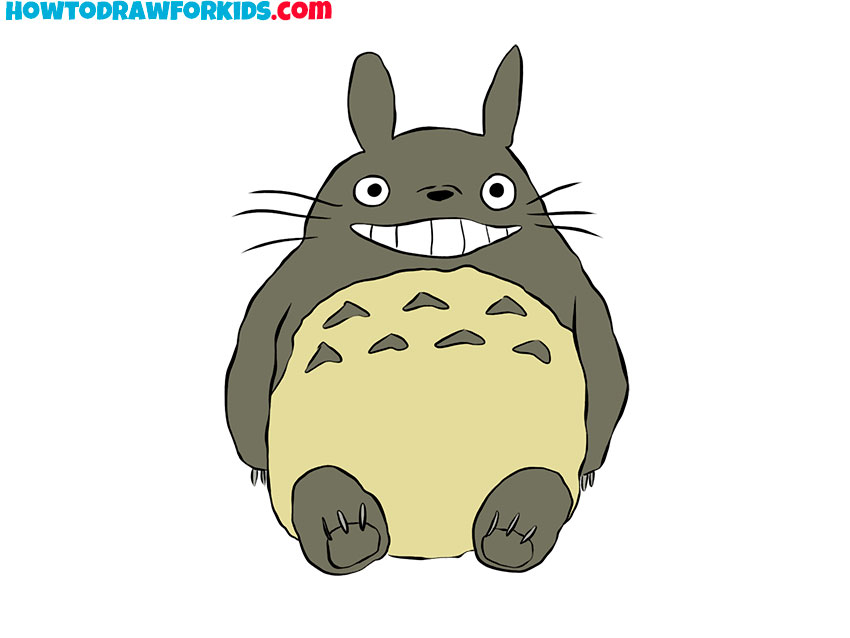
In this tutorial I will show you how to draw Totoro. This is a large furry gray creature, which we know from the anime movie “My Neighbor Totoro”.
According to the plot of the cartoon, Toroto is the guardian of the forest. This creature has the characteristics of several different animals and is similar to a raccoon dog, a cat, and an owl.
I think you will be interested in drawing this cute character and boost your anime character drawing skills. Thanks to this step by step guide, you will easily draw Totoro and enjoy the creative process.
Materials
- Pencil
- Paper
- Eraser
- Coloring supplies
Time needed: 30 minutes
How to draw Totoro step by step
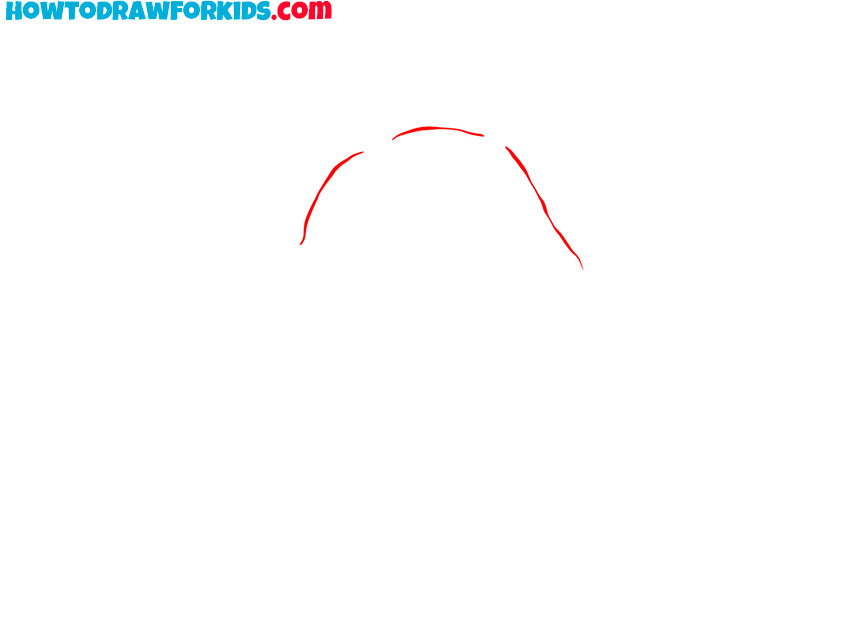
- Sketch the rounded top of the forest spirit.
First, block in the top mass. Lightly draw a wide, arched line for the crown of Totoro’s head, then angle both sides downward to represent the rounded shoulders of the forest spirit. Keep everything simple and asymmetrical; Studio Ghibli designs favor organic curves.
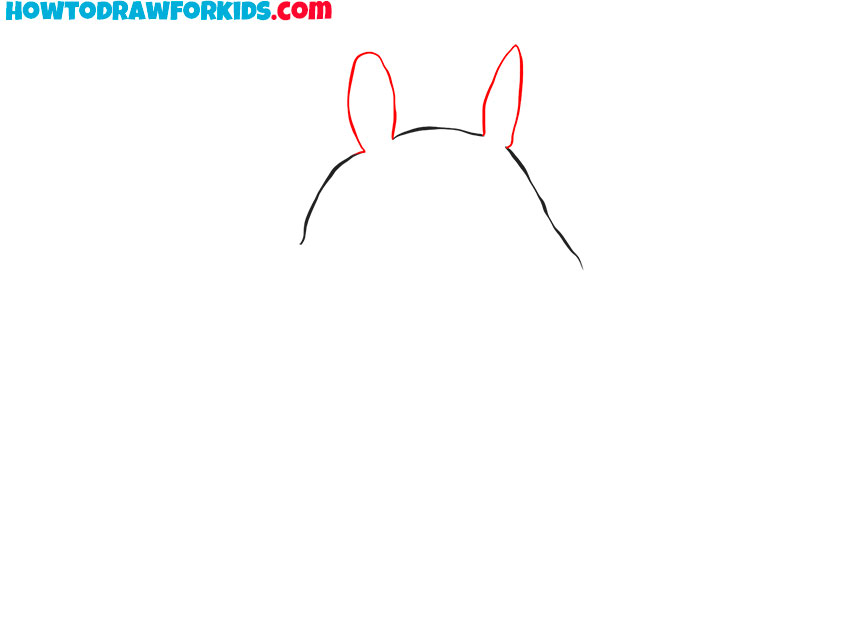
- Draw the tall ears of the Ghibli forest spirit.
Now, place the ears before the body details. Sketch two tall, tapered ovals that rise from the head arc. Each ear should widen at the middle and come to a rounded tip, not a too sharp point. Angle them a touch to the sides so they don’t look like horns.
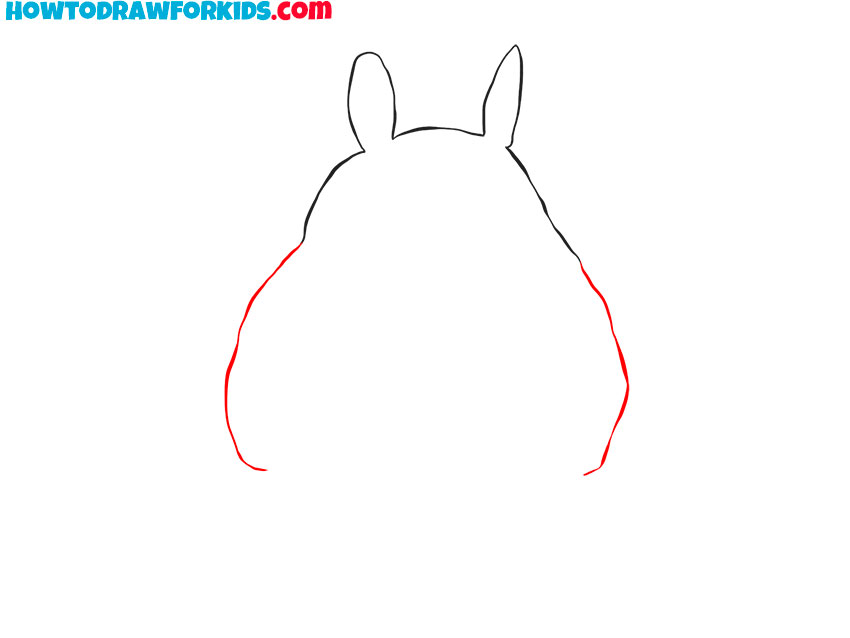
- Sketch the arm shapes of the forest spirit.
From each shoulder, sketch a long and smooth line that curves inward near the bottom. Let the contour feel heavy and plush. Try to make the sides symmetrical, almost mirrored, but don’t use too perfectly looking lines. They should be slightly wavy.
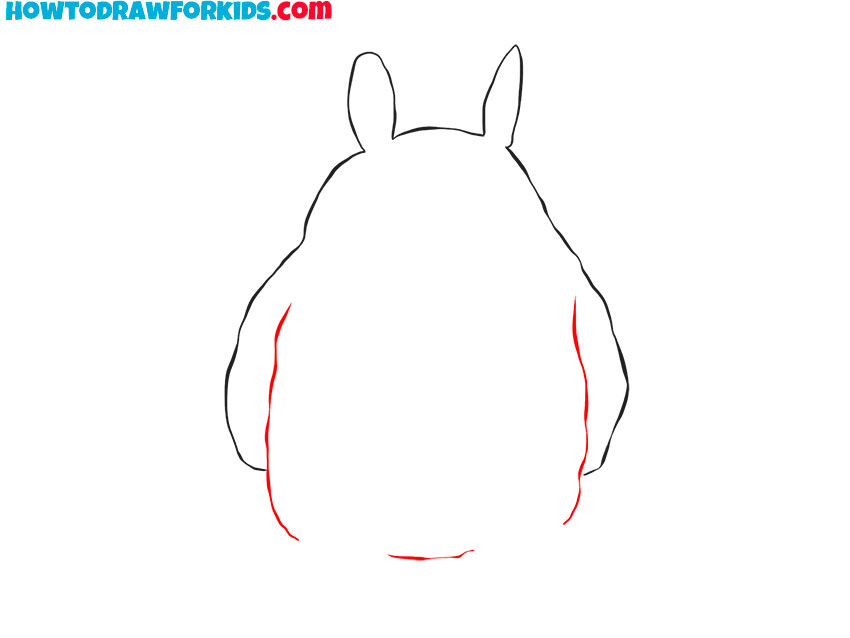
- Mark the sides of the anime character’s body.
On each side, inside the contours from the previous step, outline a short, soft line that drops from the upper torso and narrows toward the bottom area. Add a shallow curve along the very bottom to indicate where the body meets the ground.
- Sketch the legs of the Studio Ghibli creature.
Now, sketch Totoro’s legs as two simple ovals placed in front of the body. Each leg should overlap the lower torso slightly and sit symmetrically on the ground line.
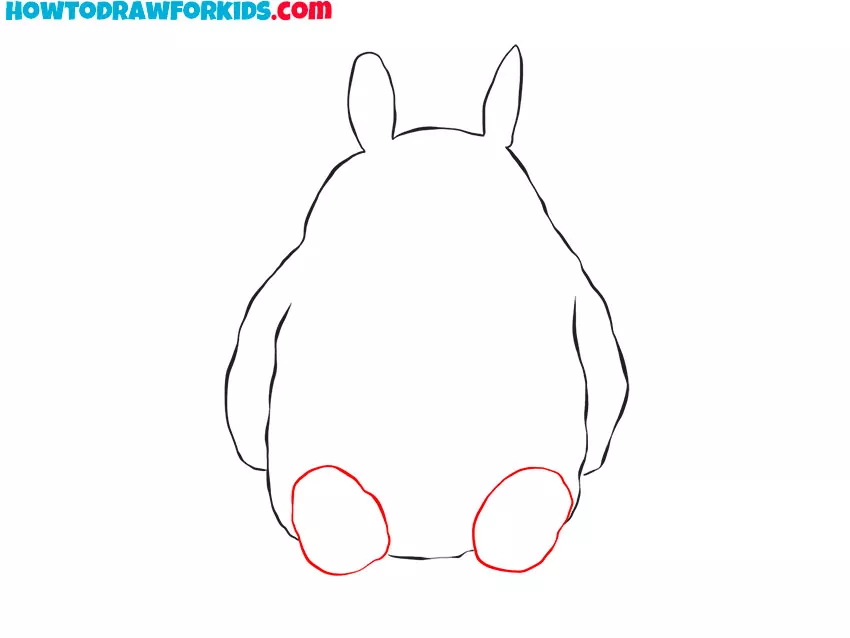
- Outline the belly patch and toes.
To separate materials, add the cream belly. Draw a broad, scalloped arc above the middle section of Totoro’s body and sketch the feet. Then, inside each foot, sketch three tiny claw/toe marks as short curved triangles. After that, sketch short claws for the upper limbs of the anime character.
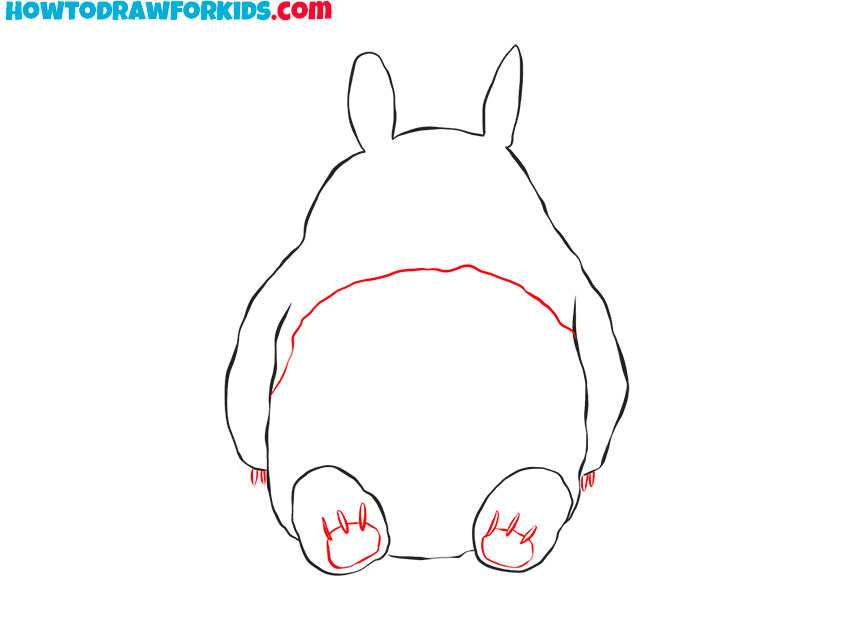
- Sketch the leaf-like markings on the belly.
To include signature markings, place the decorative chest patterns. On the upper half of the belly patch, draw two or three rows of small, rounded chevrons that look like little leaf-shaped triangles. You can vary the orientation slightly so they feel natural.
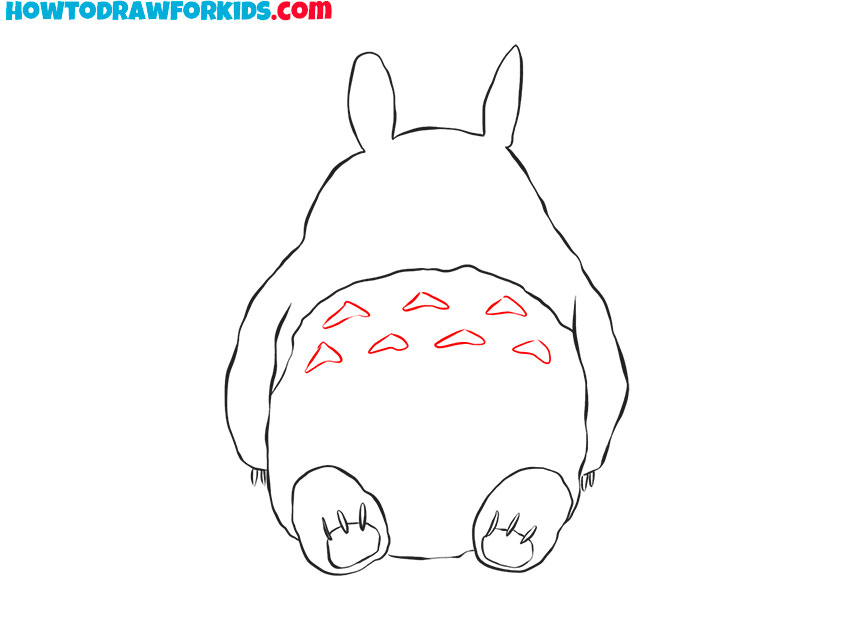
- Draw Totoro’s face and whiskers.
Place two wide oval shapes halfway down the head to draw the anime eyes. Add tiny pupils near the centers. Sketch a small oval nose below the eyes, then a long smiling mouth with shallow corners. Sketch short vertical teeth lines. From each cheek, draw three straight whiskers.
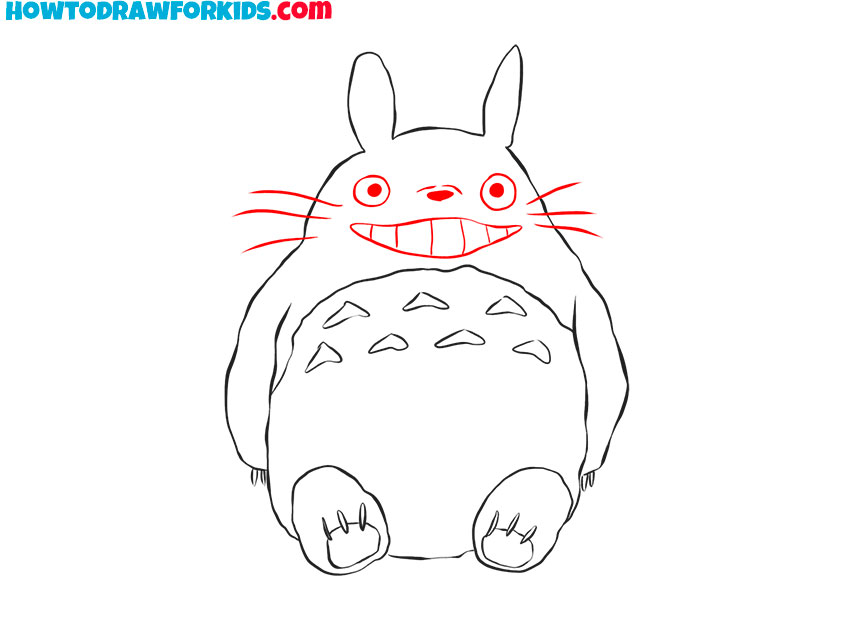
- Erase extra lines and color Totoro.
To prepare a clean finish, erase construction: remove the early liens that are no longer needed. Trace the final contour with darker strokes. Color the body a deep gray-green, the belly a warm cream, nose dark gray, and claws slightly darker than the feet. Fill the chevrons with gray. Also, you can leave bright highlights in the eyes.
I have prepared a PDF file for you which contains a short version of this tutorial. You have the opportunity to download this file, so that later you can use it at any time convenient for you.