How to Draw Zuko
In this tutorial, you will learn how to draw Zuko in just nine easy steps. Start this guide and get useful drawing skills!
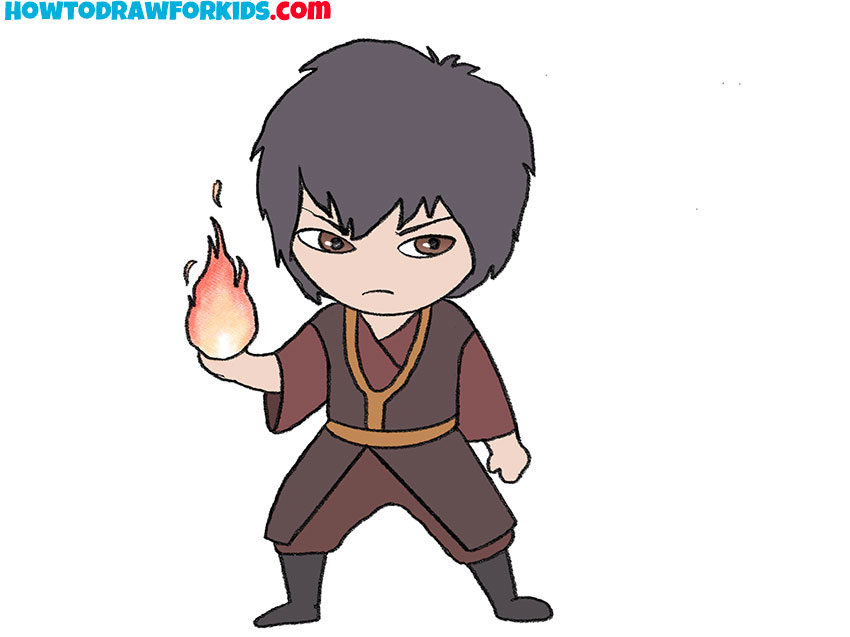
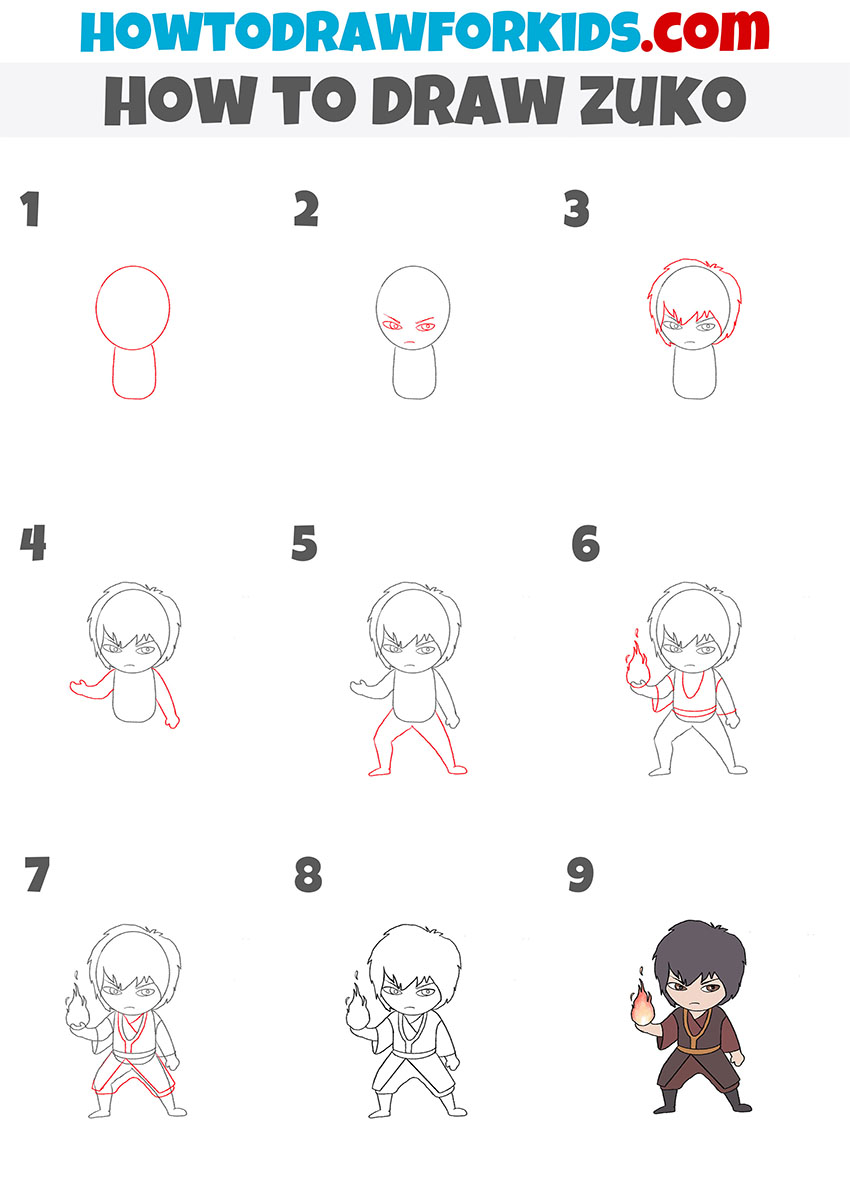
In this lesson, I will show in detail how to draw Zuko. This is one of the main characters of the animated series Avatar – The Last Airbender. If you watched this series, remember that Zuko is the prince of the Fire Nation.
This young man got into various life situations and adventures. Sometimes it was tough for him, he overcame all obstacles and tried to understand the people around him and himself.
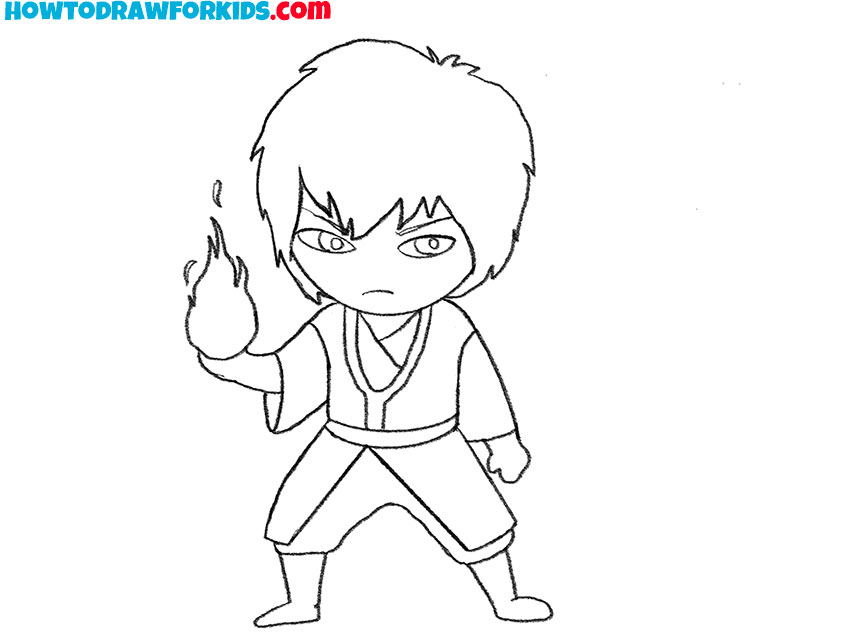
In one of the storylines, Zuko traveled to the ancient Fire Temple to regain his lost mastery of the elements. In the picture, you can see that Zuko is holding a flame in one hand.
Zuko is tall, strong, and agile, so he quickly performs various tricks and is excellent with weapons. By nature, Zuko is stubborn, serious, and short-tempered.
In this drawing, Zuko is presented in chibi style. This style is characterized by certain proportions of the body of the characters when the head is larger than the body, arms and legs are short, and facial features are pronounced.
Zuko Drawing Tutorial
Materials
- Pencil
- Paper
- Eraser
- Coloring supplies
Time needed: 30 minutes
How to Draw Zuko
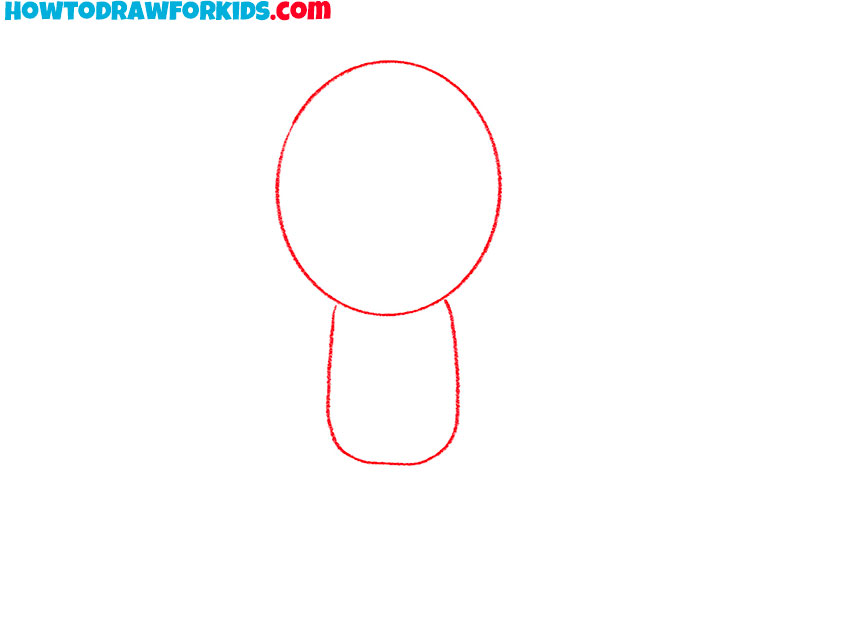
- Draw the head and torso.
Depict an oval and draw the small torso at the bottom, which has a rectangular shape.
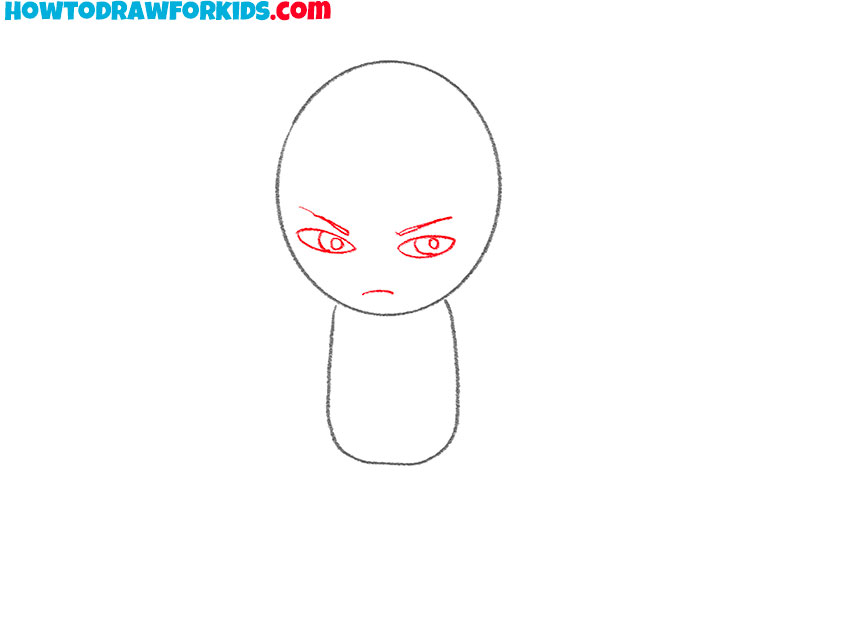
- Add the facial features.
Sketch out the eyes, eyebrows and mouth.
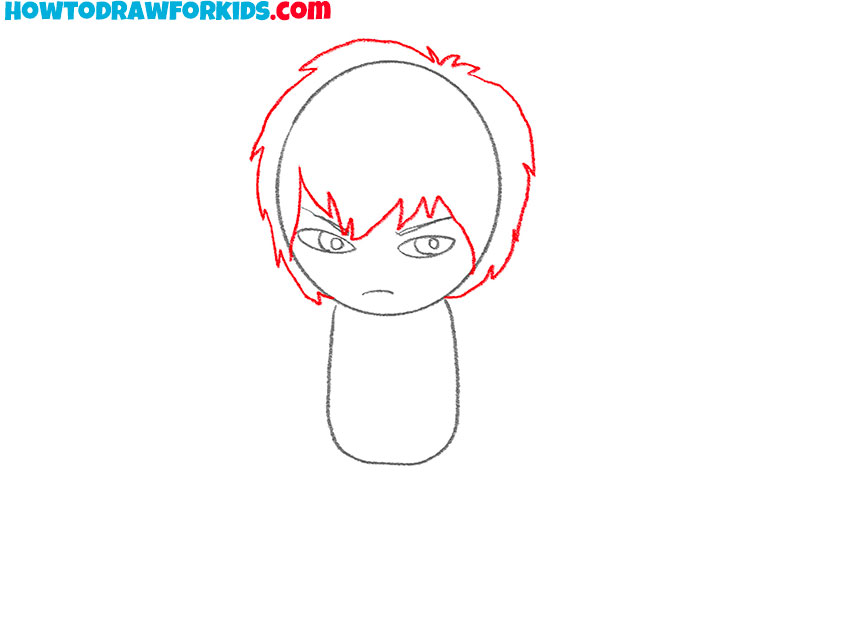
- Depict the hair.
Using short strokes draw the outline of the hair. Individual strands have a pointed shape.
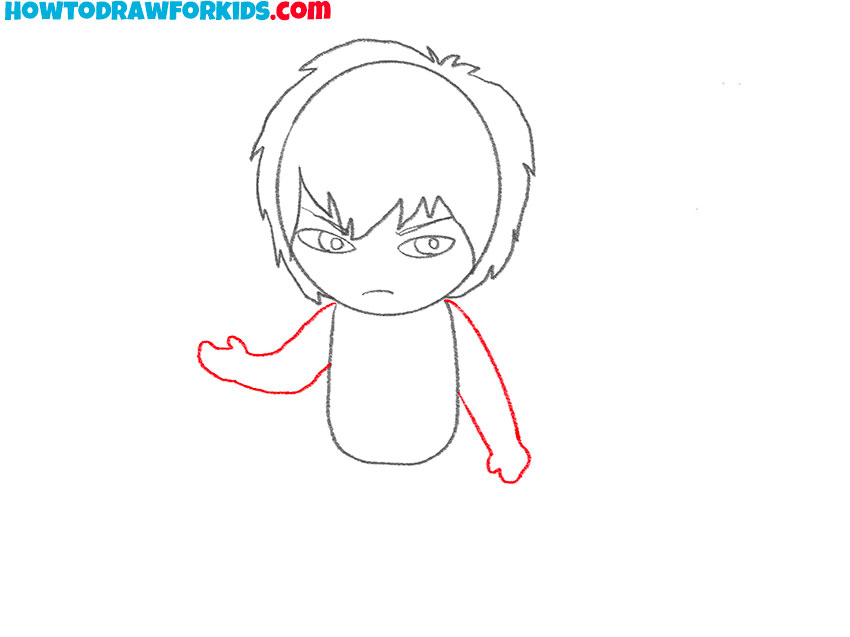
- Draw the arms.
Sketch out two arms in the same position as in the example.
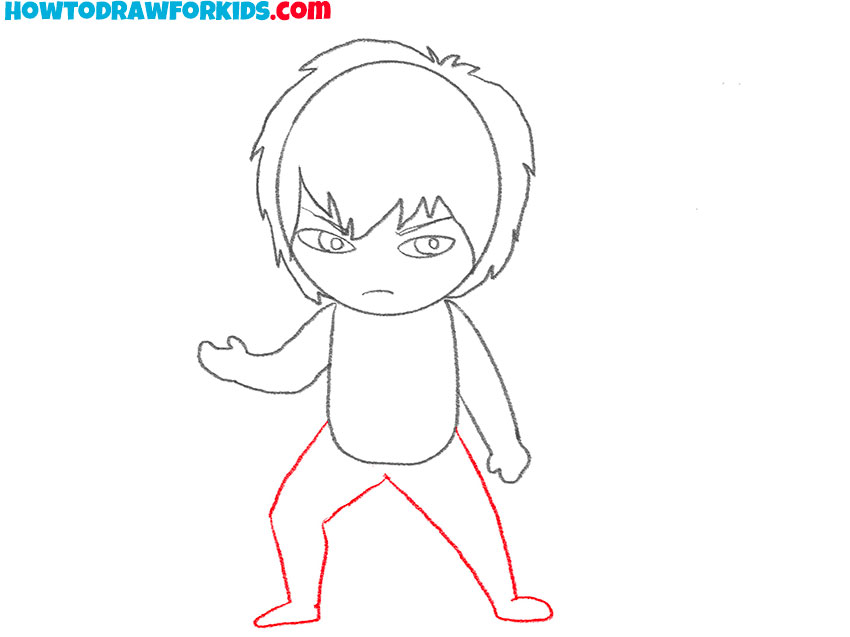
- Draw the legs.
The legs are slightly bent at the knees, the feet are turned in different directions.
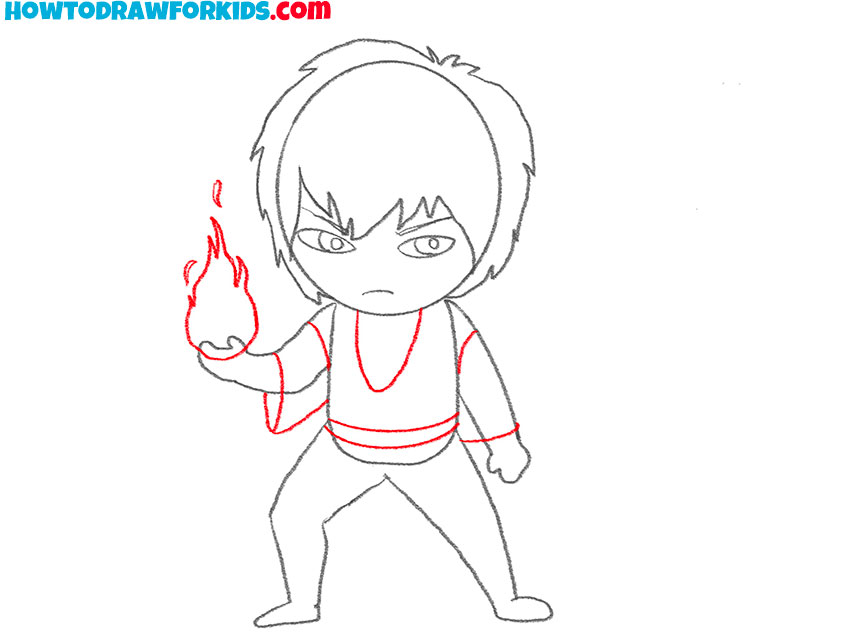
- Add details.
Draw the collar, sleeves and belt on the clothes and in one hand depict the flame.
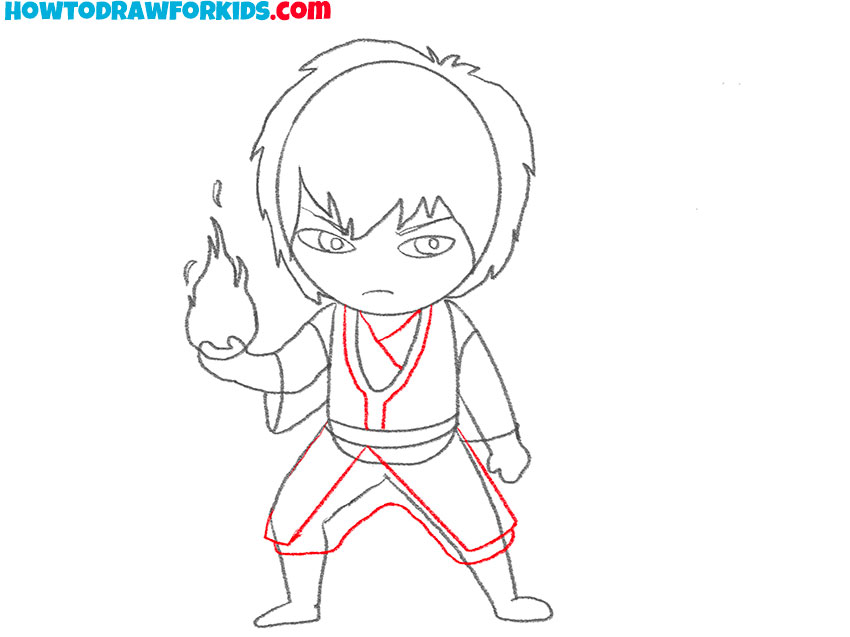
- Depict the rest of the clothes.
Add the bottom edge of the clothes and detail the clothes at the top.
- Correct inaccuracies.
At this stage, remove extra lines.
- Color the Zuko.
You will need beige, yellow, red, and shades of brown and grey.
Zuko is ready! By tradition, I have prepared for you a short version of this lesson in PDF format. Save this file to have access to the lesson at any time.