How to Draw Stan Marsh
Let me show you how to draw Stan Marsh from South Park and show how to add cool and recognisable backgrounds to your drawing.

How to Draw Stan Marsh: Basic Information
Welcome to this simple tutorial where you’ll learn to draw Stan Marsh, one of the main characters from the South Park series. This lesson is created to help you sketch this popular cartoon character and enhance your overall drawing skills.
For example, drawing characters schematically helps simplify complex forms into basic shapes. This technique makes it easier to understand proportions and structure. By breaking down Stan Marsh into circles, rectangles, and lines, you’ll gain a foundational skill useful for drawing any character or figure.
Learning to draw well-known characters like Stan Marsh can boost confidence and provide a fun way to practice. Drawing recognizable figures helps young artists focus on capturing key features and unique characteristics, which is essential for any aspiring artist looking to improve their cartooning skills.
This tutorial not only covers drawing Stan but also suggests various backgrounds. Adding environments to your characters helps develop a sense of place and story, enhancing the overall composition. This skill is really important for creating interesting artworks.
Stan Marsh Drawing Tutorial
Materials
- Pencil
- Paper
- Eraser
- Coloring supplies
Time needed: 30 minutes
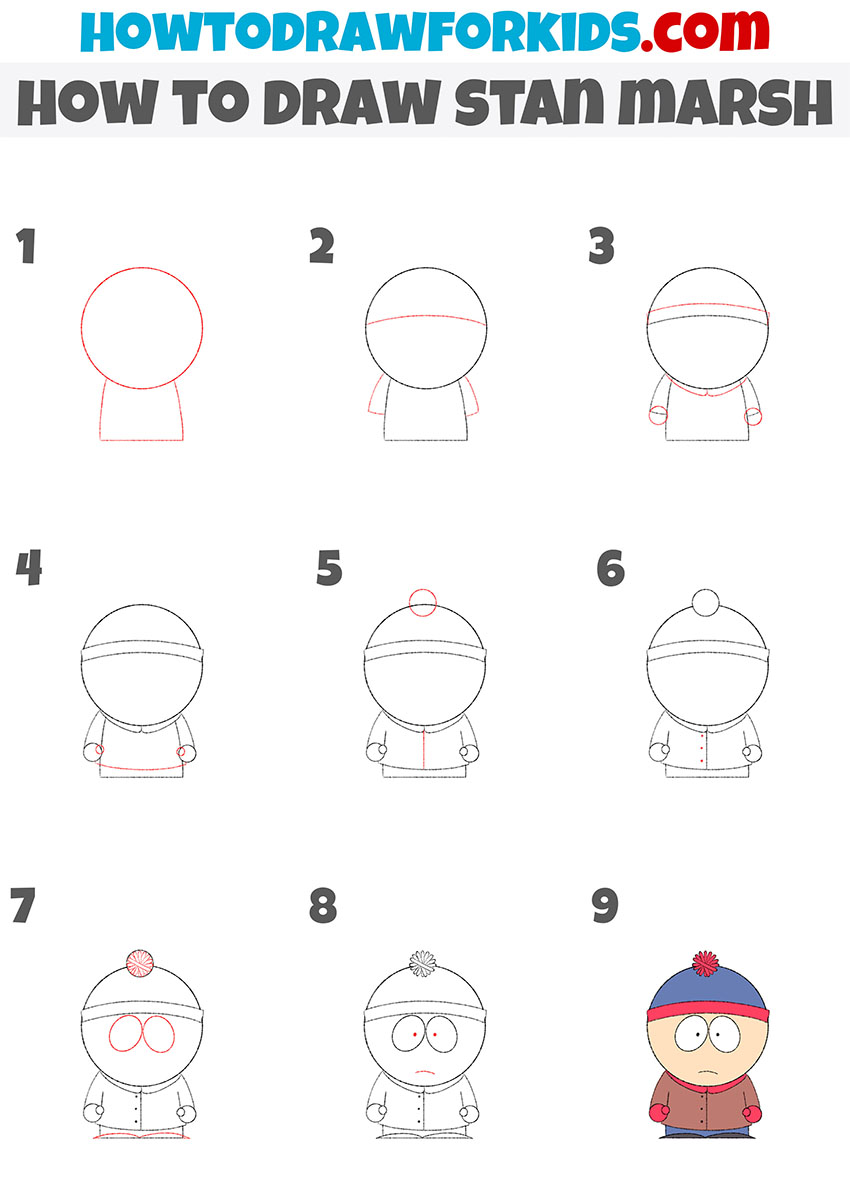
How to Draw Stan Marsh
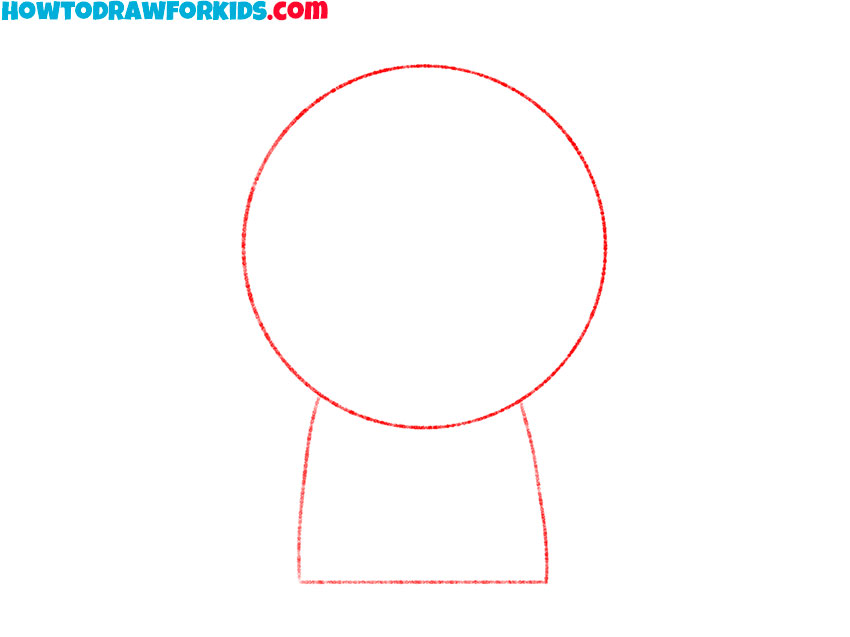
- Draw the Stan Marsh head and torso.
Start by drawing a large circle for Stan’s head. Below the circle, draw a rectangular shape to represent his torso. The rectangle should be centered beneath the circle, with the top touching the bottom of the head. The head should be significantly larger than the torso.
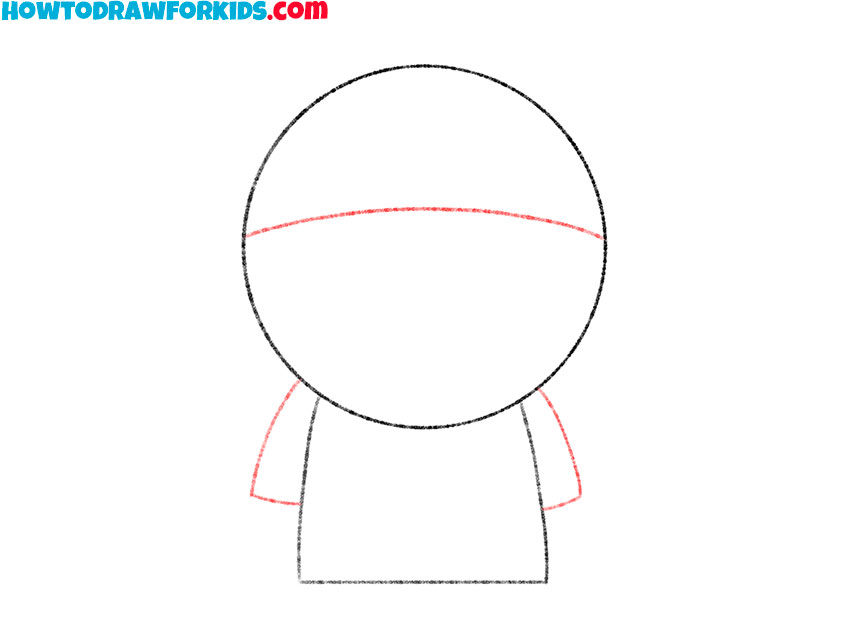
- Sketch the hat and arms.
Add a horizontal line across the circle, slightly above the midpoint, to mark where Stan’s hat will sit. For the arms, draw two lines extending from each side of the torso. These lines should curve slightly outward to suggest the natural position of the arms.
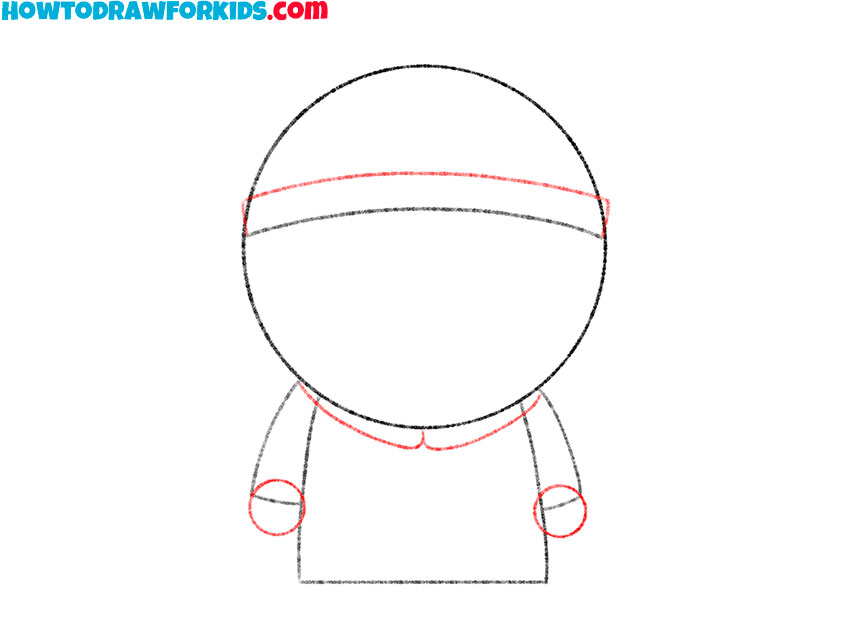
- Detail the hat, add the mittens and collar.
At the end of each arm line, draw small circles to represent Stan’s hands. Next, draw two small curved lines at the base of the head, to form the collar of Stan’s jacket. Next, draw another horizontal curved line above the line from the previous step to complete the shape of the hat.
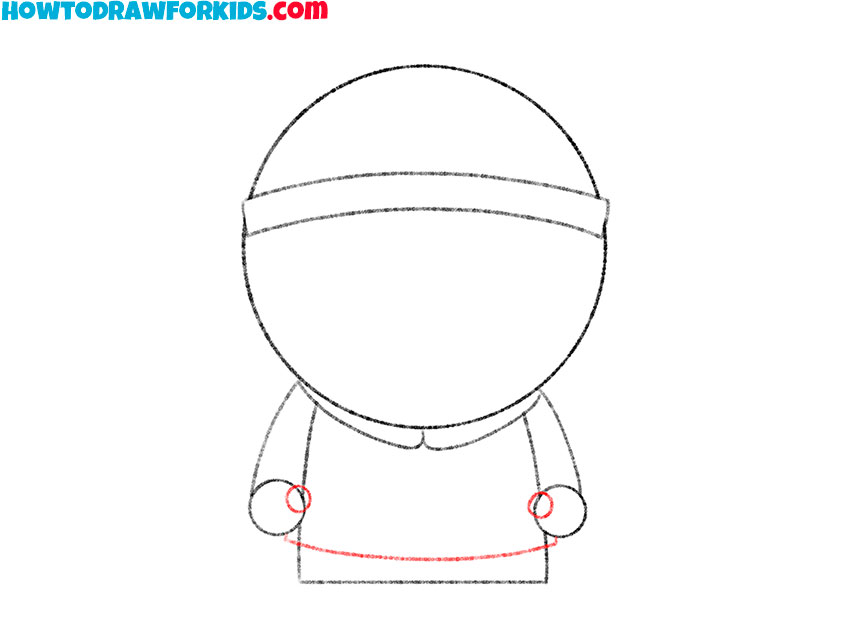
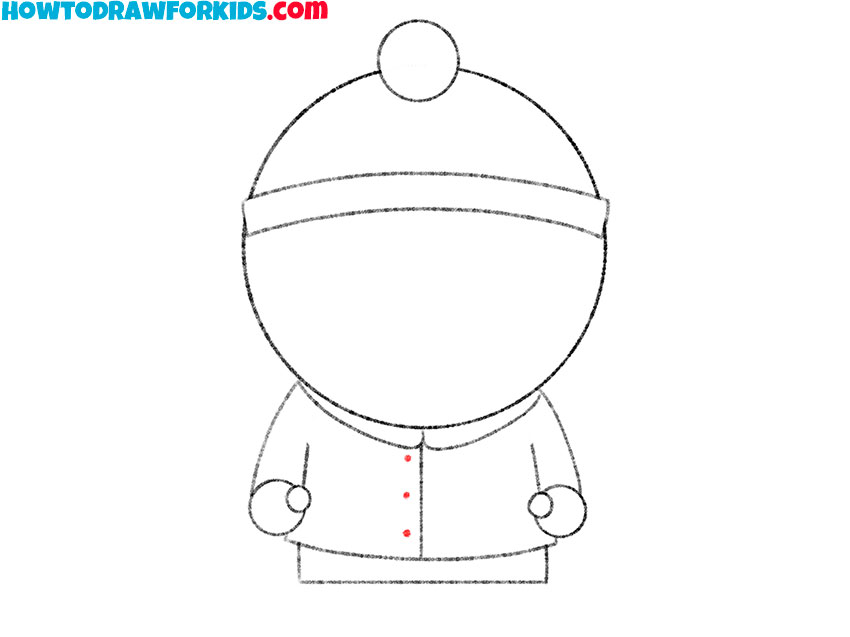
- Draw the thumbs and add the outline of the jacket.
Add small curved shapes next to the hands to represent Stan’s thumbs. Draw a horizontal line across the bottom of the torso to mark the lower edge of Stan’s jacket. This line should be parallel to the top of the torso and slightly curved to match the body’s shape.
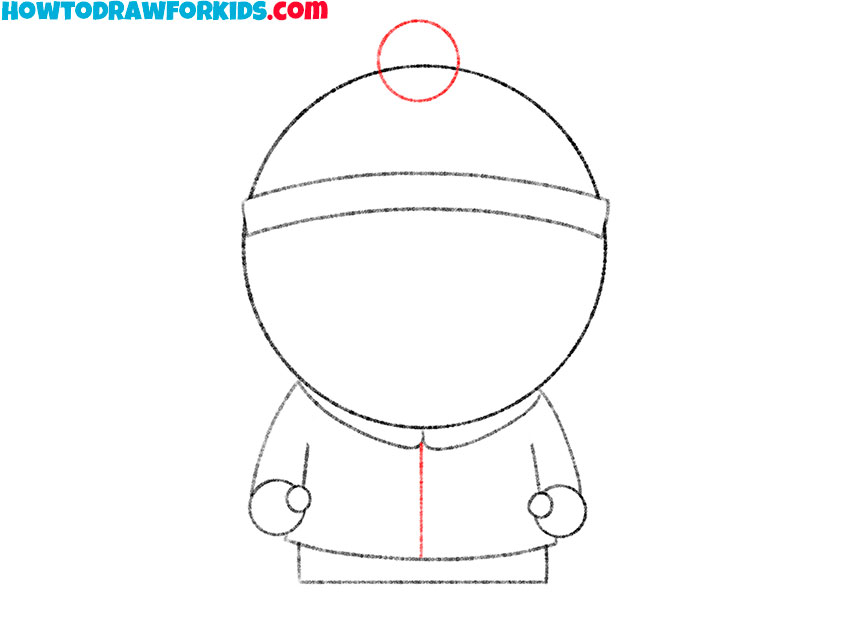
- Sketch the pompom and detail the jacket.
At the top of Stan’s head, draw a small circle to represent the pom-pom on his hat. This circle should be centered and proportional to the head size. Draw a vertical line down the center of the torso to represent the jacket’s zipper. This will give Stan’s clothing a more recognizable look.
- Draw the buttons on the Stan Marsh clothing.
Add three small dots on the left side of this line to indicate the buttons. Space them evenly from the top of the jacket to the bottom. Erase any unnecessary guidelines from previous steps to clean up your Stan Marsh drawing. Be careful not to accidentally delete important lines.
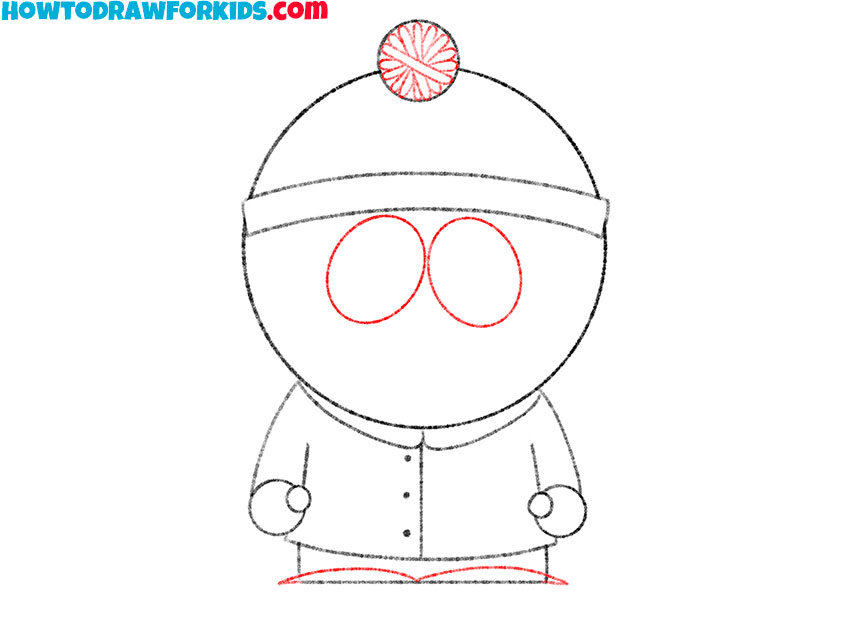
- Detail the pompom, illustrate the eyes and shoes.
Draw two large circles for Stan’s eyes, centered horizontally on the head and slightly below the hat band. Below the torso, draw small ovals to represent Stan’s shoes. Refine the pom-pom by adding small, curved lines radiating from the center to give it a fluffy texture.
- Draw the pupils and mouth of Stan Marsh.
Inside each eye, draw a small dots for the pupils. Ensure the pupils are centered and proportional within the eyes. Below the eyes, draw a small curved line to represent Stan’s mouth. Position the mouth centrally and give it a slight downward curve to reflect Stan’s typical expression.

- Color the drawing of Stan Marsh.
Use red for the Pom Pom, hat band and mittens, blue for the hat and pants, brown for the jacket and black for the shoes. Color Stan’s face in a light tan or peach color. Adding colors will make Stan instantly recognizable and complete the drawing.

Additional Content
I’ve put together a PDF file containing a streamlined version of this drawing tutorial. Notably, the file is completely free, and additionally, it’s designed for offline use, so you can continue to draw even if you’re not online.
Furthermore, this means you have the freedom to practice your drawing skills whenever the mood strikes, regardless of internet availability. In essence, it’s crafted to make learning to draw as easy and accessible as possible for you.
How to Draw Stan Marsh in Different Environments
Coming to the end of the Stan Marsh drawing, I invite you to create your own scenarios and scenes inspired by the animated series South Park:
- Draw Stan Marsh and his friends sitting at a table in the school cafeteria. For example, draw Kenny or Kyle Broflovski. It is important to depict cafeteria interior details such as tables, chairs, and food on trays.
- Here, draw Stan Marsh and company having a snowball fight or sledding. Pay attention to the details of the snowy park, such as trees with snow on their branches and footprints in the snow.
- Place Stan at the iconic South Park bus stop with the familiar green bench and the mountain range in the background. Add a snow-covered sidewalk and a street sign that says “Bus Stop.” You can include other characters like Kyle, Cartman, and Kenny waiting alongside him.
- Draw the South Park Elementary classroom with desks, a blackboard, and educational posters. Include details like the teacher’s desk and the American flag. You might add a few classmates and Mr. Garrison or another teacher for an authentic school scene.
Through these exercises, you develop your drawing skills and learn to express your own ideas and emotions through artworks, drawing familiar characters and plots from ‘South Park’. This way you create your own unique Stan Marsh drawing.
If you encounter any difficulties in drawing certain elements from these scenes, you can make use of my drawing tutorials. If you can’t find a specific object or favorite character on my website, please leave a comment about it. I will definitely take your suggestions into account!
Conclusion
By following the steps of this Stan Marsh drawing tutorial, you’ve gained an understanding of how to construct a character drawing from scratch. This process involves observing and translating the character’s unique features into your artwork. Each step, from the initial sketch to the final coloring, builds your skills and boosts your confidence as an artist.
Please share your wishes and suggestions for future tutorials. Is there a particular character or scene from South Park you want to learn how to draw? Maybe you have other favorite shows or characters you’d like to see featured. Let me know in the comments below.
Furthermore, if the Stan Marsh drawing lesson has sparked your interest, and you’re keen on accessing more such content, I urge you not to overlook the opportunity to follow me on social media. Also, be sure to check out other engaging tutorials on my website, including lessons on drawing characters from “South Park”.