How to Draw a Chick
Get ready for an adorable art adventure with my tutorial on how to draw a chick! Offering two methods, kids will learn to create their own cute chicks, enhancing their drawing skills and enjoying the process of artistic creation.
Eager to draw a fluffy chick? My tutorial covers two methods, front and side views, making it easy for kids to grasp basic concepts and create adorable chick illustrations.
How to Draw a Chick: Basic Information
Let’s hatch a masterpiece together as we learn to draw a chick in a few easy-to-follow steps!This lesson is designed to teach you how to create a fluffy little chick using simple shapes and lines. You’ll be amazed at how a few circles and curves will come together to form an adorable baby chicken.
As we progress, I’ll guide you through each stage, from the round body to the tiny beak and feet. With each stroke of your pencil, your chick will start to come to life on the page. It’s a great way to practice drawing animals and understanding how simple forms can build up to a complete figure.
By the time we finish, you’ll know how to draw a chick that looks so cute, you’ll want to name it! Remember, practice makes perfect, so keep drawing and experimenting. Soon, you’ll have a whole flock of these little chicks on your paper.
Chick Drawing Tutorial
Materials
- Pencil
- Paper
- Eraser
- Coloring supplies
Time needed: 25 minutes
How to Draw a Chick
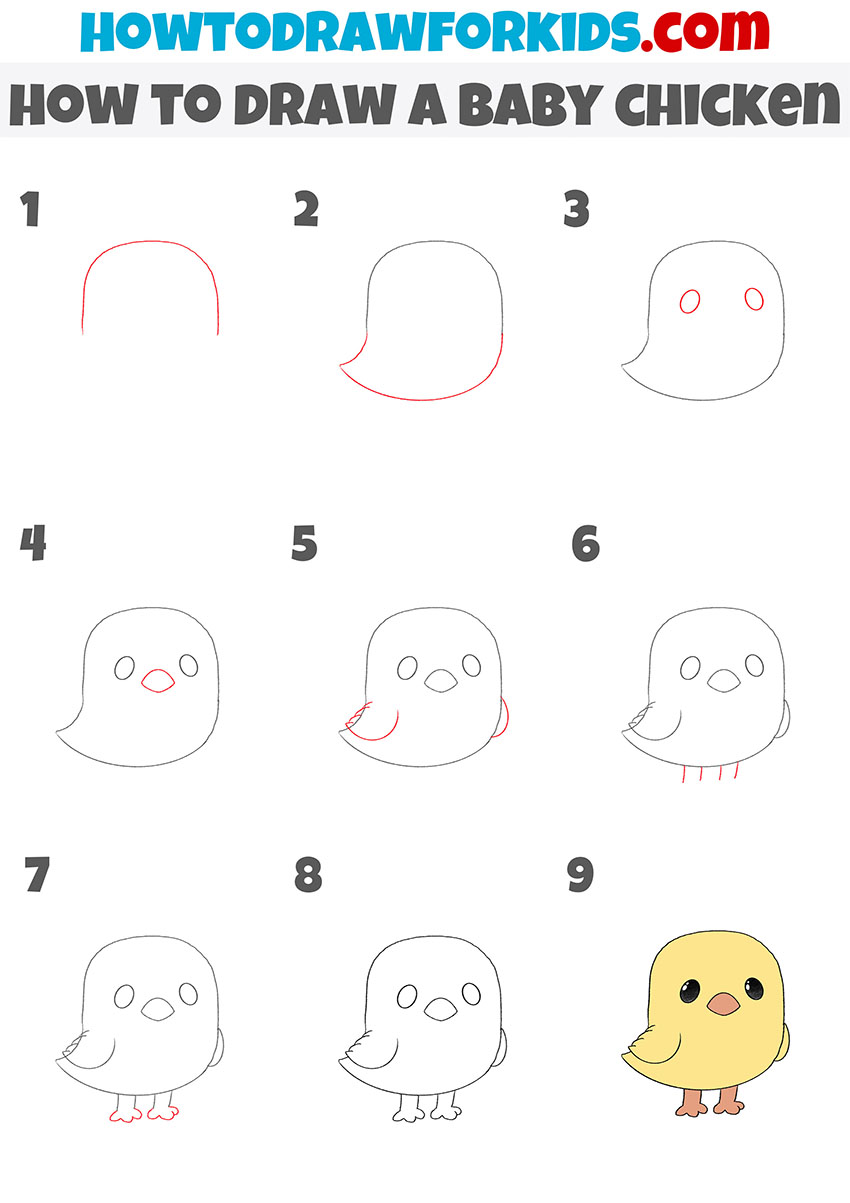
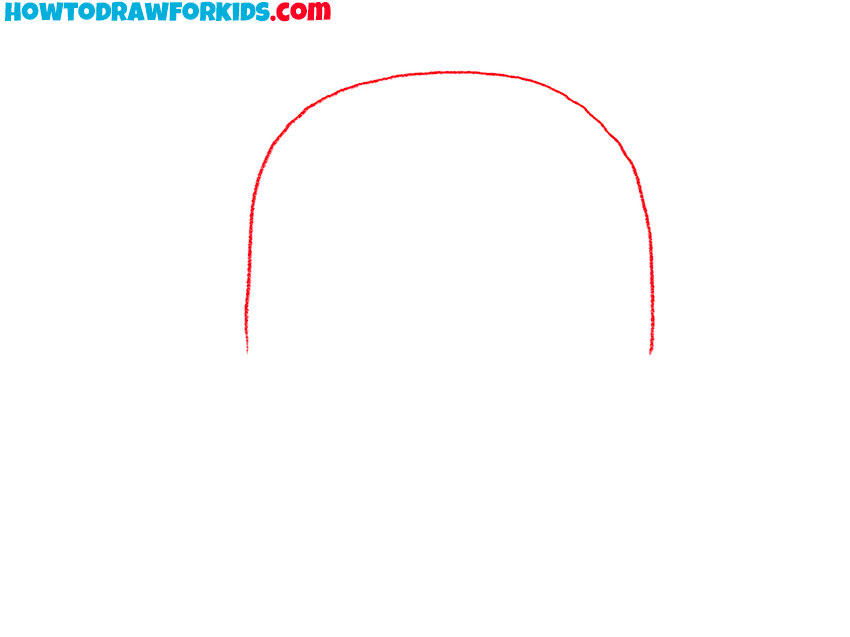
- Draw the upper body.
The lesson starts with drawing the top of the baby chicken’s head. Begin with a simple curved line, resembling an arch. This line sets the shape of the head and should be drawn with a smooth stroke.
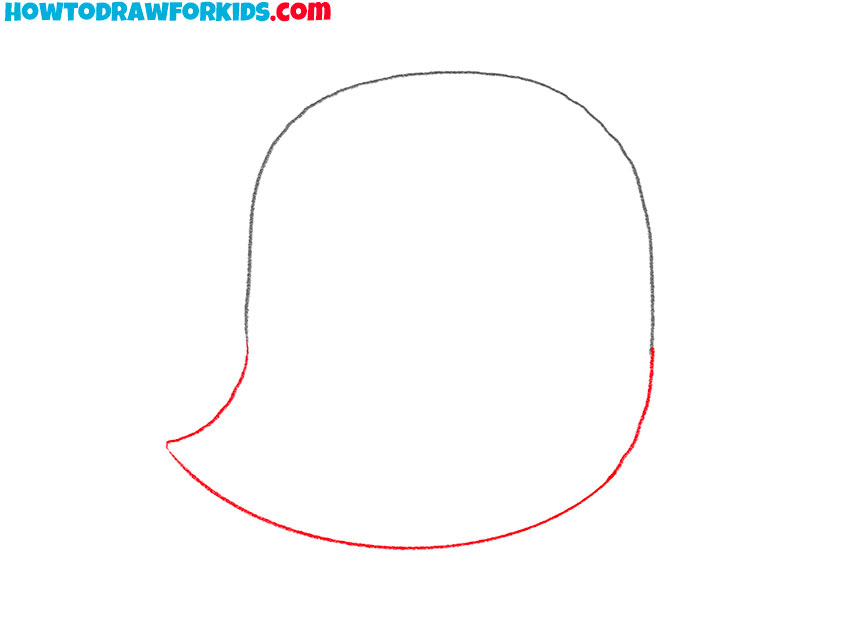
- Depict the lower part of the torso.
This step involves completing the head and adding the chick’s body. Extend the curved line from step one downward and around to form a shape that resembles a slightly tilted water droplet.
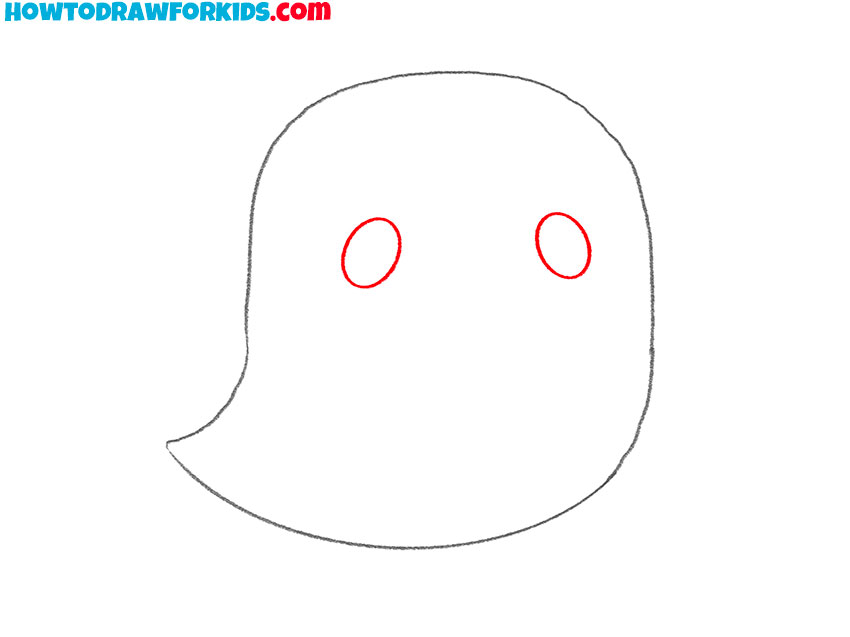
- Sketch out the eyes.
Here, we add the baby chicken’s eyes. Position two small ovals above the midpoint of the body, ensuring they are evenly spaced to maintain symmetry.
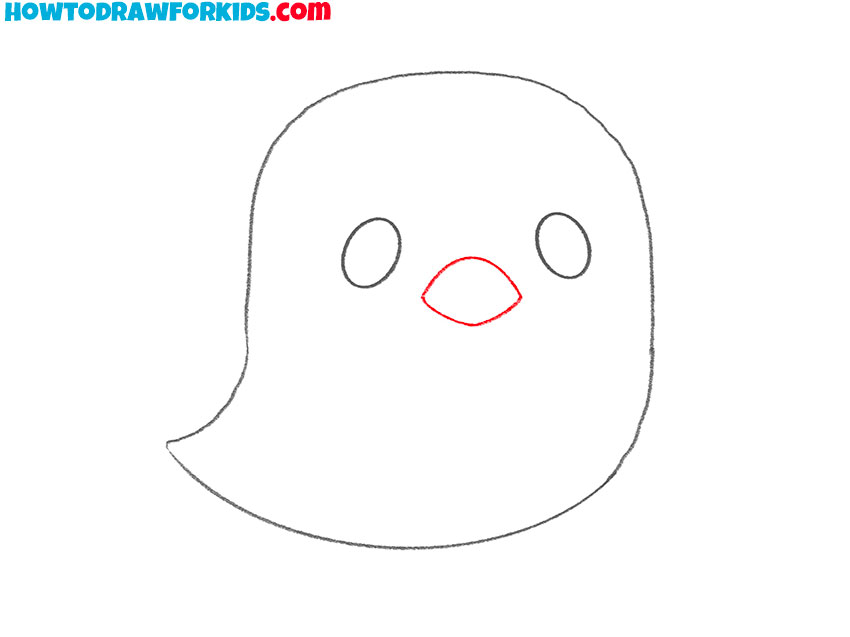
- Draw the beak.
The fourth step is to draw the chicken’s beak. Insert a small, triangular shape between and slightly below the eyes. The beak should be centered to keep the face symmetrical.
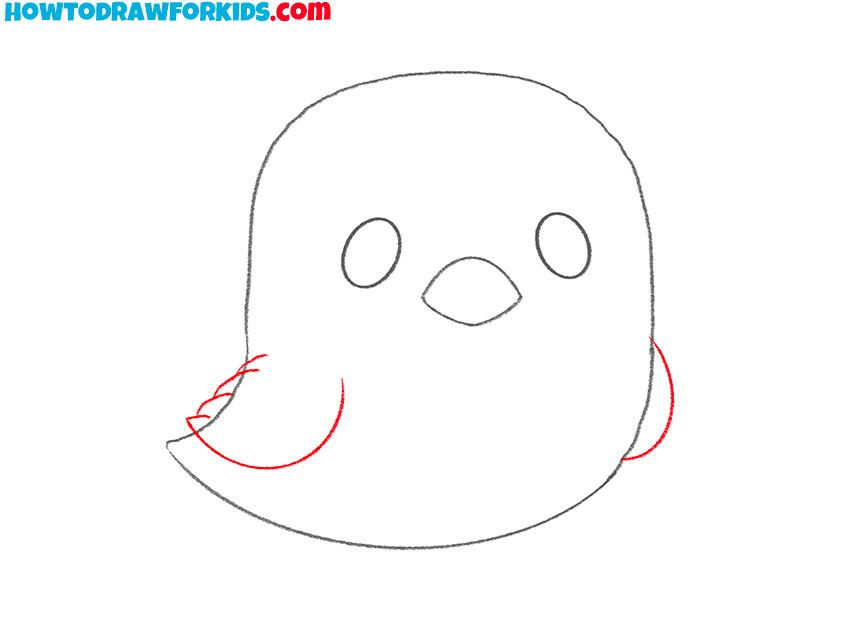
- Add the wings.
Now, we add the small wings to give the chick a nice expression. Place two small, curved lines on each side of the beak. These lines should be lightly sketched, resembling parentheses.
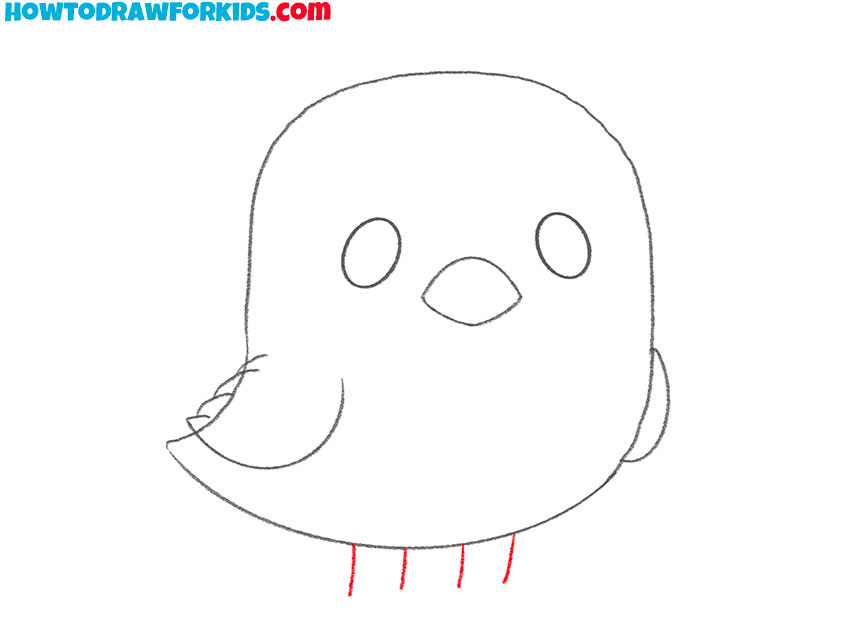
- Depict the top of the paws.
For the chick’s paws, sketch several small lines at the bottom of the body. The lines should be evenly spaced and angled slightly outward to convey the baby chick’s stance.
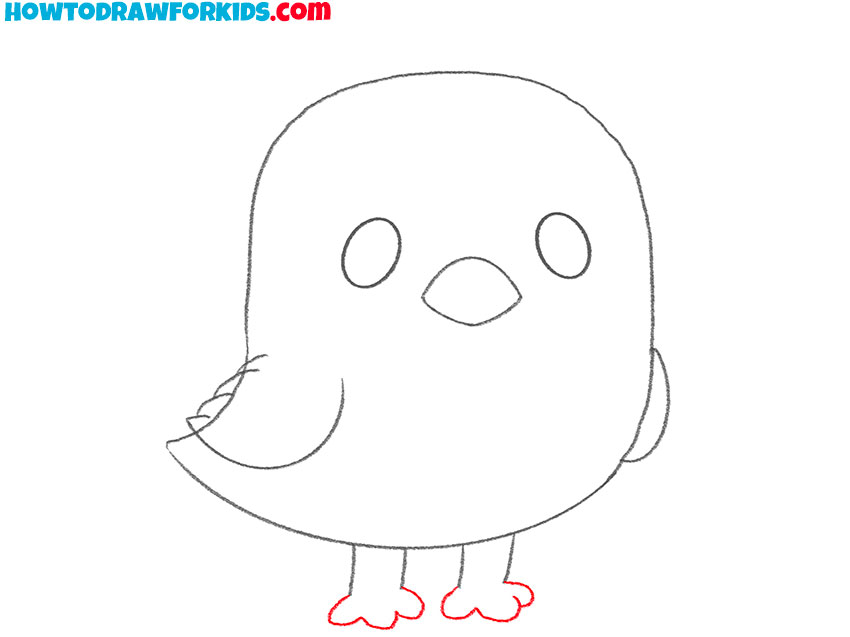
- Add the bottom of the paws.
Great, now add some more detail to this chicken. Draw three rounded toes on each paw, like in my image. It’s a little different from a realistic bird, but gives it a cute, cartoonish quality.
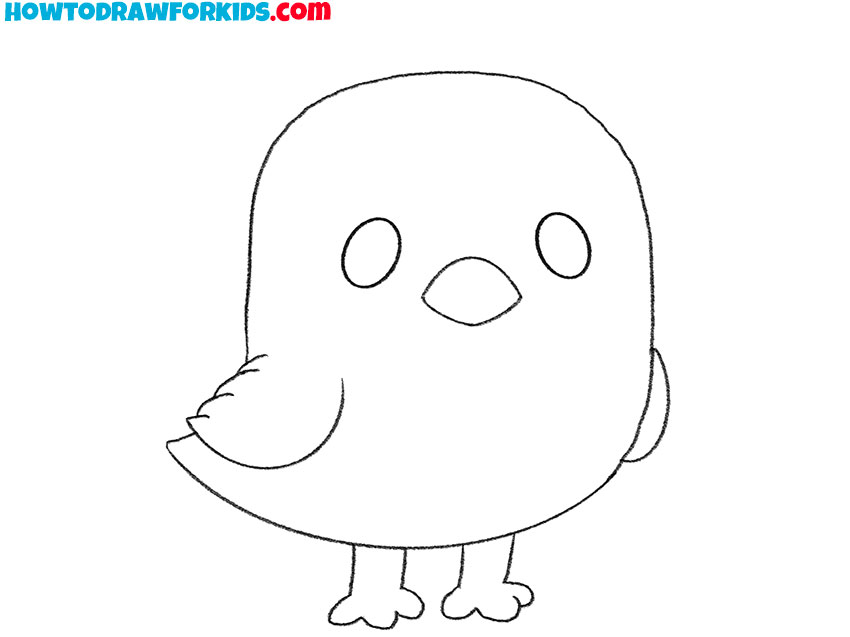
- Correct inaccuracies.
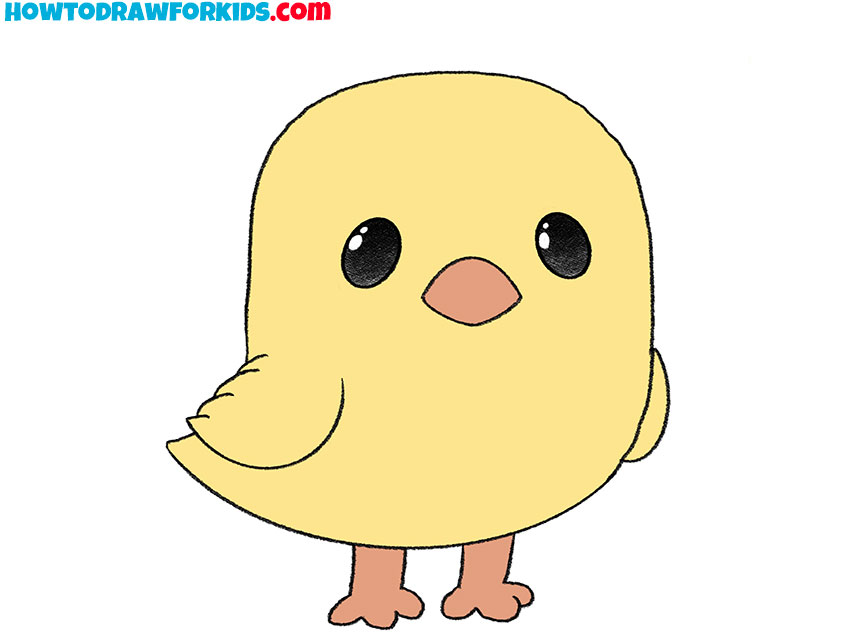
In the end, it should be a cute and funny chicken. Look at the whole drawing as a whole, correct the mistakes and start coloring this little bird.
- Color the baby chicken.
The final step is to color the drawing. Use a soft yellow for the body, an orange for the beak and feet, and a touch of red for the cheeks to bring warmth to the chick’s face.
Additional Content
Exciting news – my chick drawing lesson is now available as a free PDF, just for you. This brief guide retains all the fun of my original class, distilled into an offline format for your convenience.
Perfect for practice sessions away from the computer or tablet, this PDF is a treasure trove of artistic enjoyment that fits right into your backpack. So don’t let the lack of internet dampen your artistic spirit; download the PDF today and keep those creative juices flowing!
Alternative Drawing Method
To all my budding artists in search of more drawing fun, I’ve crafted yet another method to depict a chick. This alternative approach is not only enjoyable but will also provide you with ample practice to refine your art skills and bring those adorable chicks to perfection.
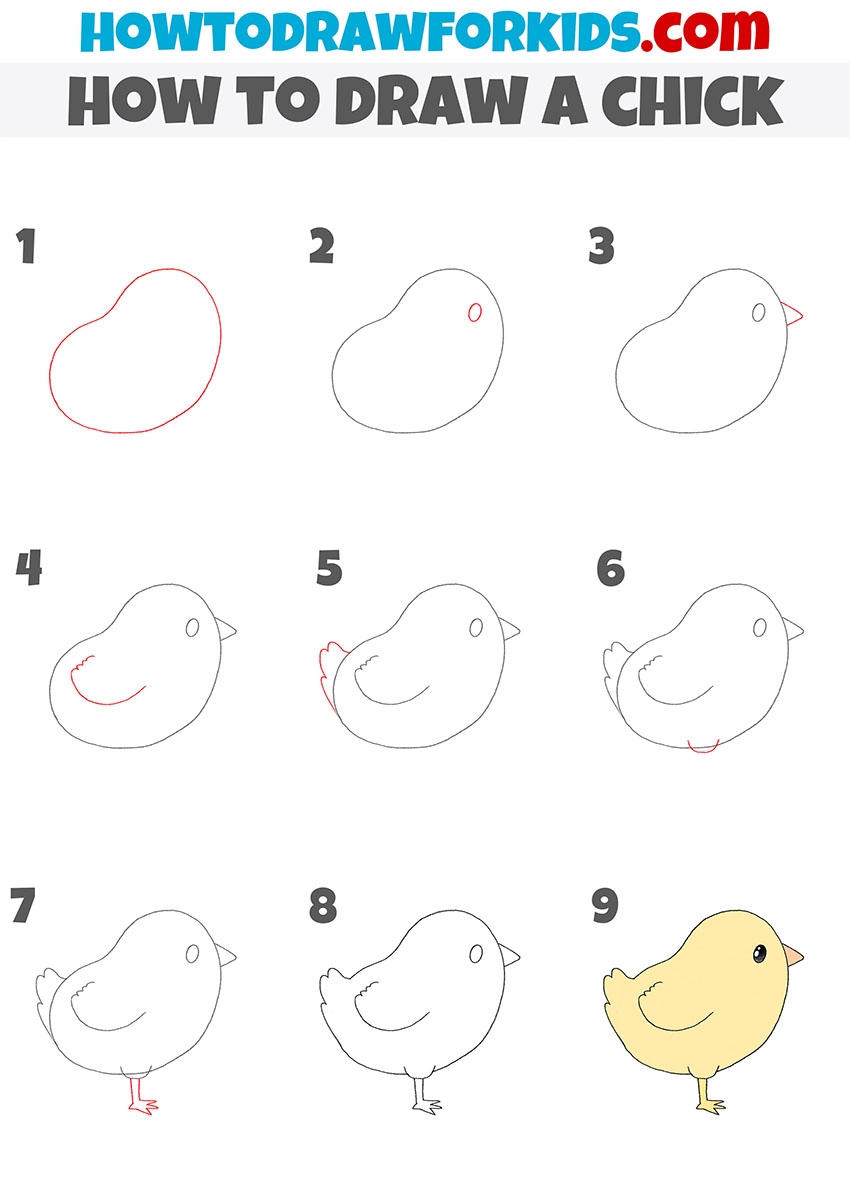
How to Draw a Chick Side View
So, in this alternative approach, we start with an organic shape that sets the stage for our chick’s profile. Each step builds upon the last, fleshing out a plump body from the side and adding character with a dot for an eye and a triangle for a beak.
By the final stroke, we’ve captured the essence of a chick in a new stance, showcasing its side silhouette in a simple yet effective sequence of only nine steps. It’s a playful method that emphasizes the chick’s adorable side view.
Next Steps in Chick Sketching
All right, little sketchers! You’ve just wrapped up a wonderful drawing session, but the adventure doesn’t end here. It’s time to take your skills to new heights and make your artwork even more splendid. Let’s get those pencils moving and see how we can turn a single drawing into a masterpiece with some extra flair:
- Add a Family: Try drawing a whole family of chicks and chickens around your main chick. Maybe they’re pecking at the ground or snuggling together.
- Create a Scene: Place your chick in a meadow with lots of grass, a bright sun above, and maybe even a worm or two for a snack.
- Feathery Textures: Experiment with techniques like cross-hatching or stippling to give your chick’s fluff some texture. See how shading can add depth and warmth to its feathers.
As you put the finishing touches on your delightful chick drawing, remember, this is only the start of your artistic journey. Use the lessons on my website as your guide to draw not just chicks, but whole worlds where they can roam, peck, and play. Your imagination is the only limit, so let it run as wild as the chicks in a meadow!
Conclusion
What a wonderful chick drawing you’ve completed! If you found joy in this lesson, you’ll be thrilled to explore more tutorials on my website. For instance, discover the secrets of sketching Spider-Man or capture the wild essence of a tiger with easy-to-follow guides.
Don’t miss out on any creative updates – join our community on social media today! By subscribing, you’ll be the first to hear about new lessons and tips to enhance your artistic journey.