How to Draw a Fawn
Unlock the magic of drawing with my how to draw a fawn lesson, designed to inspire and educate young minds. With this guide, children will learn to transform simple shapes into an enchanting animal.
Start an artistic adventure that leads you through the woods to draw a fawn with ease. This guide is a perfect blend of creativity and fun, designed for beginners to turn simple lines into the delicate features of a forest friend.
How to Draw a Fawn: Basic Information
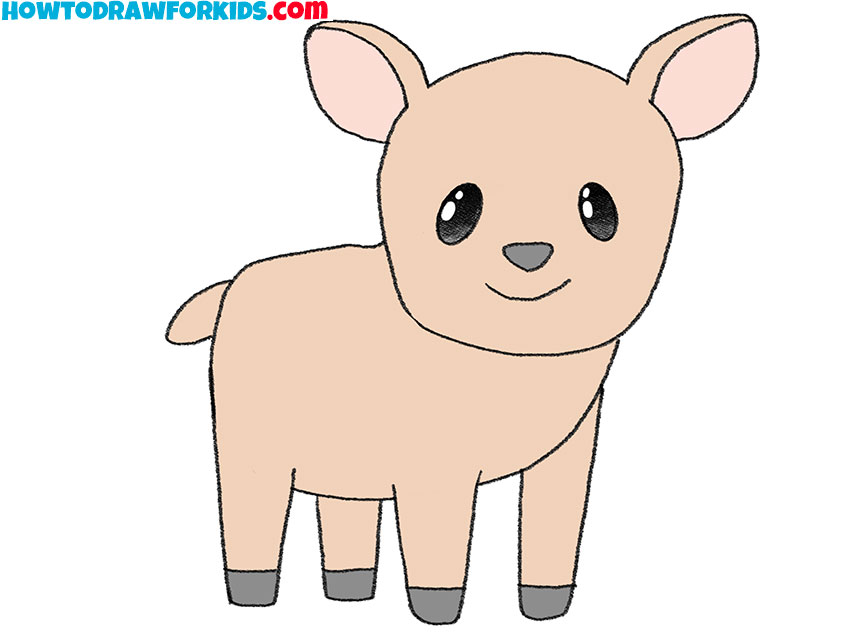
Imagine a forest where gentle fawns frolic among the whispering leaves. That’s our canvas today as we master how to draw a fawn with strokes of pure joy. Each line you draw will be a path through the woods, leading to the heart of nature’s artistry.
In this lesson, we focus on the gentle curves that give our fawn its charming form, from the roundness of its face to the soft lines of its body. We’ll learn to capture the essence of this forest baby without the need for intricate details. This approach keeps drawing fun and accessible, just like a game of connect-the-dots.
Ready to start? Let’s draw a fawn together! With each number, we add another piece of our woodland puzzle. And before you know it, you’ll have a friendly fawn smiling back at you, a testament to your growing artistic skills.
Fawn Drawing Tutorial
Materials
- Pencil
- Paper
- Eraser
- Coloring supplies
Time needed: 30 minutes
How to Draw a Fawn
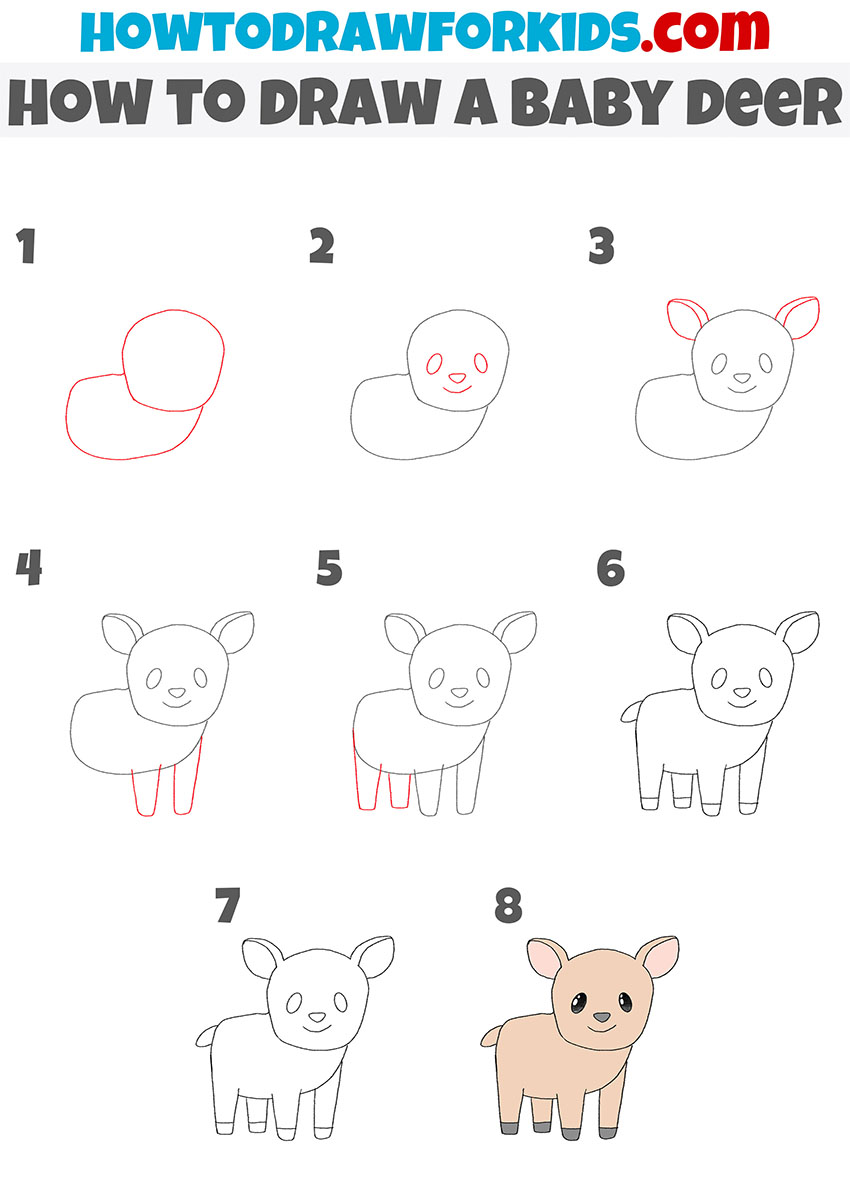
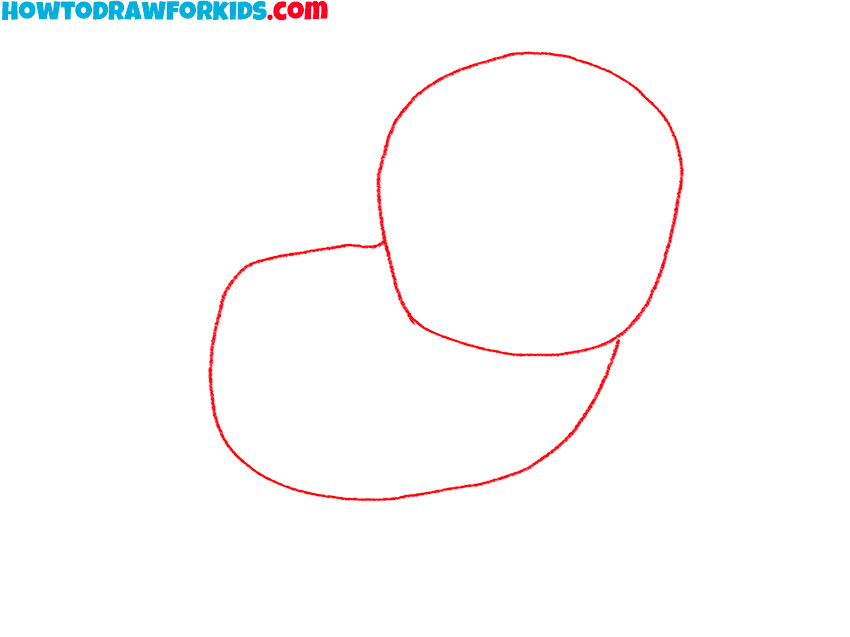
- Draw the head and torso.
Begin by drawing two overlapping shapes, a circle for the deer’s head and a larger oval for the body, ensuring the proportions reflect a fawn’s delicate structure. Place this in the center of your piece of paper.
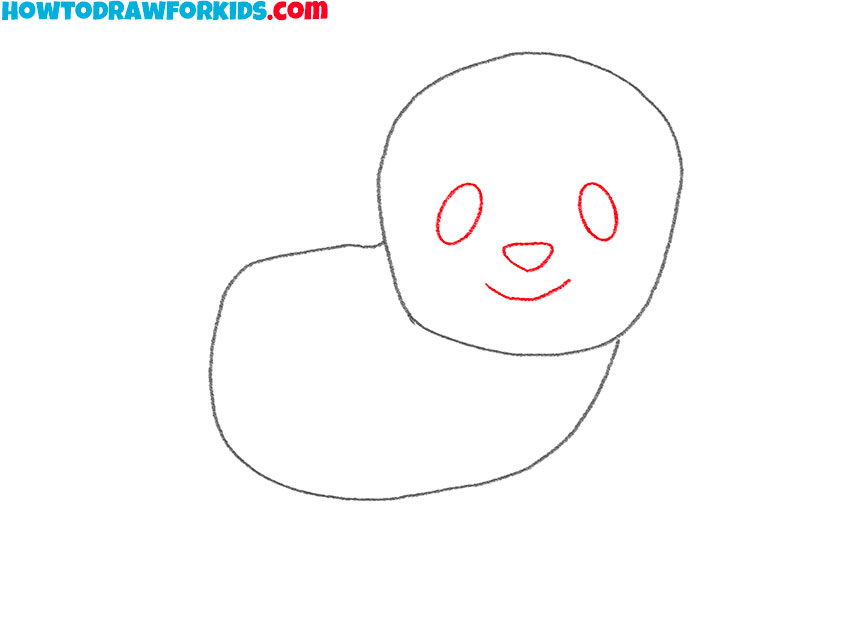
- Add elements of the muzzle.
So, sketch the facial features starting with two dots for the eyes, a small triangle for the nose, and a curved line for the mouth to capture the fawn’s gentle expression. As you can see, very simple geometric shapes can form a vibrant and realistic facial expression.
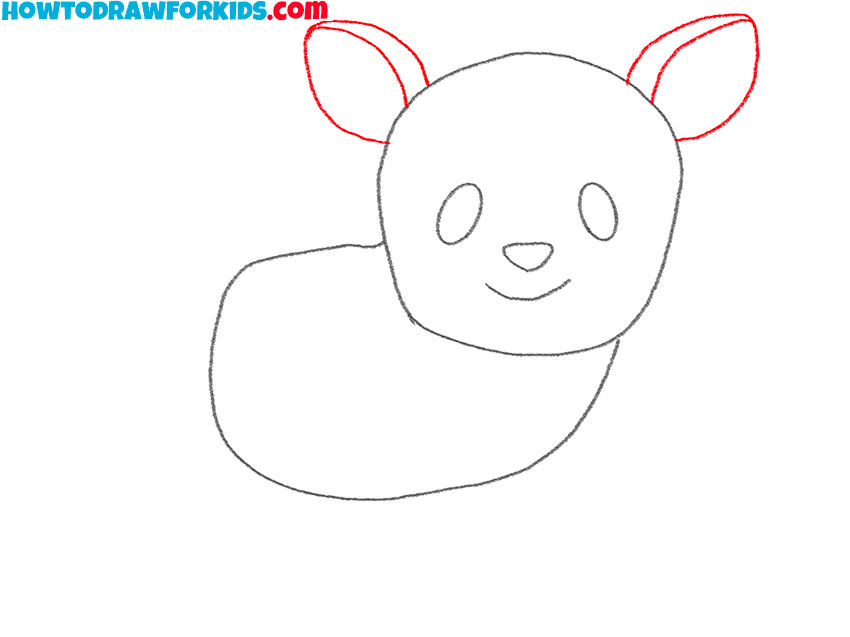
- Depict the ears.
Add the ears by adding two leaf-shaped figures on top of the head, with inner lines to suggest the inner ear detailing. Cartoon animals with large ears always look a little ridiculous and funny.
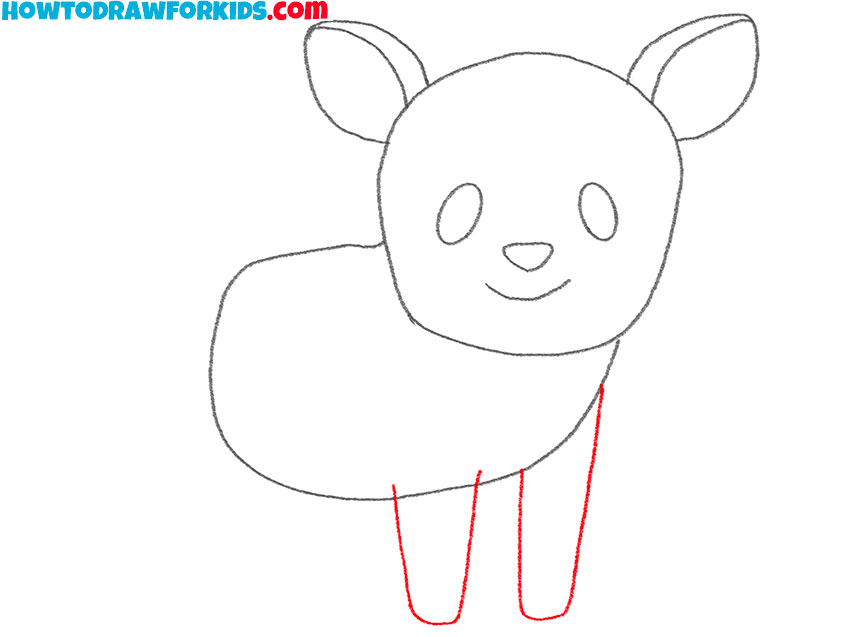
- Sketch out the front legs.
Draw the front legs with two sets of parallel lines descending from the body, slightly tapering as they reach the hooves. The front part of the fawn’s body slightly hides the leg closest to us. Because of this, the legs look asymmetrical.
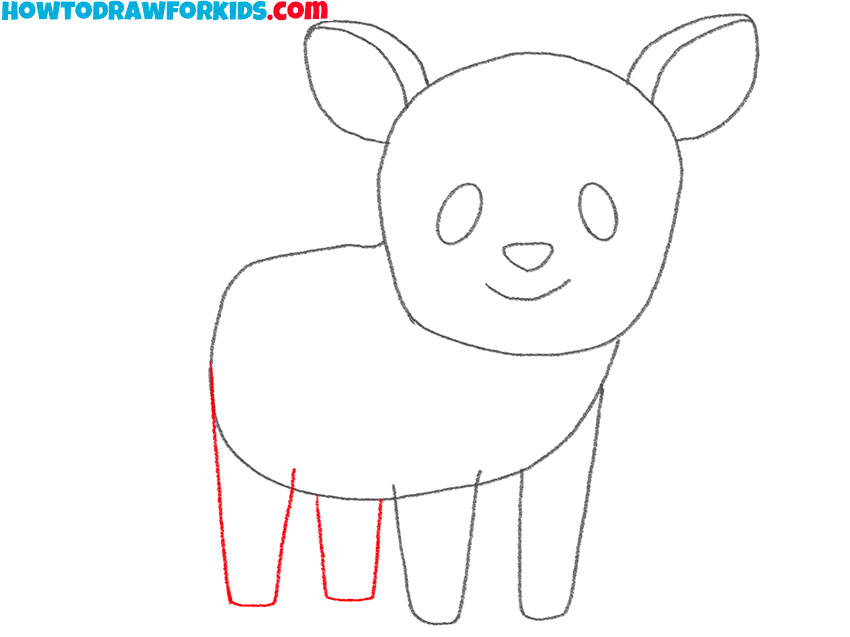
- Draw the hind legs.
Outline the fawn’s back legs with a gentle curve at the top, moving into straight lines towards the hooves, giving the stance stability and a sense of rest.
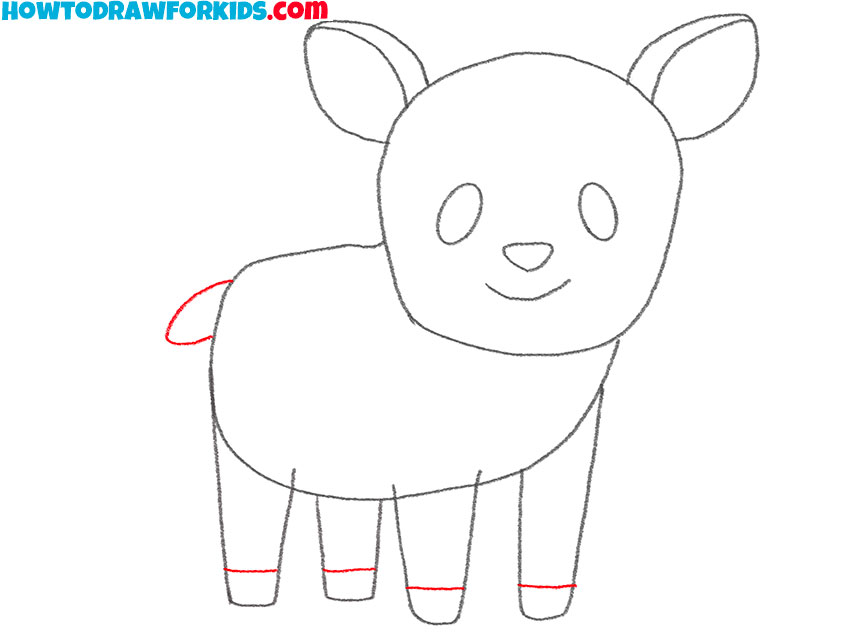
- Add the hooves and tail.
Our fawn has a very small, short tail. Try to draw exactly the shape and size of the tail so that the fawn really looks like a baby animal. The second action of this step is hooves, which is even more simple.
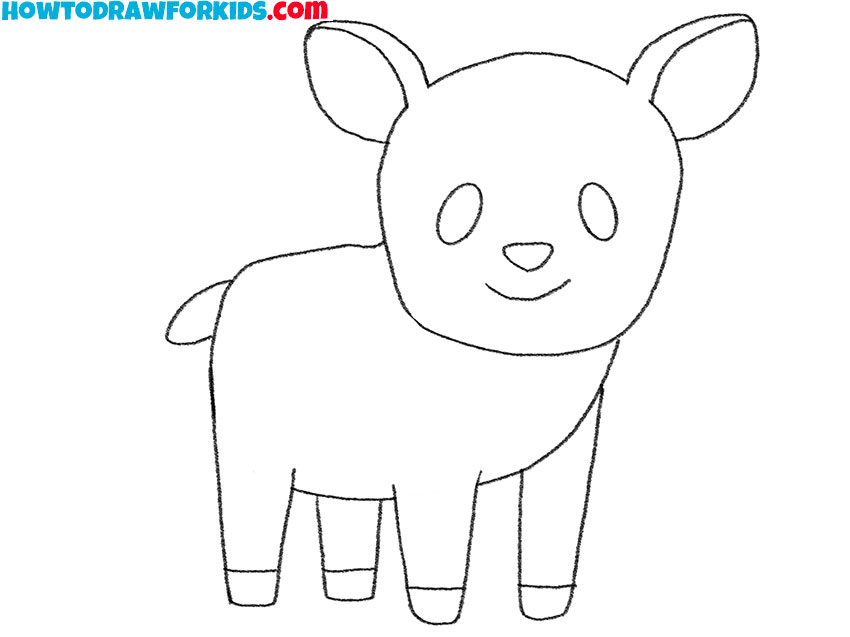
- Correct inaccuracies.
So, it should look like a cute, funny deer with a large head, a small body and a funny face. Check your drawing, find any inaccuracies and fix it. Next up is coloring.
- Color the drawing.
The entire design, with the exception of the eyes, can be painted in solid colors. You can choose any colors for this fawn’s fur. However, the inner parts of the ears look great in pink. Don’t forget about the highlights inside the eye contours.

Additional Content
In my commitment to fostering creativity and making art lessons more accessible, I’m delighted to offer a free PDF file of our fawn drawing tutorial. This condensed version is specifically designed for easy reference and practice, regardless of your internet status.
It’s the perfect companion for quiet afternoons, travel, or any moment you find yourself disconnected from the digital world but connected to your creative spirit. This downloadable guide is a bridge to continuous learning and artistic growth, inviting you to explore the joys of drawing whenever and wherever you choose.
Enhancing Your Fawn Artwork
You’ve just taken a fantastic journey through the forest with your pencil and paper and brought a charming little fawn to life. But guess what? So, the adventure doesn’t stop here! I’ve got some super secrets to share with you on how to make your drawings even more magical. Ready to level up your art skills? Let’s hop right in!
- Use Reference Photos: Look at pictures of real fawns. Notice how they stand, their big, beautiful eyes, and those cute little spots. It’s like going on a mini-safari!
- Mix It Up with Mediums: Don’t just stick to pencils. Try crayons, markers, or even paint! Each one can add a new layer of fun and texture to your drawings.
- Light Touch for Fur: Use soft, gentle strokes to suggest fur. Think of it as tickling the paper with your pencil. This technique gives your fawn a fluffy appearance, making it come alive.
- Creating Spots: When adding spots to your fawn, remember they don’t have to be perfectly shaped or evenly placed. Just make small, irregular shapes across the back and sides of your fawn.
Wow, you’re on your way to becoming an even more incredible artist! Remember, every great artist started just where you are now. With these handy tips, you’re not just drawing; you’re telling stories, sharing dreams, and spreading a little bit of your own magic with the world.
Conclusion
You did it! If you’re curious about what to create next, why not visit my website? There, you’ll find a variety of lessons waiting for you, from capturing the quiet beauty of books to the cozy charm of drawing homes. These tutorials are your next steps toward broadening your artistic horizon.
Also, consider joining our social media family to stay ahead of all the creative insights and upcoming content announcements. It’s your direct link to a community eager to see your next masterpiece and to share the journey of endless creativity.

