How to Draw a Baseball Player
This tutorial will teach you how to draw a baseball player – an athlete whose image is strongly associated with the United States.

In this tutorial, you will learn how to draw a baseball player step by step. Undoubtedly, this lesson will be interesting and useful for you, because you will train your ability to draw a human figure and in the future, you will be able to easily draw a person in motion.
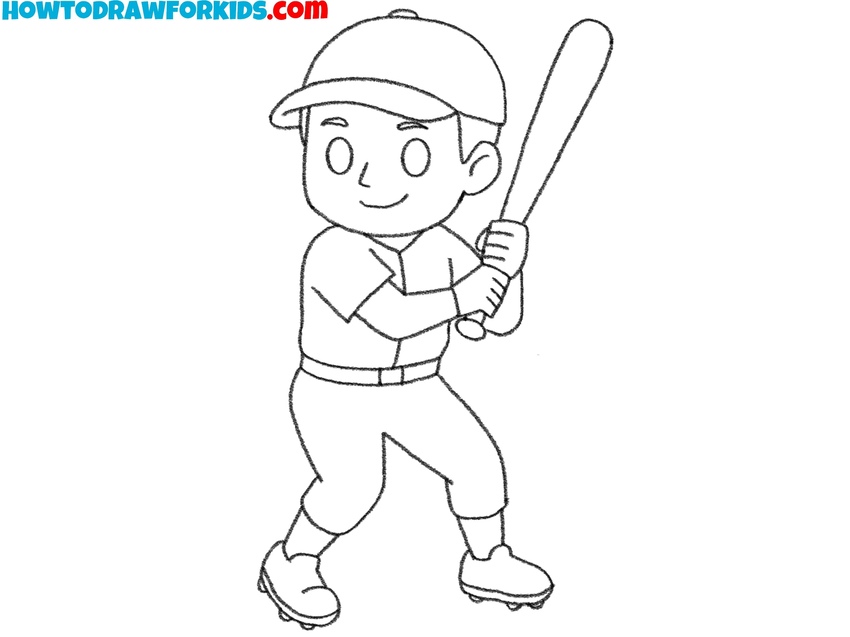
In the picture, you see a young baseball player who is holding a bat during the game. The posture of this athlete indicates that he is ready to reflect the ball at any moment.
If this drawing seems difficult for you, then I want to convince you of the opposite. This tutorial includes a few simple steps. One step is one simple action. If you are diligent at every step and use small hints, then you will get a great result.
Materials
- Pencil
- Paper
- Eraser
- Coloring supplies
Time needed: 40 minutes
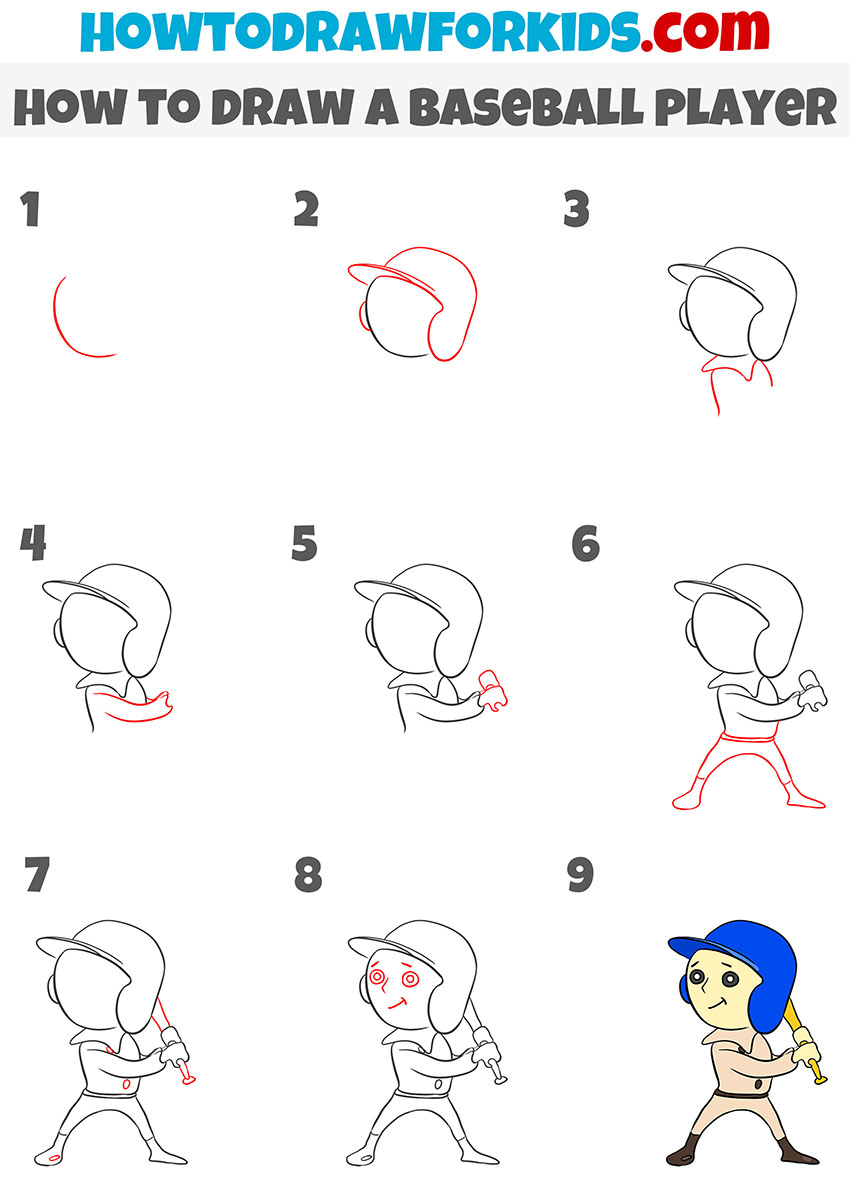
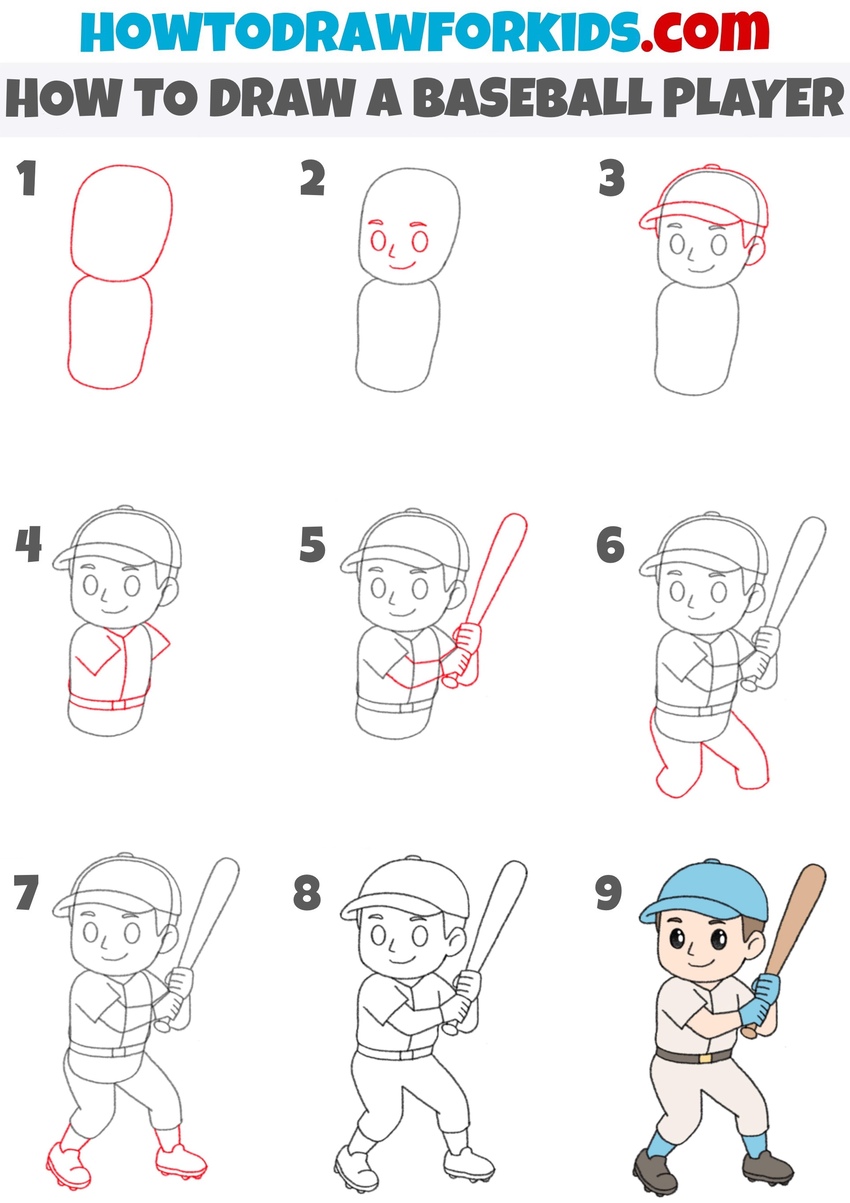
How to draw a baseball player
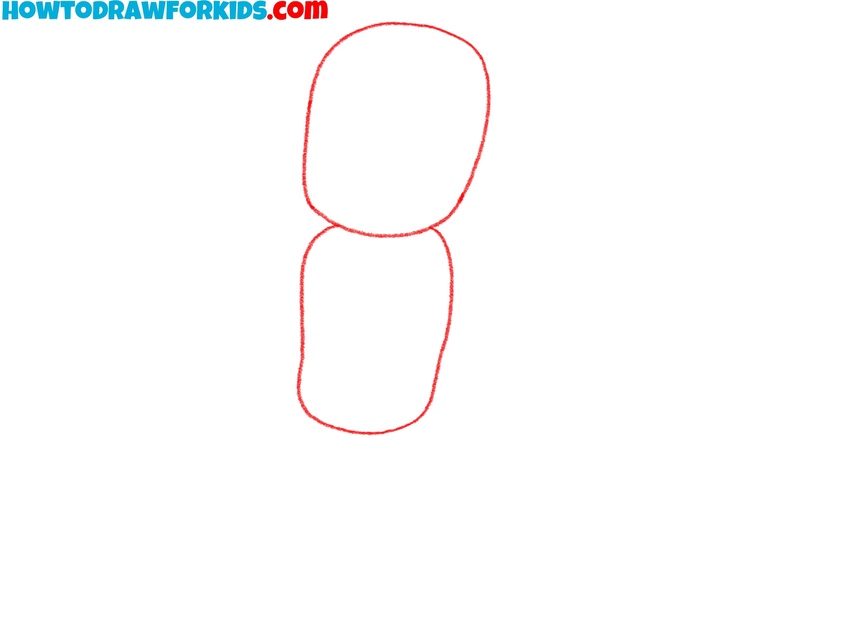
- Outline the head and torso of the athlete.
Draw two basic shapes that will define the posture of the baseball player. Sketch a small oval for the head and a larger rounded shape below it for the body. You can connect them by a short neck. The body should lean forward. Use smooth, light strokes so you can adjust proportions. You can add a vertical guideline through the center to help with symmetry later.
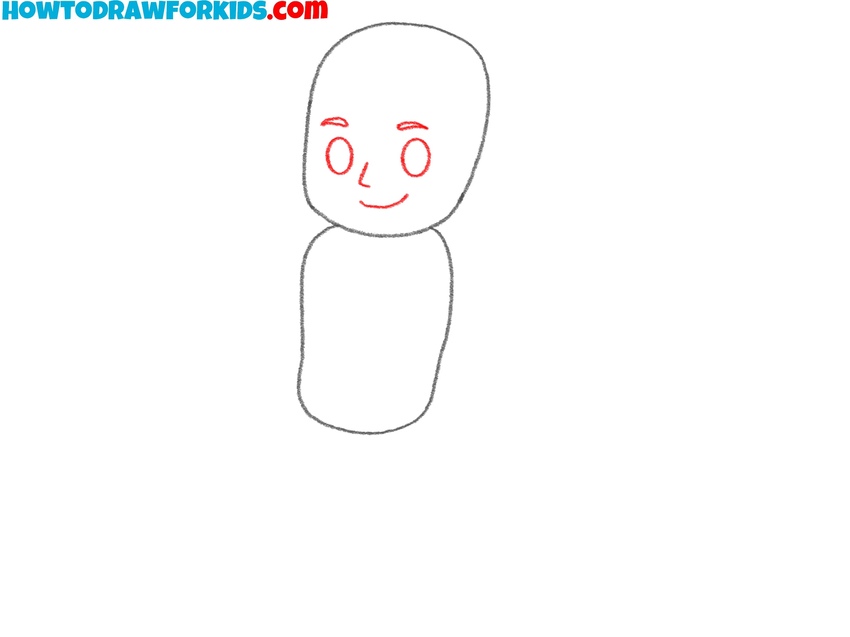
- Sketch the face of the baseball player.
Within the head shape, start building the face of the player. Draw the eyes as two small ovals, then add a small curved line for the nose and a slight smile below. Try to draw the facial features of the baseball player using simple shapes. You can also indicate the chin line gently to define the head’s contour.
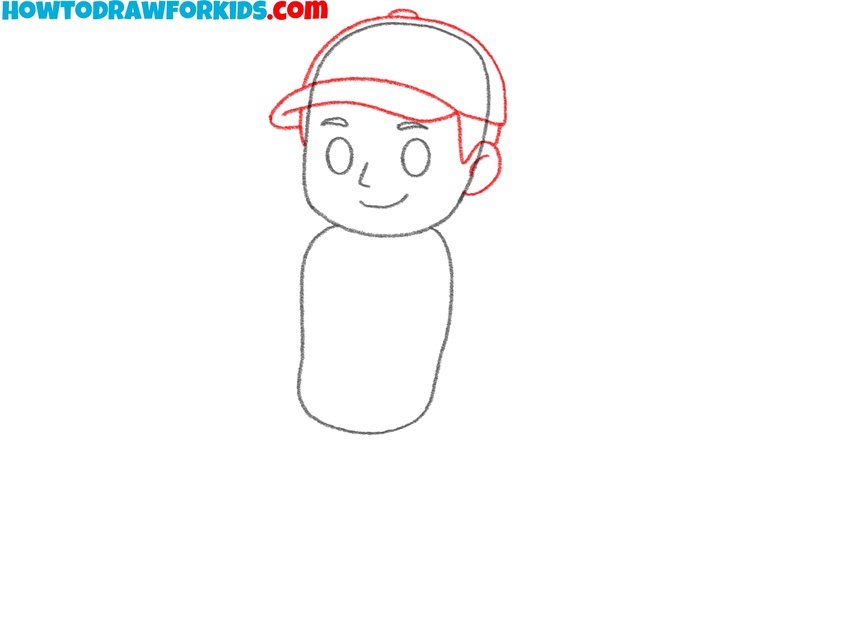
- Add the helmet or cap, ears, and hair.
To draw the baseball cap, outline the curved brim that stretches over the forehead. Then draw the rounded top of the hat following the head’s contour. Add a small button-like detail on top to complete the cap. The ear should appear below the hat line. Also, add the hair below the cap.
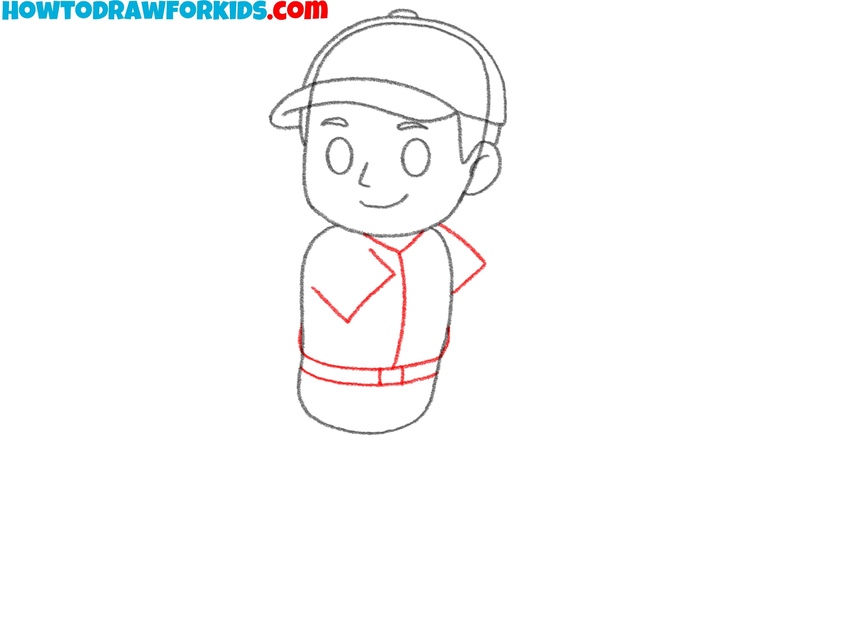
- Sketch the upper uniform of the athlete.
Move on to the player’s torso and upper uniform. Starting from the base of the neck, sketch two curved shapes for the shoulders and shape the shirt with soft contours following the body form. Add a V-shaped collar or a button-down line in the center to draw a jersey. Below the shirt, draw horizontal lines for the baseball player’s belt. Add a small rectangle for the buckle.
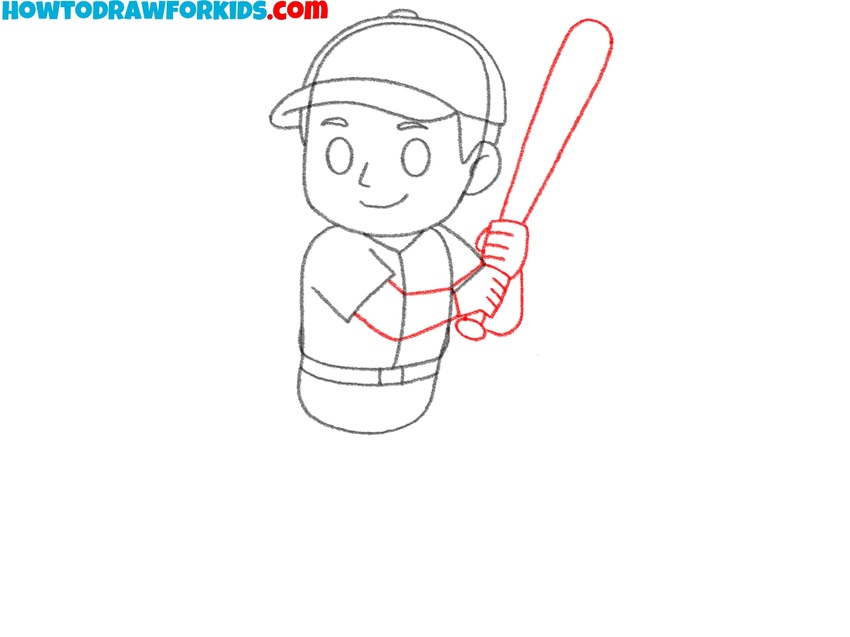
- Shape the arms and baseball bat.
From each shoulder, sketch the arms using elongated cylindrical forms to represent the upper and lower sections. The arms should bend at the elbow to hold the bat. Draw the hands with small oval shapes at the ends. Between them, draw the baseball bat – a long shape that thickens toward the top. Include a knob at the handle’s end. Check the direction of the bat. Fingers can be sketched with short curved lines.
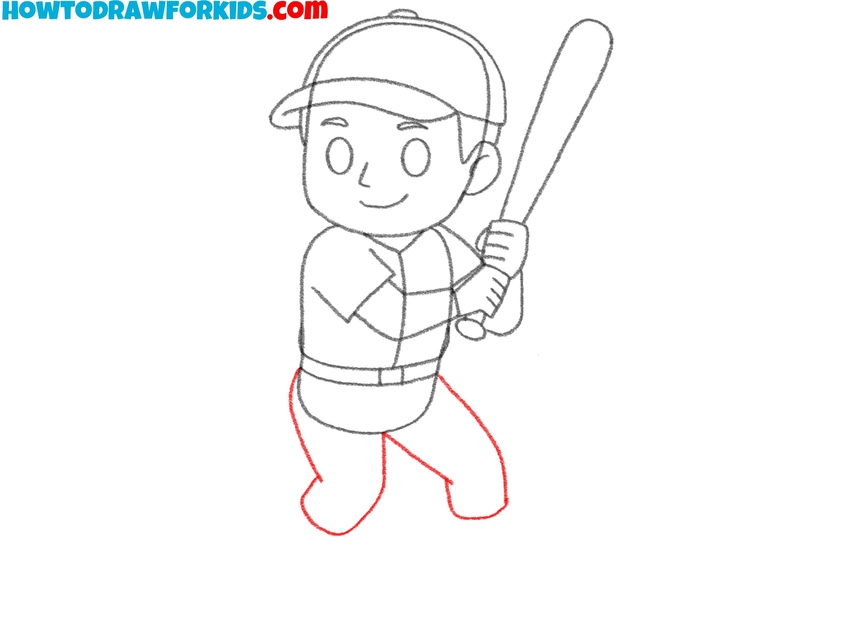
- Sketch the upper legs and knees.
Draw two long shapes for the thighs of the player. The front leg should step forward, while the back leg remains behind. Here, you can also add rounded knee caps. Connect the legs to the belt smoothly. You can also indicate slight fabric folds around the knees and belt where the baseball pants stretch or crease. Don’t draw the legs parallel; a natural athletic pose always has one leg shifted.
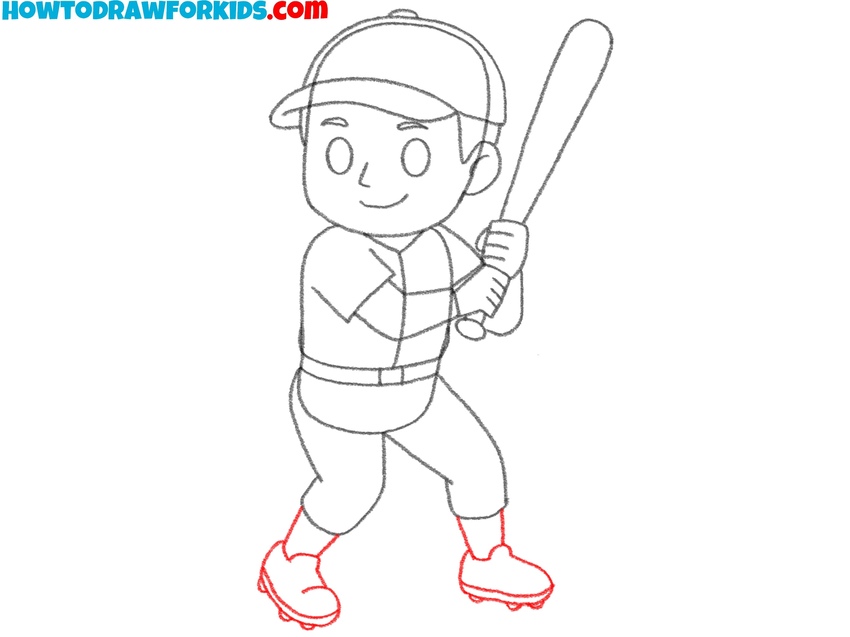
- Draw the baseball socks and cleats.
Illustrate cleats with small outlines, trying to make them look simple. First, carefully draw the ankles, following the lines of the legs. Next, draw the upper part of the baseball player shoes, then outline the soles and the spikes with small round shapes. Adjust any uneven angles in the legs.
- Erase extra lines and finalize the player’s form.
Carefully go over the entire baseball player sketch, tracing and darkening the final outline with more clean, confident lines. Remove any construction lines you drew earlier, the shapes used for the head, body, and limbs that are no longer needed. Double-check the overall proportions of the sketch one last time. Simplify any extra marks to keep the character readable and clean. A good tip is to slightly thicken the outline.
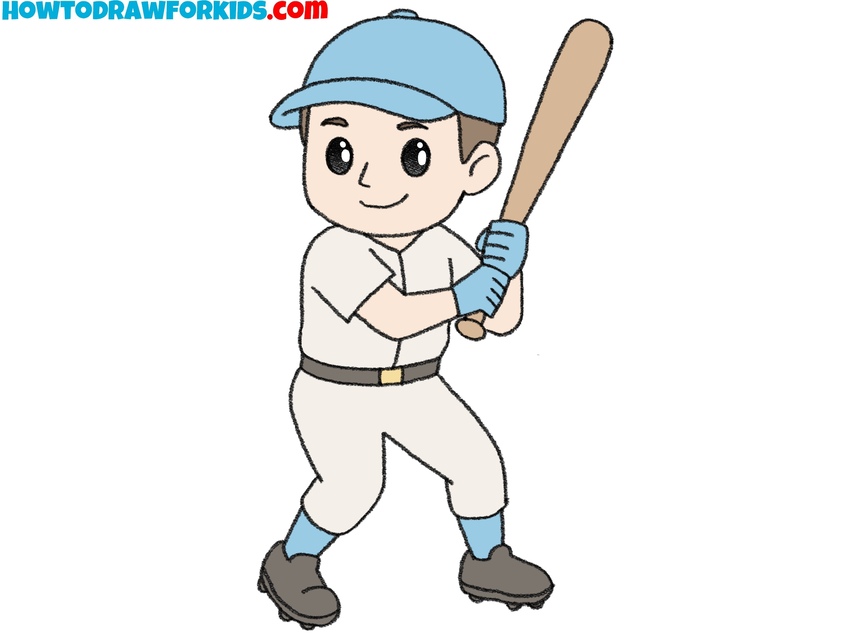
- Finish the sports figure drawing with coloring.
Take blue to paint the cap and socks, use beige or white for the uniform, brown for the bat, and skin tones for the face and hands. You can add small accents like shadows to make the player look more three-dimensional. Avoid over-saturating the colors.
Watch the Full Video Tutorial
Easy Baseball Player Drawing Tutorial
In this additional tutorial, you can see how to sketch a baseball player in a ready-to-swing pose. The character is drawn with even more simplified shapes.
The lines are very simple and curved. The drawing shows the main elements of a baseball player in a very basic form.
Construct the outline of the head using a rounded curve, then attach the baseball helmet using intersecting curved lines. Outline the upper body and shoulders, making the torso tilted forward.
Sketch the arms bent toward the chest, and draw the hands gripping the bat firmly. Extend the legs in a wide stance with one foot turned outward. Add the details of the uniform, including the collar, belt line, and simple shoes.
Draw the bat with light guidelines and refine its shape to keep proportions even. Add facial features inside the head shape and review all lines before finalizing. Once complete, color the baseball player drawing using simple tones for the clothing, bat, and helmet.