How to Draw a Bear
On this page, you will find four different yet simple step-by-step methods demonstrating how to draw a bear, the king of the forests.
How to Draw a Bear: Basic Information
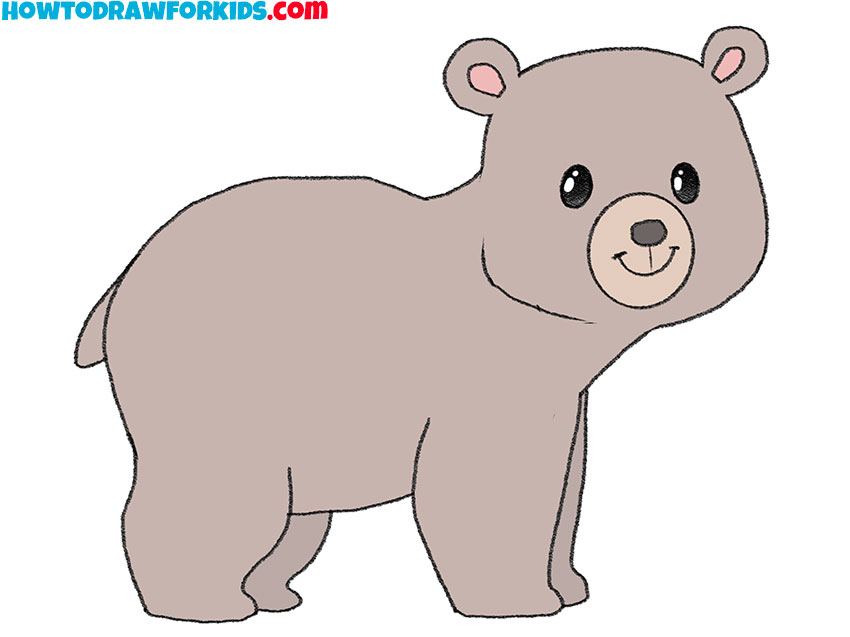
As mentioned, today we will draw a bear, illustrated in a simplified and cute style. First, we will cover the basic lesson, followed by three different methods, each providing an additional way to depict the bear.
The simplified style is suitable for children and beginners. To help a child or beginner learn to draw, it is important not to overload the subject with details. In this tutorial, we will draw a bear, avoiding unnecessary elements and focusing on the key details that make the drawing recognizable.
When discussing the bear specifically, its key features include a round, large body, distinctive stance, and recognizable facial and head characteristics. Additionally, the bear has a characteristic color scheme that should be reflected in the drawing. These aspects will be covered in this tutorial.
To reinforce the knowledge gained, we will go through three additional instructions. These lessons are really simple and present different styles and step-by-step sequences. This variety ensures that you can practice and compare different techniques, helping you understand how slight changes in style and sequence can impact the overall result.
Bear Drawing Tutorial
Materials
- Pencil
- Paper
- Eraser
- Coloring supplies
Time needed: 30 minutes
How to Draw a Bear
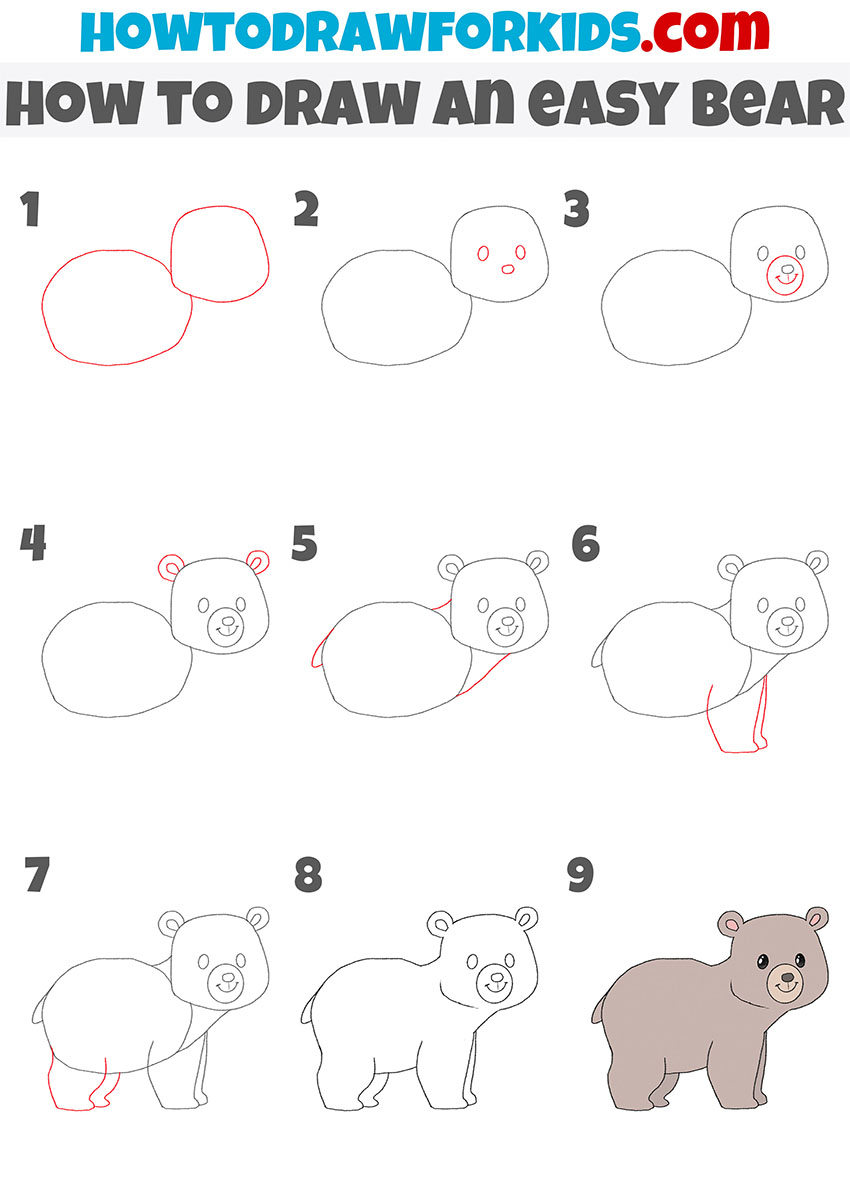
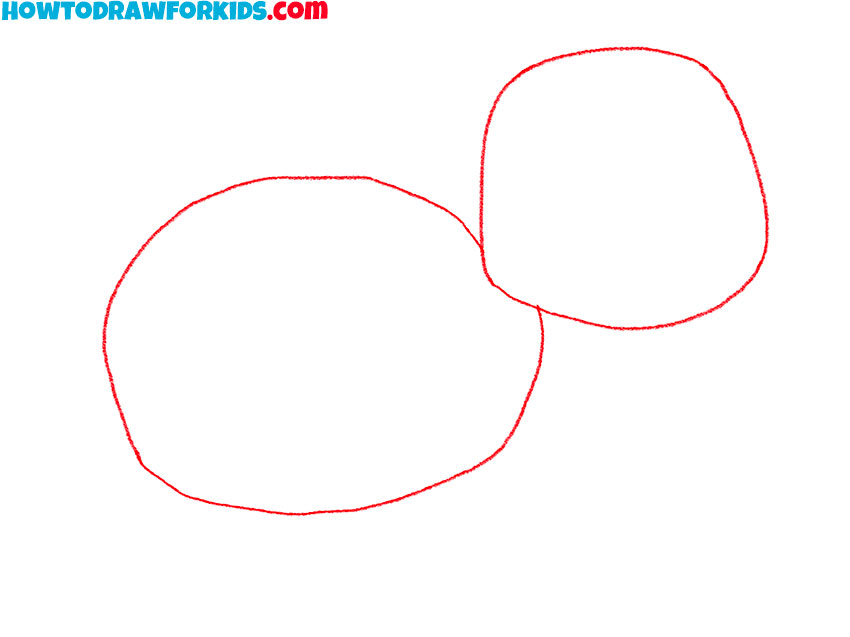
- Draw the basic body shapes.
Begin by sketching two overlapping ovals. The larger oval will represent the bear’s body, while the smaller one will form the head. The ovals should slightly overlap at one point. Try to keep the lines light, as this will make it easier to adjust later on.
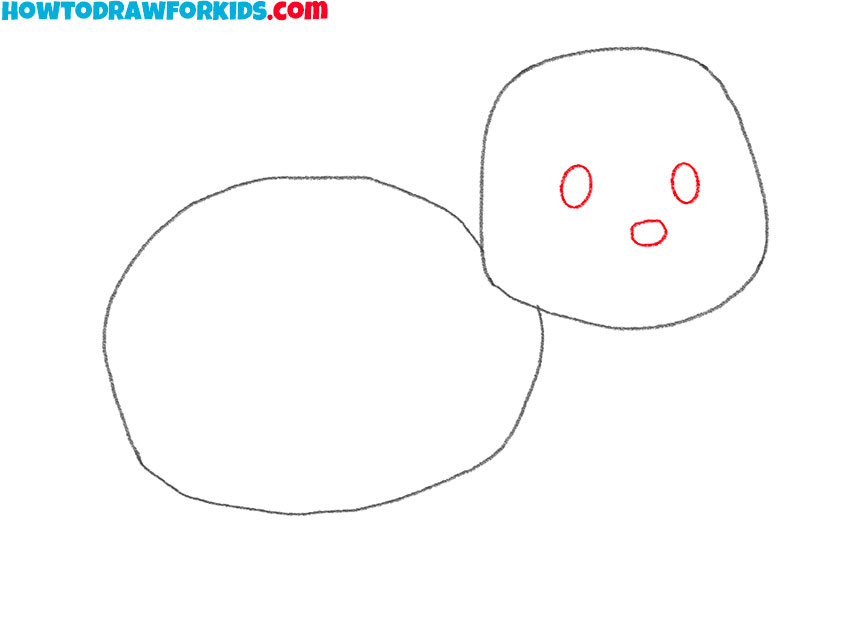
- Add the facial features.
Draw two small circles for the eyes within the head oval. After that, place a small circle in the lower part of the head oval to mark the nose. You can change the position and size of these facial parts to give your bear drawing a more unique look.
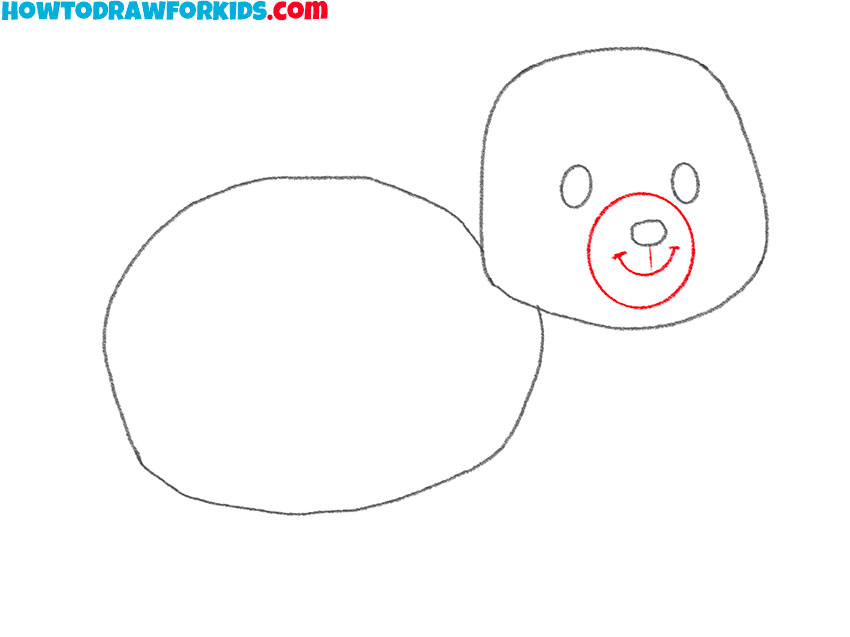
- Sketch the nose and mouth.
Below the nose, add a curved line for the mouth. Then, draw the outline of bear’s snout around the nose and mouth. Don’t forget to draw a small line that goes from the nose to the center of the mouth. This small detail will give your bear’s face a more natural and convincing look.
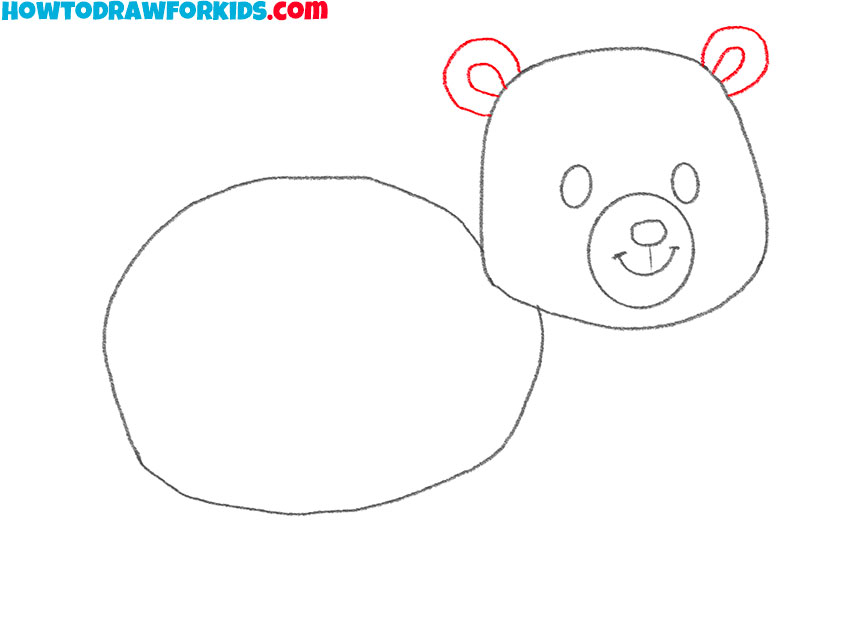
- Add the ears.
Next, draw the bear’s ears by placing two round shapes on top of the head. The ears are small, rounded, and simple, which keeps the drawing process really easy for beginners. Be sure to draw a smaller circle inside each ear to represent the inner detailing of the ear.
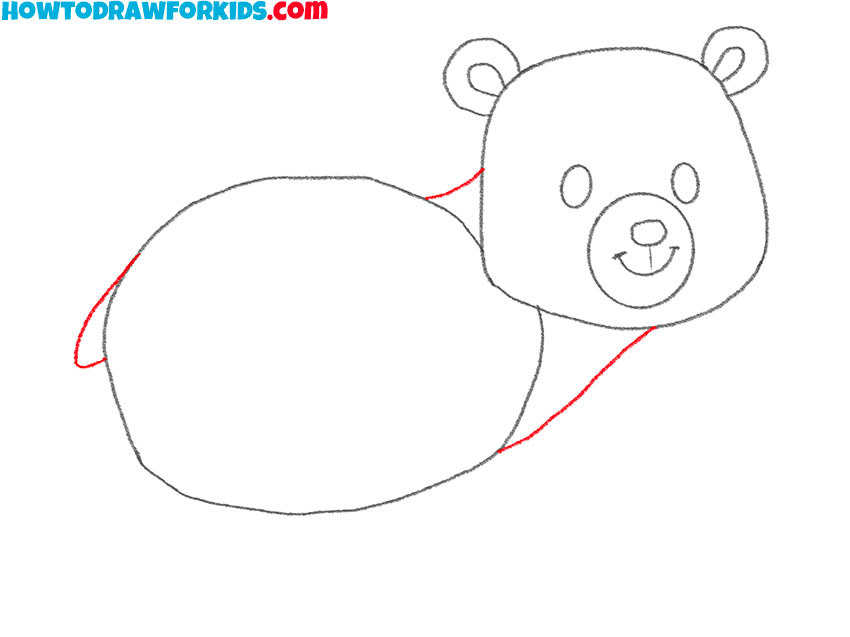
- Add the neck and tail.
To connect the head and body more naturally, draw two curved lines from the side of the head down to the body, creating the bear’s neck and shoulder area. After that, draw the tail of the bear as a small geometrical shape the rear part of the body.
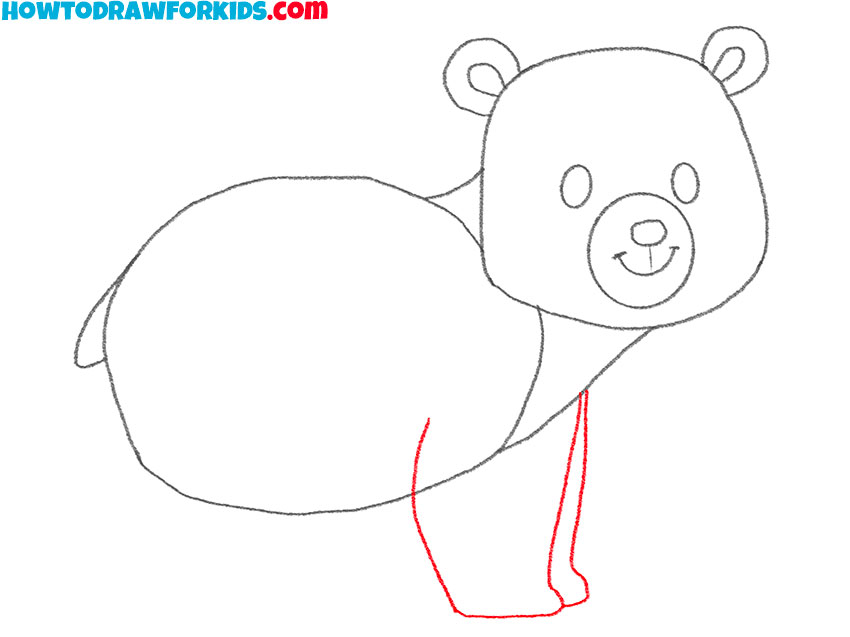
- Add the front legs.
At this stage, start drawing the bear’s front legs. From the bottom of the body, draw slightly curved lines downward to form the legs. The legs of the bear should be thick, so try to convey this at your sketch. Add small feet at the base of the legs with simple rounded lines.
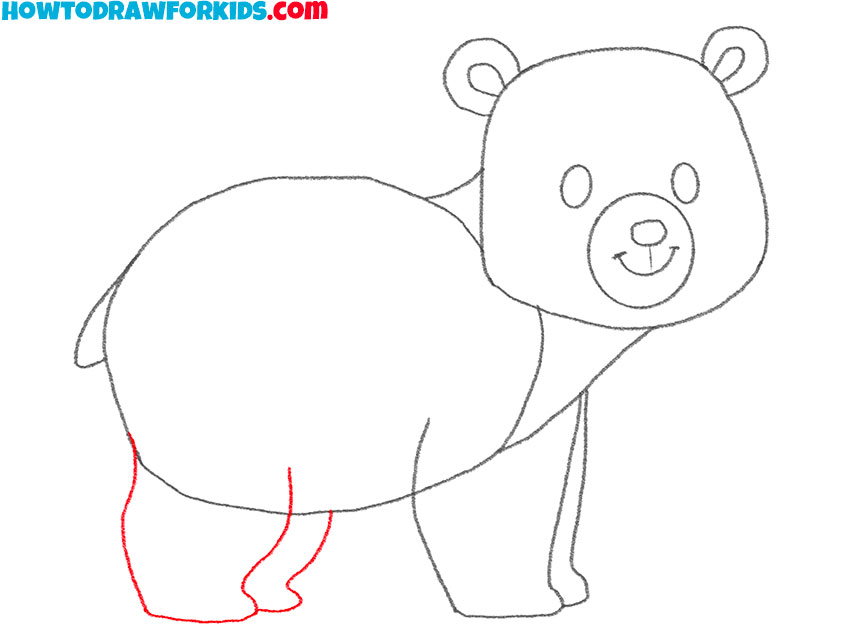
- Draw the hind legs.
Now, let’s move on to drawing the hind legs of the bear. The hind legs should be larger than the front legs and positioned at the back of the body. Use rounded lines to create the legs, and sketch simple shapes at the bottom to form the back feet. The hind leg is slightly bent to show the bear’s weight distribution.
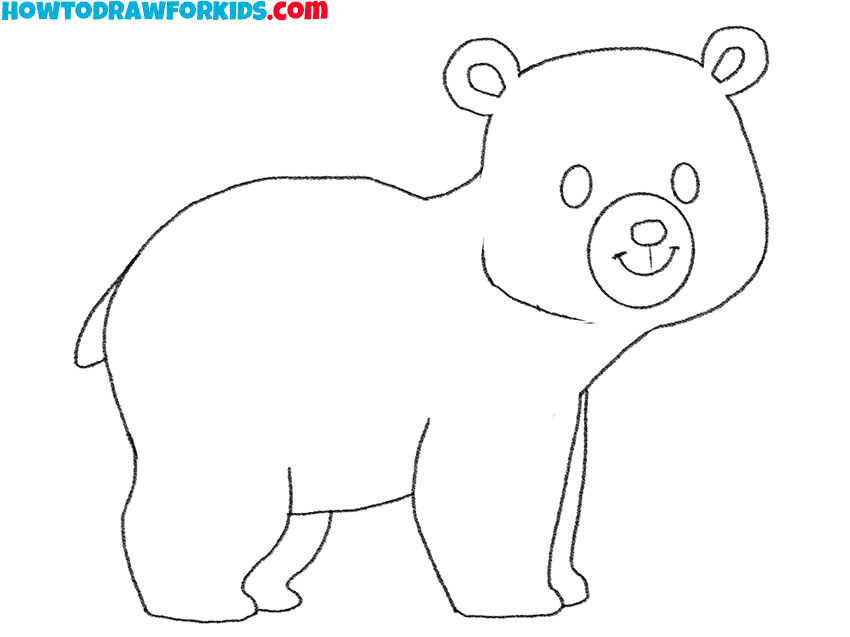
- Finish the sketch and polish the outlines.
Go over the bear’s sketch with a darker, more defined line to finalize its shape. Carefully erase any remaining guidelines that were used to build the initial structure. Smoothen out the lines of the sketch, and give them more clean finished look.
- Color the bear.
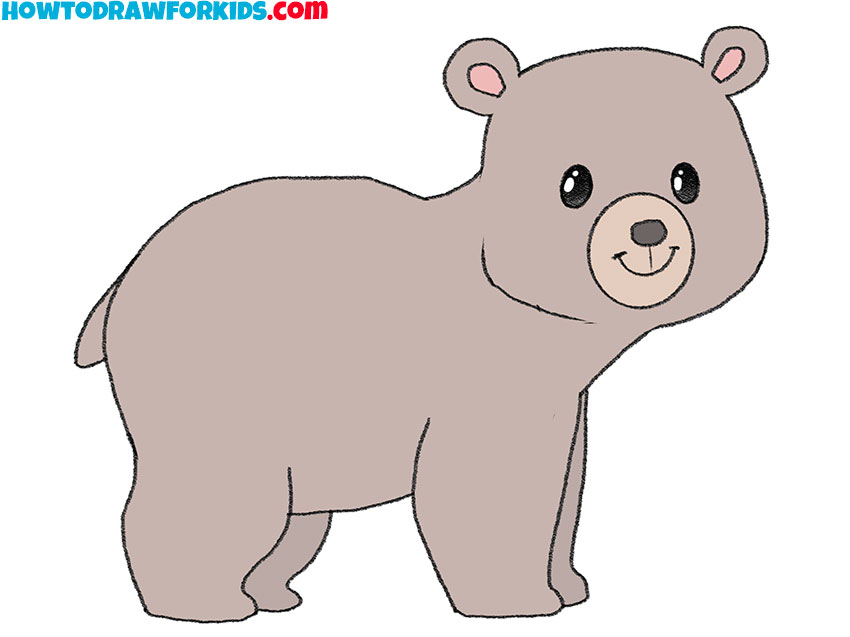
Now, add color to the bear by filling in the body with a light brown or grey shade, while the nose and inner parts of the ears can be colored a darker tone. The eyes can be darkened, and a small white dot can be added to each eye for a highlight effect.
Additional Content
Great news for beginner artists! Free worksheets for this bear drawing lesson is available. It’s a condensed version of the tutorial, which can be downloaded and used for drawing offline.
In addition to the steps in the tutorial, the file also includes a coloring page, a tracing worksheet, and a grid drawing worksheet. These additional materials will help you further practice and develop your bear drawing skills.
How to Draw a Bear: Additional Techniques
I’ve created several additional simple techniques for drawing a bear, each designed to give you more practice and help improve your drawing skills.
By practicing these different styles, you’ll be able to track your progress and improve your work. Now, grab a pencil and start drawing to turn your bear sketches into completed drawings.
How to Draw a Bear for Kindergarten
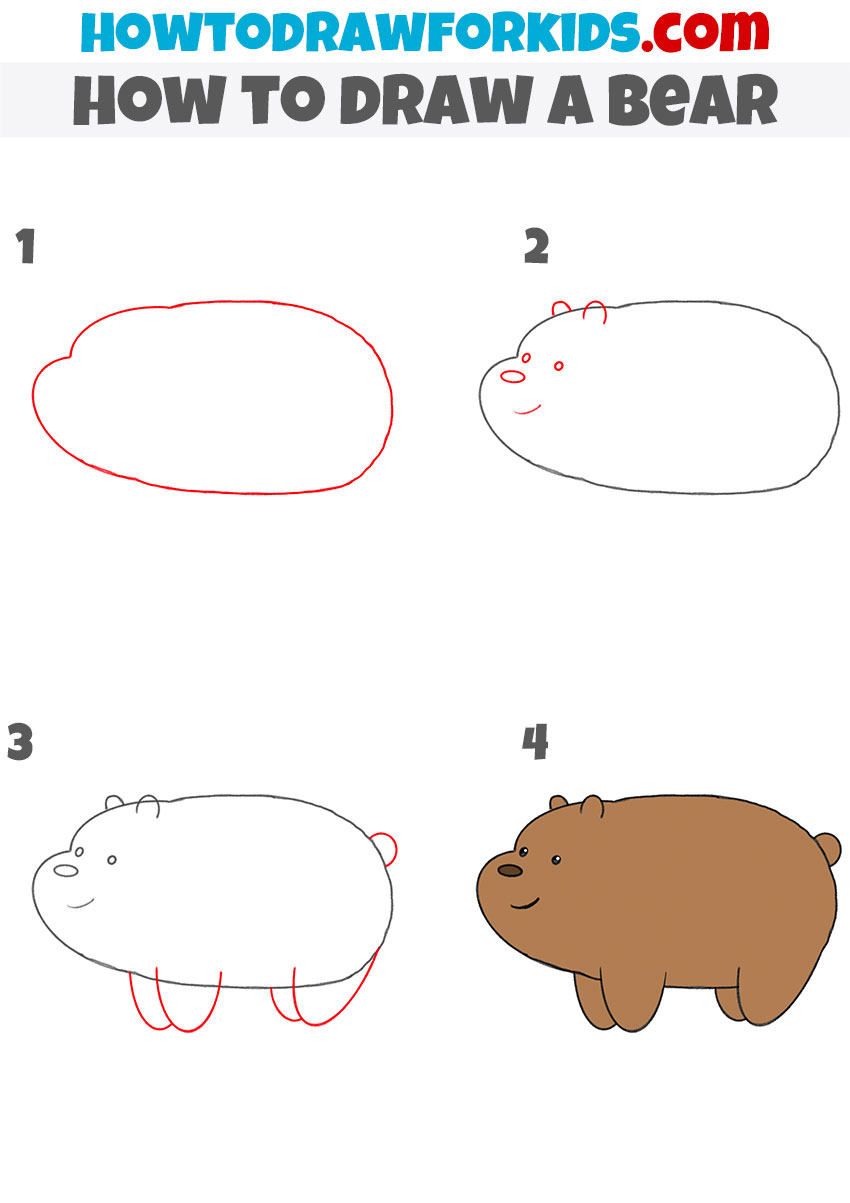
The second drawing method is a more simplified version of the first, ideal for kindergarten students due to its reduced number of steps. Instead of constructing the body and head separately, this method combines them, simplifying the drawing process.
Sketch the basic shape of the bear’s body. This can be done by drawing a large oval with a slightly rounded top to represent the body. After this, draw two small rounded ears on top of the head and add facial details by sketching simple eyes, nose, and a smiling mouth.
Move on to draw the bear’s legs by adding simple rounded shapes below the body. Add a small tail at the back, keeping it simple and rounded. Once the basic outline is completed, go over the drawing, refining the lines and ensuring the bear’s form is smooth and clear. Lastly, color the bear using a light brown or any preferred shade to finish the drawing. Your simplified bear is now complete.
Alternative Bear Drawing Technique
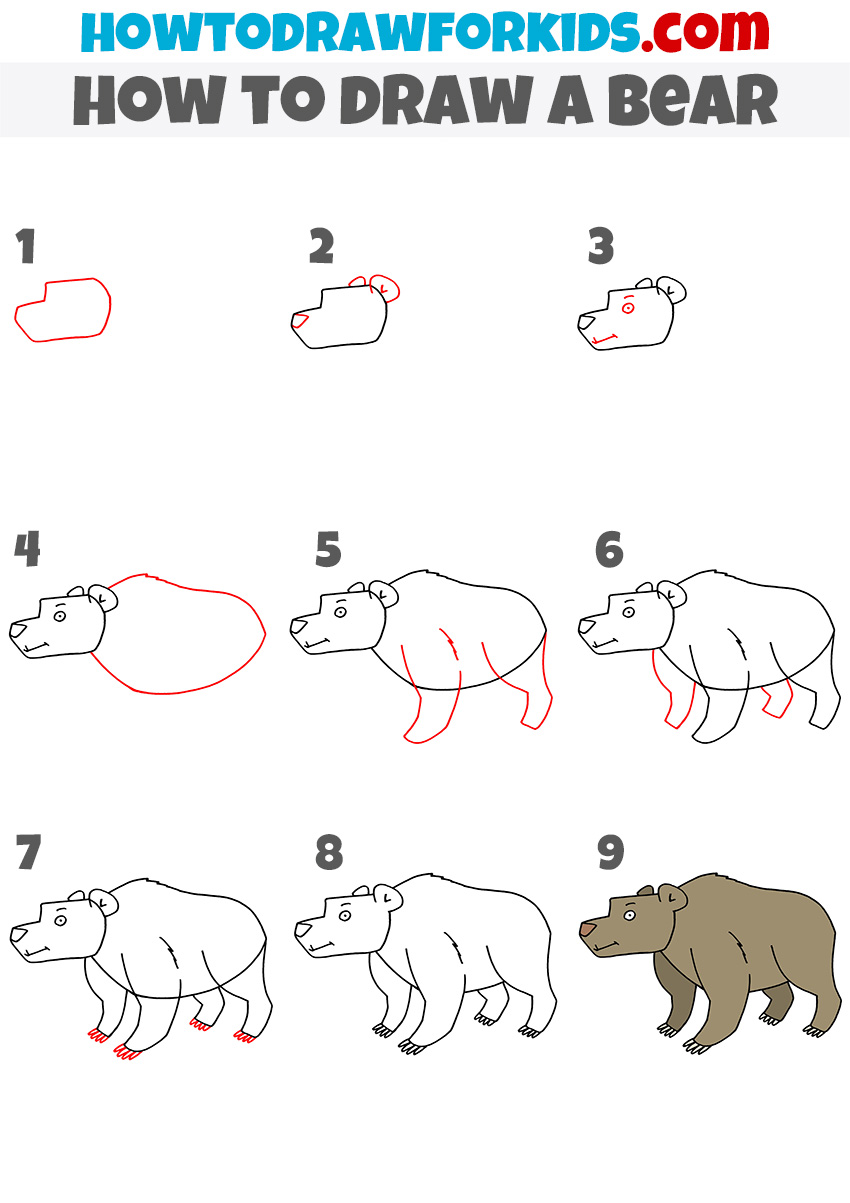
This drawing technique provides a more realistic depiction of a bear compared to the first two methods. Additionally, this tutorial follows a completely different sequence of steps. Instead of beginning with circles and basic sketches, this method focuses on drawing the bear detail by detail.
Begin by drawing the bear’s head, using a boxy shape for the general outline. Next, add the ears, which should be small and rounded on top of the head, and draw the nose and mouth details. Add a simple eye and a small curved line for the mouth.
Once the head is complete, draw the large, rounded shape for the bear’s body. Move on to sketching the legs, starting with the front legs and then the back legs, using slightly curved lines to represent their natural shape. Add the bear’s paws with simple lines for the claws. Refine the body shape, adding a few lines for extra detailing. Once the outline is complete, you can color the bear using a natural brown shade to finish the drawing.
Simple Bear Drawing Technique
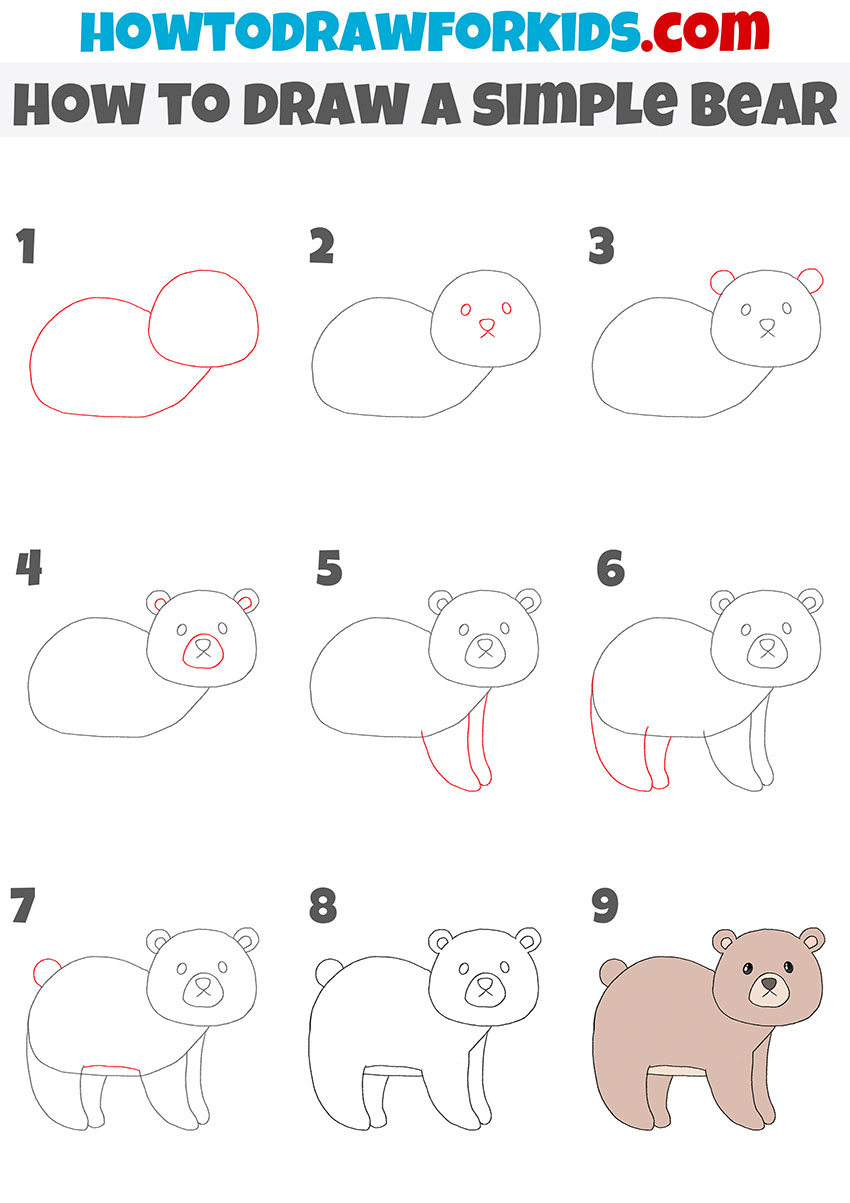
The third method for drawing a bear is a more simplified alternative than the first one, but a little more detailed than the version for preschoolers.
At first, draw two overlapping ovals, one for the bear’s head and one for its body. Then, add two small circles inside the head oval to indicate the eyes, and place a small, upside-down triangle in the lower part of the head for the nose. Add a simple curved line for the mouth. Next, draw two rounded ears on top of the head.
Now, outline the snout by drawing an oval shape around the nose and mouth area. Begin adding the legs by drawing two long, curved lines from the body downward. Add two more curved lines to complete the bear’s back leg. Finally, draw a small round tail at the back of the body and finish by refining the lines to create a smooth outline. Once the outline is complete, color the bear using a light brown or any preferred shade. Your simple bear drawing is now ready.
Conclusion
So, you’ve completed drawing a beat successfully. My website offers many other drawing tutorials and articles about art for beginners. For example, you can try lessons like drawing a fox or train your skills in drawing a bunny next.
Make sure to follow on social media to stay updated on the latest drawing activities, tips, and exclusive content shared only with followers. Stay tuned for more tutorials, as there’s always something new to create.

