How to Draw a Cave
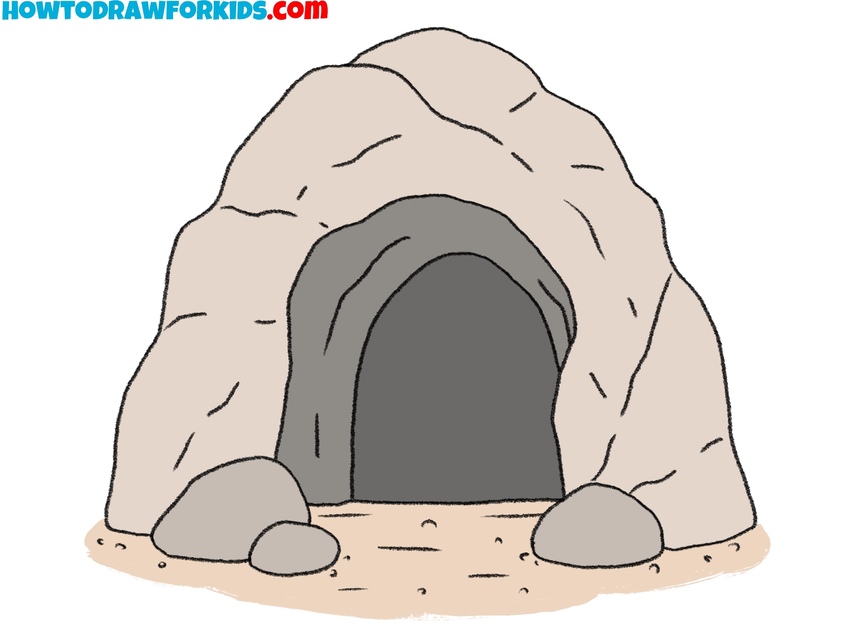
If you need a cave drawing for a background or setting, this tutorial shows how to draw a cave with just a few curved lines and stone shapes.
How to Draw a Cave: Introduction
Drawing a cave is a simple way to practice working with organic, uneven forms. Unlike buildings or geometric objects, a cave doesn’t follow strict lines or symmetry. This tutorial on how to draw a cave is a good choice for beginners who are still learning how to draw freehand natural shapes without worrying too much about precision.
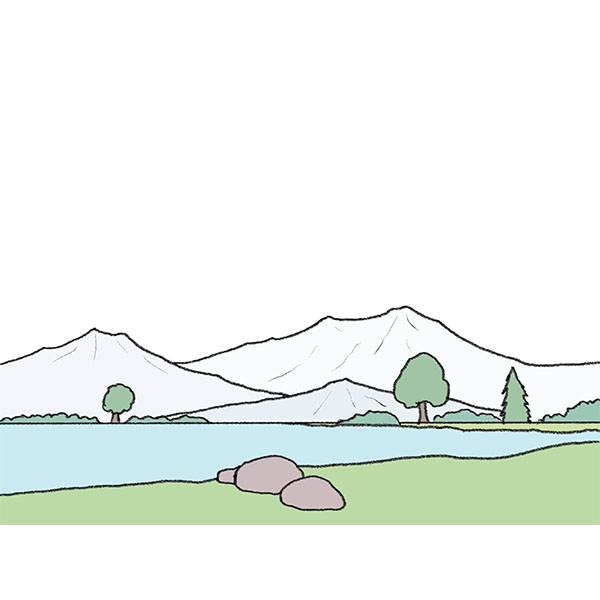
This type of simplified drawing is useful when creating background elements that need to look finished but not too complex. The cave fits well into scenes with other natural elements like trees, hills, or animals. You can reuse the same basic shape and modify it slightly to fit other parts of your picture.
But at the same time, don’t try to make the drawing too simplified. Adding simple surrounding elements like rocks or dirt helps make the cave look more complete. These shapes can be irregular and don’t need to be perfectly placed. The goal is to give the impression of a natural setting without adding too much detail.
Cave Drawing Tutorial
Materials
- Pencil
- Paper
- Eraser
- Coloring supplies
Time needed: 25 minutes
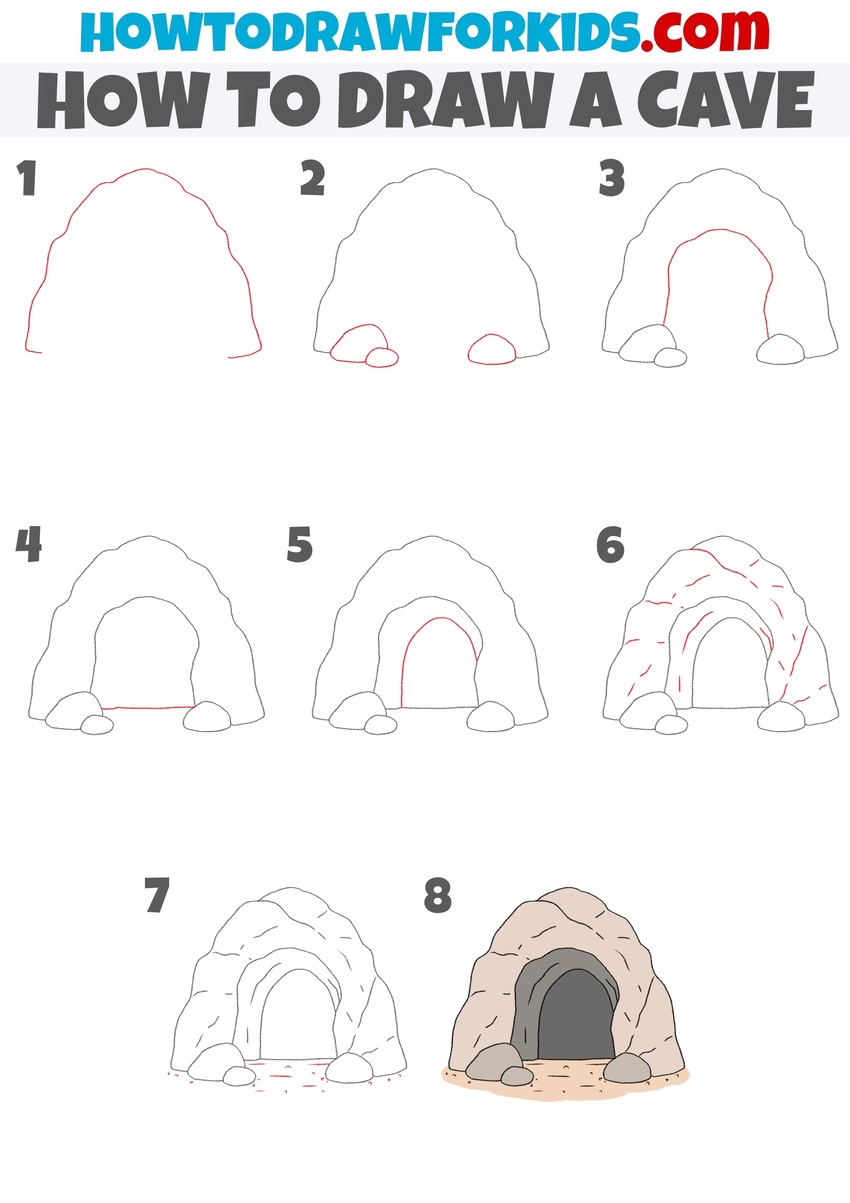
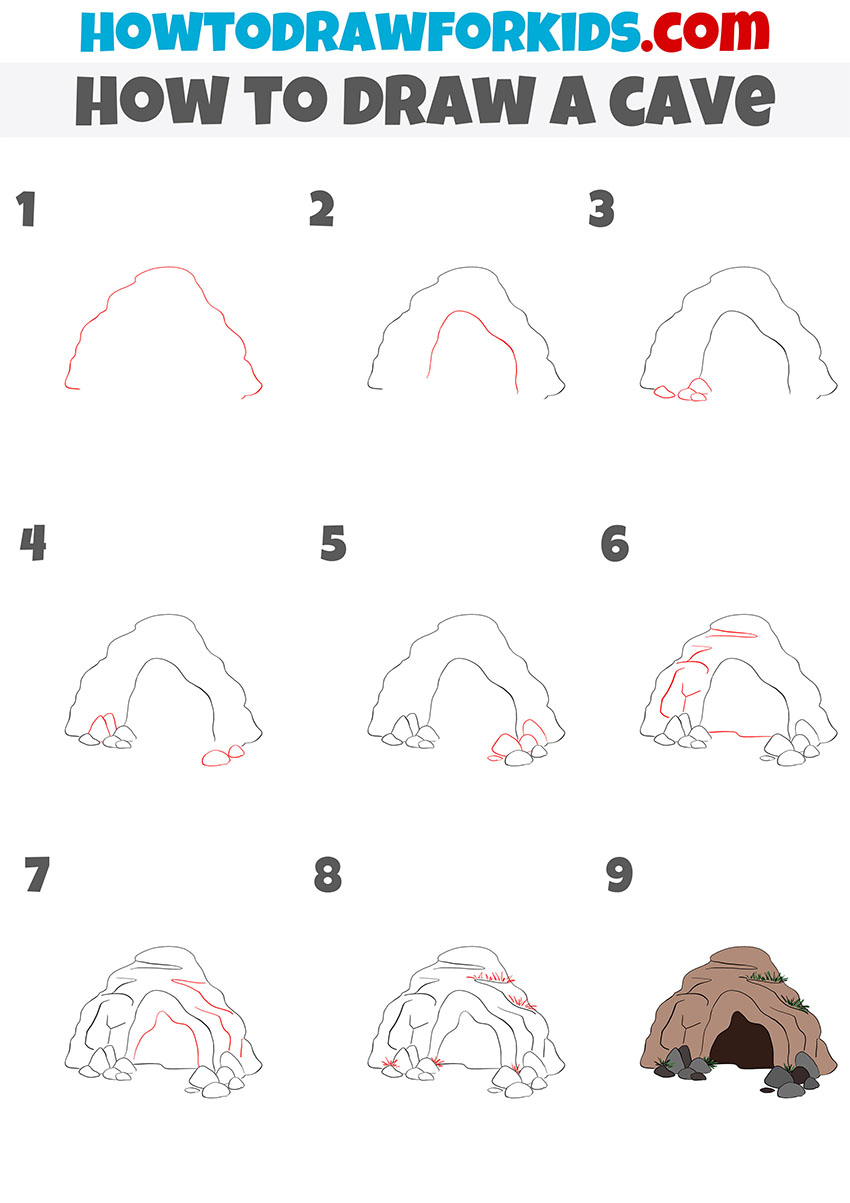
How to Draw a Cave
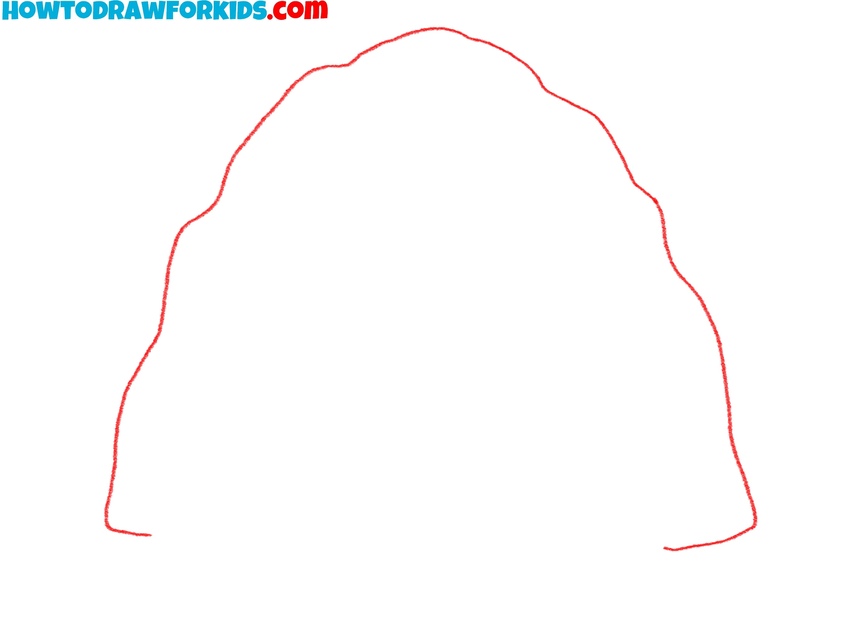
- Sketch the outer cave structure.
First, sketch a rough arch-like shape for the outer rock formation. The contour should not be symmetrical. Vary the curve by using short, bumpy lines to create a rocky texture. Avoid making the arch too smooth – irregularities help make the cave drawing look more like natural stone.
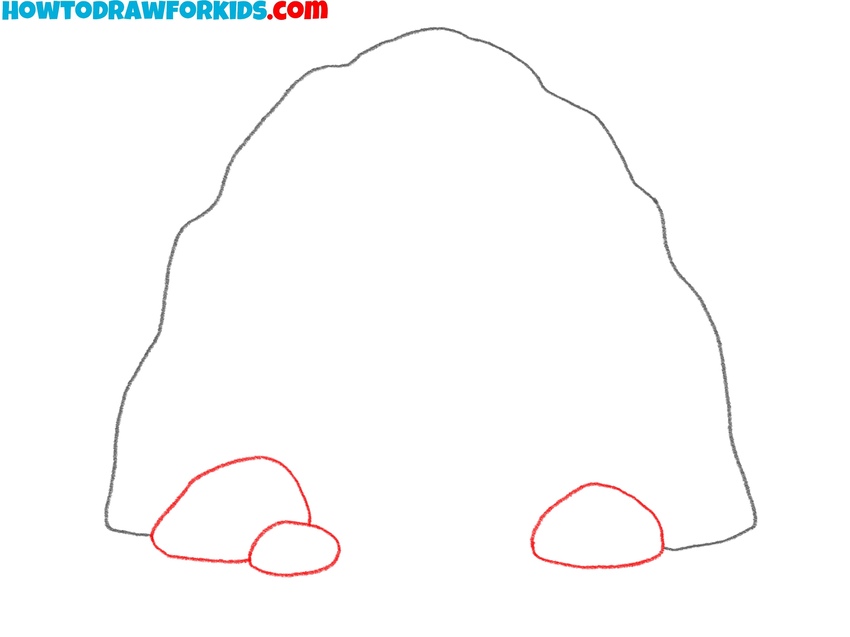
- Draw stones near the cave’s entrance.
Draw two large stones at the base of the cave. They should overlap the bottom edge to make the scene look more three-dimensional. Drawing stones, use simple oval and egg-like shapes, but vary their size and placement. You can place three or more rocks or change their shape to more angular forms.
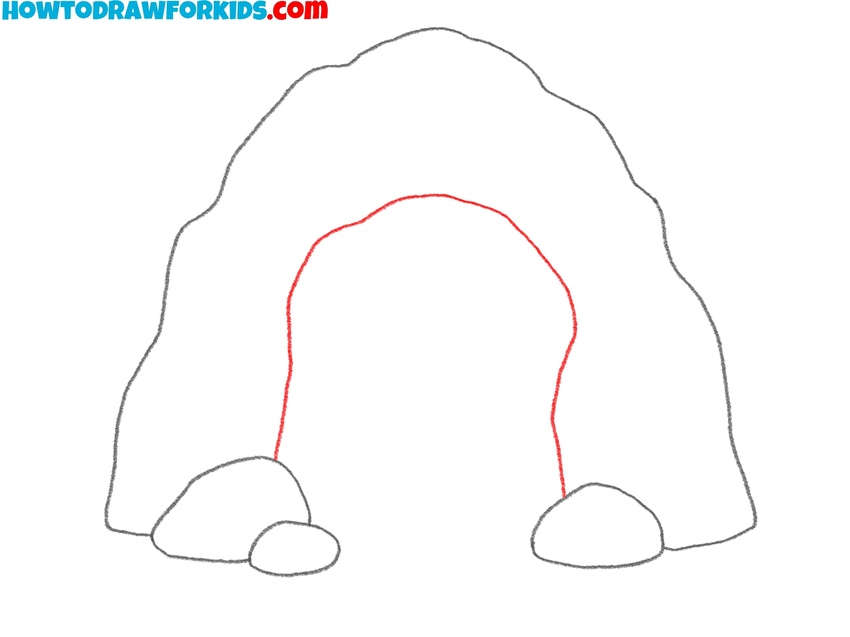
- Sketch the front of the tunnel.
Now, draw the cave’s opening by sketching a large arched line in the middle. It should begin and end near the two foreground rocks to look like it sits behind them. Use an uneven curve to match the irregular style of the cave. You can make the entrance taller and narrower or lower and wider.
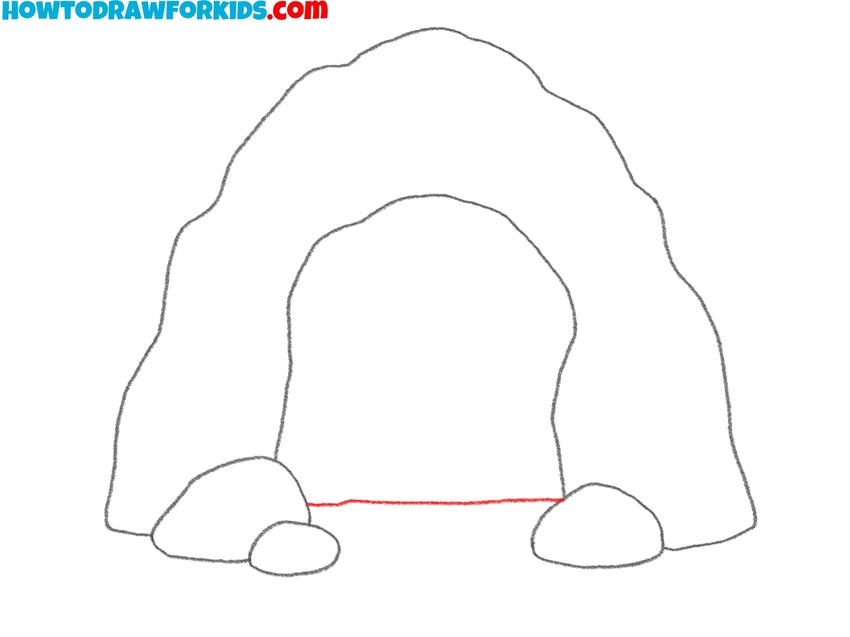
- Draw the floor of the cave.
Connect the bottoms of the rocks and the cave entrance with a horizontal ground line. You can keep it mostly straight or add slight curves for a more natural terrain. Optionally, you can place some small pebbles or cracks along the floor for extra detail.
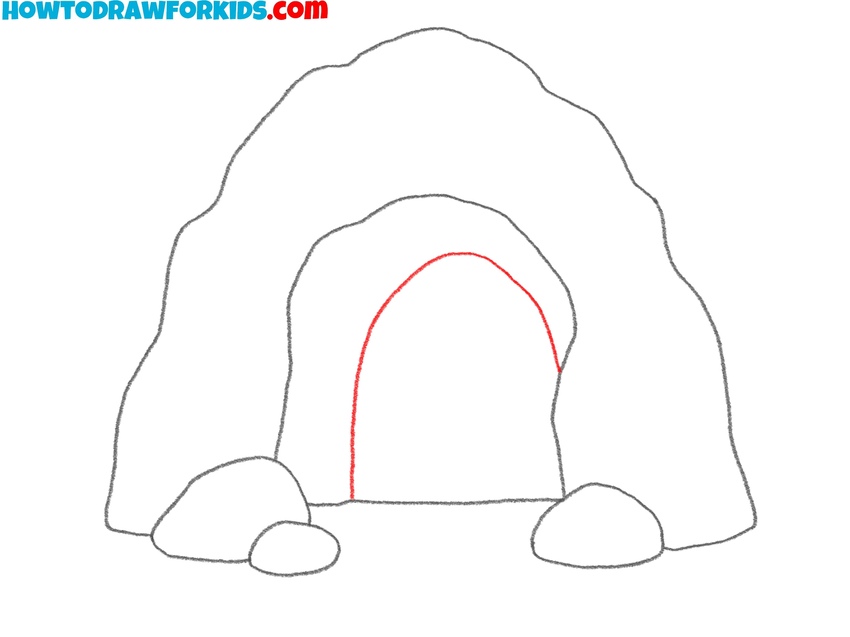
- Sketch the inner cave walls.
Sketch another arched shape inside the entrance to make the cave drawing look deeper. It should roughly follow the shape of the first entrance but smaller and inset. You can shift the arch even more to the side or draw it centered.
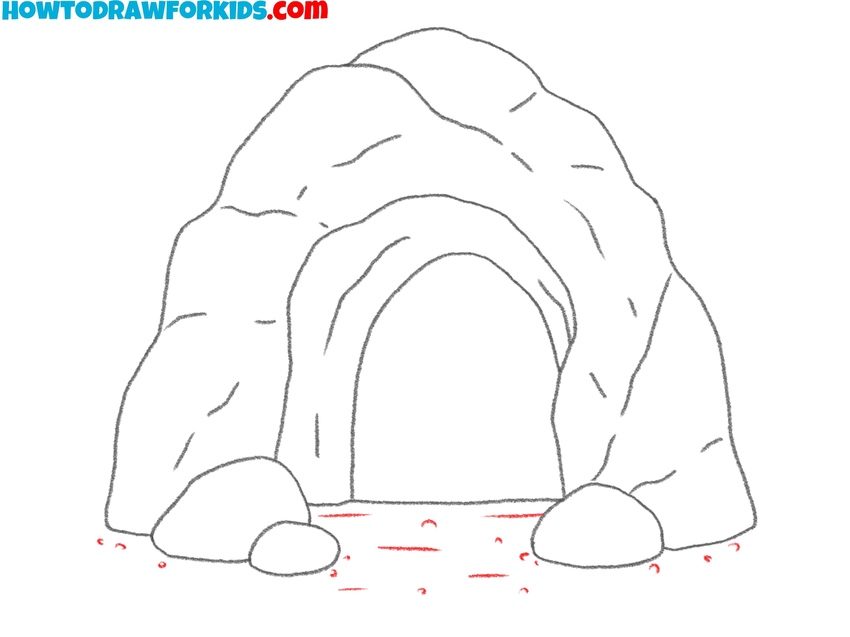
- Draw cracks and surface texture.
Draw short, slightly curved lines across the outer and inner cave walls to represent surface cracks and layers in the rock. Don’t overfill the surface to avoid clutter. You can also add texture with stippling or dotted marks in certain places.

- Sketch ground texture details.
Add small scattered dots and lines near the cave’s base to create dirt, sand, or gravel. Vary the placement, keeping more marks closer to the cave and fewer farther out. If you want a forest setting, you can draw some grass tufts instead. For a volcanic cave, replace ground dots with cracks and charred areas.
- Add color to the rocks and ground.
Start by filling the main parts of the cave with a light brown or sandy tone to give it a natural rock look. For the inner part, apply a dark gray or black to show the deep shaded interior. The stones around the entrance can be colored in various shades of gray. For the ground, you can use a muted beige.

Simple Cave Drawing Tutorial
This simple cave drawing tutorial is an additional version of the main cave lesson. It keeps the structure very minimal and simplified while still showing the most important elements like the rock shape, entrance depth, and some foreground details.
The shape and perspective are the same as in the main version, but the level of detail is reduced to make it easier for younger kids or absolute beginners to follow. A few blades of grass and simple rock outlines are used in place of heavy crack textures, and the coloring is more flat.
Start with the outer shape of the cave. Keep the outline slightly wavy to imitate a natural rock formation. Next, draw the cave entrance using a smaller arch placed inside the main shape. Add several overlapping rocks near the bottom on both sides of the entrance.
Place a few more rocks inside the opening. Continue by adding simple background stones on either side and placing curved lines. In the last detail steps, sketch a few cracks and draw grass shapes near the top and sides. Finish by coloring the cave brown, the entrance dark gray, the stones in gray shades, and the grass in a soft green tone.
Conclusion
This pair of tutorials showed how to draw a cave in two different ways. The main cave drawing tutorial gave you a more textured and detailed version with some extra lines, while the additional tutorial offered a simpler version using just essential shapes. Both versions followed the same base pose and structure, so you can see how complexity can be added or reduced depending on the style you prefer.
You can practice both methods or choose the one that matches your skill level and style. If you’re still learning to draw, the simpler version is a great place to start, and once you’re comfortable, the main version will help you to create a more natural variation.
If you have any questions, leave them in the comments. Also, share your work, let me know which version you liked more, and don’t forget to follow me on social media.


Love this, can you make a version with cave art inside of it?
That’s an interesting idea. A version featuring cave art could make a unique addition. I’ll consider creating an additional tutorial inside this one like that.