How to Draw a Standing Dog
Here, I will show you how to draw a standing dog on two legs, followed by two simple additional lessons and PDF with supplementary materials.

How to Draw a Standing Dog: Introduction
This is another lesson on drawing pets, where I’ll show you how to draw a standing dog. The lesson is simple and cute, and any child or beginner can handle this task. This tutorial is essentially an addition to my main dog drawing lesson and serves as an extra exercise for practicing sketching this animal.
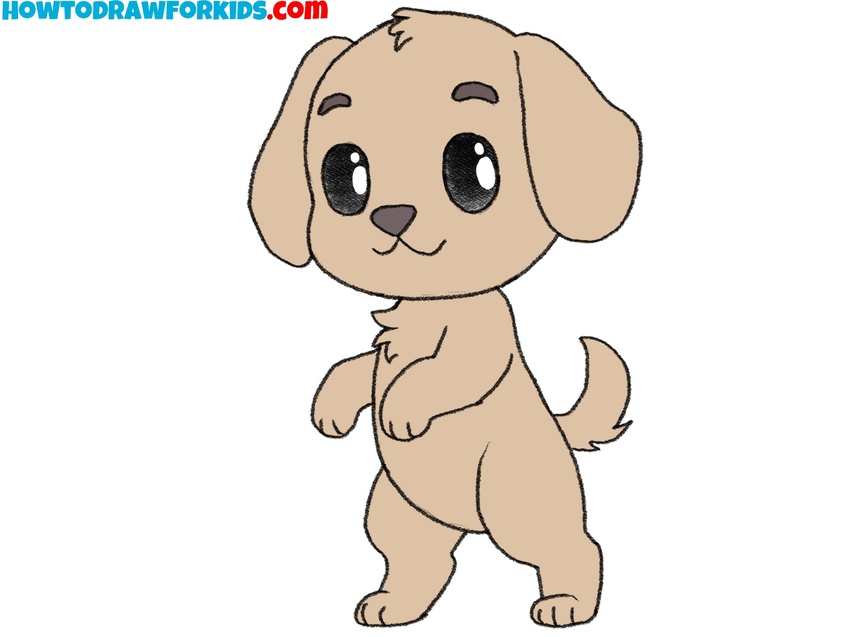
The picture shows a cartoon dog, but the same proportions can be used to draw a realistic standing dog. As you work, focus on making smooth lines and maintaining proportions. Practice each step, spend more time drawing, and you will achieve good results.
Some steps in this standing dog drawing guide are easy, while others are a bit more challenging. Be careful at each step and try to follow the lines as shown in the example. We will begin with the main parts and then proceed to the smaller details.
To make it easier for you to draw a standing dog, I have included two additional tutorials at the end of the page. These tutorials present the whole process in slightly different ways. Try both of these additional tutorials on how to draw a standing dog to see which one suits you best.
Standing Dog Drawing Tutorial
Materials
- Pencil
- Paper
- Eraser
- Coloring supplies
Time needed: 40 minutes
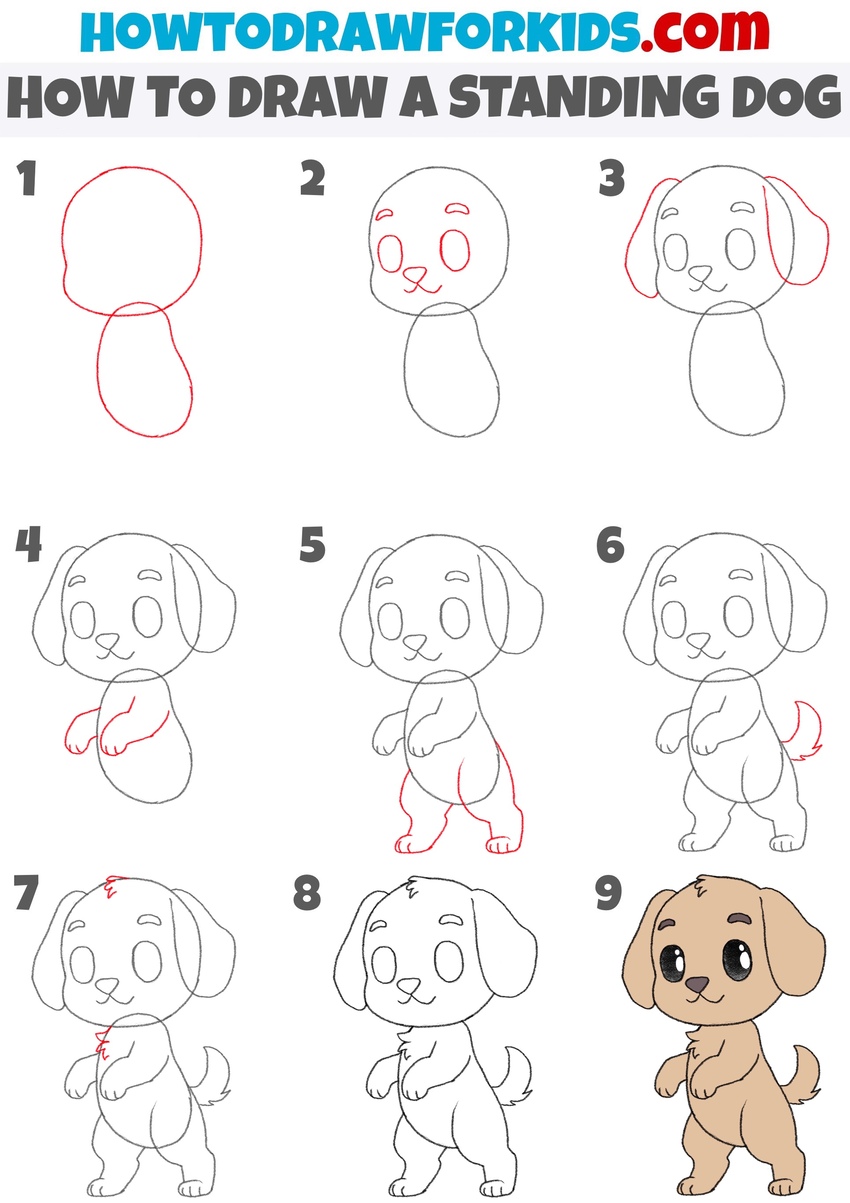
How to Draw a Standing Dog
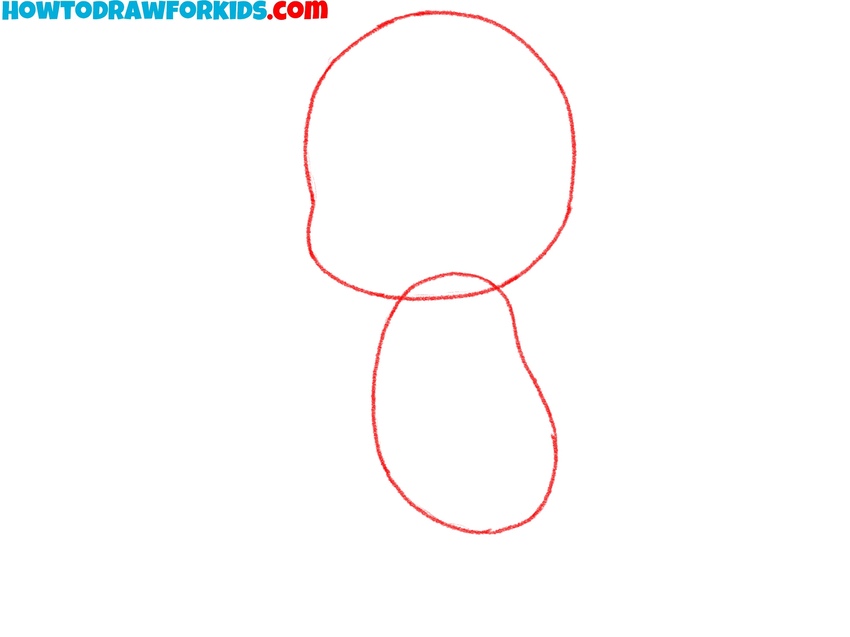
- Draw the basic shapes the standing dog.
Begin drawing a standing dog with the head, sketching a large, oval-like shape at the top. Underneath, draw a smaller, elongated shape connected to the head, representing the body. Make sure the head is proportionately larger, as this will give the standing dog a more cartoon-like appearance.
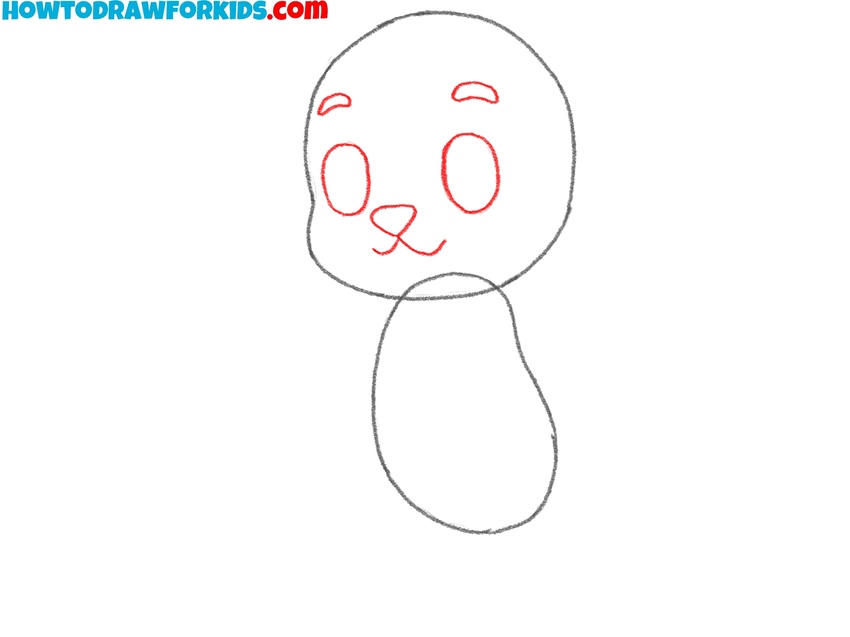
- Add the facial features.
Begin by adding two large, oval eyes near the upper part of the head. Then, draw the nose of the dog as a small oval in the center, followed by a curved line for the mouth just below it. Draw two short, curved lines above each eye to indicate the eyebrows.
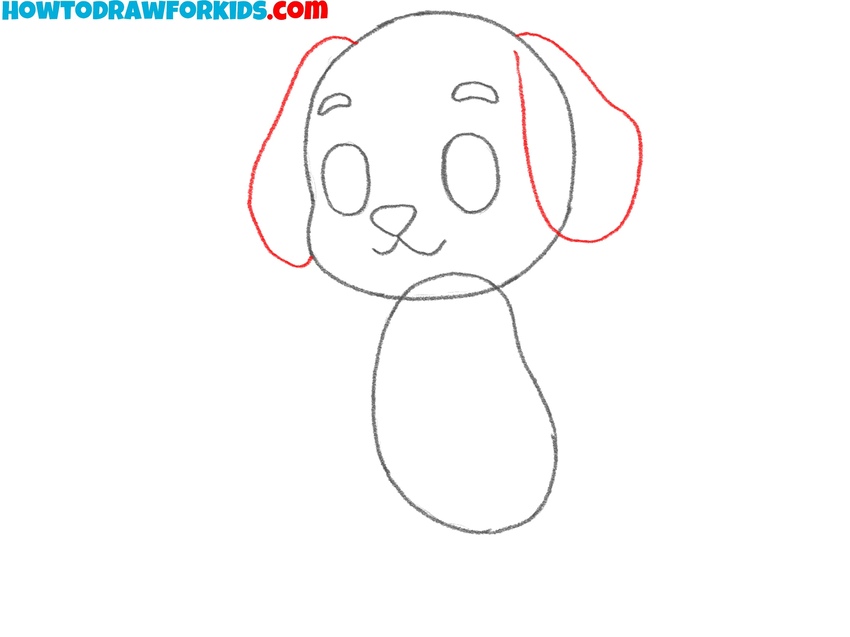
- Illustrate the ears.
Draw two large, floppy ears on either side of the dog’s head. Start the ears at the top of the head, curving them downward to create a soft, rounded look. Be sure to keep the lines smooth and rounded. You are free to draw dog ears as in my example or give them any other look.
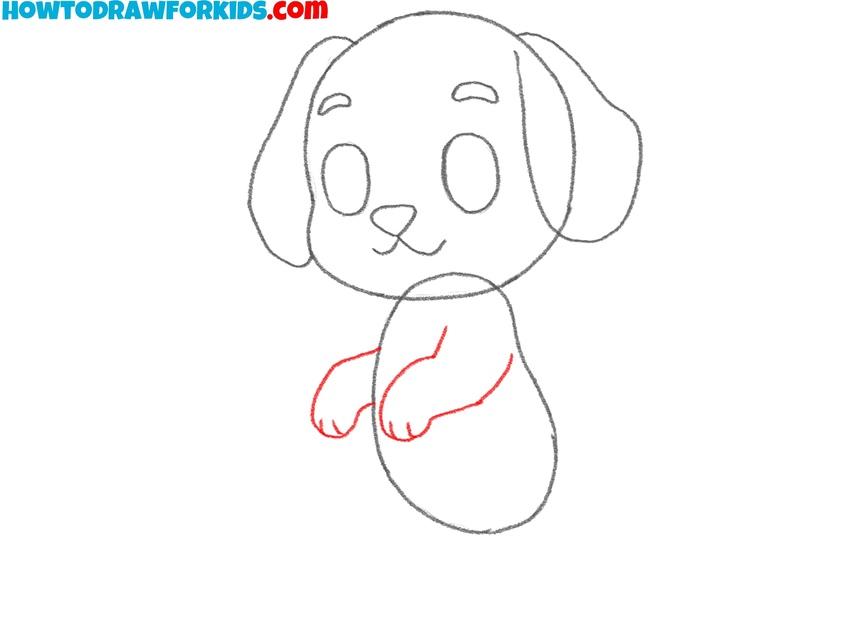
- Sketch the front paws.
With the head and ears complete, it’s time to start detailing the body by drawing the front paws. From the upper part of the body, draw two short, curved shapes that extend slightly forward. These shapes should be rounded at the ends, creating the paws.
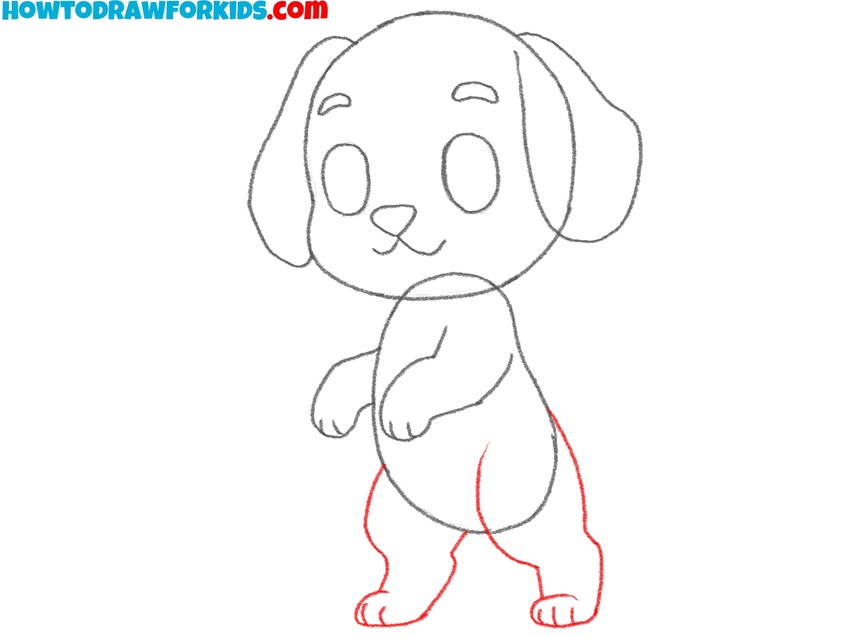
- Outline the back legs.
Begin by drawing two curved lines from the bottom of the body shape, one on each side. Make sure to give the legs a slight bend, as this will make the pose of the standing dog more natural. The legs should be thicker at the top and taper slightly towards the bottom, ending in small, rounded feet.
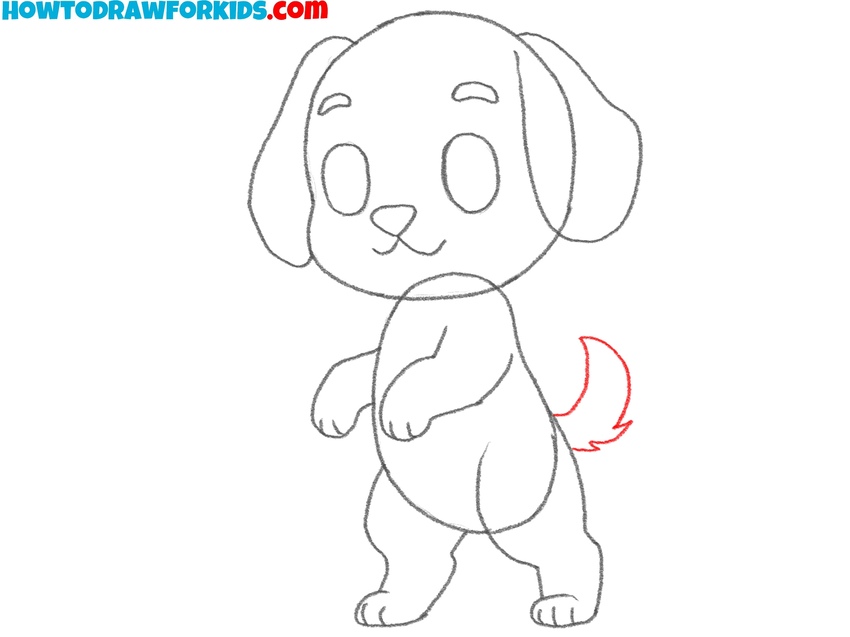
- Draw the tail of the standing dog.
Draw a short, curved tail at the back, starting from the lower body. The tail should have a gentle upward curve. To give your standing dog’s tail a more realistic look, draw it using jagged lines. You can also give the tail movement by drawing lines on either side of the tail.
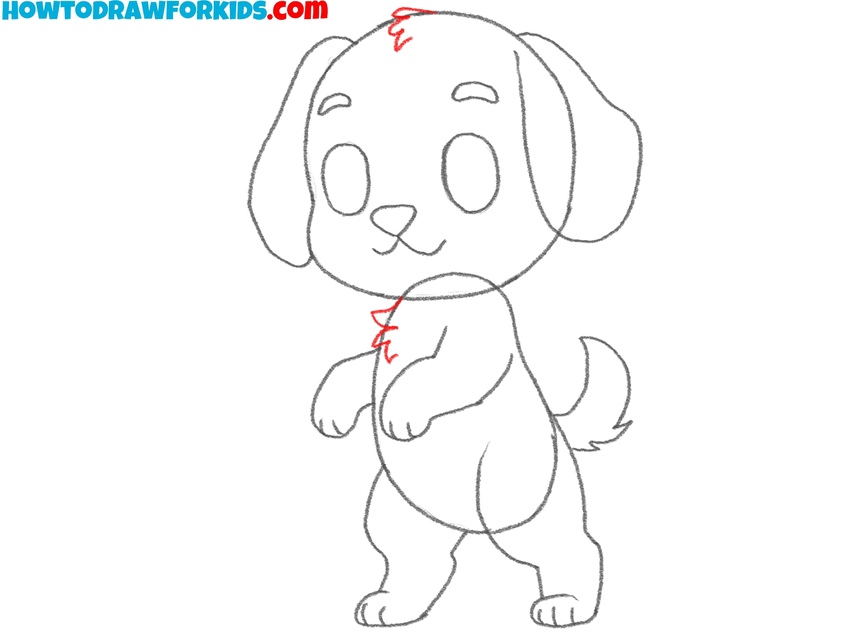
- Detail the fur on the body.
Now that the main outline is complete, add a few small fur details to make the standing dog drawing more realistic. Draw short, zigzag lines on the top of the head and on the chest, giving the appearance of fur. These details should be minimal but noticeable.
- Refine and finalize the sketch.
Erase any unnecessary guidelines from the standing dog drawing to clean up the image. Carefully go over the lines you want to keep, making them smooth and refined. This step finalizes the shape and details of the standing dog, preparing it for the final step.

- Color the standing dog drawing.
To complete your standing dog drawing, add some colors. Use a light brown shade for the fur, a darker tone for the nose, and black for the eyes. Draw two spots in each eye for the dog. Adding a bit of shading on the body and paws can give the drawing more more realistic look.
Additional Techniques
We have now completed the main lesson on how to draw a standing dog. The basic techniques have been covered, and it is time to reinforce this knowledge and learn new techniques. Below are two additional instructions, each offering a different approach to drawing a standing dog and providing an opportunity to develop new skills.
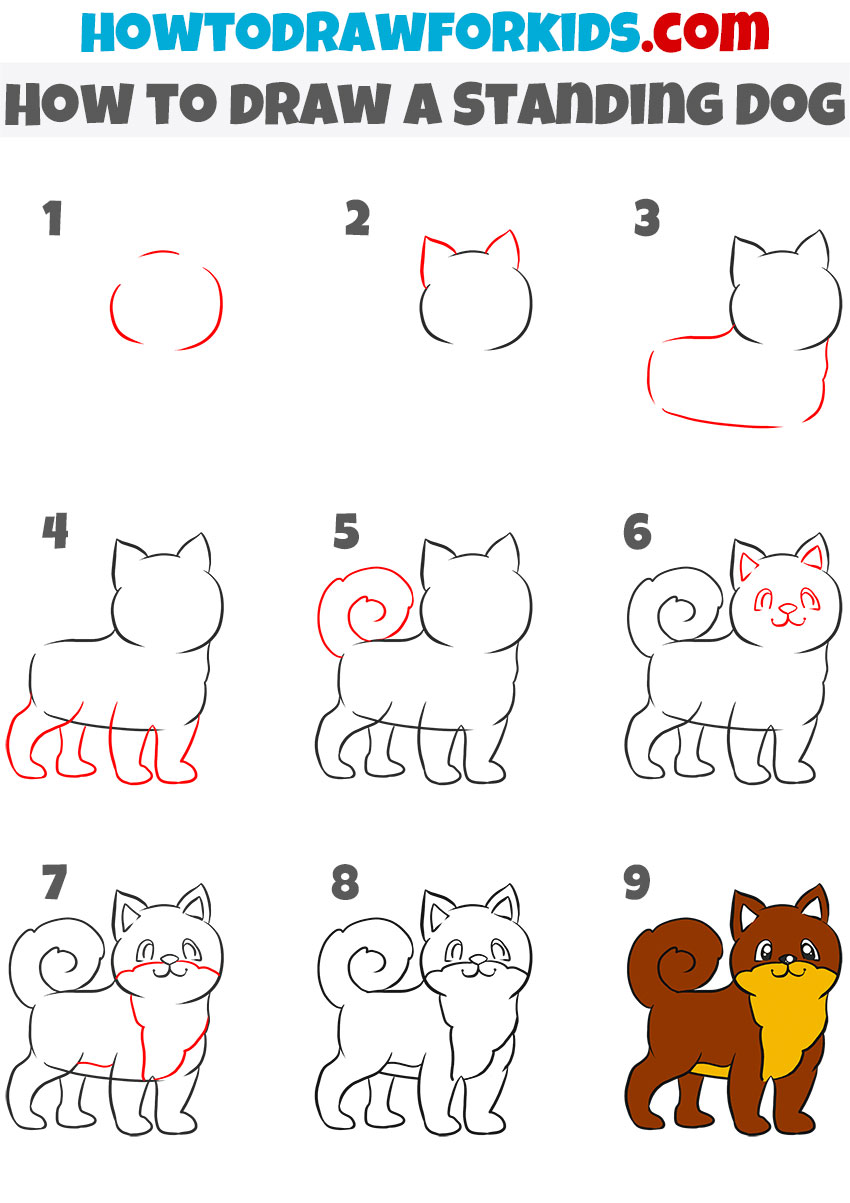
Drawing a Dog Standing on Four Legs
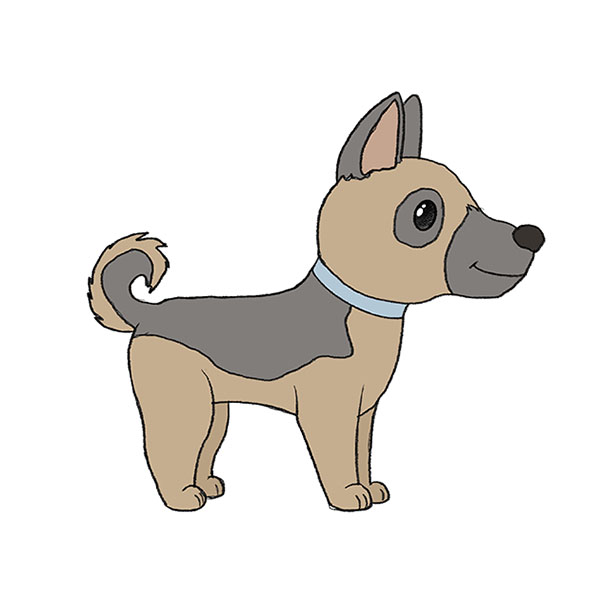
Besides the fact that the dog in this lesson stands on four legs instead of two, titles has some other differences. This tutorial differs from the first by presenting a more stylized, cartoon-like standing dog with distinct, pointed ears, a curled tail, and a fuller, furry neck and chest. The steps focus on creating a compact, fluffy dog shape, while the first tutorial shows a simpler, more rounded dog form with floppy ears and a smooth coat.
To draw a standing dog on four legs, begin with a large circular head. Next, outline the pointed ears to complete the head shape. Draw a rounded shape connected to the head, representing the dog’s body. Add curved lines beneath the body to form the front and back legs.
Draw a curled, circular tail on the left side. Add the face by drawing dog eyes, a small nose, and a smiling mouth. Improve the dog’s furry appearance by adding details to the face and a fluffy chest. Erase any unnecessary lines, refine the outline, and finish by coloring the standing dog, using shades that complement the cartoon style.
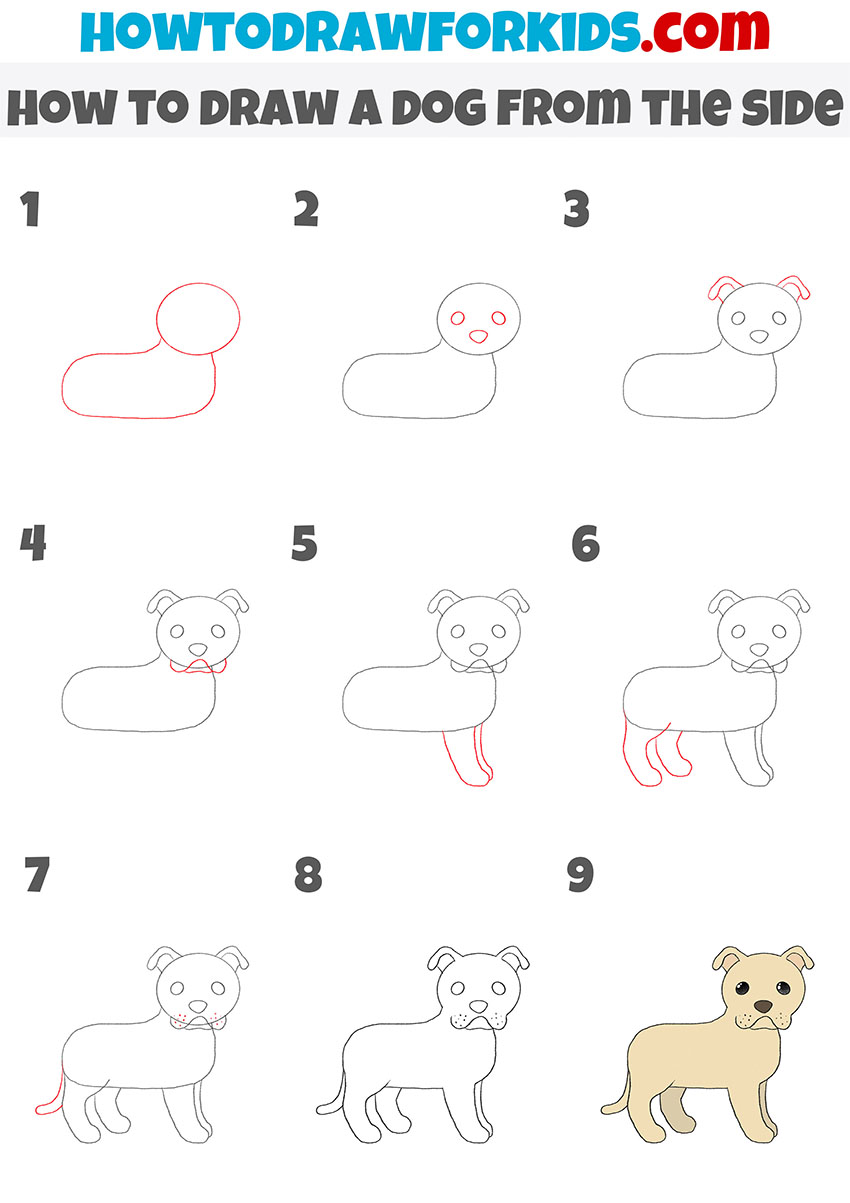
Drawing a Standing Dog From the Side
This tutorial differs from the first two by showing how to draw a dog from the side, rather than a front-facing standing dog. The focus is on creating a side profile, with simpler shapes for the body and a lower level of detail, making the dog appear more basic and simple.
To draw a standing dog on four legs from the side, start by sketching an oval for the body and a circle for the head. Add two small circles for the eyes and a rounded triangle for the nose, then draw a simple smile below the nose.
Sketch two rounded, floppy ears at the top of the head. Draw the front legs, using simple lines. Complete the body by adding two hind legs in a similar style. Finally, add a simple, short tail at the back. Clean up any extra lines and color the dog to finish the drawing.
Conclusion
Now, you can review the result. You may add surroundings or details, such as drawing grass, a house, or food for the dog. You can share the finished result with friends.
I hope you found this standing dog drawing tutorial helpful. If some parts did not work as expected on the first attempt, don’t worry. Keep practicing, and your drawing skills will improve. These lessons are here to assist you.
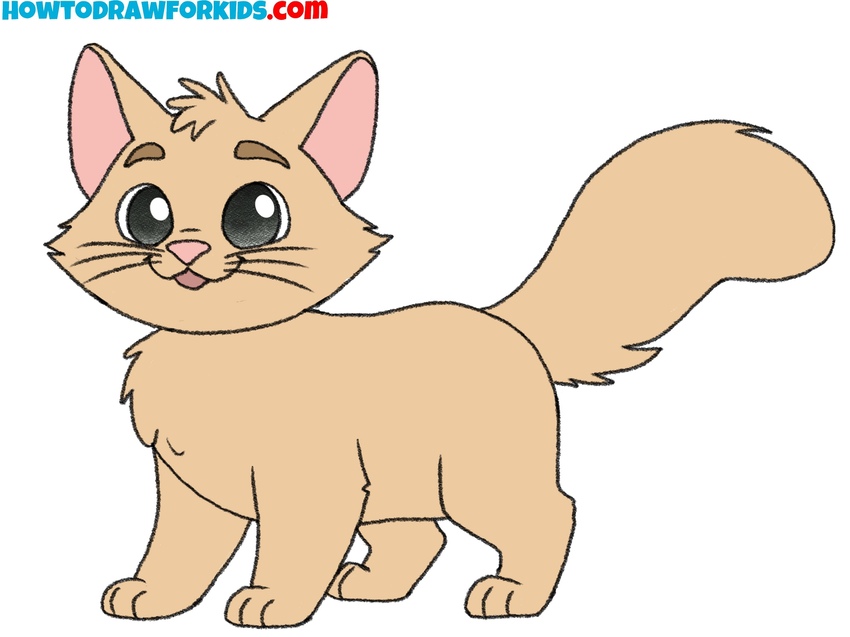
Also, let’s practice our drawing skills, taking them to a new level. To do this, draw a horse or study my lesson on drawing a cat. Besides these animals, you will find a huge number of other animals on my site, so scroll through the pages and learn to draw with me.