How to Draw a Flamingo
Especially for you, I have gathered several simple techniques to explain in detail how to draw a flamingo, a beautiful and graceful bird.

How to Draw a Flamingo: Introduction
The flamingo has a very distinctive appearance, and you are unlikely to mistake this bird for any other. The shape of its body and head, along with its color, makes the flamingo easily recognizable to anyone.
In this lesson, I will show you how to draw a flamingo using simple methods while ensuring that anyone who sees your drawing will immediately recognize what bird is depicted.
I always keep in mind that my drawing lessons are read by a wide range of people, from complete beginners with no experience to professional artists. Because of this, I strive to cover a diverse range of drawings, incorporating different styles and levels of difficulty.
This lesson on how to draw a flamingo will be no exception, as the basic tutorial will be supplemented with additional ones, which you will find at the bottom of this page. Each of these instructions approaches drawing a flamingo from a different perspective and requires varying levels of effort. While each tutorial takes a different approach, they all lead to a beautifully finished flamingo drawing and train your bird drawing skills.
Flamingo Drawing Tutorial
Materials
- Pencil
- Paper
- Eraser
- Coloring supplies
Time needed: 30 minutes
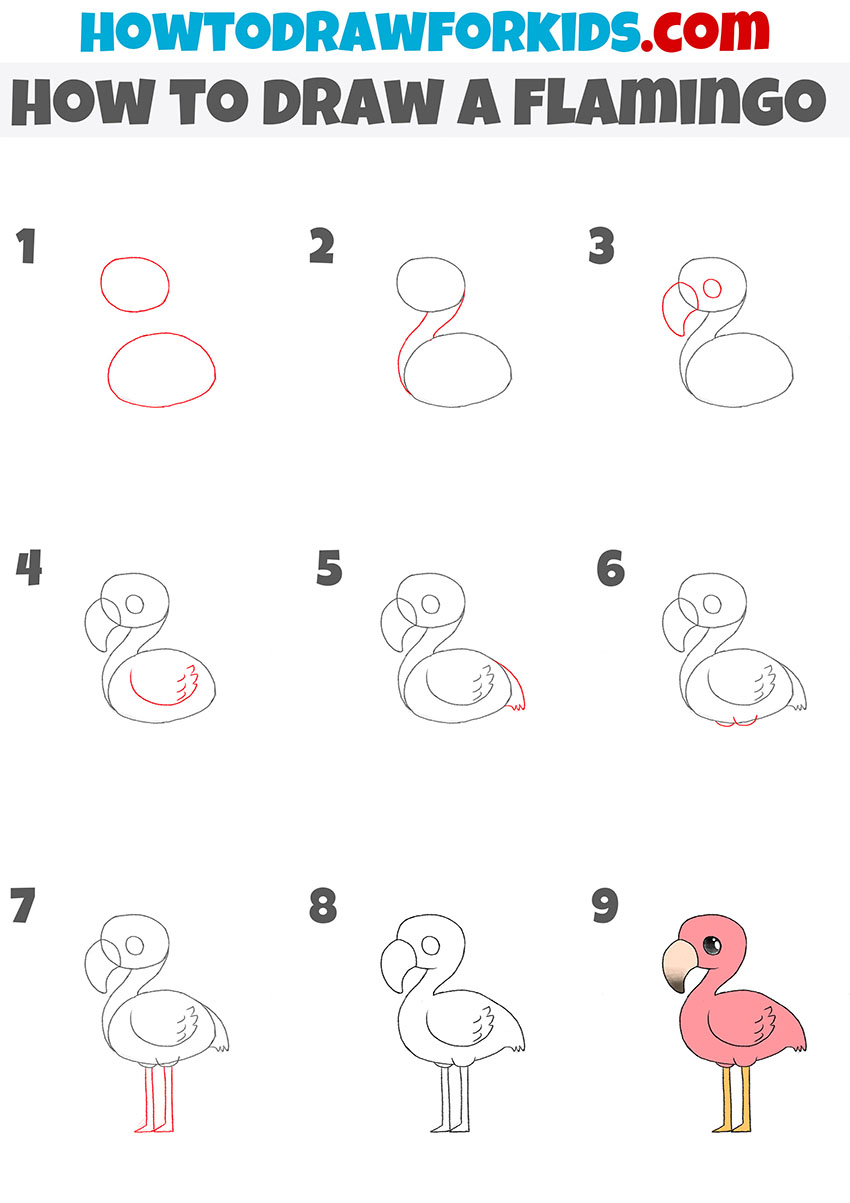
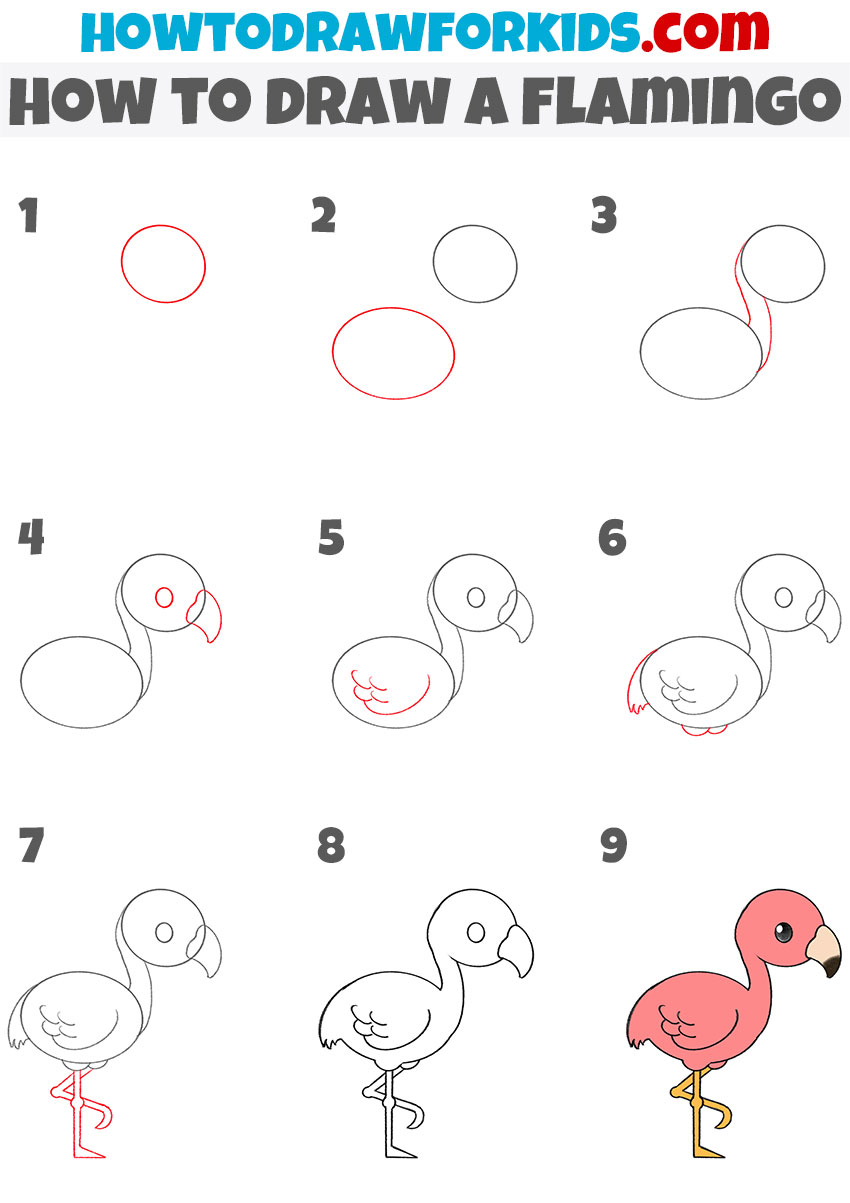
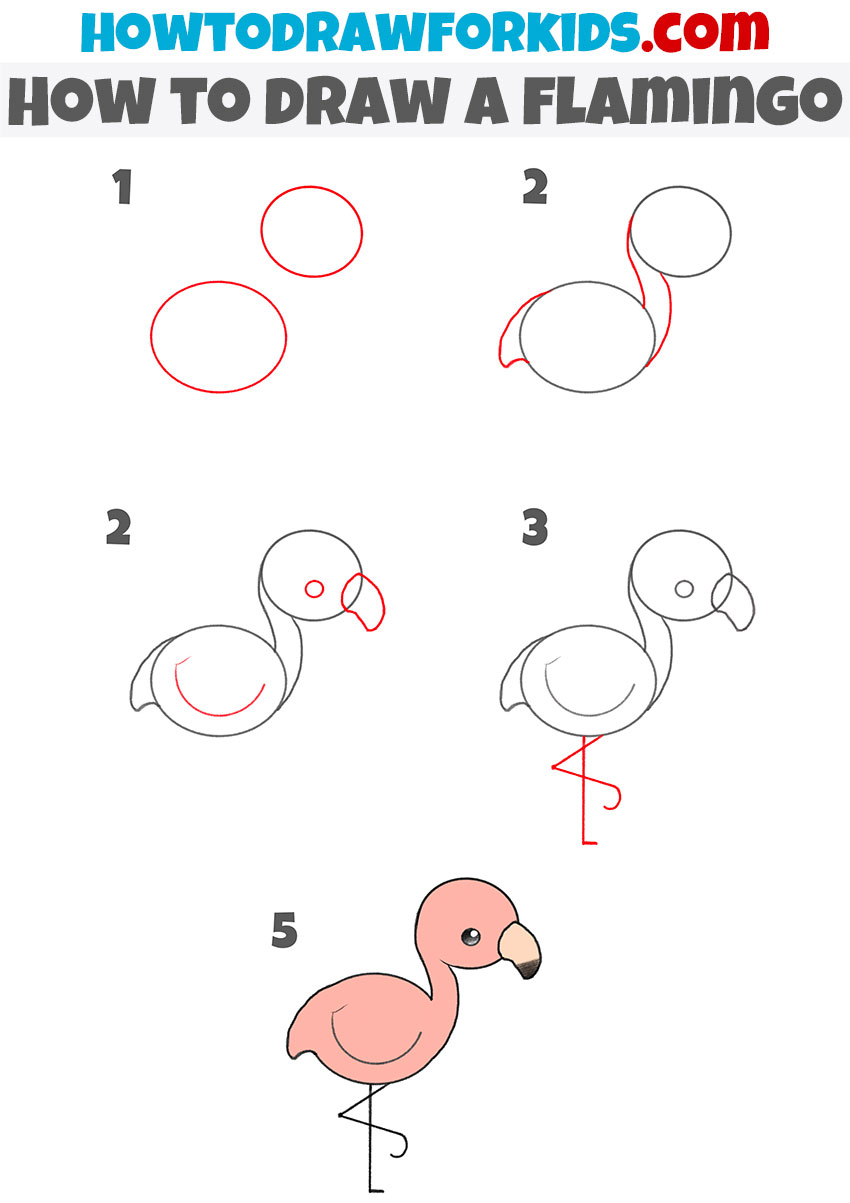
How to Draw a Flamingo
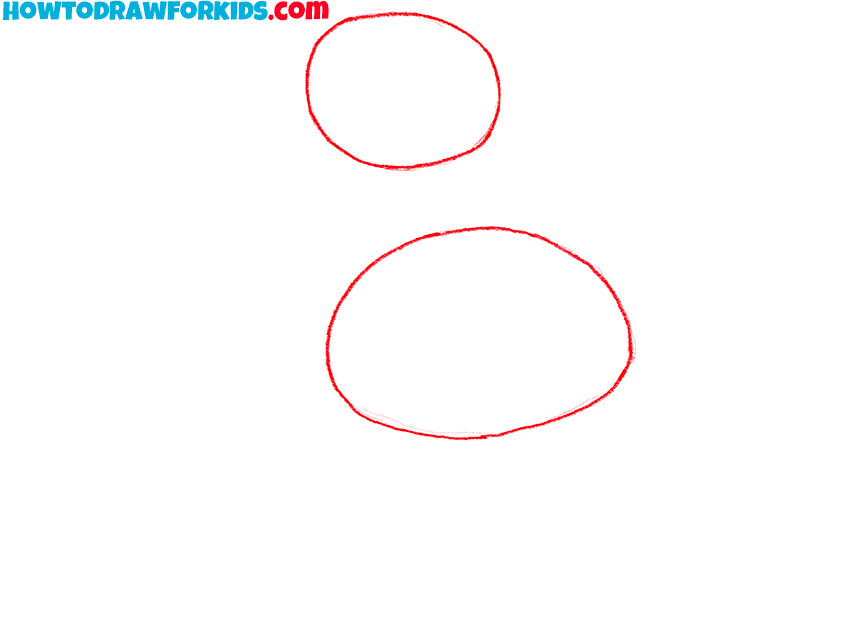
- Draw the flamingo’s basic shapes.
Sketch two simple ovals to form the head and body of the flamingo. Draw a smaller oval at the top for the head and a larger oval below it for the body. Keep your lines light and loose so that you can refine them later. At this stage, focus only on placement and general size, without worrying about details.
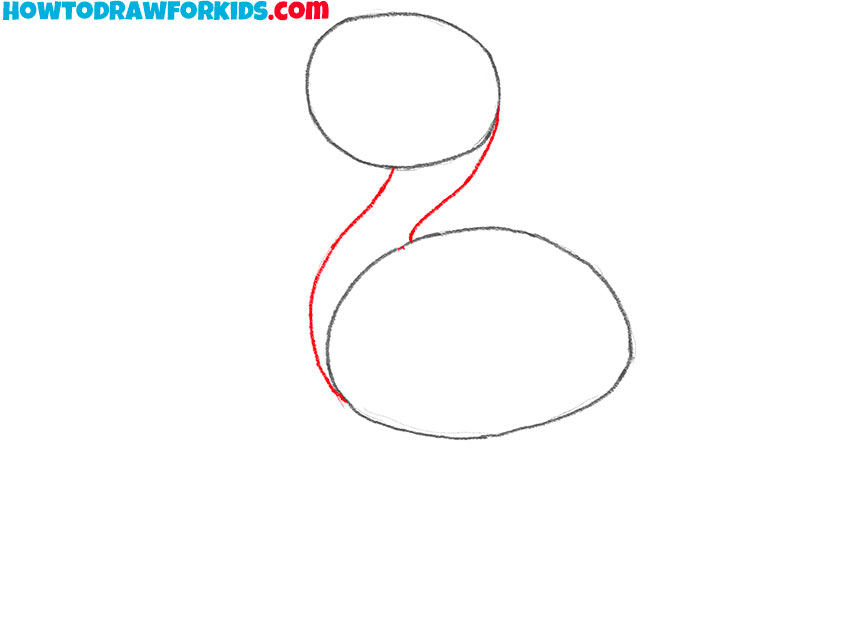
- Sketch the curved neck.
Now, draw the flamingo’s curved neck, connecting the head and body. Start from the lower part of the head oval and create two smooth, elegant curves that extend down to meet the body oval. Flamingos have an S-shaped neck, so try to make the curve look natural rather than stiff or straight.
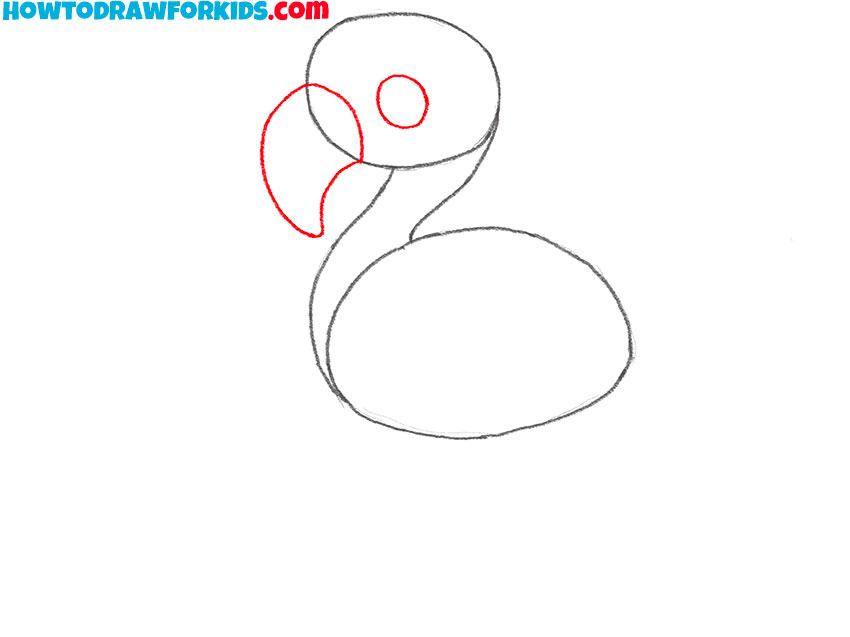
- Add the beak and eye.
Start by sketching a curved beak extending from the front of the head. Flamingos have a distinctively hooked beak, so make sure it bends downward. After sketching the beak, add a small circle or oval for the eye, placing it slightly above and behind the beak.
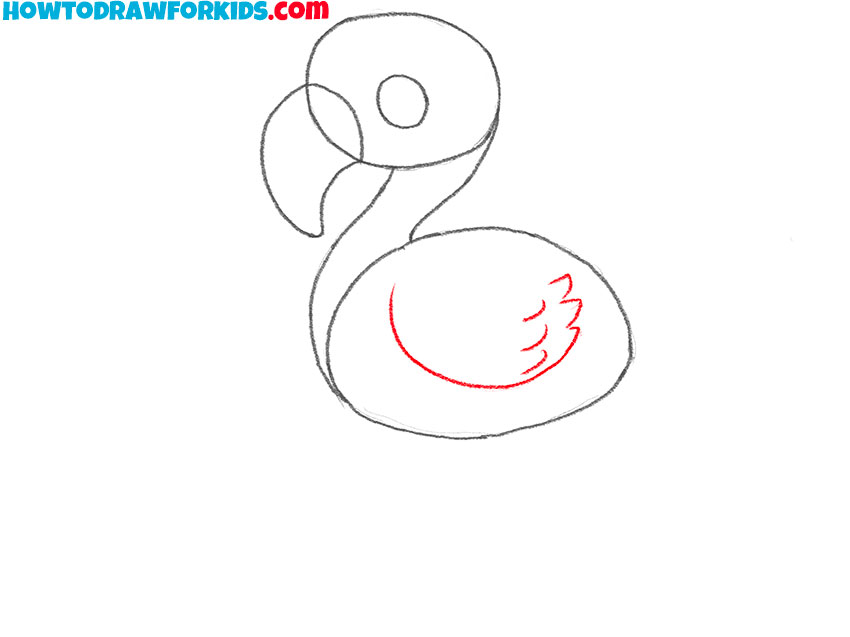
- Sketch the wing and feathers.
Sketch a curved line that extends from the middle of the body oval, following its contour. This will create the base shape of the wing. Then, add a few small, curved lines at the edge of the wing to represent the feathers of the bird.
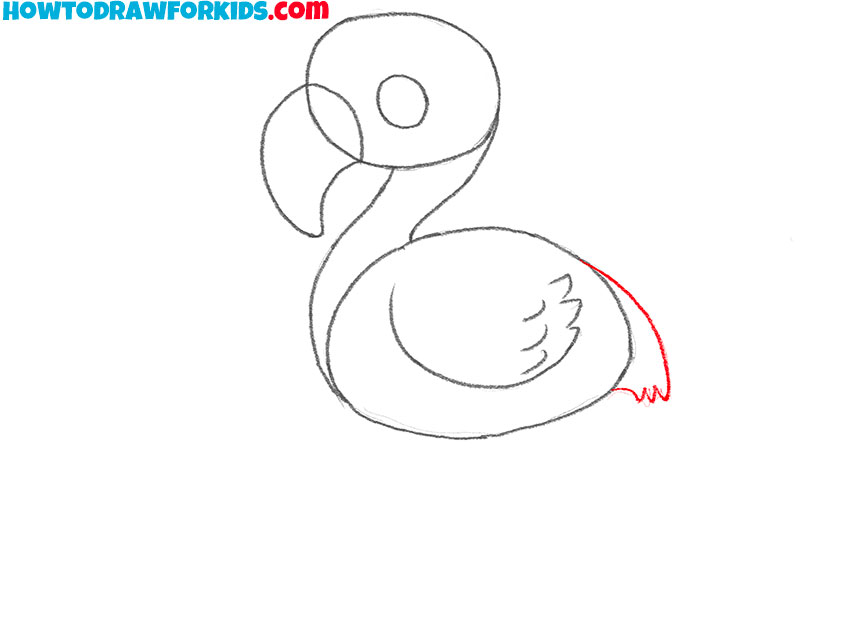
- Add the tail feathers.
Sketch a short, curved line at the rear end of the oval. Then, add small, pointed feather shapes to give the tail a recognizable appearance. Flamingos have relatively short tails, so avoid making the feathers too long or exaggerated. You can add extra feather lines for more realism.
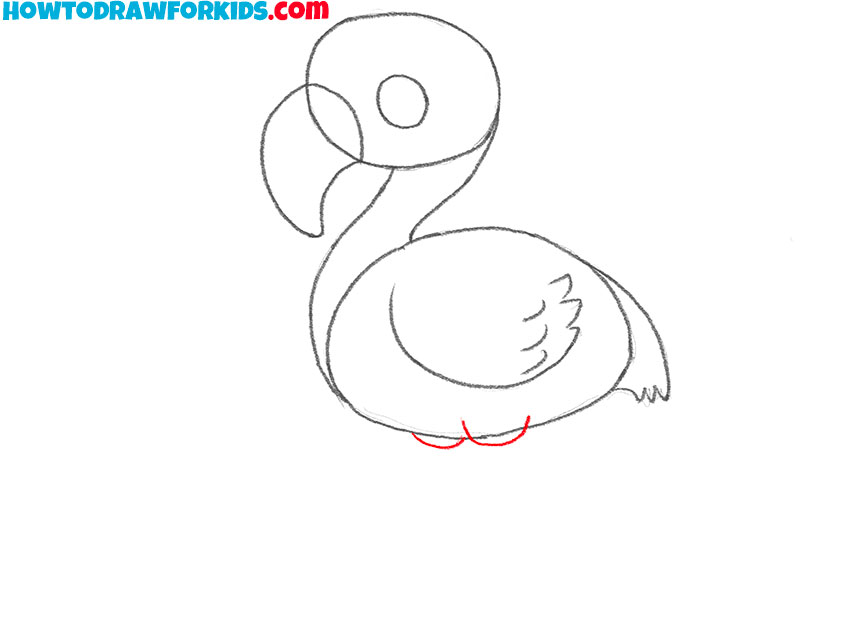
- Sketch the top of the legs.
Move to the lower part of the flamingo’s body and add small lines where the legs will later connect. These two small lines represent the top of the flamingo’s legs. At this step, you can also add some additional details or correct any mistakes before moving on to the legs.
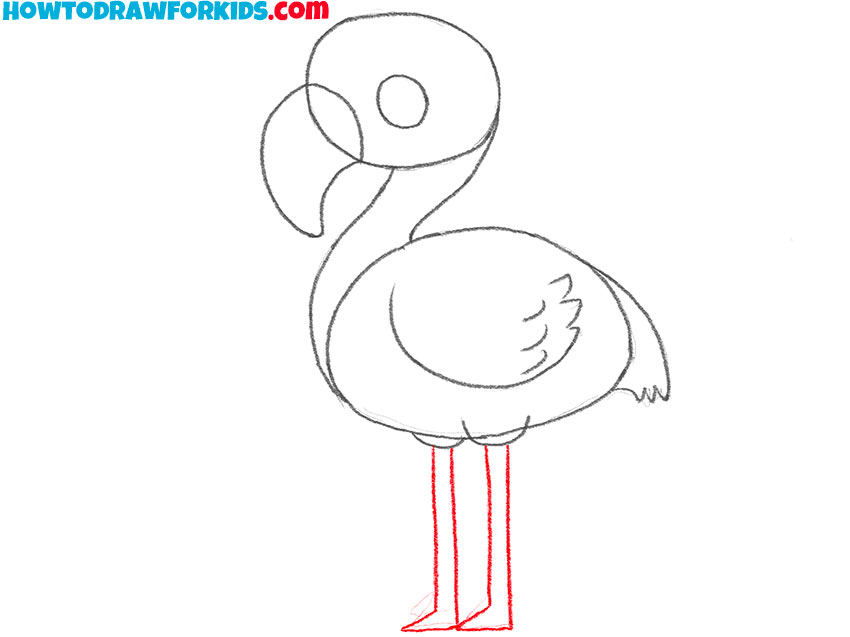
- Finish sketching the legs.
First, sketch two vertical lines extending downward from the lower part of the body. Flamingos have thin legs, so keep the lines relatively narrow. Add small horizontal lines at the bottom to illustrate the feet. You can also draw a couple of circular shapes at the middle of the legs for the joins.
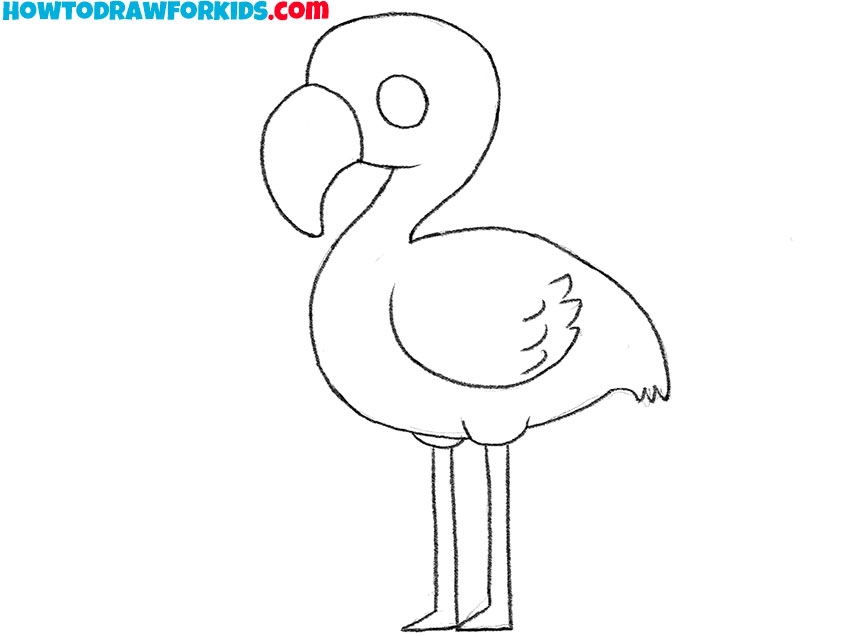
- Finalize the basic bird outline.
Darken the lines that define the shape of the flamingo, making them more pronounced while erasing any unnecessary guidelines. Make sure the neck has a smooth curve and the legs are correctly positioned. You can also slightly adjust the curves of the wings, tail, or neck to improve the overall appearance.
- Add color to the flamingo drawing.
Use a soft pink or coral shade for the body of the flamingo. The beak should be a combination of black and light tan, with the darker shade on the tip. The legs should be a pale yellow or light pink to match the characteristic flamingo coloring. Color the eye black with a small white highlight.

How to Draw a Flamingo: Video Tutorial
Alternative Drawing Methods
Now that you’ve completed the main flamingo drawing tutorial, you can refine your skills with three additional variations. One method focuses on drawing a flamingo standing on one leg, creating its signature pose. Another offers an even easier approach, using basic shapes and minimal details for beginners. The simplest version is designed for preschoolers, reducing the steps and using smooth, rounded shapes. Try one or all of these methods to practice different ways to draw a flamingo.
How to Draw a Flamingo on One Leg
This method features a flamingo in a standing pose with one leg raised, making it different from the first tutorial where the flamingo is standing on both legs. The curved shape of the raised leg is the most noticeable feature, highlighting the characteristic stance of a real flamingo. The rest of the drawing process follows a similar structure, using simple shapes and step-by-step construction.
To learn how to draw a flamingo standing on one leg, sketch an oval for the body and a smaller oval for the head. Connect them with a curved line to form the long neck. Next, outline the beak and add a small circle for the eye. Shape the beak with a downward curve. Draw the wing using a curved line with a few feather details.
Then, add a small tail with short, rounded feathers at the back. Move to the lower part of the body and draw the legs. One leg extends downward, while the other bends at the knee and tucks under the body. Refine the body’s outline by smoothing out the shapes. Go over the entire outline, making the lines cleaner. Finally, color your flamingo drawing using shades of pink and give the beak and legs their appropriate colors.
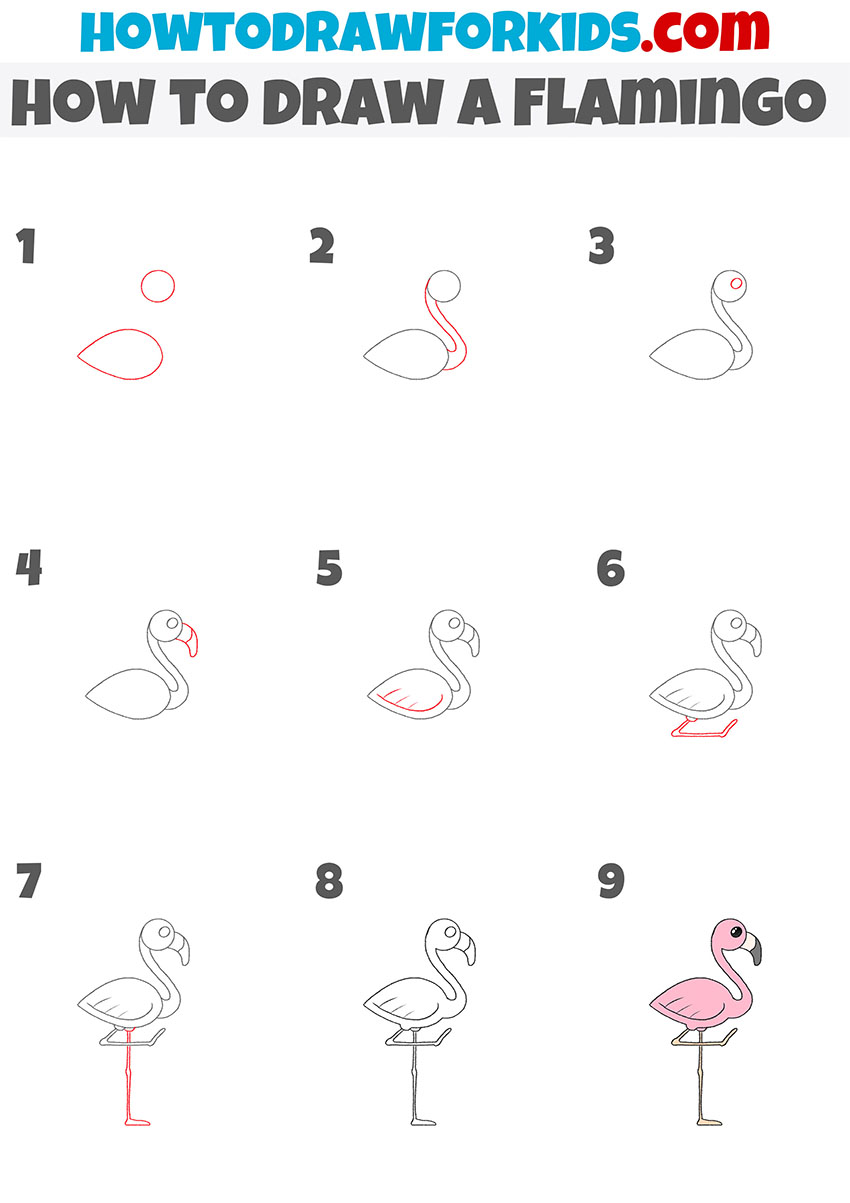
Easy Flamingo Drawing Tutorial
This method shows how to draw a flamingo in a more simplified way, with fewer details and a more basic structure compared to the first tutorial. The main difference is the overall shape, as this version uses a teardrop-like body rather than an oval, and the features are more stylized. The legs are also drawn with straight lines and minimal detail.
Sketch a small circle for the head and a larger teardrop shape for the body. Connect them with a long, curved neck that extends smoothly between the two shapes. Add a small dot for the eye and sketch the beak with a downward curve at the tip. Draw a simple wing on the body with a few short lines for feathers.
Then, add the first leg bent backward with a flat foot, followed by the second leg extending straight down. Keep the lines simple. Refine the outline by cleaning up any unnecessary lines. Go over the flamingo drawing with darker lines to finalize the shape. Finally, color the flamingo pink and shade the beak and legs in appropriate colors.
Flamingo for Preschoolers
This is the simplest method to learn how to draw a flamingo, designed specifically for preschoolers. It uses the most basic shapes and minimal details. Compared to the first tutorial, this version simplifies the body structure, reduces the number of steps, and keeps the overall design smooth and rounded, with no complex elements. The leg positioning remains iconic but is drawn with the fewest possible lines.
Sketch a large oval for the body and a smaller oval for the head. Connect them with a curved line to form the neck. Add a rounded beak to the front of the head and a small dot for the eye. Draw a simple curved wing on the body with a single guiding line inside.
Sketch the flamingo’s thin, straight legs, bending one leg upward while keeping the other extended downward. Refine the flamingo drawing by softening any rough edges and making sure the shapes look finished. Go over the lines to define the final outline. Color the flamingo pink, shade the beak with a dark tip, and color the legs accordingly.
Conclusion
We have learned how to draw a flamingo in different variations, poses, and styles. These lessons were simple, yet they differed quite noticeably. You may have studied all the flamingo drawing lessons or only partially focused on one specific version. Did you only use the drawing tutorial, or did you also try the additional exercises? Let me know so I can improve the existing content on my website and create new content based on your interests.
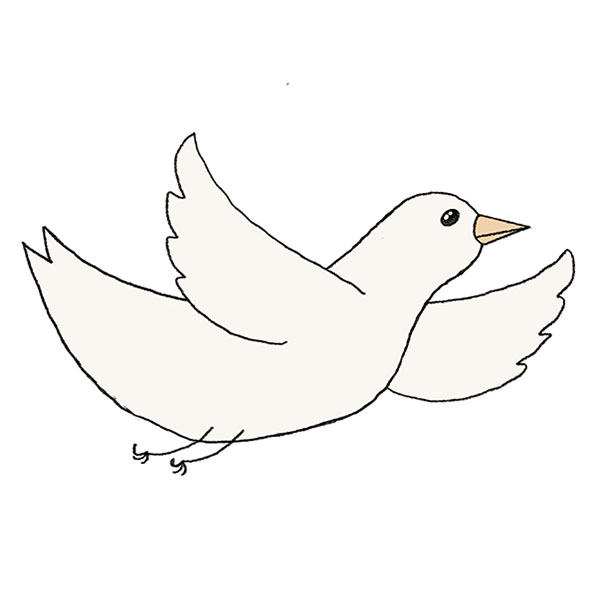
Also, don’t forget to visit my other guides. You can learn how to draw a dove or any other bird in a really simple way. Or you can create a background for your bird sketches by drawing a forest or other interesting places.