How to Draw a Goblin
Do you want to learn how to draw a goblin? I’ll show you how! This step-by-step tutorial is simple and easy to follow. I have also prepared a free PDF for you!
In this goblin drawing tutorial, I used simple lines and easy steps to help you get a good result and feel more confident as you draw.
Prepare to Draw a Goblin
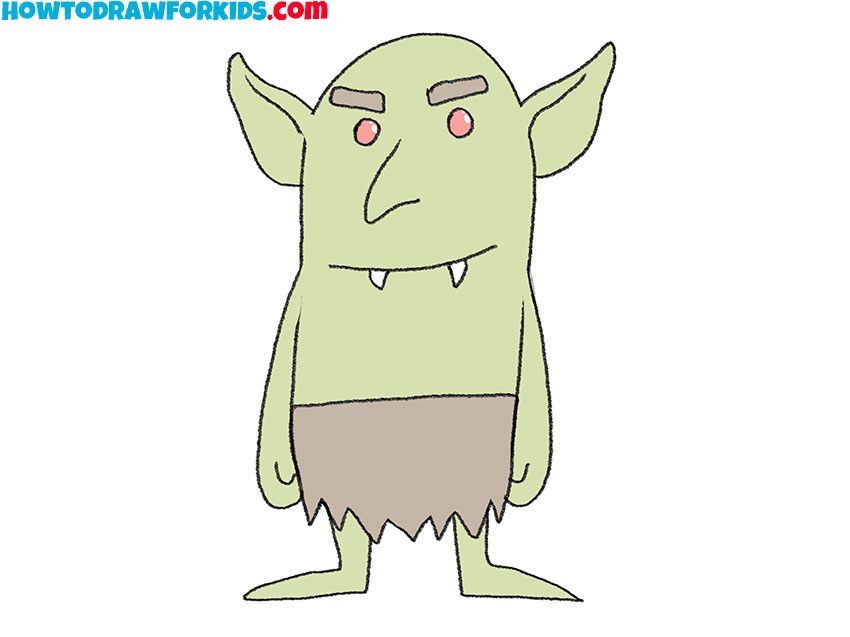
If you want to learn how to draw a mythical creature, be sure to follow this guide on how to draw a goblin. According to ancient legends, this creature lives in underground caves and cannot tolerate sunlight.
A goblin has an unpleasant appearance. Its body has an unnatural green color, and its ears and nose are large and pointed.
The eyes are red, making the creature look angry, while its sharp fangs make its appearance even more intimidating.
You will need to include all of these features in your drawing. I hope you can easily draw this unusual creature by following my clear and simple instructions.
As you work, try to keep the correct proportions. Look at the drawing as a whole and pay attention to how large the head is compared to the body, how long the arms and legs are, and how wide the feet should be.
Step-by-Step Goblin Drawing Tutorial
Materials
- Pencil
- Paper
- Eraser
- Coloring supplies
Time needed: 30 minutes
How to Draw a Goblin
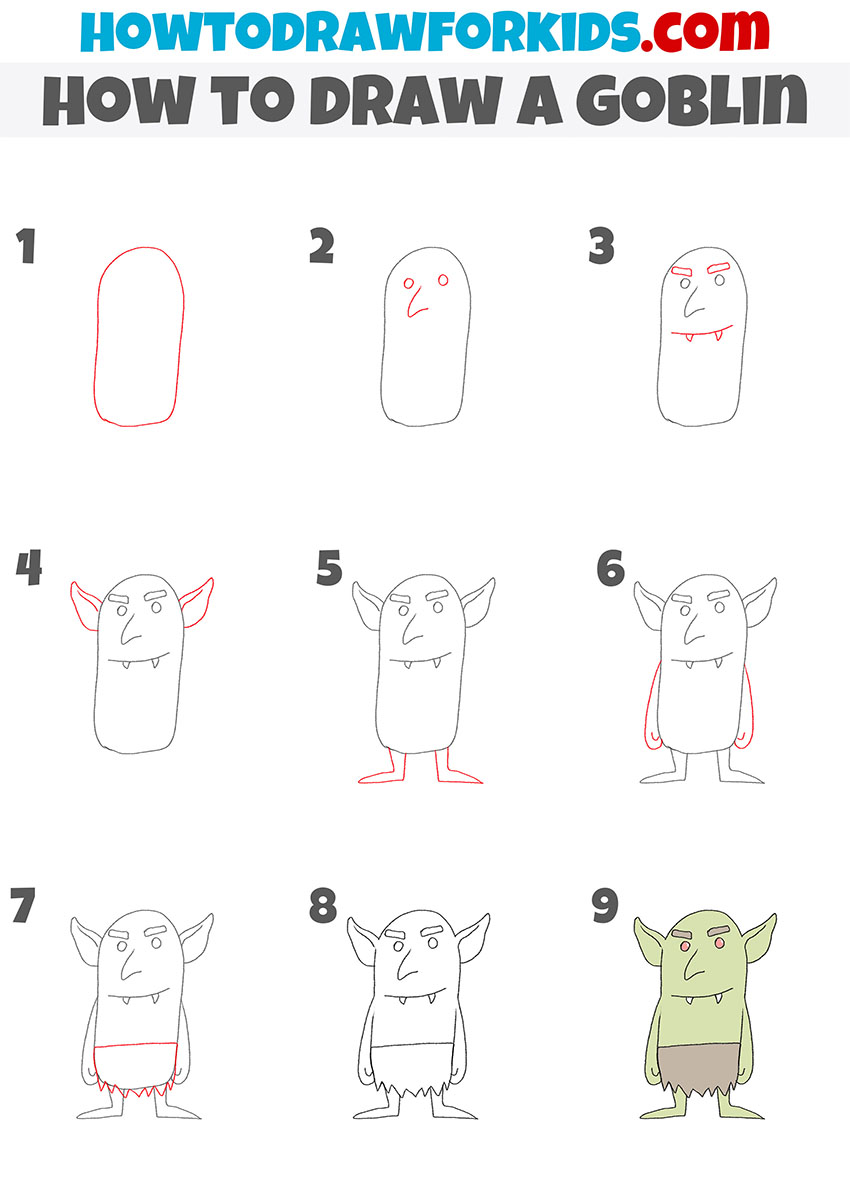
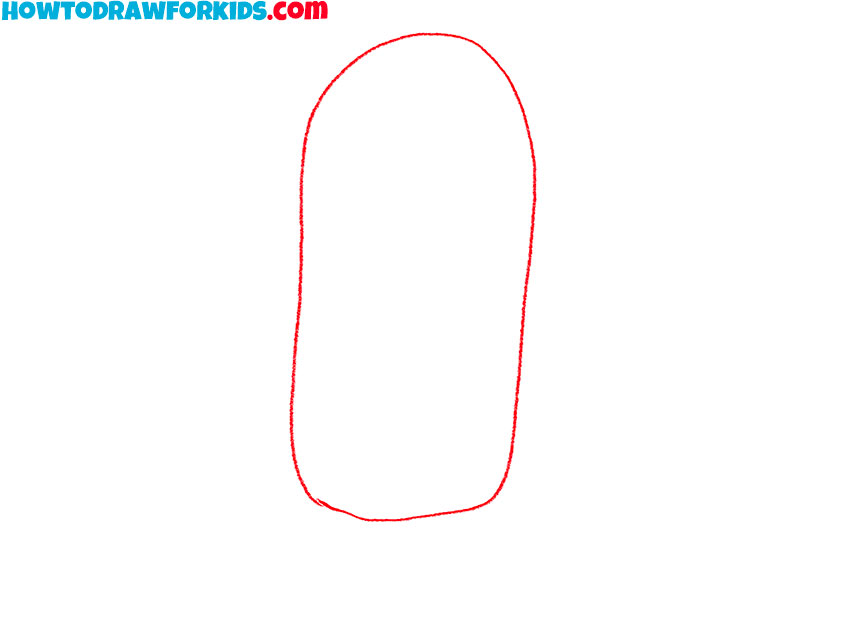
- Draw the outline of the body.
In the case of a simplified drawing of the Goblin, an elongated oval figure is enough for us to depict the body. It’s a bit like a big keyhole. This figure should be located in the center of the picture.
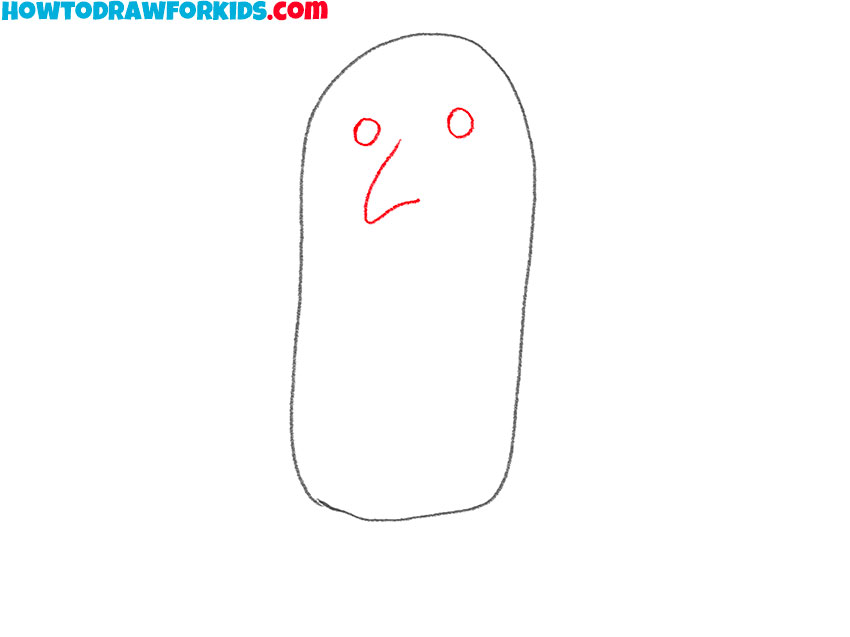
- Depict elements of the face.
A simple fairy tale character face can look pretty cool. Try drawing a couple of round shapes at the top and a long hooked nose that consists of two lines.
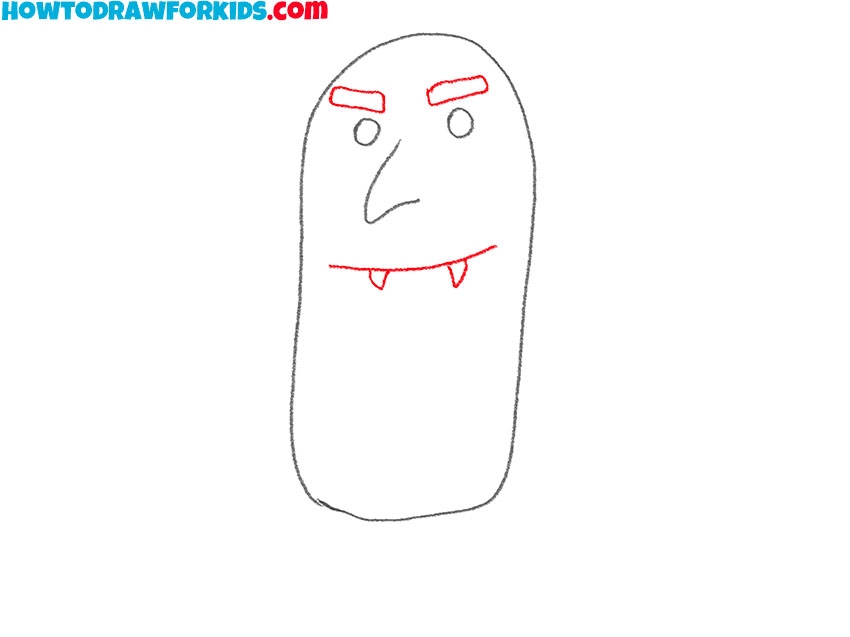
- Add the rest of the elements of the face.
And a few more simple figures to revive our goblin. Draw the eyebrows in the form of elongated rectangles. The, depict a horizontal line for the mouth with a pair of triangular teeth.
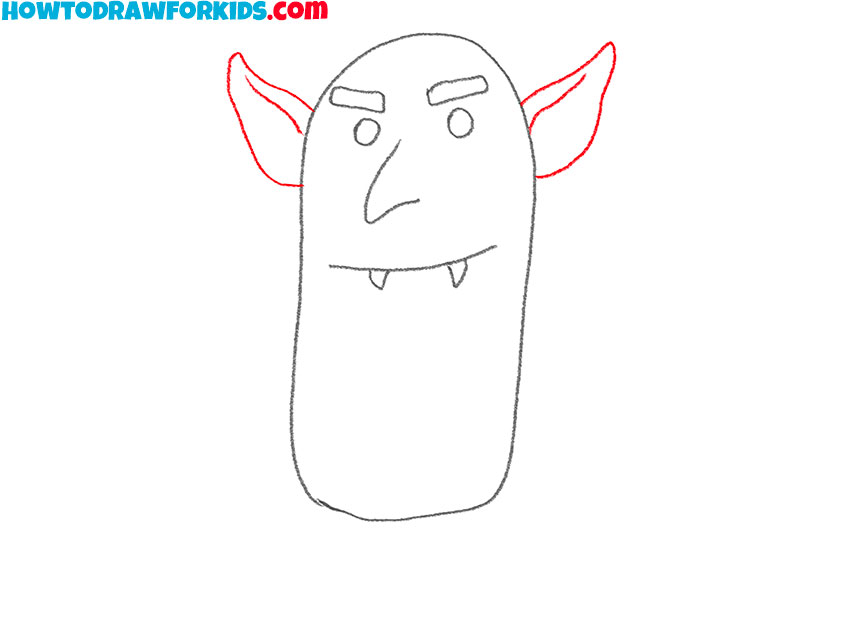
- Sketch out the ears.
You can see pointed ears on different characters from different fantasy universes. The goblin also has large, pointed ears that are positioned diagonally from its head.
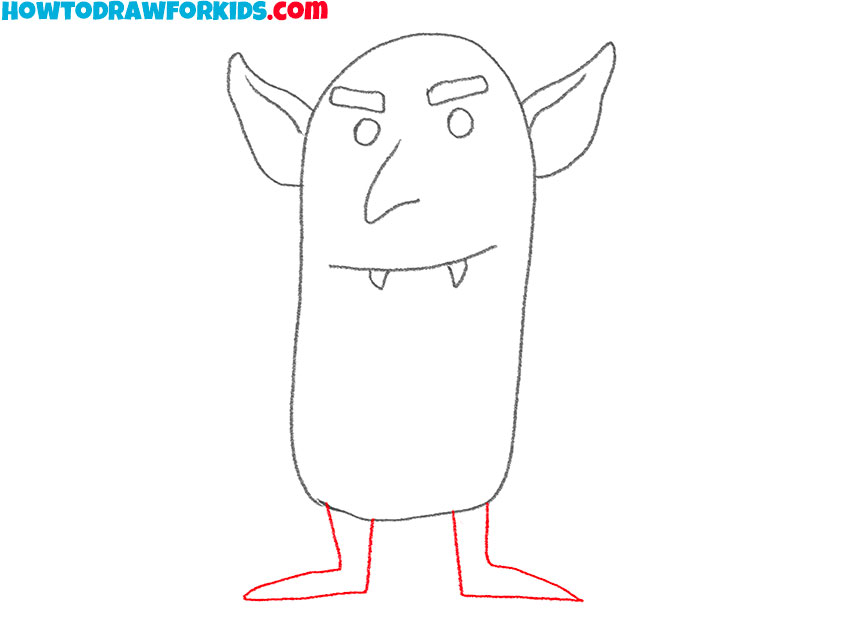
- Draw the legs.
Our troll has rather funny short legs. It looks like two figures bent at right angles. The feet should be directed in different directions, as in our example.
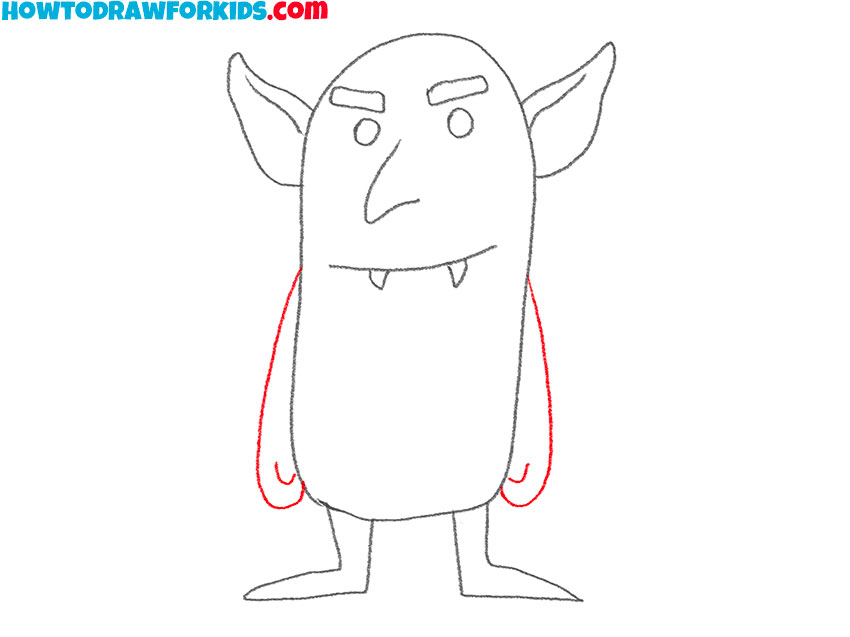
- Depict the hands.
In order to create a comical figure, I decided to abandon the dynamic pose. In this case, the goblin’s arms simply hang next to the body. To draw this, draw the arms as two rounded outlines on either side of the body, as in the example.
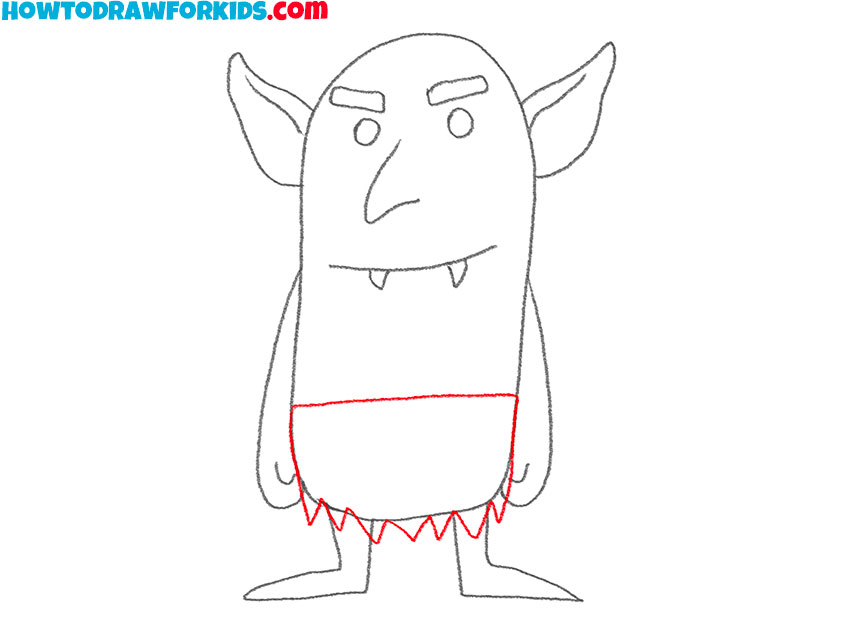
- Sketch out the loincloth.
The clothes of such fairy-tale characters should look sloppy and simple. Therefore, for our goblin, draw just a piece of torn fabric on the lower part of the body.
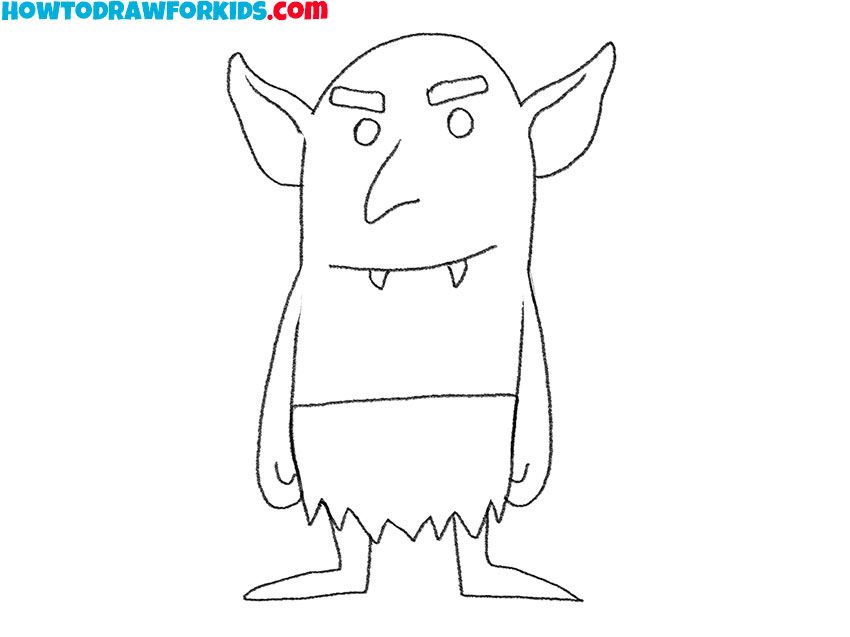
- Correct inaccuracies.
Rate your drawing. This should be a funny, slightly clumsy goblin who looks at you with a blank look. Remove unnecessary guide lines and correct any inconsistencies.
- Color the drawing.
Lighter colors will make your drawing more cartoonish. However, avoid too bright shades. Two highlights inside the eye contours will enliven your drawing, don’t forget about it.
Additional Content
For your convenience, I’ve prepared a free PDF version of this lesson. It includes a simplified version of the tutorial, a coloring page, a tracing worksheet, and a grid drawing worksheet, so you can practice anytime, even without an internet connection. You can download it for free using the link below.
Alternative Way to Draw a Goblin
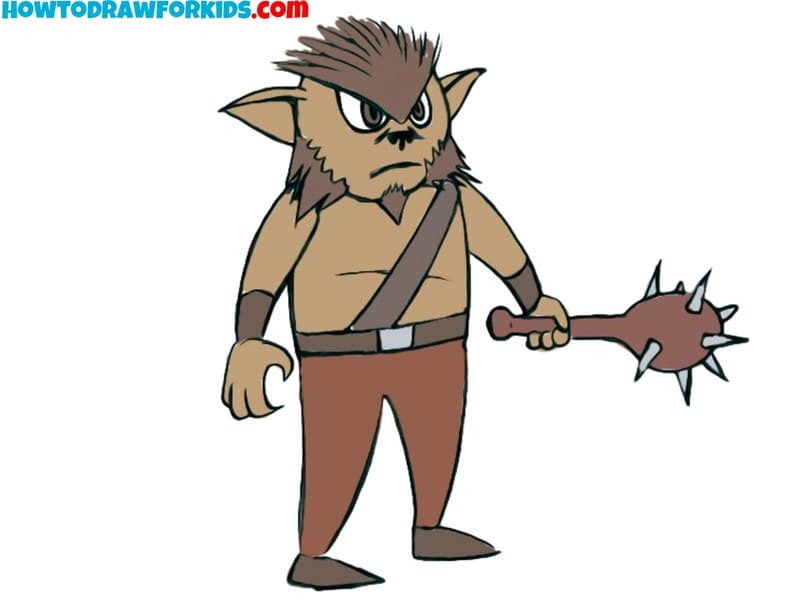
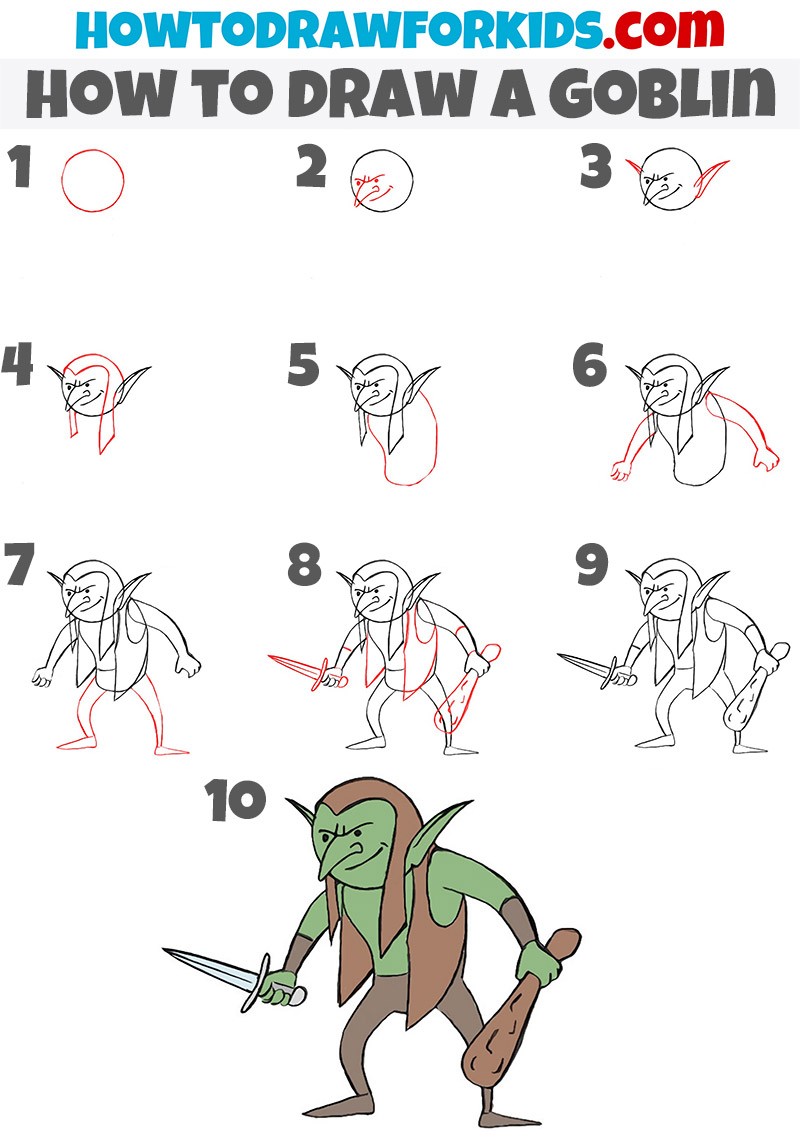
In the main lesson, I showed you how to draw a goblin in a simple cartoon style. Now it’s time to try a more detailed version.
This goblin has a more threatening appearance, stands with its legs spread apart, leans slightly forward, and holds a weapon, making it look ready for battle.
As you draw, pay close attention to the pose and facial expression. Try to match the position of the body, arms, and legs to my example.
Notice that the eyebrows are lowered and angled toward the center of the face, giving the goblin a focused and angry look. The grin adds even more personality and makes the character appear confident and intimidating.
My Recommendations
Once you’ve finished the drawing, you can make it look more detailed by adding shadows. This will help give the goblin a more three-dimensional appearance.
You can also create a simple background for your character. Since goblins are often shown living in caves, try drawing a rocky cave behind it.
Add large stones, patches of grass or moss, mushrooms, or a few small plants around the goblin to make the scene more interesting.
If you’d like to make the drawing even more unique, try changing the weapon, the facial expression, or the pose. Small changes like these can create a completely different character while using the same basic construction.
When you’re finished, let me know how your drawing turned out in the comments. I’d love to hear how this lesson went for you and what you’d like to draw next.
Conclusion
I hope you enjoyed this goblin drawing tutorial and are happy with your finished drawing. Take a moment to compare your artwork with my example and see if there are any details you would like to improve.
If something didn’t turn out the way you expected, don’t worry. Try drawing the goblin one more time and pay a little more attention to the steps that seemed the most difficult. Every new drawing helps you improve your skills and makes the next one even better.
If you enjoy this guide, be sure to follow me on social media. That’s where I share all my newest tutorials, drawing tips, and other updates.
You’ll find links to all my pages at the end of this tutorial. You can also leave a comment below and let me know what you’d like to draw next. I always enjoy reading your suggestions for future drawing tutorials.