How to Draw a Hawk
In crafting this lesson on how to draw a hawk, I’ve carefully selected two methods that will enable you to portray the bird’s dignified posture and intricate feather patterns. I take you step by step through each technique, ensuring that by the end, you have a striking representation of this predator’s spirit.
How to Draw a Hawk: Basic Information
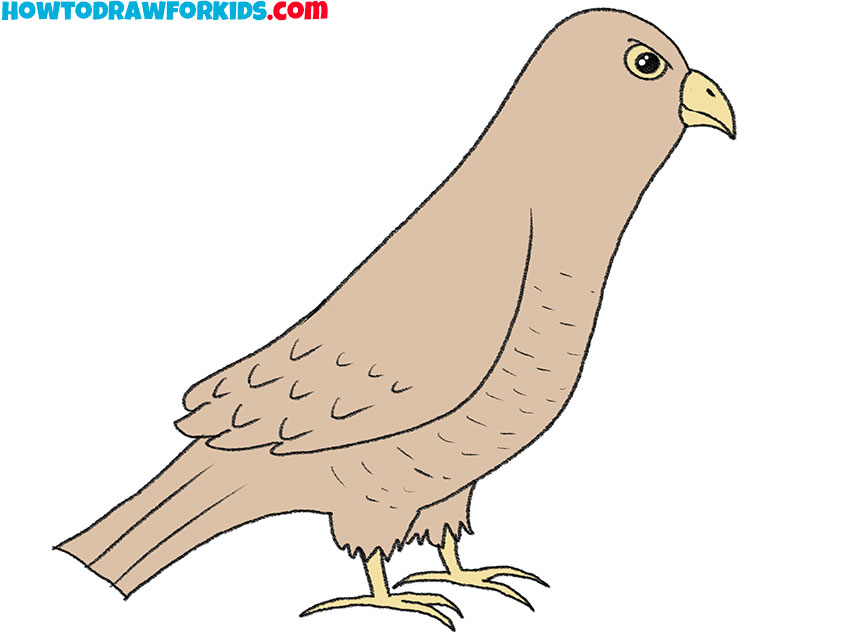
The quest on how to draw a hawk begins with a pencil, a vision. I’ve laid this path for those eager to sketch this noble creature. My method, simplifying its complex form, makes learning both accessible. The depicted hawk, with piercing eyes and a robust build, transcends being merely a subject; it becomes a part of your artistic tale.
The distinct contours and the subtle gradation of feathers are what make this hawk drawing come to life. In crafting this tutorial, I paid special attention to breaking down complex shapes into manageable steps. Each stroke adds to the hawk’s vitality, from the curve of the beak to the spread of the tail feathers.
To draw a hawk that embodies the spirit of the wild, one must imbue their artwork with both precision and passion. My guide invites readers to not just replicate, but to understand the bird’s anatomy, allowing for a creation that soars off the page. May this lesson be your gateway to mastering the art of avian illustration.
Hawk Drawing Tutorial
Materials
- Pencil
- Paper
- Eraser
- Coloring supplies
Time needed: 30 minutes
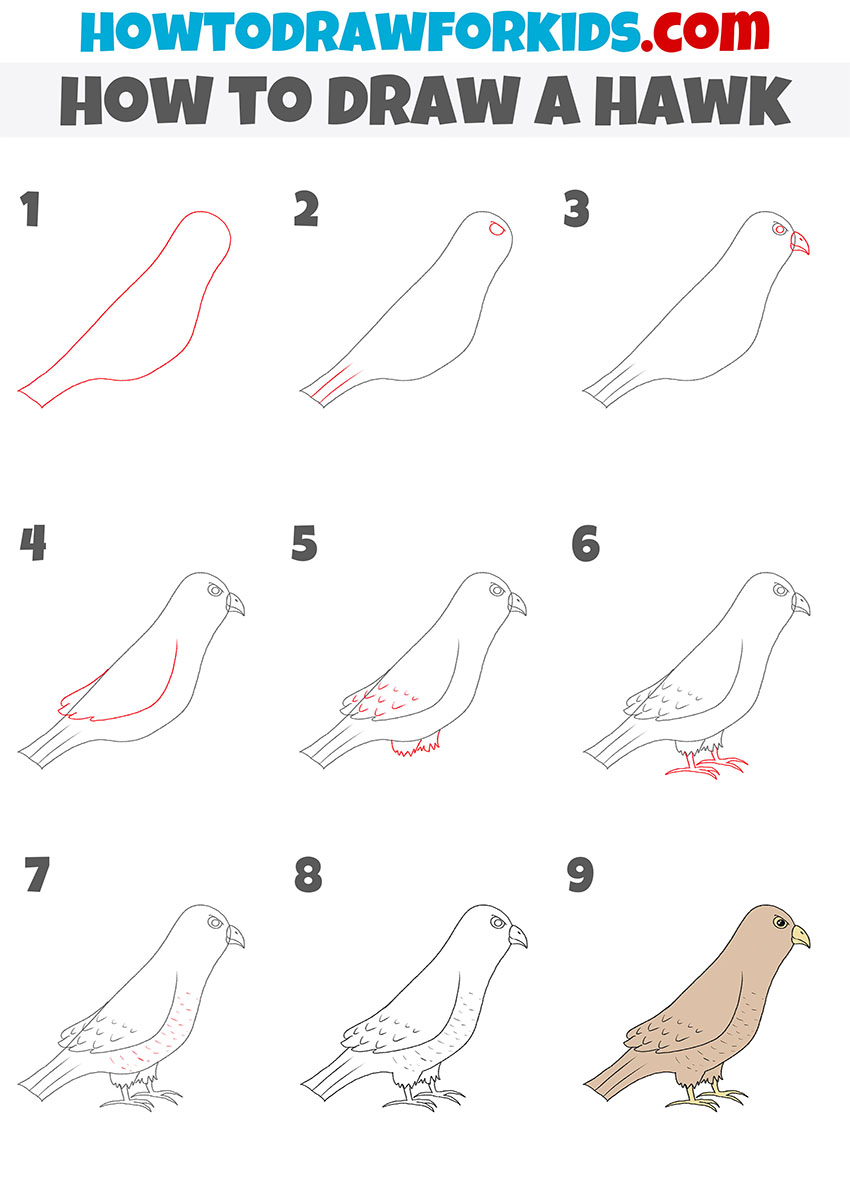
How to Draw a Hawk
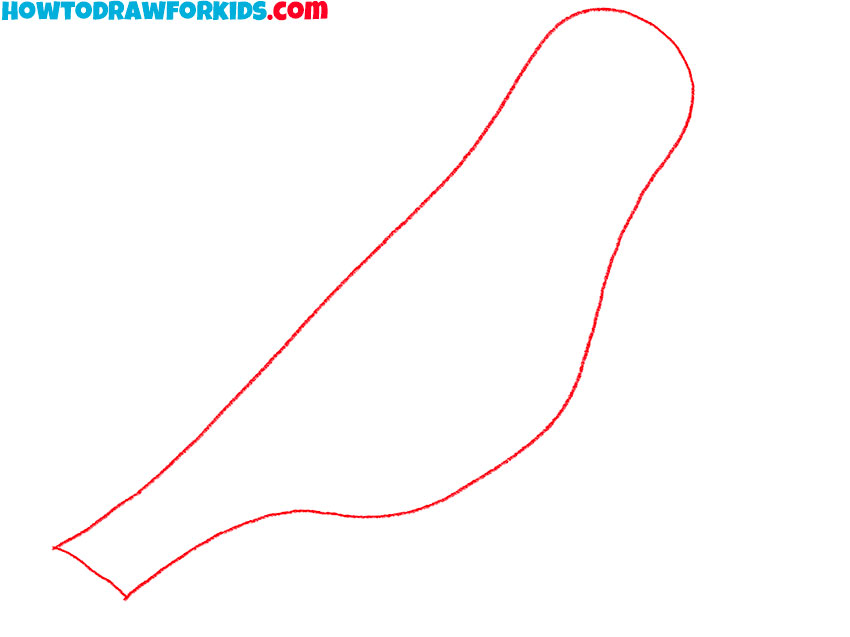
- Draw the outline of the bird’s body.
To complete this step, you need to use curved lines as shown in the picture.
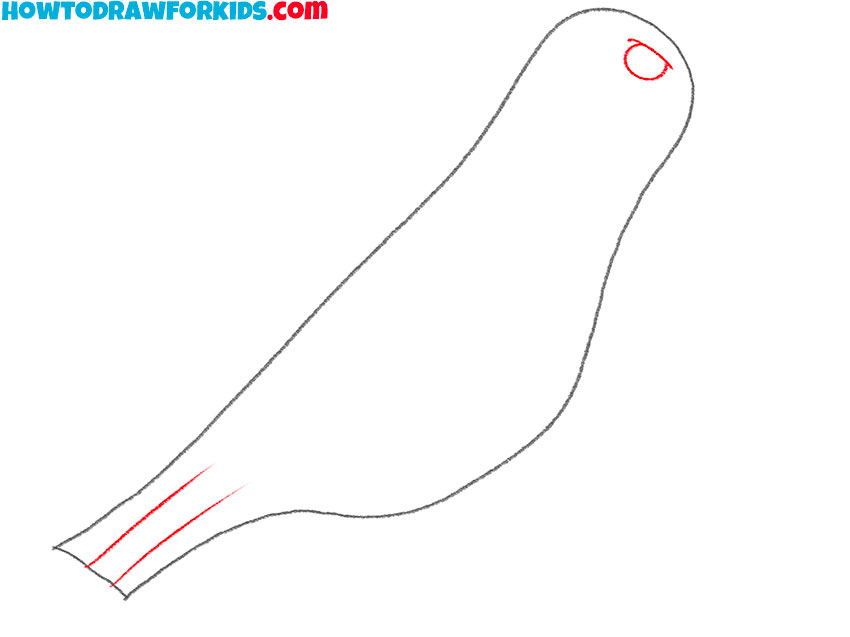
- Add the eye and plumage on the tail.
At the top of the body, draw an incomplete oval, a curved line, add two lines on the tail.
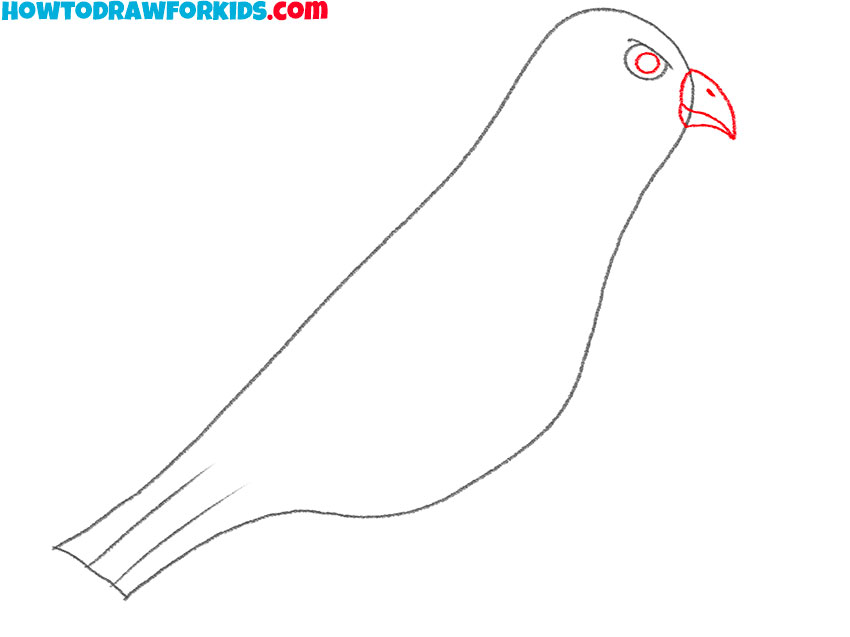
- Finish drawing the eye and add the bird’s beak.
Depict a circle inside the eye, add the large beak using curved lines and the dot.
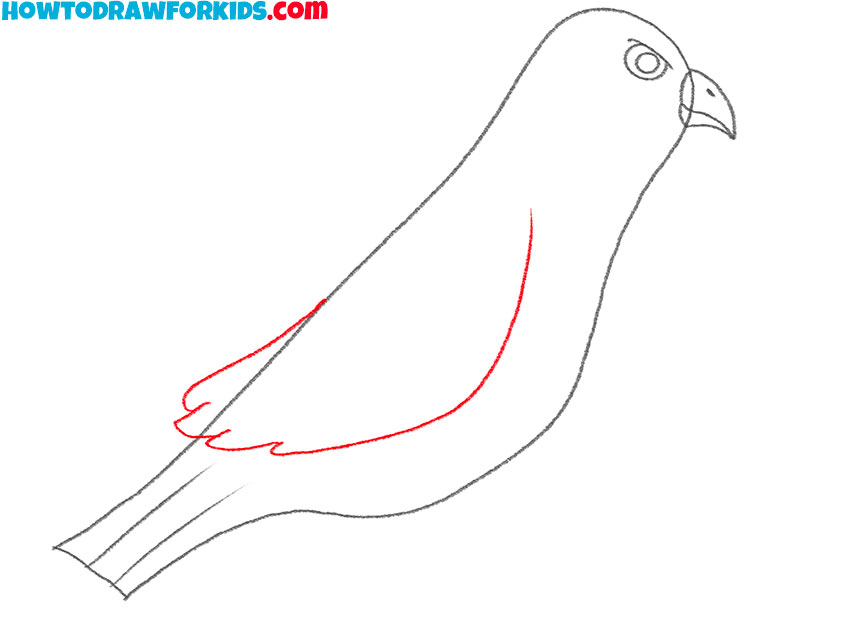
- Sketch out the outline of the hawk’s wing.
On the side of the bird’s body, depict the wing using curved lines, as shown in the figure.
- Add the feathering on the wing and the upper legs.
On the drawn wing, add many curved lines. Below the torso, add the bases of the legs.
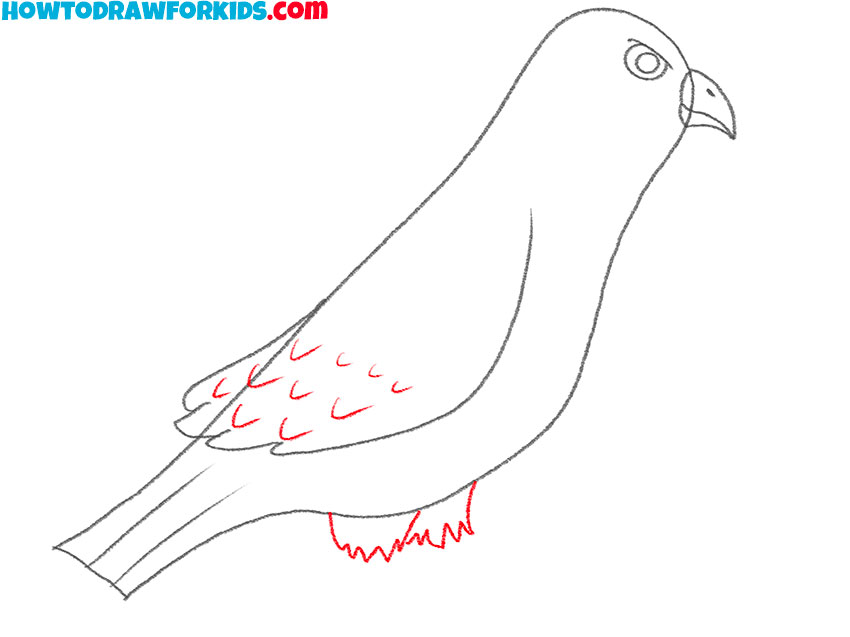
- Finish drawing the legs of the hawk.
Use straight and curved lines to draw the hawk’s feet, spurs, and toes.
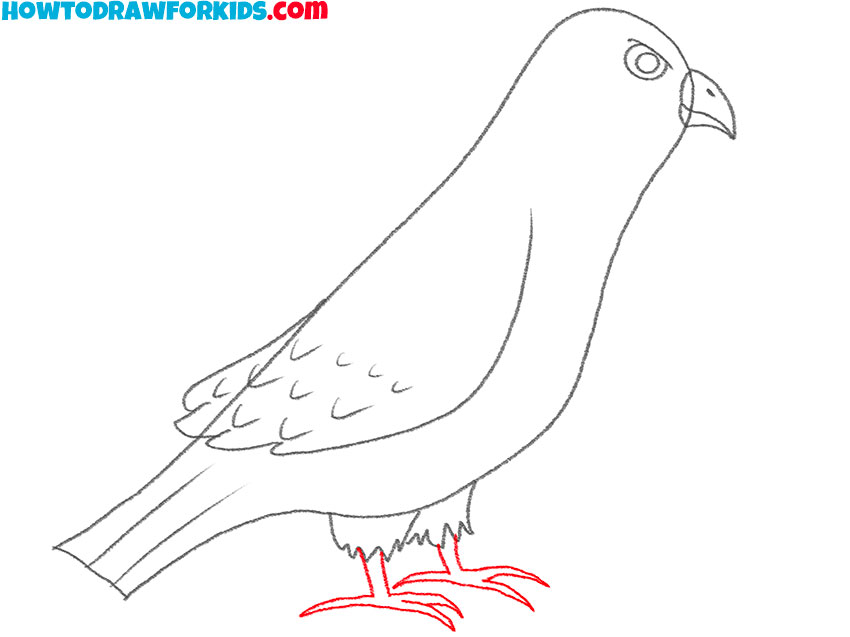
- Add the plumage to the hawk’s body.
To represent the ripples on the bird’s body, add many small straight and curved lines.
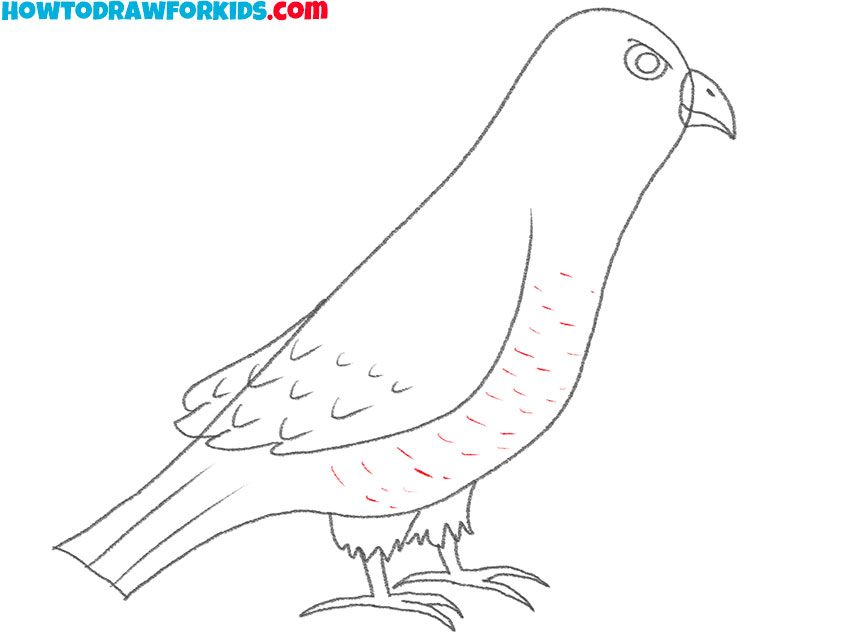
- Correct inaccuracies.
Before you start coloring the hawk, use the eraser to remove the extra lines.
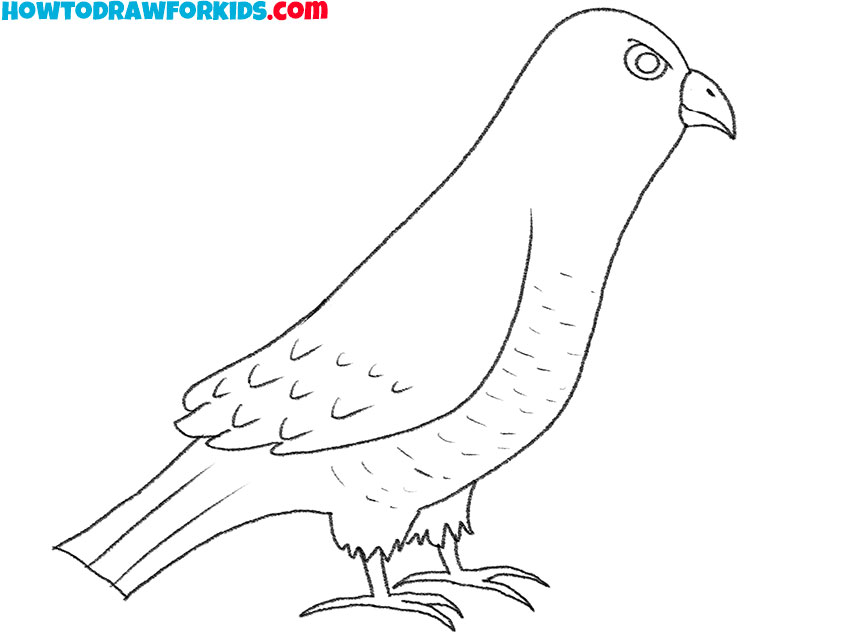
- Color the drawing.
To color the hawk, use black, yellow, and brown.

Additional Content
Certainly, I’ve taken the liberty to enhance your learning experience by creating a complimentary PDF file for this how to sketch a hawk lesson. This concise version of the lesson is conveniently designed for you to download and use at your leisure, with or without an internet connection.
It’s an ideal solution for those times when you wish to practice your drawing skills outdoors, while traveling, or in the comfort of your own home, away from the digital screen. It’s replete with illustrations, ensuring you have a handy reference to help develop your drawing abilities and confidence in illustrating this magnificent bird.
Alternative Drawing Techniques
I’ve also prepared an alternative drawing technique for the majestic hawk, aiming to provide you with a broader canvas for practice and skill enhancement.
Through this diversified training, you’ll be able to capture the hawk’s essence with a newfound depth and precision, advancing your capabilities as an artist.
How to Draw a Hawk from a Different Angle
Exploring various perspectives and techniques is essential in art, which is why I’ve developed this new method for drawing a hawk from a different angle, complete with a unique approach to detailing. This method will challenge your understanding of the hawk’s structure and texture, offering a fresh way to portray its powerful features.
By experimenting with this new technique, you will enhance your ability to observe and render the subtleties that make each hawk distinct, from the curvature of its beak to the layering of its feathers. This practice is not just about replicating what you see; it’s a process of deepening your artistic intuition and expanding your skillset.

Finishing Touches for Your Hawk Artwork
As we wrap up this lesson on drawing a hawk, I’d like to leave you with a few pearls of wisdom that I’ve gathered along my artistic journey. These tips and tricks are little nuggets that can transform your drawing from good to great, breathing life into your sketches.
- Observe Intently: Before pencil touches paper, study the hawk’s form in nature or photographs. Notice the proportions, the way light drapes over its feathers, and the intensity in its eyes.
- Maintain Proportions: Use guide lines to keep the hawk’s features in correct relation to each other. The head is not too big, the talons are just right, and the wings balance gracefully.
- Shade with Purpose: Use shading to create volume and depth. Observe where the light naturally hits and where shadows fall, adding realism to your hawk.
- Feather Textures: Practice the patterns and textures of feathers. They shouldn’t be uniform; each has its own direction and shape, contributing to the hawk’s regal appearance.
- Keep Your Pencil Sharp: A sharp pencil provides the fine lines needed for the intricate details of the hawk’s feathers and gaze.
These tips are guides, not rules. They’re here to serve your creativity, not to constrain it. As you continue to practice and apply these tricks, you’ll find your own rhythm, your own way of speaking through your art.
Conclusion
Bravo on completing the hawk drawing lesson! Your artistic spirit has truly taken flight today. But don’t stop there – my website is a treasure chest of lessons on all sorts of subjects. Fancy sketching the delicate dance of a seahorse or capturing the beauty of a plant? My tutorials are just a click away.
Join the crew on my social media to stay updated with all the latest content drops. And your voice matters – share your thoughts and wishes for future lessons in the comments. Your feedback is the magic that shapes our next artistic adventure. Keep those pencils dancing across the page!

