How to Draw a Lizard
Get your pencils ready, young artists, because I’m going to show you how to draw a lizard in three easy, fun-filled ways.
How to Draw a Lizard: Introduction
This easy lizard drawing tutorial will guide you through each step of building the figure of this interesting ancient animal from simple shapes.
A lizard has a very flexible and smooth body, and in this lesson, I’ll show you how to depict it using simple, flowing lines. You’ll also learn how to include small features without turning the drawing into a complex realistic study.
As usual, to make the process easier and strengthen your drawing skills, I’ve added two extra versions of this tutorial. They break the process of drawing a lizard into different styles and show this animal from various perspectives.
Lizard Drawing Tutorial
Materials
- Pencil
- Paper
- Eraser
- Coloring supplies
Time needed: 25 minutes
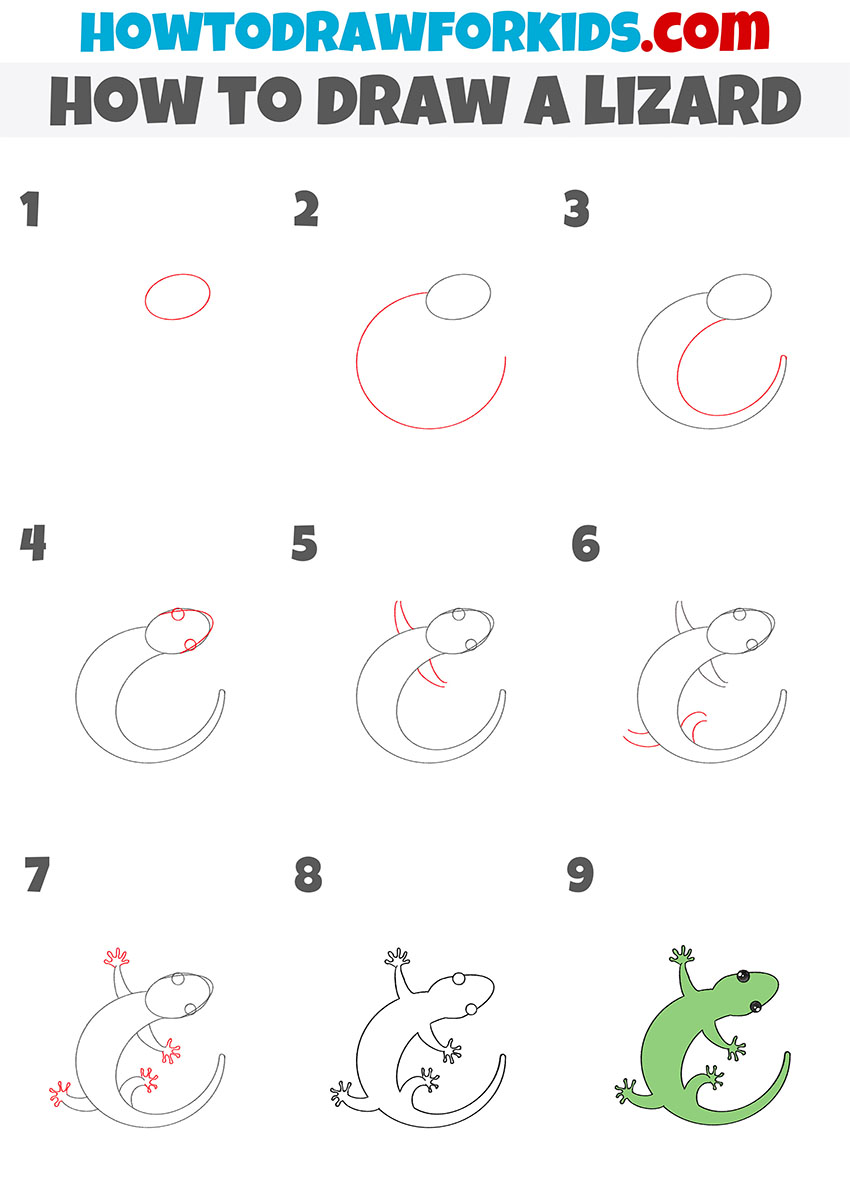
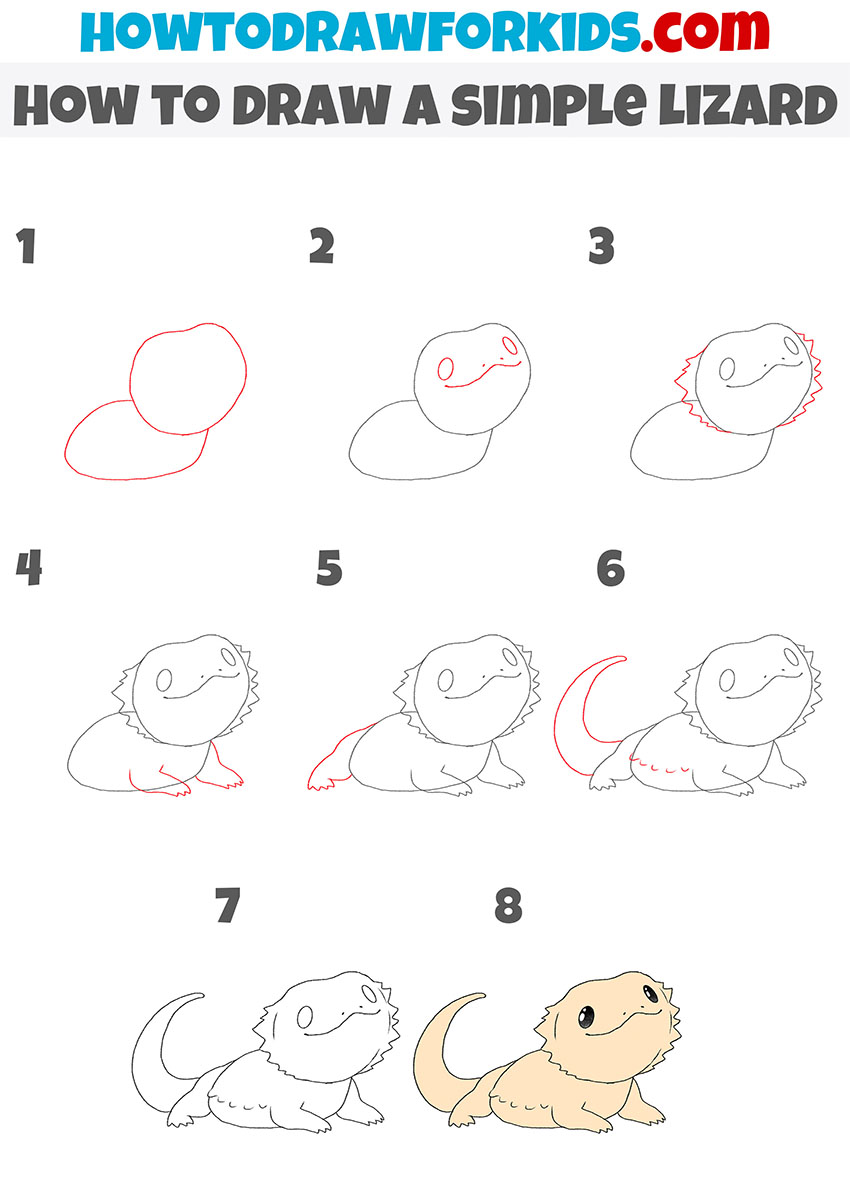
How to draw a lizard step by step
- Sketch the animal’s oval head outline.
Start with a simple head so the rest of the reptile scales to it. Draw the head as a small horizontal oval placed high and slightly right of center. Keep the oval smooth and not too long; geckos and small lizards often have short, rounded snouts. Leave open space below for the curved body and a long tail.

- Add the first curved body outline.
From the back of the head, draw the broad, sweeping and rounded body edge that bends down and then forward, like a large open “C.” You can change the shape of this curve in such a way as to change the pose of the animal.
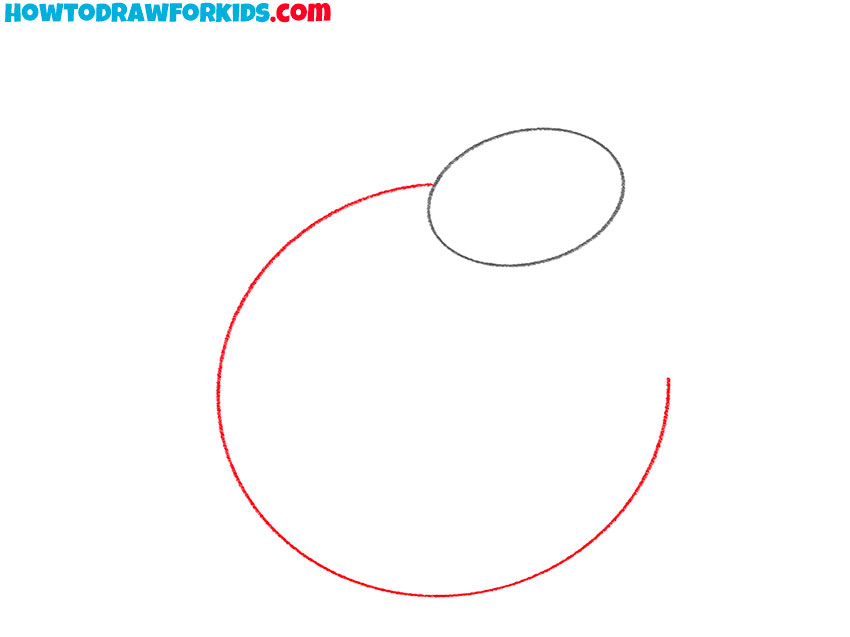
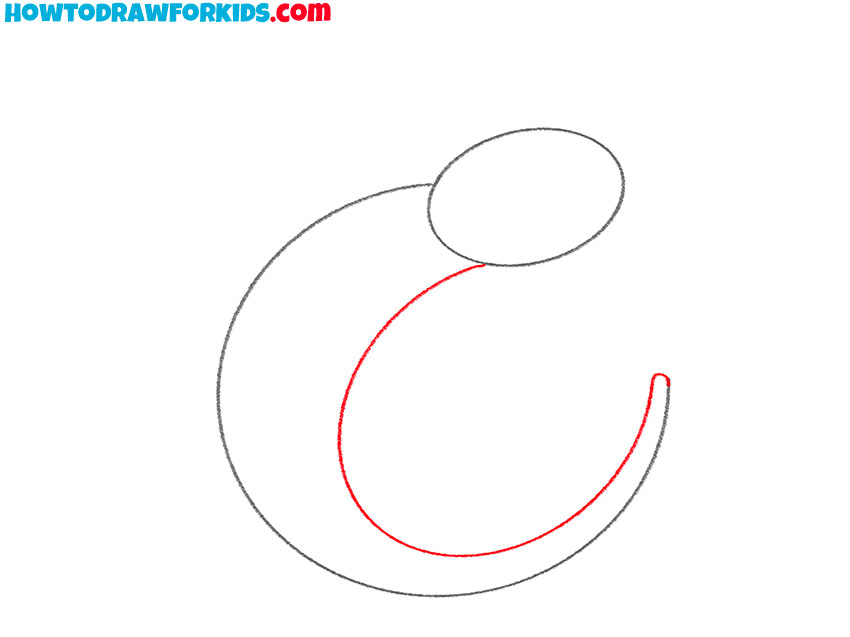
- Add the second curve of the body and tail.
Inside the large “C,” draw the parallel and curved inner edge of the body snd tail that follows the same path and ends with a short upward hook. Leave the body section thicker near the head and gradually reduce the gap between the two curves as they approach the tail tip. This produces a natural taper common to lizards, skinks, and geckos.
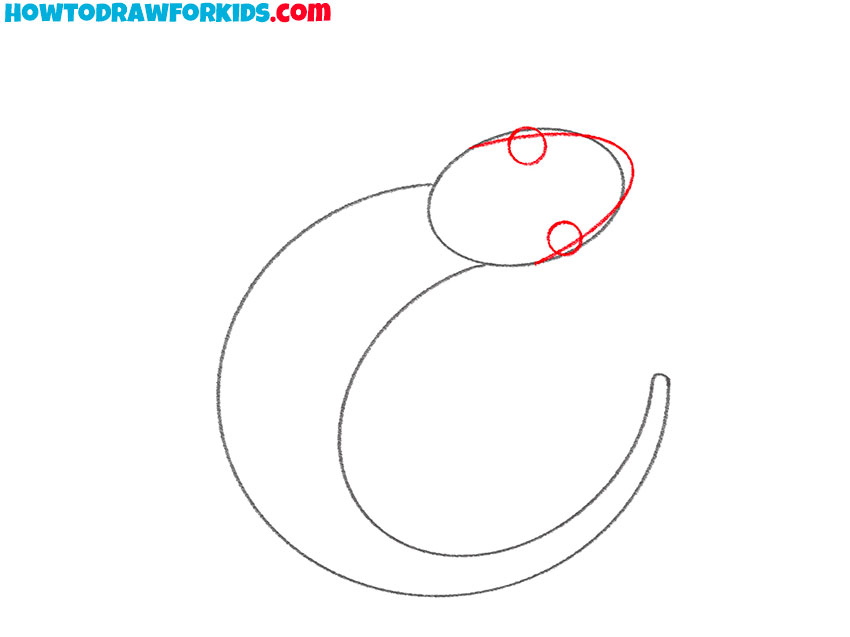
- Sketch the eyes and snout.
On the head oval, draw the eyes as a couple of small circles or ovals on both sides of the oval. Near the front of the head, sketch the snout tip. You can also mark the nostrils as a couple of tiny filled dots.
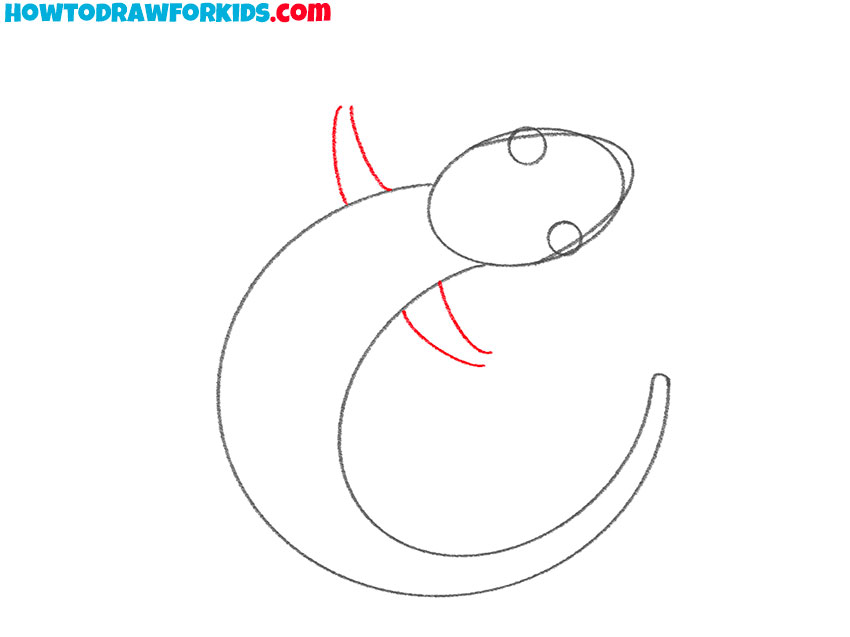
- Draw the front legs of the lizard.
From the top of the shoulder area, draw the upper forelimbs as a couple of short, curved shapes. Keep both limbs slim and slightly tapering.
- Sketch the hind legs of the animal.
Hind legs complete the anatomy of the animal. From the back of the body, draw the rear legs using simple shapes, similar to the outlines of the arms.
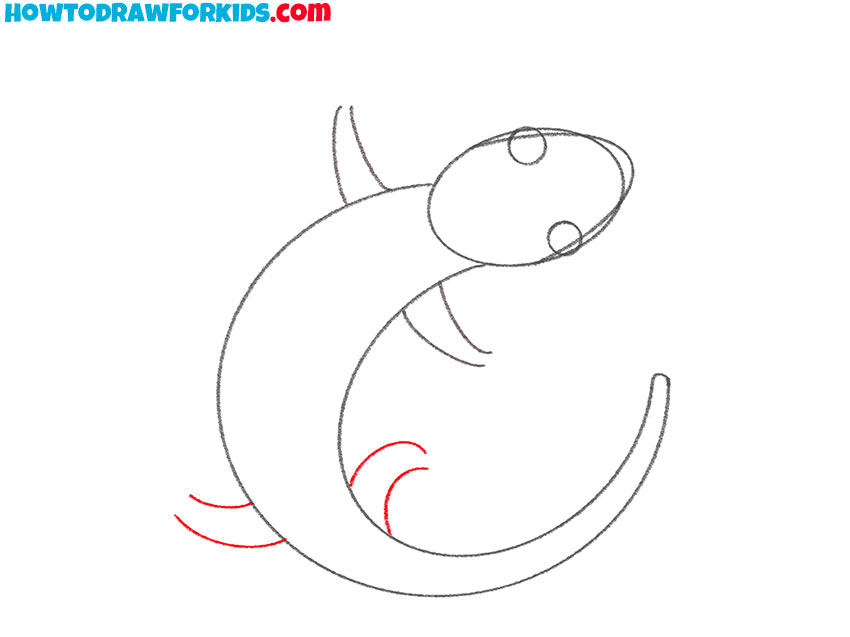
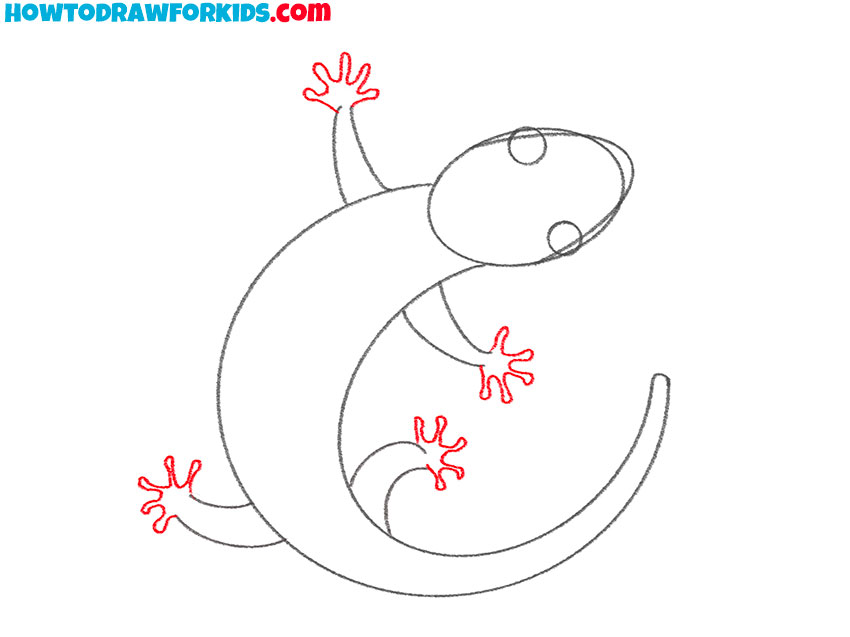
- Draw the toes and feet of the lizard.
On each limb end, draw the uneven and simple star-like toes: four or five rounded pads radiating from a small palm. Keep the pads bulbous and separated to imply lamellae found on geckos. Vary the angles of the front and rear limbs.
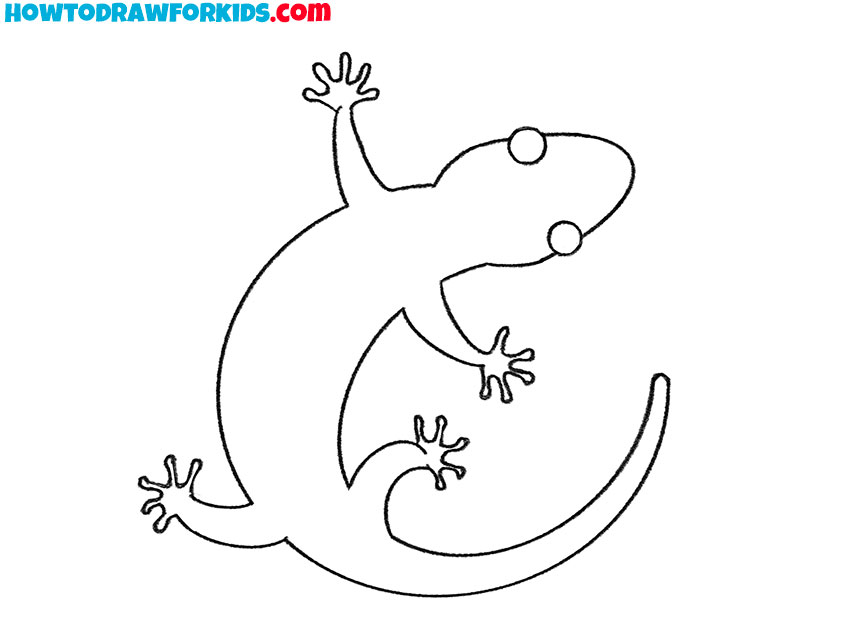
- Refine and finalize the animal contour.
Darken the outer contour of head, body, limbs, and tail of the animal. Also, erase extra construction, removing the head oval segments hidden by the eyes and snout and delete overlapping limb sketch lines inside the body. Keep the interior features minimal.
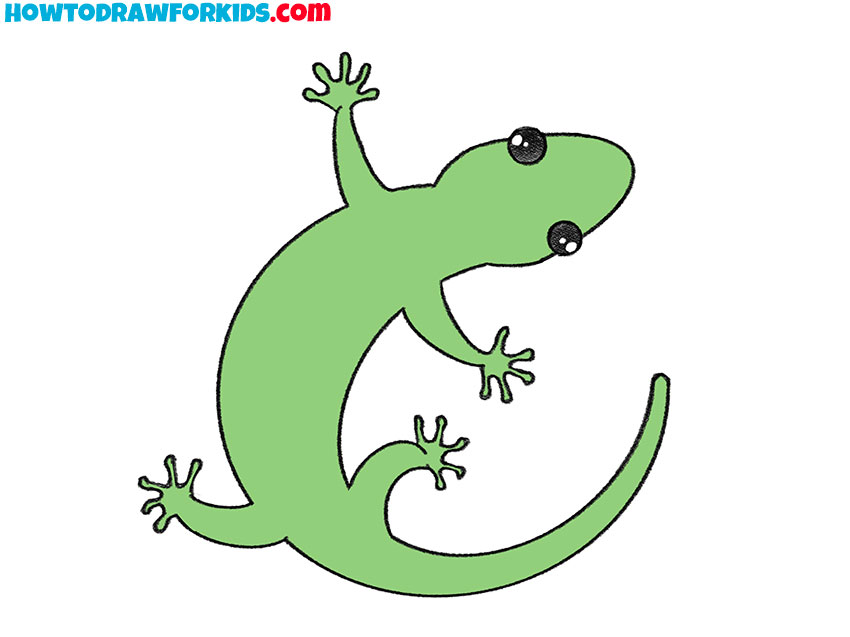
- Add bright green tones to the body.
Paint the entire body with a fresh green or olive typical of small house geckos and anoles. Color the eyes a deep brown or black with a tiny white highlight. You can darken the tail tip slightly or add a thin outline along the back to represent a dorsal ridge.

Additional Content
To accompany this lizard drawing lesson, I’ve prepared a free downloadable PDF version. It includes the main steps in a compact format that’s easy to follow both online and offline.
Inside the file, you’ll find all the essential stages of the drawing process, along with simplified versions for
How to Draw a Lizard: Alternative Techniques
Alongside the main tutorial, I’ve added several alternative ways to draw a lizard. Each one shows a different perspective or style, helping you practice sketching a lizard using alternative techniques.
Alternative Lizard Drawing Tutorial
In this variation of the lizard drawing tutorial, the animal is sketched in a slightly larger with the same basic shape as in the main lesson.
In this tutorial, I also showed how to sketch lizards using a different set of steps and shapes. This way, you can see how to illustrate the same animal using different methods.

How to Draw a Lizard from a Different Angle
Alright, young artists, let’s get set to sketch a lizard like no other – one that smiles back at you with oodles of character.
This lesson is quite different from the previous ones, as here I’m showing the animal in a different pose and from a different perspective. Here we see the animal from the front and side, rather than from above as in the previous examples.
Conclusion
This easy lizard drawing lesson is now complete, but there are many other tutorials on the website that will help you continue practicing.
You can try to draw a crocodile to illustrate another animal with similar shapes or visit my alligator drawing tutorial to find out more about these animals.
Each tutorial is designed to help you build new skills step by step and apply them to different subjects. Follow the project on social media to stay informed about upcoming lessons and share your results in the comments. Keep practicing regularly and develop your drawing technique further.