How to Draw a Megaphone
Continuing the topic of drawing simple electronics, let’s try to draw a megaphone using two different but still simple techniques.


How to Draw a Megaphone: Introduction
In one of the previous drawing lessons, I showed you how to draw a microphone using basic circles and straight lines. This lesson on how to draw a megaphone is a bit more complex, but it still remains as simple as possible and accessible even for the youngest artists.
Like any other simple drawing lesson, including those on electronics, this lesson on drawing a megaphone is not just an instruction on how to draw a particular object but also a great guide for creating something more complex and detailed.
Here, I will first show you how to draw a simple yet fairly realistic-looking megaphone using basic lines and shapes. Then, I will demonstrate a more simplified version of drawing a megaphone in case the first one seems too difficult.
In the second version, we will use even simpler lines and the most basic shapes to achieve the final megaphone drawing. Of course, this version will look more cartoonish and less realistic, but having two approaches will help you grasp the idea of drawing this device in a well-rounded way.
Megaphone Drawing Tutorial
Materials
- Pencil
- Paper
- Eraser
- Coloring supplies
Time needed: 20 minutes
How to Draw a Megaphone
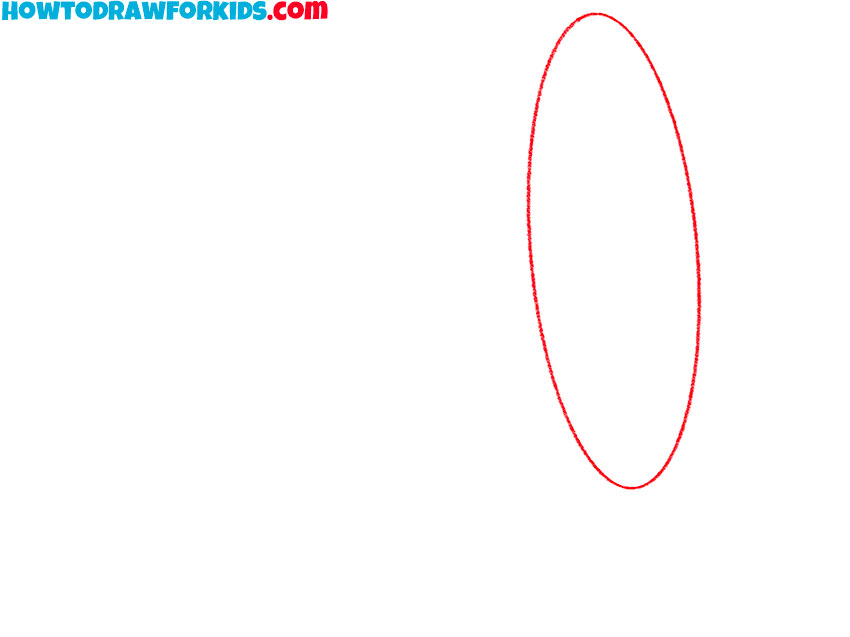
- Draw the front opening.
Start by sketching an elongated oval shape. This oval represents the front opening of the megaphone, where sound projects outward. Make sure to keep the oval slightly tilted to create a more natural perspective. If necessary, use light pencil strokes so that you can make adjustments before finalizing the outline.
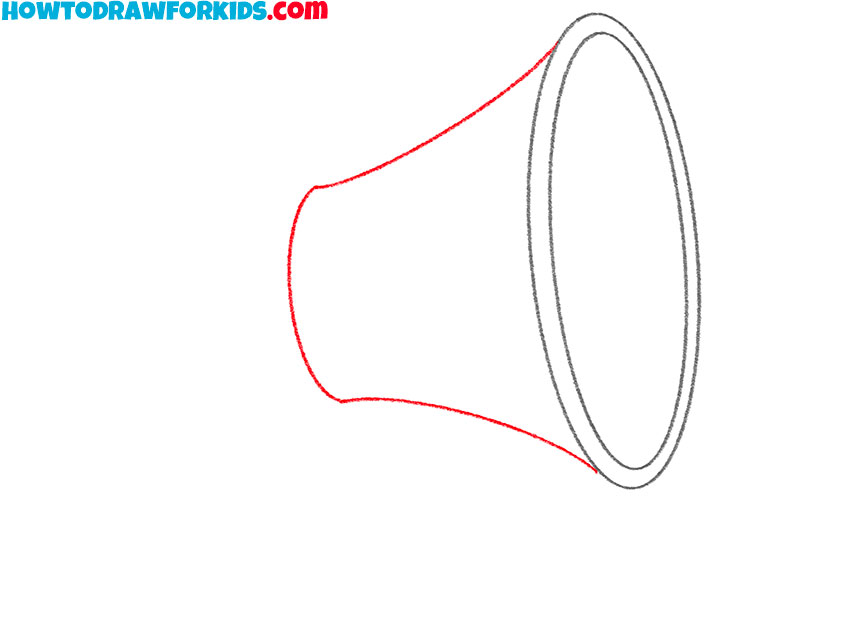
- Create the inner edge.
Now, draw another oval inside the first one, slightly smaller but following the same curvature. This line creates the rim of the megaphone, making it appear three-dimensional. The distance between the two ovals determines how thick the rim of the megaphone will look.

- Sketch the megaphone body.
Sketch two curved lines from the sides of the oval, tapering them inward slightly as they move away from the opening. These lines will form the main body of the megaphone. At the end of these curved lines, connect them with another slightly curved line to close off the base of the megaphone.
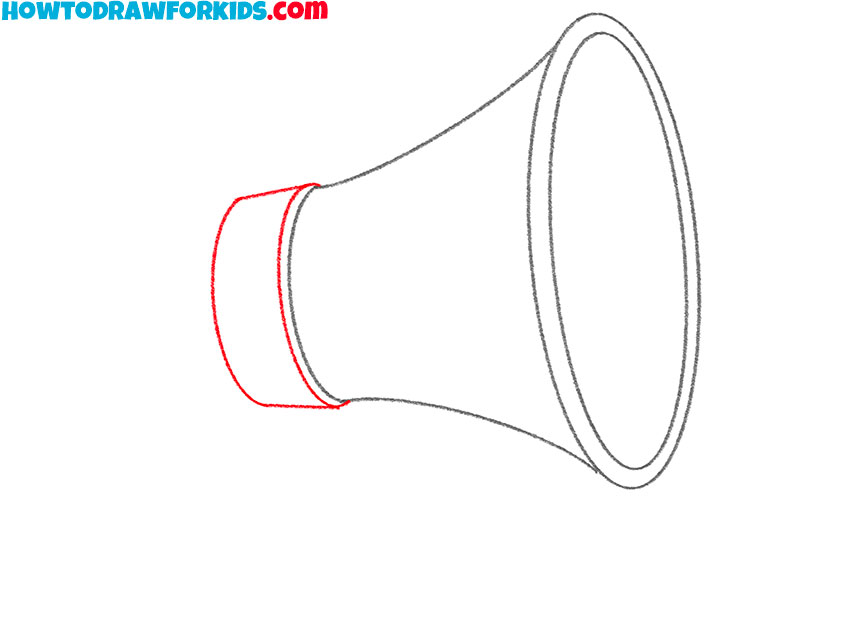
- Add the back section.
Now, draw a small rectangular shape at the back end of the megaphone, just where the cone narrows. This section represents the back casing of the megaphone. This addition helps define the transition between the main body and the back part.
- Draw the microphone section.
Attach a small, rounded shape at the very back of the megaphone, slightly overlapping the previous section. This element represents the rear cover of the microphone, giving the megaphone main body a finished look. You can change the shape of this part, making it more angular.

- Attach the handle.
To make the megaphone drawing look more functional, sketch a curved handle extending downward from the back section. The handle should be slightly bent to reflect how real megaphones are designed for grip. If the handle appears awkward, adjust its curvature and position to make it look more natural.

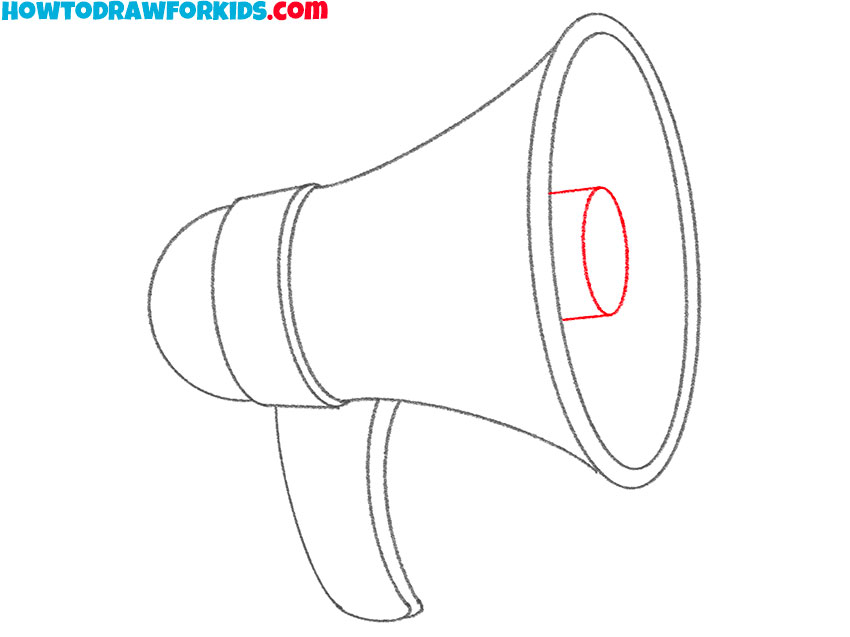
- Draw interior details of the megaphone.
Now, add an inner cone shape within the front opening of the megaphone. This small detail represents the inner speaker cone, which helps direct and amplify sound. To create this part, draw a smaller oval inside the opening and connect it with short lines to the line of the outer rim.
- Finalize and color the megaphone.
Erase any unnecessary guidelines and ensure that the shapes are clean. If you want to add color, consider using gray or metallic shades for the main body, with a yellow or orange back section. The handle can be shaded darker. But of course, you can use any other color to color the megaphone.

Additional Content
Recognizing the importance of accessibility in art, I’ve transformed our megaphone drawing lesson into a free, downloadable PDF file. It’s an ideal way to continue your artistic growth without needing an internet connection. This streamlined guide gives you the flexibility to draw anytime and anywhere.
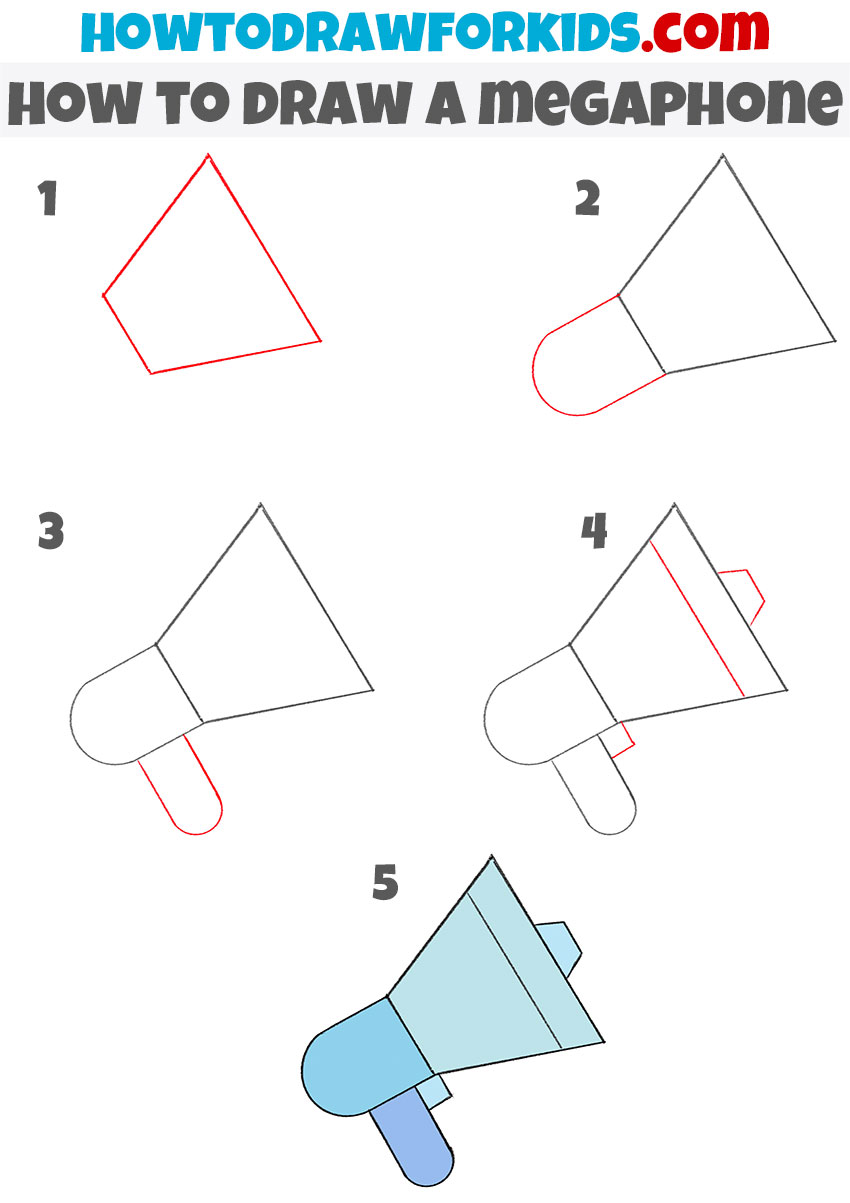
Simple Megaphone Drawing Tutorial
This method focuses on using straight lines and geometric shapes to simplify the process of drawing a megaphone. Compared to the first tutorial, this version has a more simplified appearance, with basic forms like triangles and rectangles instead of smooth curves. The handle and back section are simplified, making it easier for beginners. The overall shape is blockier, creating a more cartoonish look.
To learn how to draw a megaphone with this technique, start by sketching a four-sided shape with angled lines to form the base structure of the megaphone. Extend a rounded shape from one side to represent the back section. Add a small, slightly curved rectangle at the bottom to form the handle.
Ensure that all lines remain straight where necessary to maintain a geometric look. Draw a horizontal band across the front section to indicate the speaker’s outer rim. Attach a small rectangular shape for the button. Refine the outline by erasing any unnecessary lines and making sure the edges are clean. Color the megaphone using light blue shades for the main body and darker blue for the handle and back section.
Conclusion
First, we learned how to draw a megaphone in a simple way while achieving a fairly realistic-looking result. Then, we drew a highly simplified megaphone, similar to those seen in cartoons or basic children’s illustrations. Which of these two versions did you like more? Did you draw both megaphones, or did you focus on just one of them? Your opinion plays an important role in shaping content and improving existing lessons, so be sure to share your thoughts with me.
Also, don’t forget to share this drawing lesson with your friends, classmates, and family members. This will help other artists discover my simple instructions, learn to draw easily, and possibly become professional artists in the future.