How to Draw a Palm Tree
In this tutorial on how to draw a palm tree, I will show two methods. The first method will be simple, and the second will be even simpler.

How to Draw a Palm Tree: Basic Information
The palm tree has a distinctive and recognizable appearance, which makes it an interesting subject to draw. Illustrating its characteristic features is very important to creating a convincing representation. It’s tall, slender trunk and the arching, fan-like fronds give the palm tree’s unique silhouette. The artist should convey these elements as close to the original as possible.
Palm trees can serve a variety of purposes in artwork. They can be the primary focus of a composition or play a supporting role as part of a background. This tutorial on how to draw a palm tree will allow you to learn how to create images of this tree in such a way that they can be used for any purpose.
For example, a drawing of a palm tree might frame a beach scene, create a tropical setting, or become a part of a more complex environment. Understanding how to integrate a palm tree into a scene without overwhelming the composition can improve the look of your drawing.
When drawing a palm tree, it’s important to isolate and illustrate only the most important features. This not only helps to simplify the process but also ensures that the final image is easily recognizable. Avoid adding excessive details that could complicate the task or detract from the tree’s characteristic shape. Instead, focus on clearly defining the trunk, fronds, and their natural arrangement to create a simple but professional result.
Palm Tree Drawing Tutorial
Materials
- Pencil
- Paper
- Eraser
- Coloring supplies
Time needed: 25 minutes
How to Draw a Palm Tree
- Draw the first palm fronds.
Start your palm tree drawing by sketching the outline of first fronds. Use a couple of slightly curved lines to create the first frond, then mirror this with another pair of curved lines to create the second frond. Keep these fronds wide and slightly arching to illustrate the natural shape of palm leaves.

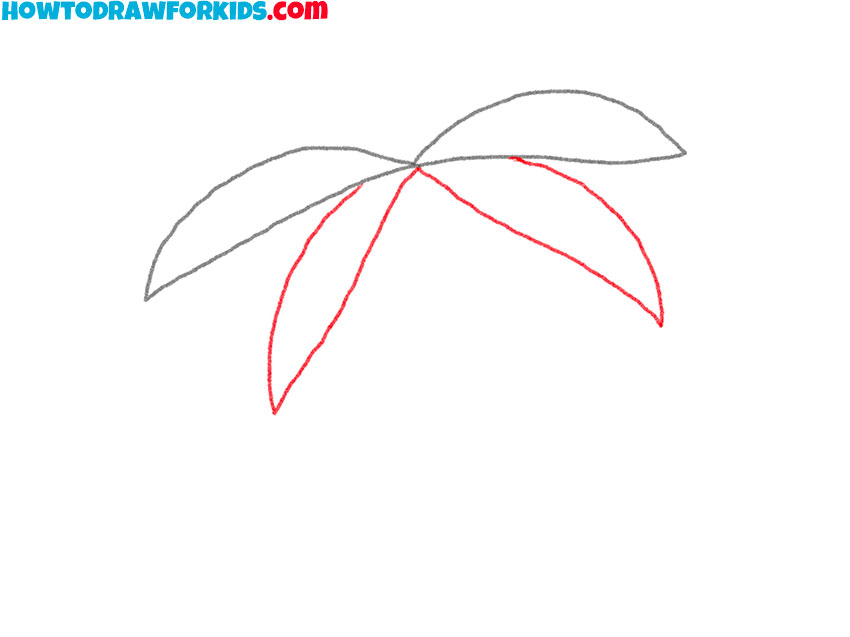
- Add more fronds.
These fronds should overlap the first two slightly and should be angled differently to create more natural look. Repeat the same curved, pointed shapes as in the first step, but try varying the length and angle slightly, for a more natural, varied look that mirrors how palm fronds grow in different directions.
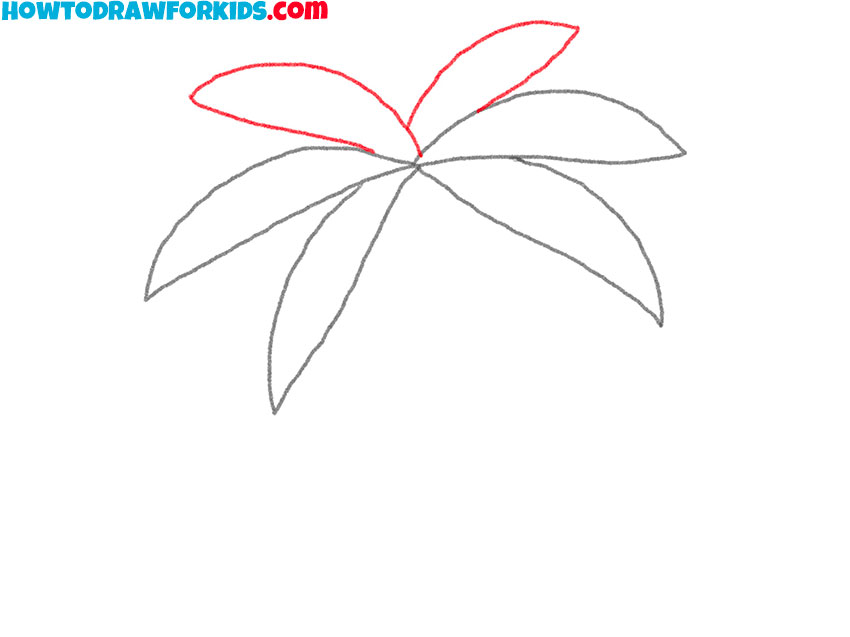
- Complete the crown.
To finish the crown of the palm tree, draw two more fronds in the remaining spaces, making sure they radiate outward from the same central point. Position these new fronds at the top of others. In this step you should have a finished palm tree crown with fronds naturally diverging in different directions.
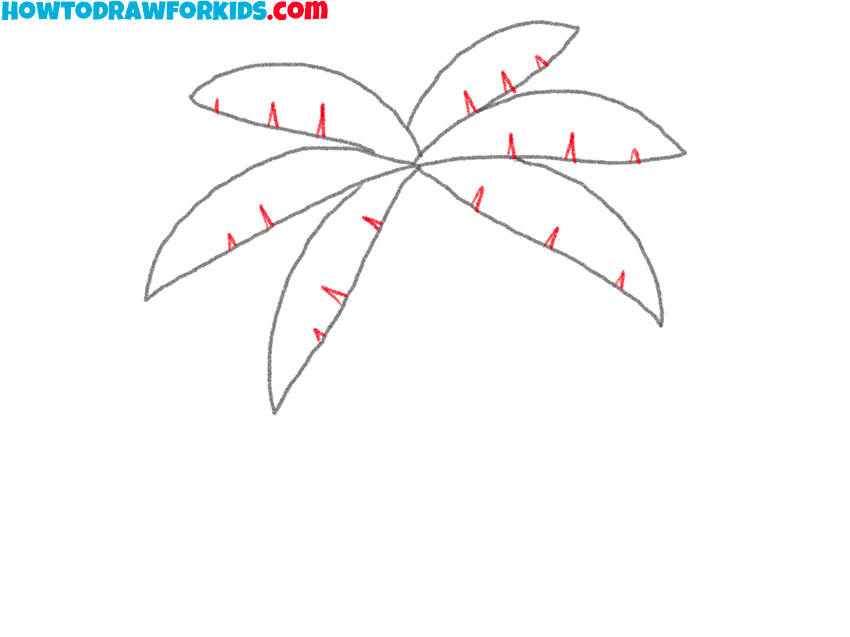
- Detail the fronds.
To give each frond more detail and texture, add short spaced lines along the bottom edges of the fronds. These lines represent the natural separations seen on palm leaves, creating a realistic segmented look. You can vary the size and placement of these separations for greater realism.
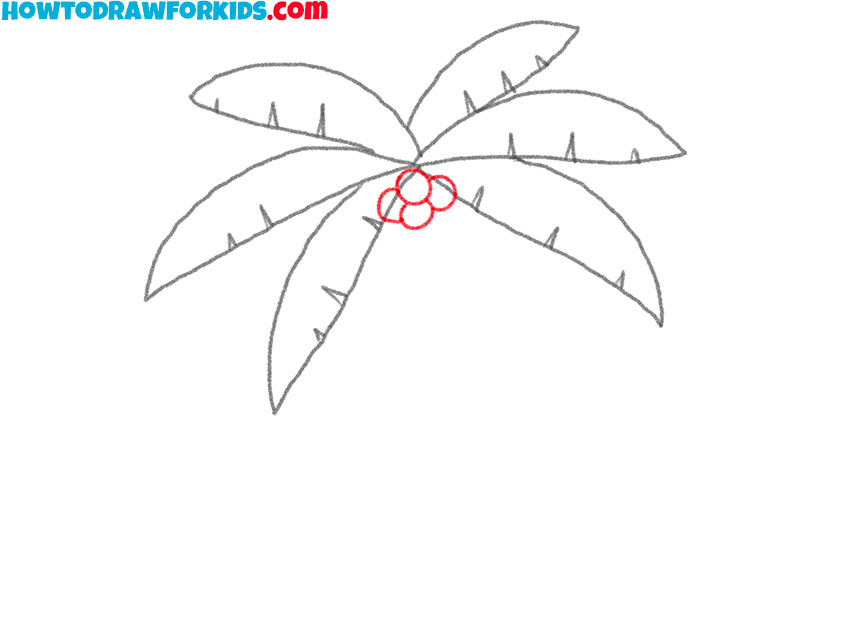
- Add some coconuts at the base of the crown.
Add a few small circles at the base of the fronds where they meet the trunk to represent coconuts. These circles should vary slightly in size and overlap a bit to give a natural clustered look. Draw the coconuts lightly at first to adjust their placement if needed. Keep the shapes simple and smooth.
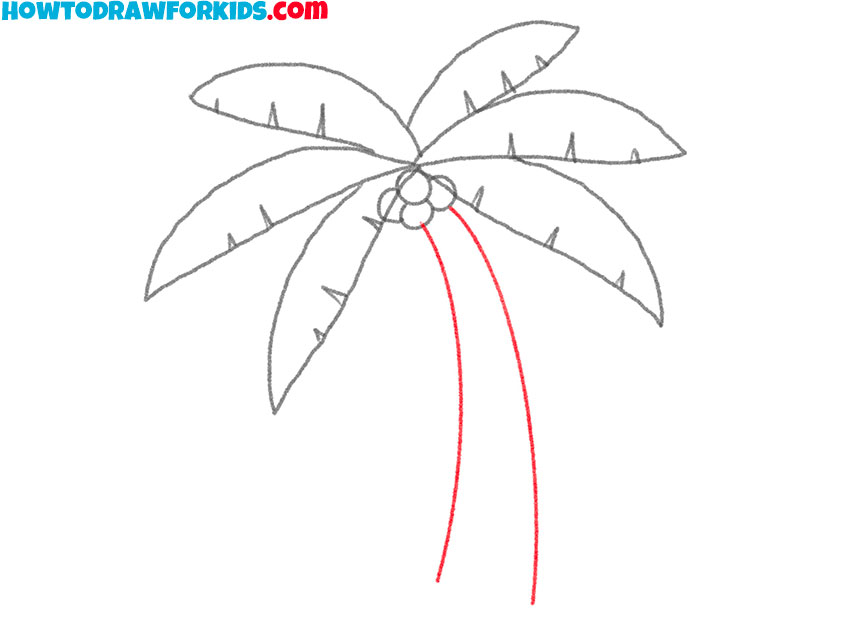
- Sketch the outlines of the trunk.
Draw two slightly curved lines down from the base of the crown to form the trunk. Position these lines parallel at the top, then widen them gradually as they descend, showing the narrowing shape typical of palm tree trunks. Make sure the trunk expands and curves evenly as it approaches the ground.
- Detail the trunk.
Draw horizontal, slightly curved lines along the trunk of the palm tree to represent its segments. These lines should follow the trunk’s gentle curve to create a textured effect that resembles the rough surface of a real palm tree. At the very bottom you can illustrate the ground with an uneven line.

- Refine the sketch of the palm tree.
Erase any extra guidelines or overlapping lines to tidy up the palm tree drawing. Refine the edges of each frond and make sure the trunk lines are smooth. Take your time with this step, as cleaning up the drawing improves the final look and prepares your drawing of a palm tree for coloring.

- Color the palm tree.
Use a solid green color for each frond to give the leaves a natural look. For the trunk, choose a light brown shade to represent the typical color of a palm tree trunk. If you’ve drawn coconuts, you can color them in a darker brown, to give your pal, tree drawing more realism.

Additional Content
This PDF file contains all the steps from the palm tree drawing tutorial. In addition to the steps themselves, this file contains a coloring page, a tracing worksheet, and a grid drawing worksheet.
Whether you are relaxing at home or traveling, this PDF allows you to practice drawing palm trees whenever you want. Simply open the file and start working on your drawings at your convenience.
How to Draw a Simple Palm Tree
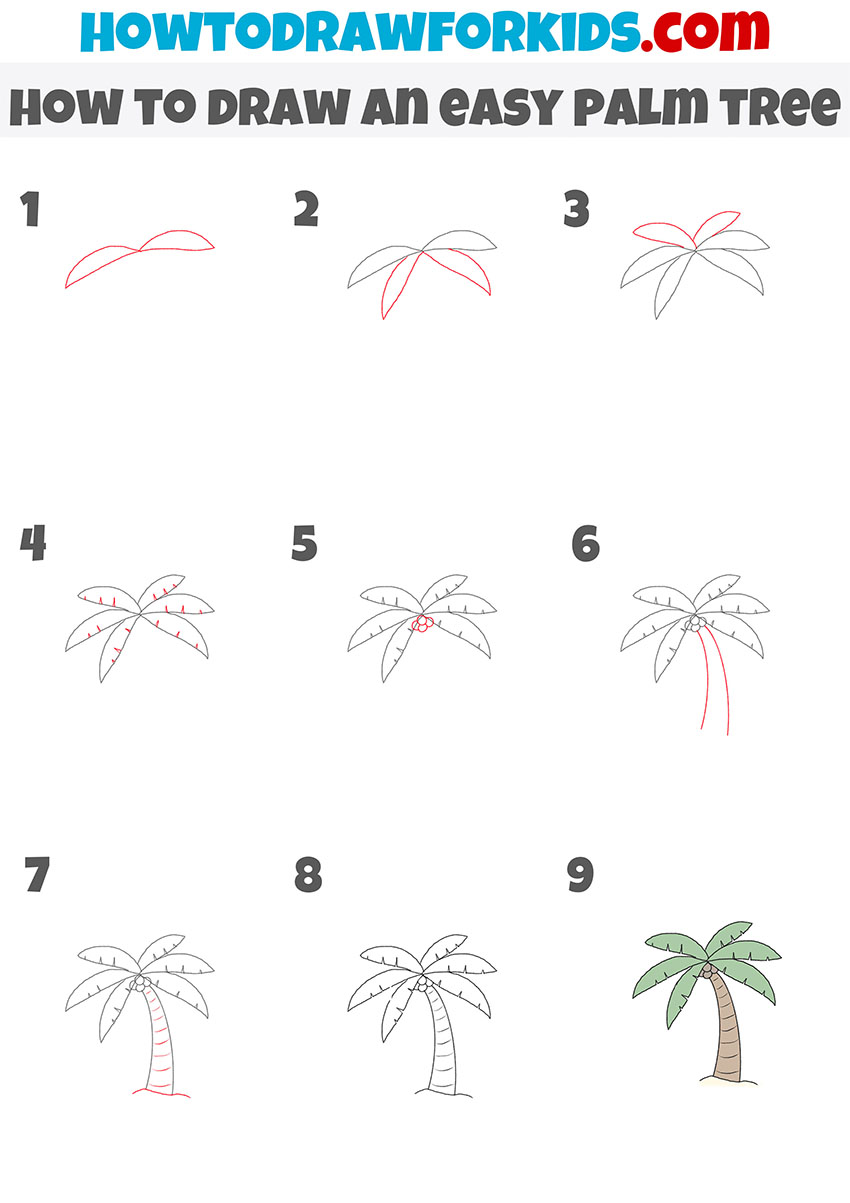
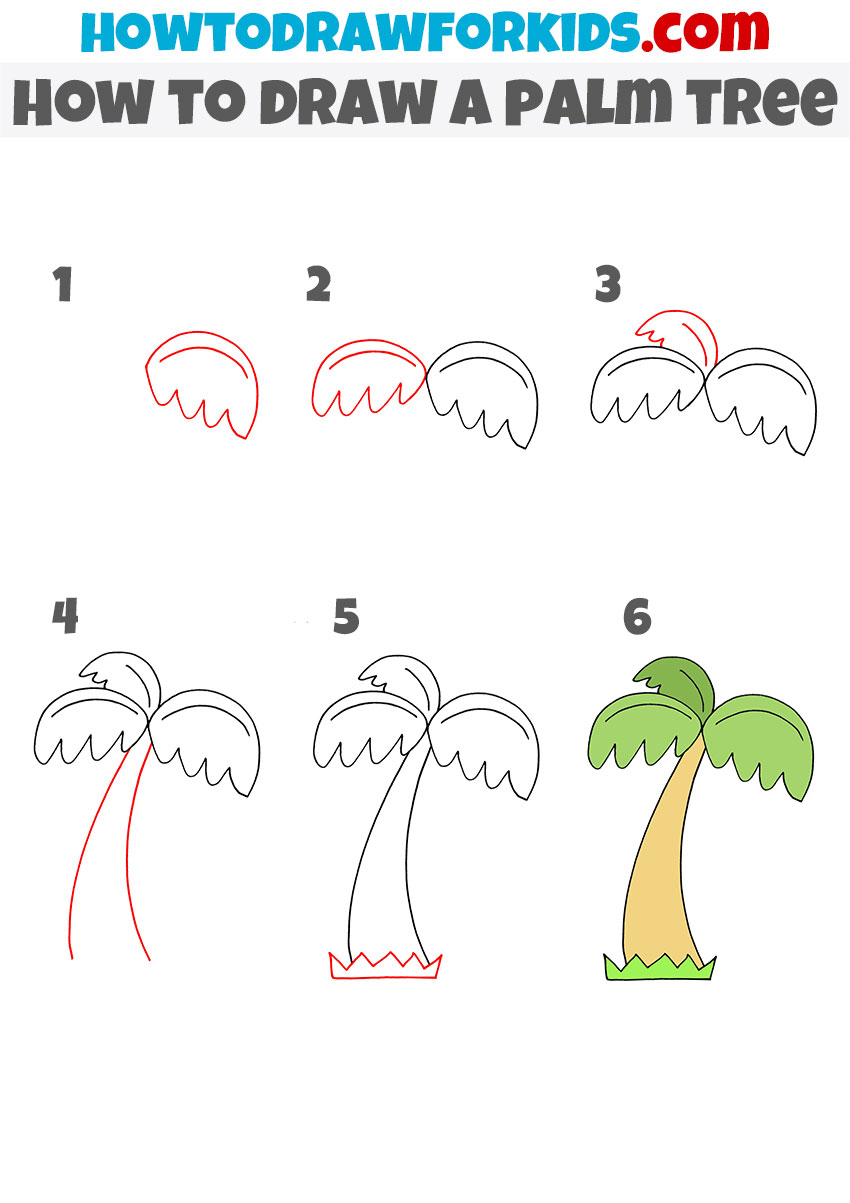
The main difference between this palm tree drawing tutorial and the previous one is the simplicity and structure of the fronds and trunk. In this version, the fronds are drawn as rounded shapes with fewer detailed segments, making the design more simplified and stylized. Additionally, this tutorial has fewer steps and focuses on creating a simplified palm tree structure without complex details.
To draw an easy palm tree, start by sketching one large frond on the left side. Draw a curved top line, then add a series of rounded sections along the bottom to form the leaf segments. Next, draw the second frond of the palm tree to the right of the first one, following the same pattern. Add the third, smaller frond at the top center, positioned between the first two to complete the crown of the palm tree.
Then, draw the trunk by extending two curved lines downward from the crown, widening them slightly toward the bottom. At the base of the trunk, add a zigzag line to represent the grass. Finally, color the fronds in solid green and the trunk in light brown to complete your simple palm tree drawing.
Drawing Your Own Palm Tree Paradise
After practicing how to draw a palm tree, you can take the concept further by adding these trees into different scenes, allowing the palm tree to make the setting even more interesting.
A palm tree at the edge of the beach with waves in the background and a surfboard leaning against it can create a simple coastal scene.
Another option is to place the palm tree in a rainforest setting with thick vegetation around it. Adding a nearby waterfall and small animals behind the leaves can help depict a tropical environment.
You could also place the palm tree on an open African plain, providing shade to animals like elephants or lions. Adding a sunset in the background gives the scene more interesting and complex appearance.
Or, consider an isolated island where the palm tree is the only one around. A hammock tied to the tree and a small boat near the shore can create a quiet, secluded spot.
Conclusion
You have now completed the palm tree drawing tutorial. There are more drawing lessons available on my website, so feel free to continue with other subjects. For example, you can learn how to draw a tree in just a few simple steps, or try your hand at drawing a flower. You can find these tutorials and more with just a click.
Additionally, if you would like to be notified when new drawing lessons are available, follow me on social media. This way, you’ll be the first to know about new content.


