How to Draw a Park
Parks are very picturesque and inspiring places, and one of them inspired me to create this lesson on how to draw a park.
How to Draw a Park: Introduction
Now I will show you how to draw a park. This lesson will be one of the most fun. I am sure that you will have a pleasant time and learn useful new skills.
A park is a great place for families. The park is well landscaped, in the park, there are various trees and shrubs, there are also benches where you can sit down and enjoy the beauty of nature.
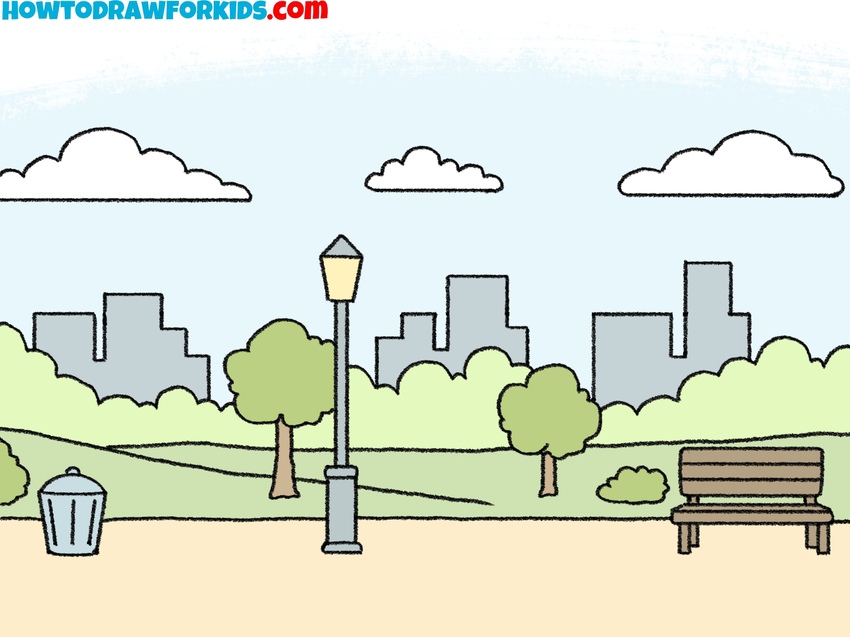
In the picture, you can see the park, which is located within the city limits. The outlines of houses are visible in the distance, and a road, a bench, a lantern, and an urn are visible in the foreground. As usual, the lesson consists of several steps that you can easily repeat, even if you have no experience in drawing. Follow all the steps in sequence, be careful and accurate at each step.
Park Drawing Tutorial
Materials
- Pencil
- Paper
- Eraser
- Coloring supplies
Time needed: 30 minutes
How to Draw a Park
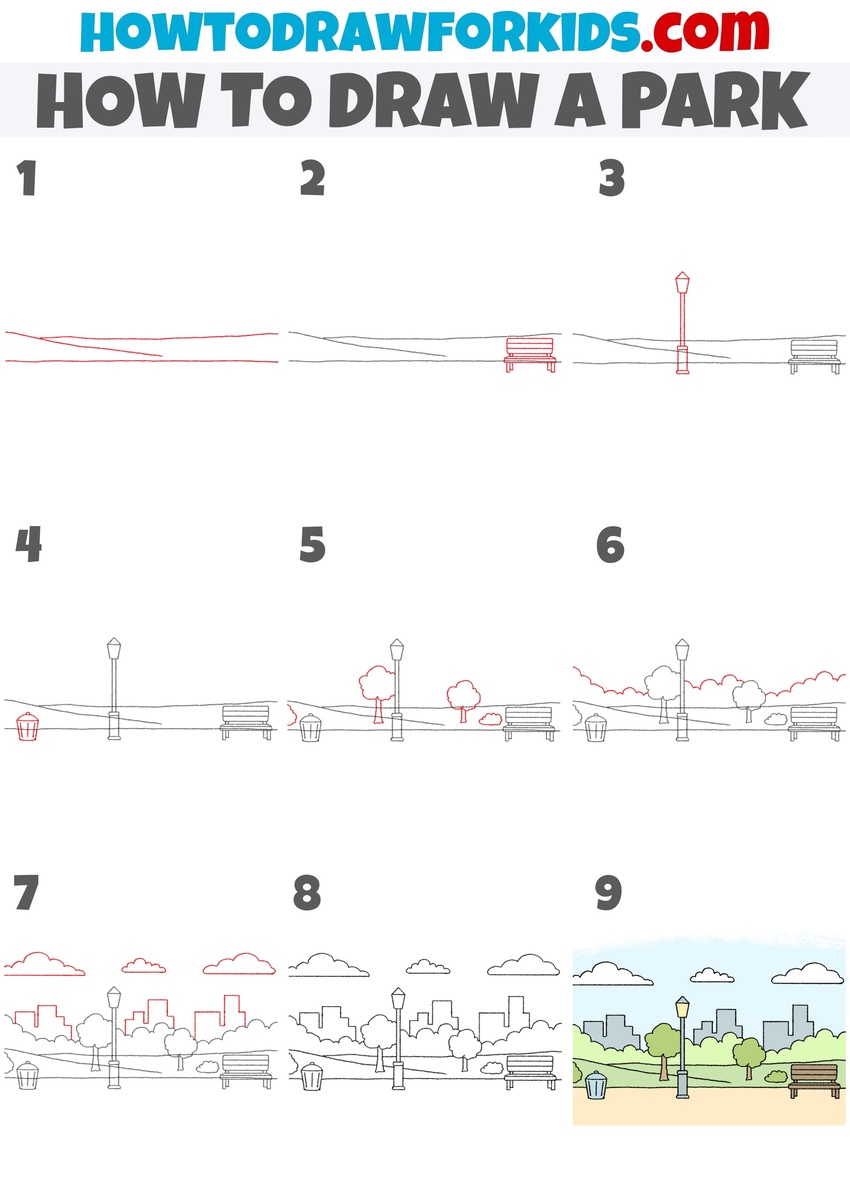
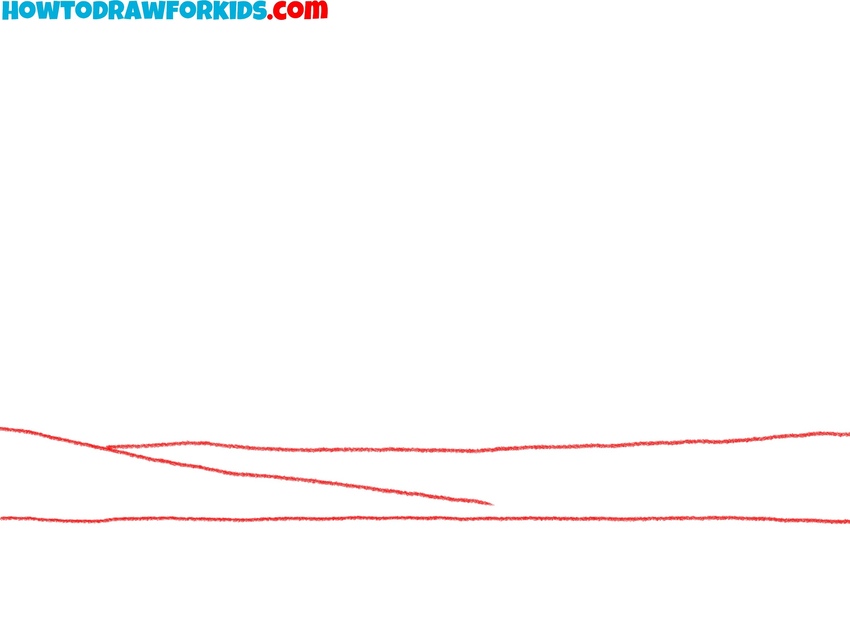
- Create the ground guidelines.
To set up the park drawing, it’s important to sketch the basic layout of the scene. To do this, use two long horizontal lines to illustrate the division between the walkway in the foreground and the ground further back. The lower line should be straight, while the upper line can have a very gentle curve to give a natural feeling.
- Draw the park bench on the side.
The park needs recognizable features, and a bench is a common element found in almost any park. Place the bench between the lines from the previous step. Draw the backrest as a simple rectangle resting, then add the seat just below it, using another horizontal rectangle, and finally, sketch two short legs

- Draw the park lamp.
To make the park feel even more natural and authentic, place a tall lamp post in the middle of the drawing. Begin by sketching a thin vertical rectangle for the post. At the top, add a narrow trapezoid with a small pointed shape above it to represent the lamp itself.

- Illustrate the trash can near the lamp.
Adding small details gives a park a more realistic setting, so place a trash bin on the left side of the drawing. Draw a short vertical cylinder with a curved oval at the top. Add a few vertical lines inside the cylindrical shape to convey the texture.

- Sketch the trees and shrubs.
To illustrate greenery in the park, draw trees and shrubs behind the benches and lamp post. For the trees, sketch rounded cloud-like shapes to represent the foliage. Place them slightly above the horizon line. For the shrubs, add small rounded lumps near the base of the trees.

- Fill the horizon with tree crowns.
To give more dimension to the background, continue the row of shrubs and tree outlines across the park scene. Use a series of wavy, irregular lines to represent foliage stretching along the horizon. This helps fill the space and creates simple yet realistic perspective effect.

- Sketch the clouds and buildings in the background.
To create a full landscape, add background elements that extend beyond the park itself. First, draw a city in the very background using straight vertical and horizontal lines. Then, sketch several simple, flat-bottomed cloud shapes in the sky above the trees.

- Erase the excess parts of the horizon lines.
Before finishing the drawing, it’s important to clean up the structure. Trace over the main outlines of the benches, lamp post, trash bin, trees, and buildings with darker lines. Erase the unnecessary parts of the horizon lines from the first step.

- Add natural and simple colors to the park.
Apply a soft blue tone to the sky, leaving the clouds white. Fill the tree shapes and shrubs with different greens. The benches can be shaded in brown, and the lamp post can be gray. Use muted shades for the buildings. The walkway should be filled with a light beige or sandy tone.

Bonus: Easy Park Drawing Tutorial
To draw a park in this method, begin by outlining a rectangular frame to define the overall space of the drawing. Divide the rectangle with horizontal lines that will later serve as the ground and the skyline. Sketch the silhouette of distant buildings, keeping their outlines irregular.
Add trees as simple circular or oval shapes supported by thin trunks, then draw clouds in the sky. Introduce benches, a lamp post, and a trash can in the foreground. Once the main forms are in place, finalize the park drawing with clean outlines and simple color fills.


