How to Draw a Poinsettia
Let’s continue practicing flower drawing and still life composition skills by learning how to draw a poinsettia step by step.

How to Draw a Poinsettia: Introduction
In this tutorial, you’ll learn how to draw a poinsettia using a simple step-by-step method and boost your flower drawing skills. The drawing consists of 9 very simple steps, each using basic lines and shapes.
When drawing a poinsettia, keep in mind that its petals are actually modified leaves called bracts, and they’re arranged around a small central cluster. Maintain symmetry as you draw each petal, and space the leaves evenly to keep the flower look realistic.
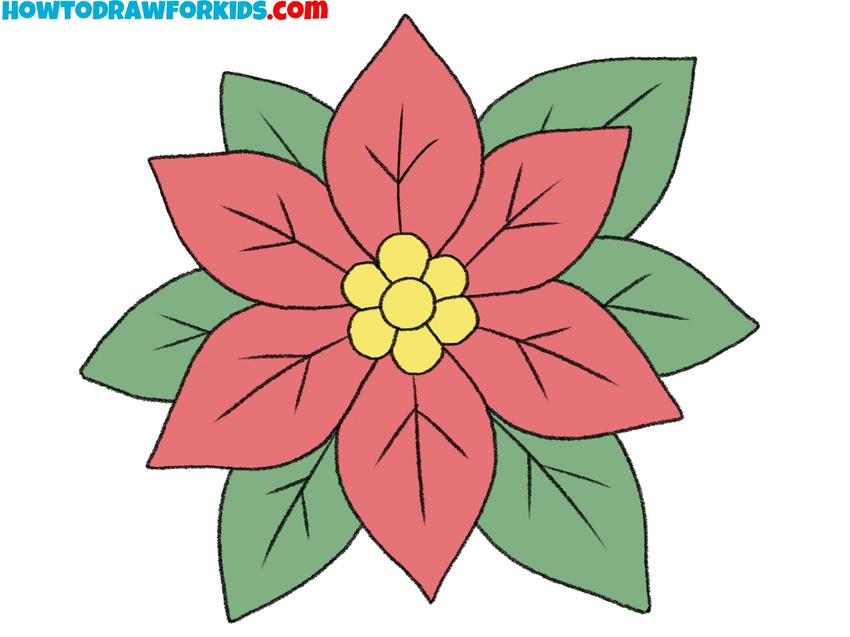
The result of this tutorial is a basic poinsettia flower bud drawn from a top view. It illustrates the general form of the plant with leaves arranged around the center. The shapes are simplified, but the overall structure stays close to how a poinsettia looks in real life. You can easily build on this foundation.
Try changing the size or angle of the leaves, or adjusting the center of the flower to create a different version. It’s also a good starting point for creating a full still life composition by placing the poinsettia next to other holiday plants or decorative elements.
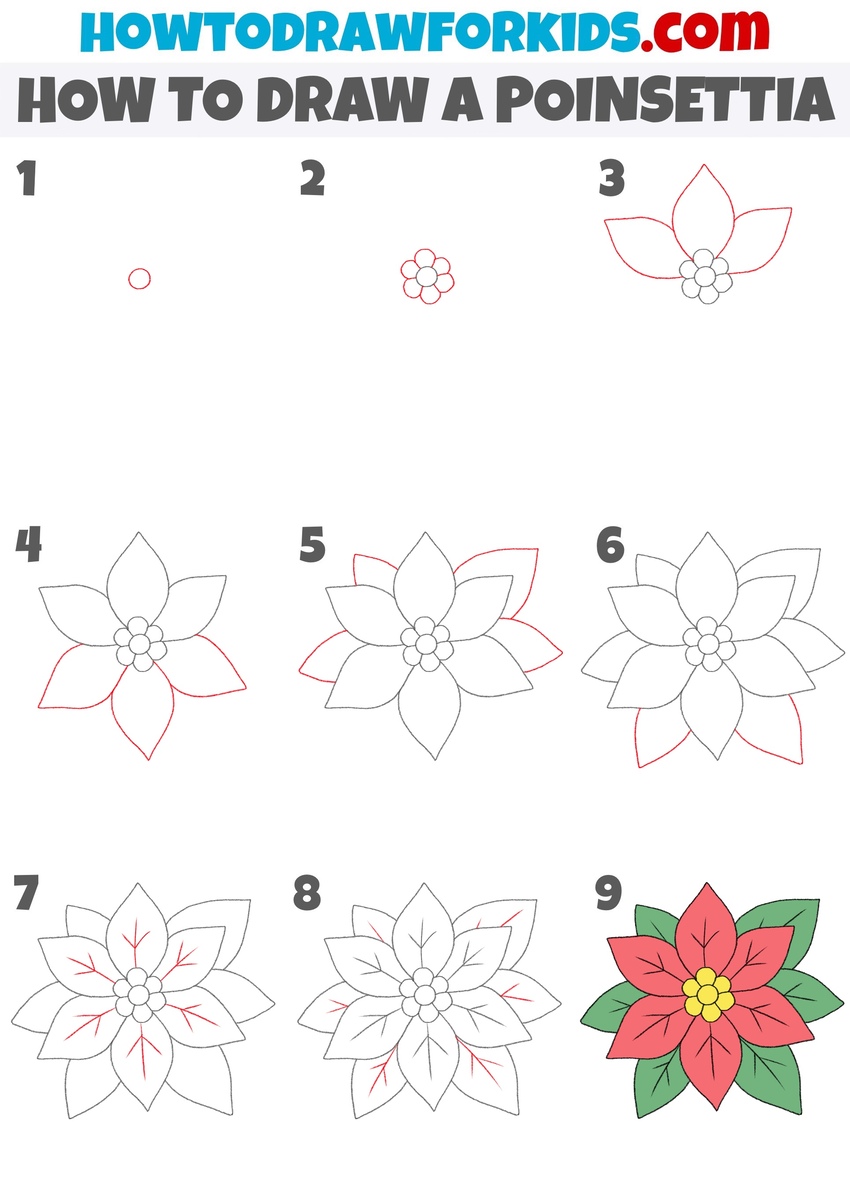
Poinsettia Drawing Tutorial
Materials
- Pencil
- Paper
- Eraser
- Coloring supplies
Time needed: 30 minutes
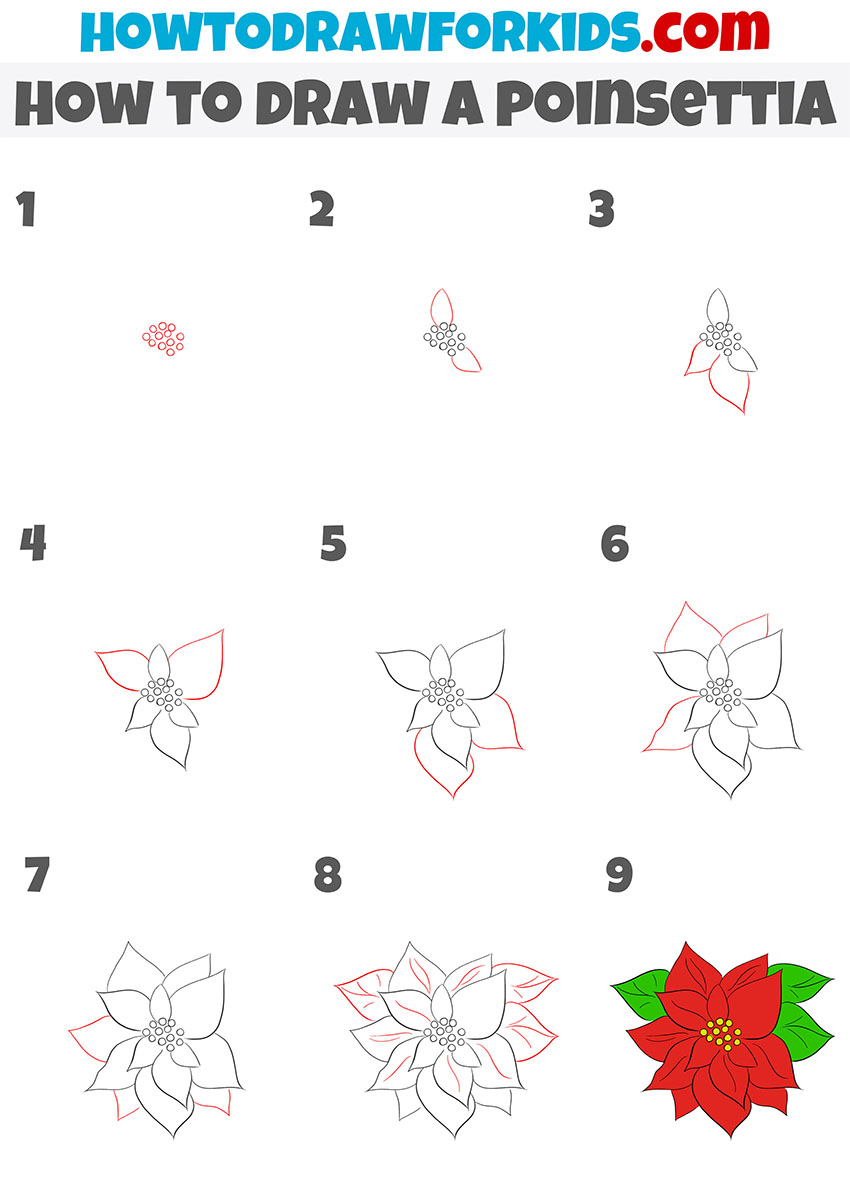
How to Draw a Poinsettia
- Draw the center circle of the poinsettia.
First, place a small circle in the middle of your paper. This will serve as the base of the flower’s central cluster. Once you’re satisfied with its size and placement, you’re ready to move on and build the main cluster that sits at the heart of the poinsettia.

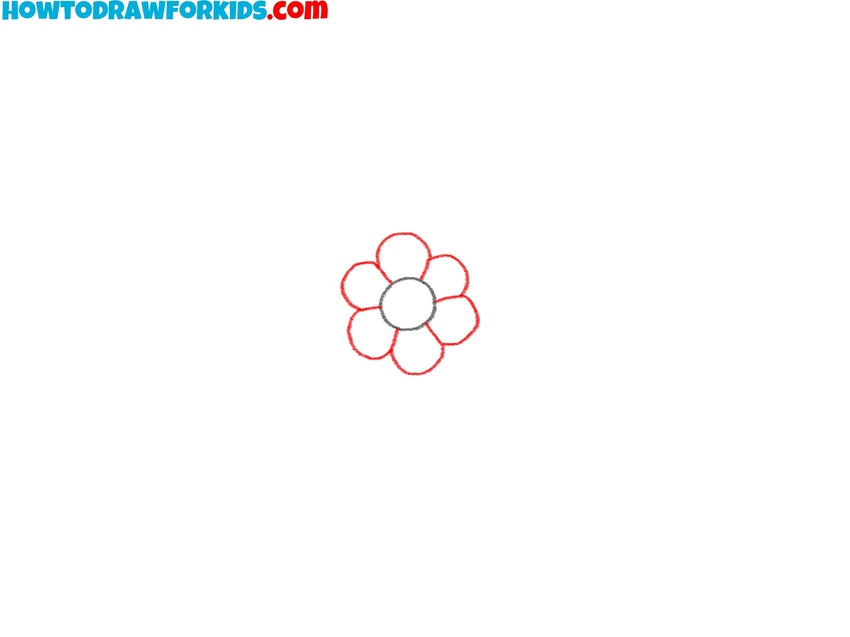
- Draw the center cluster of the poinsettia.
Surround the central circle with five equally spaced smaller circles, forming a flower-like cluster. These circles represent the small yellow structures in the middle of a poinsettia. Don’t try to make the shapes perfectly symmetrical and equal. The flower should have a natural appearance.
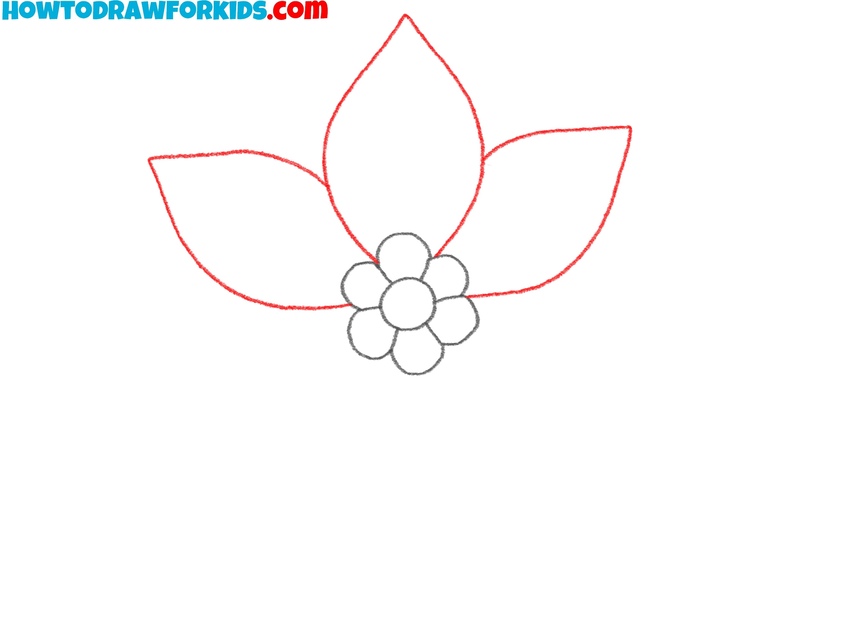
- Draw the first three poinsettia petals.
These are the top petals of the poinsettia and will form the upper part of the flower. Each petal should be drawn as a long, pointed oval. Place one petal at the top, then two slightly lower on either side. Keeping them symmetrical will help the final poinsettia drawing look more realistic.
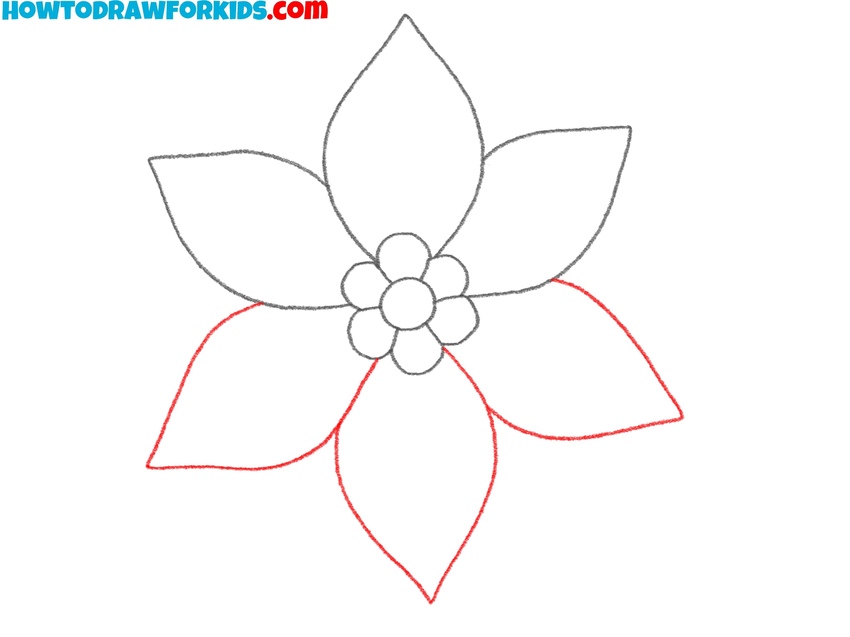
- Add three more petals.
Place one at the bottom and two on either side to fill in the gaps between the petals drawn in Step 3. These new petals should be the same shape and size as the previous ones: long, slightly pointed, and tapering to the tips. At this point, you should have a full ring of large leaves that define the outer shape of the flower.
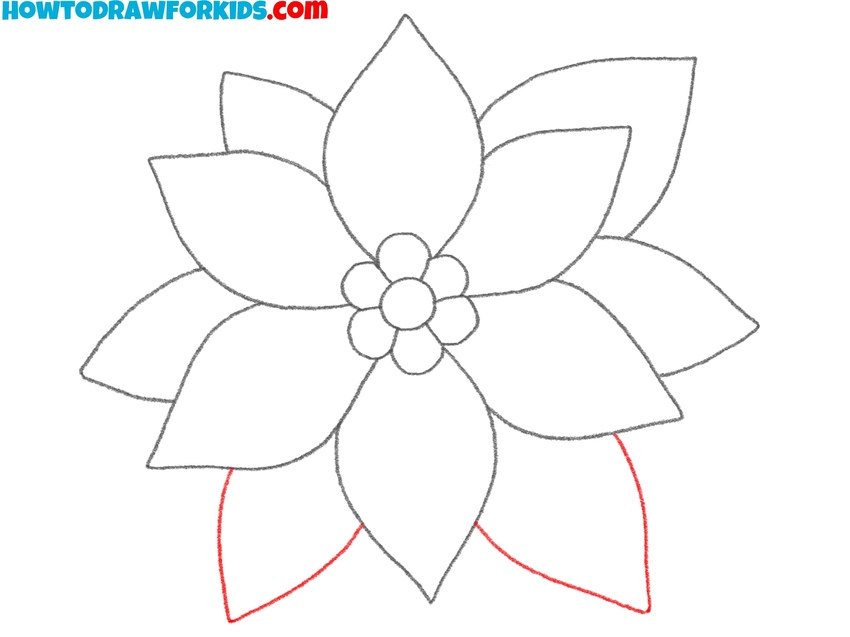
- Begin the back row of leaves.
Start the second layer by drawing another group of large petals positioned between the petals from the first layer. These should be partially visible, as if they’re sitting behind the front petals. Place the new shapes between the front petals, and keep the same pointed leaf form.

- Complete the green leaves.
Now draw the last group of petals behind the second layer. These petals also represent the green leaves often visible behind the red bracts of a poinsettia. Place them between the previously drawn petals. These final shapes help complete the full appearance typical of this plant. Use a similar pointed shape.
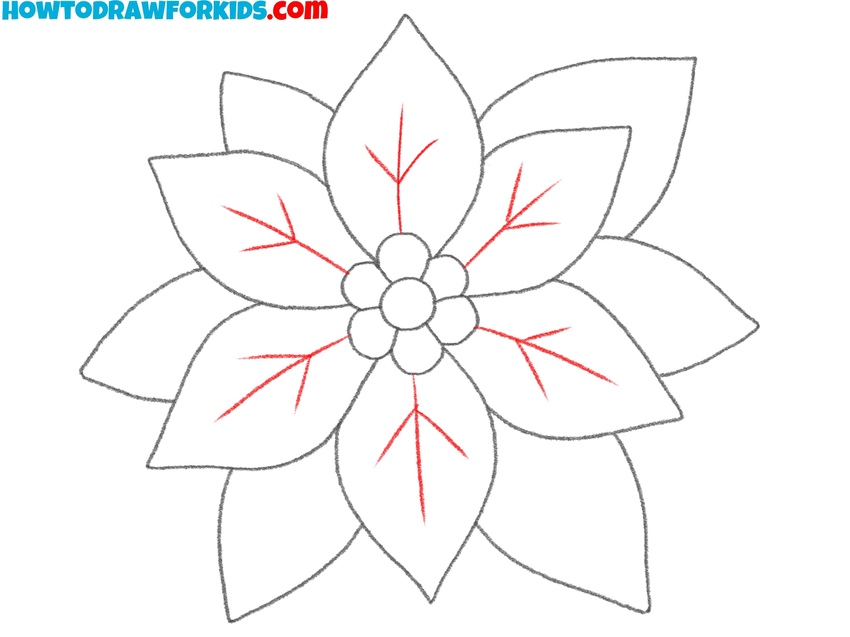
- Sketch top leaf texture.
Begin adding detail to your poinsettia drawing by sketching center lines and veins on each petal. First, sketch a line from the base to the tip of each petal, following its natural curve. Then add two or three branching lines on each side to create the texture of real leaves.
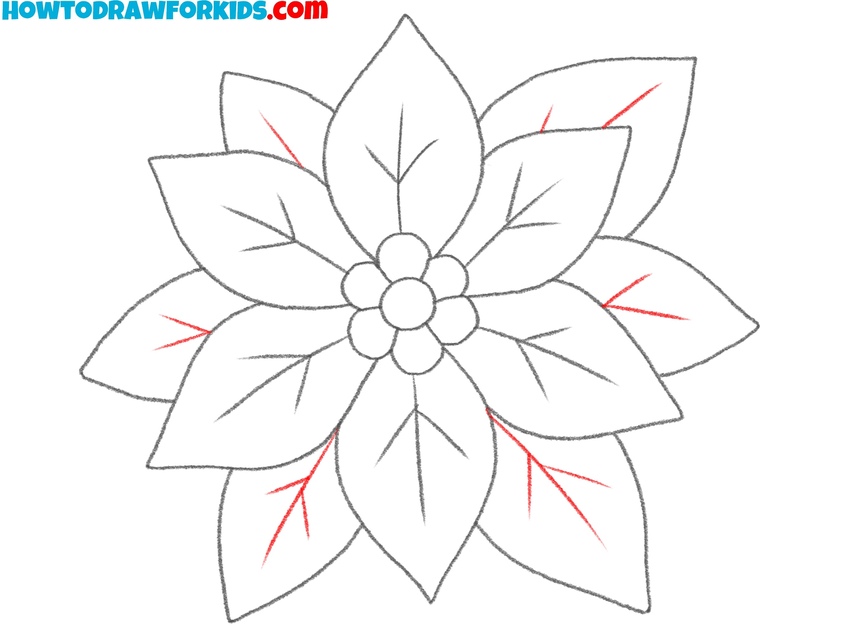
- Finish leaf lines.
Complete the petal texture by repeating the same vein detailing on the second layer. Sketch the central line for each petal, then branch out into or three angled strokes on both sides. Make sure these lines follow the direction and shape of the petal they’re on.
- Color your poinsettia drawing.
Add color to your drawing using classic poinsettia shades. Fill the center circles with yellow, then color the top petal layer in red. Use a deep green for the back layer of petals, which are actually the plant’s leaves. If you want to add more variety, experiment with different tones like burgundy, pink, or white for the petals.
Simple Poinsettia Drawing Tutorial
This additional poinsettia drawing tutorial features more simplified leaf shapes and a larger, more detailed center. Compared to the first drawing tutorial, it builds the flower gradually using a completely different sequence of steps. The final drawing looks more simplified and saturated.
To follow this additional method on how to draw a poinsettia, sketch a small cluster of dots for the center. Surround it with a few large pointed leaves. Each new leaf should be curved and added in layers. As you move out from the center, draw larger leaf shapes with slightly varied curves. Fill gaps between the main leaves with additional pointed petals. Add three green leaves around the edges to finish the full shape.
Once the main form is complete, go back and draw a line through the center of each leaf. In the final step of this poinsettia drawing tutorial, apply red and green coloring to match the traditional look of the plant. Use yellow for the flower center.
Conclusion
Now that you’ve finished this poinsettia drawing tutorial, try adding your own details or combining it with other elements. You can place the flower in a holiday still life or draw several blooms together for a fuller composition.
If you’re practicing seasonal drawings, take a look at my tutorial on how to draw a Christmas tree for more winter-themed ideas. And if you want to train drawing floral shapes, don’t miss the tutorial on how to draw a rose – it will help you practice curved petals and recognizable structure of this iconic flower.