How to Draw a Pumpkin for Halloween
In this guide, I’ll show you how to draw a Halloween pumpkin, or Jack-o’-Lantern, using this lesson along with four additional instructions.

How to Draw a Pumpkin for Halloween: Basic Information
The Halloween pumpkin or Jack-O-Lantern is a very popular subject to draw and paint. In this guide I’ll show you how to draw this in a few different ways. Your task will be very easy if you already know how to draw a pumpkin. If not, be sure to check out my pumpkin drawing tutorial.
In the initial steps, I will repeat the basics of drawing ordinary pumpkins. However, midway through this guide, we’ll start adding a recognizable spooky face to the pumpkin. Finally, I’ll demonstrate how to make your drawing even cooler with added realism and dimension.
Additionally, I’ll demonstrate a few more techniques for drawing a Jack-O-Lantern. Pumpkins come in all shapes and sizes, and so do Jack-O-Lanterns. In this tutorial, you’ll also learn how to draw different styles and expressions, from friendly and whimsical to dark and menacing.
But that is not all. At the very end of this tutorial, I’ll demonstrate you how to make your Jack-o-Lantern drawings even better. You’ll learn how to incorporate interesting elements that will make your artwork unique. Additionally, I’ll share techniques for creating appropriate Halloween-themed backgrounds that complement your Jack-o-Lantern perfectly.
Pumpkin for Halloween Drawing Tutorial
Materials
- Pencil
- Paper
- Eraser
- Coloring supplies
Time needed: 30 minutes
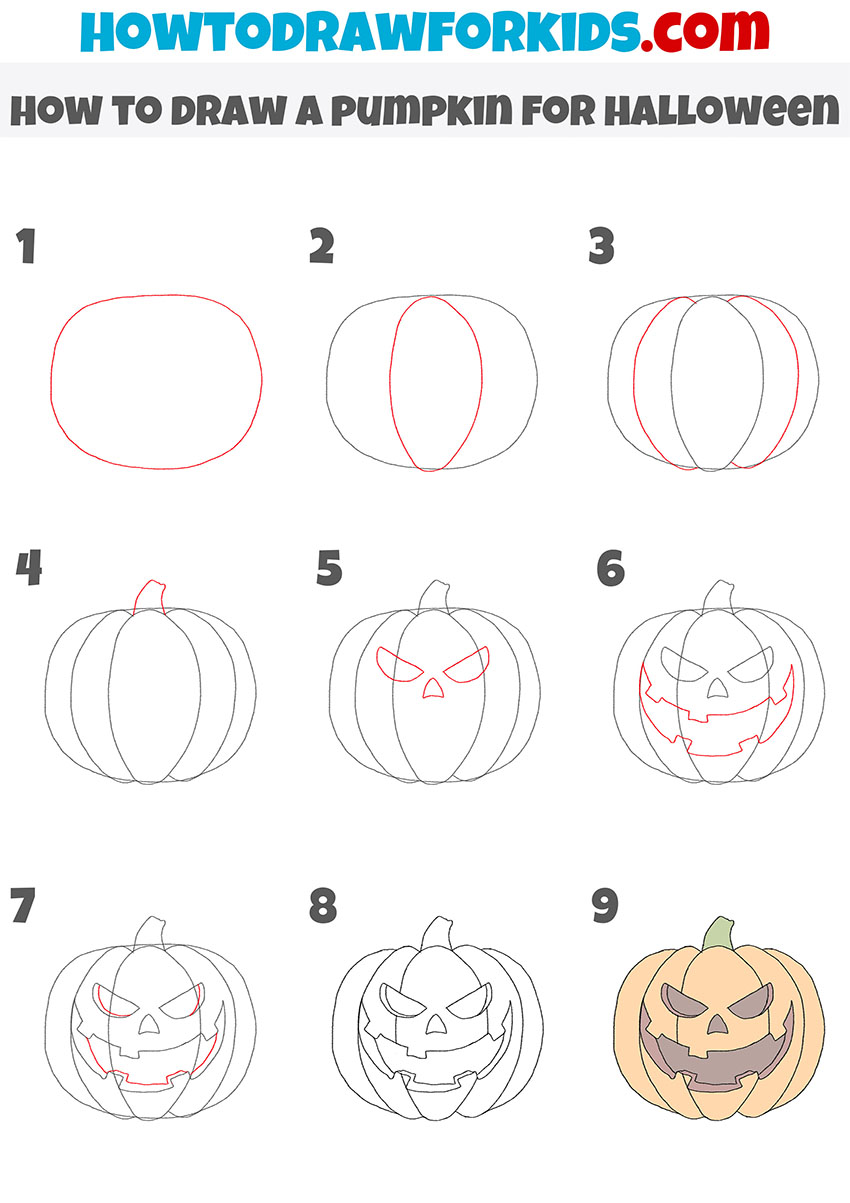
How to Draw a Pumpkin for Halloween
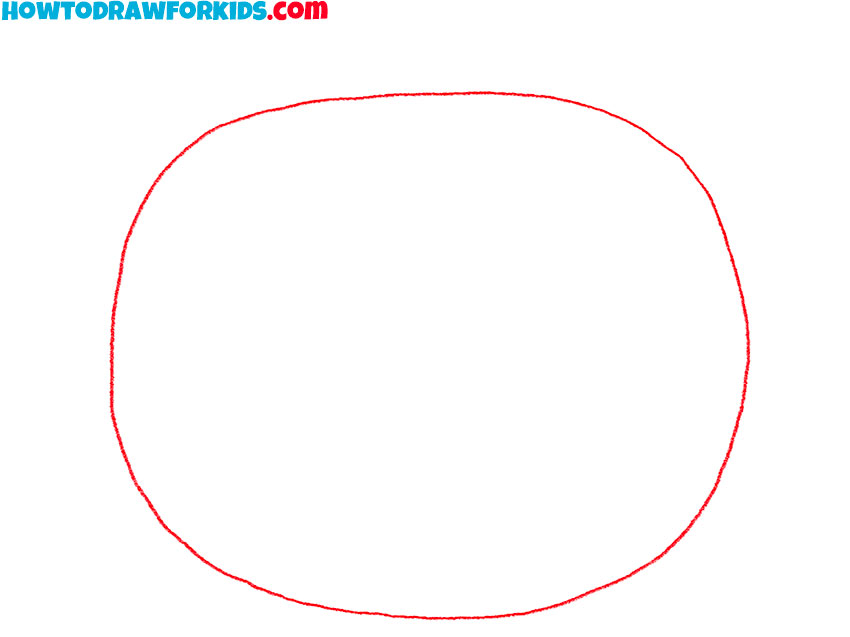
- Draw the basic shapes of the pumpkin.
Begin by drawing the basic shape of your pumpkin. This should be a large oval, slightly wider than it is tall, to represent the overall form of the pumpkin. Don’t worry about making it perfect; a slightly irregular shape will give your pumpkin a more natural look.
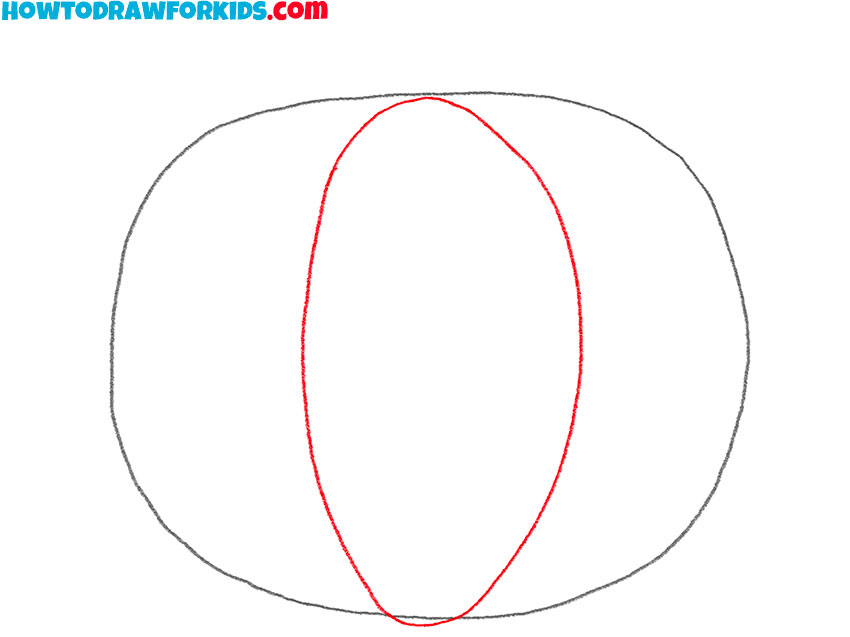
- Add vertical segments.
Next, draw the vertical segments of the pumpkin to give it a three-dimensional look. Start by adding two curved lines on each side of the oval, converging slightly at the top and bottom. These lines should follow the natural curvature of the pumpkin and help create the illusion of volume.
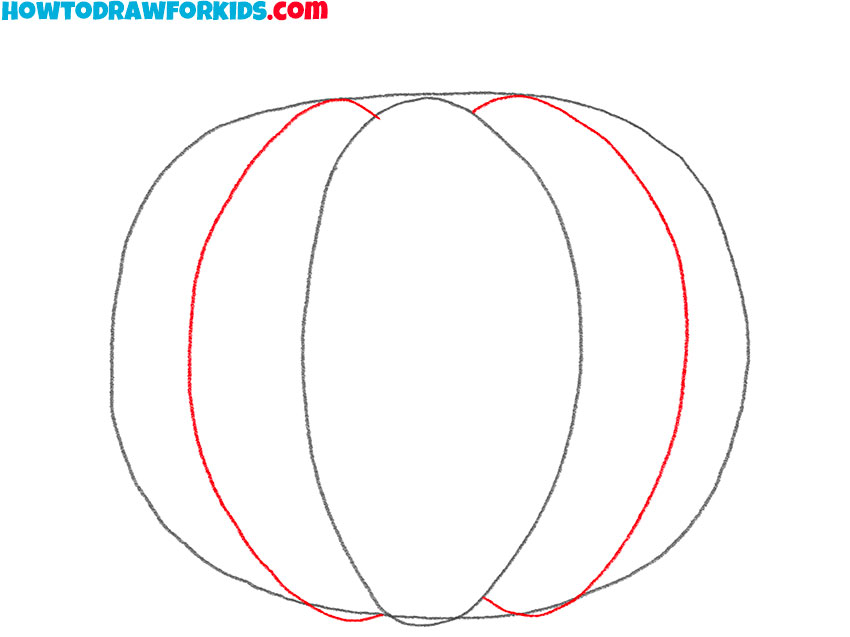
- Complete the segmentation.
Continue adding vertical lines to complete the segmentation of the pumpkin. Draw additional curved lines between the initial lines, ensuring they follow the same curved pattern. These lines should taper towards the top and bottom, showing the roundness of the pumpkin.
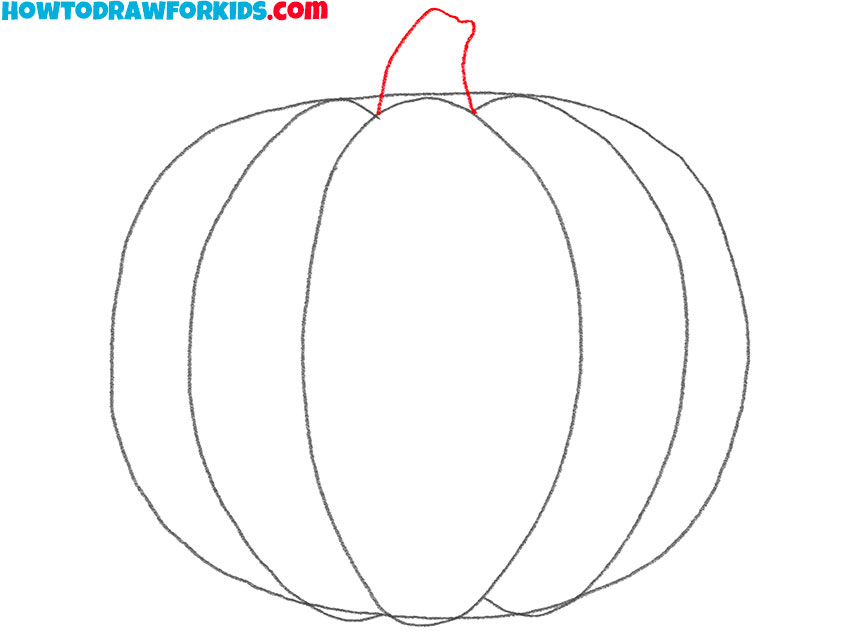
- Draw the stem.
Draw a small, irregularly shaped rectangle or a trapezoid on top of the pumpkin to represent the stem. It should be slightly tilted to one side to give it a natural look. The stem can be thicker at the base and taper slightly towards the top. This small detail makes your pumpkin more recognisable.
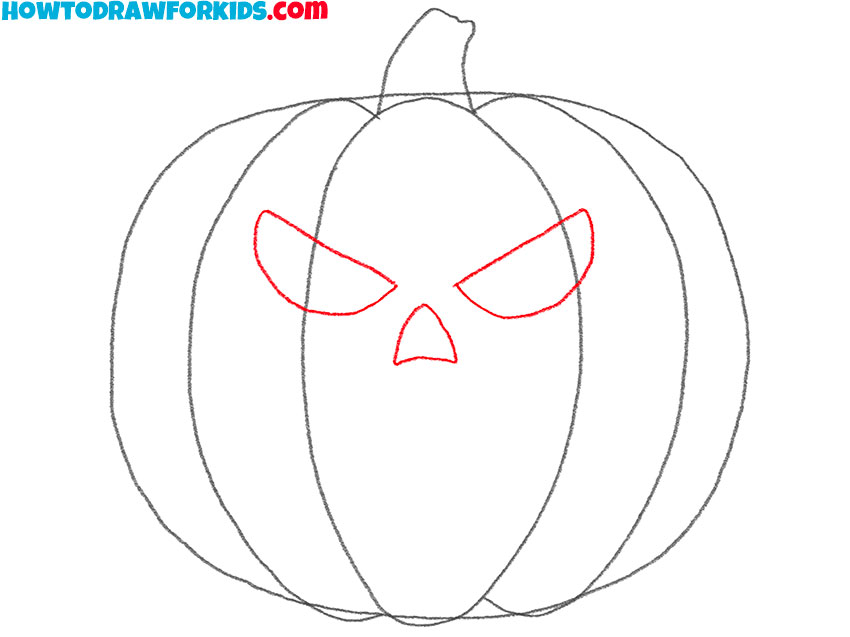
- Outline the eyes and nose.
It’s time to start transforming your pumpkin into a Jack-O-Lantern. Draw two triangular shapes for the eyes, slightly angled to give a menacing look. Then, add a smaller triangle for the nose below and centered between the eyes. Keep the angles sharp to convey a spooky expression.
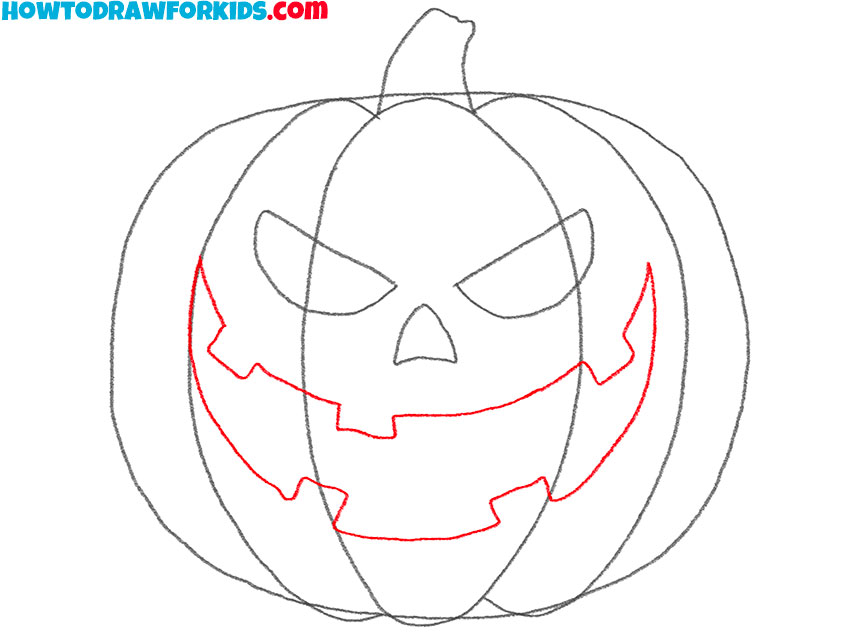
- Add the mouth.
Create a wide, jagged smile with uneven, sharp teeth to enhance the spooky effect. The mouth should span the width of the pumpkin and be positioned below the nose. Vary the size and shape of the teeth to make the expression more interesting and eerie.
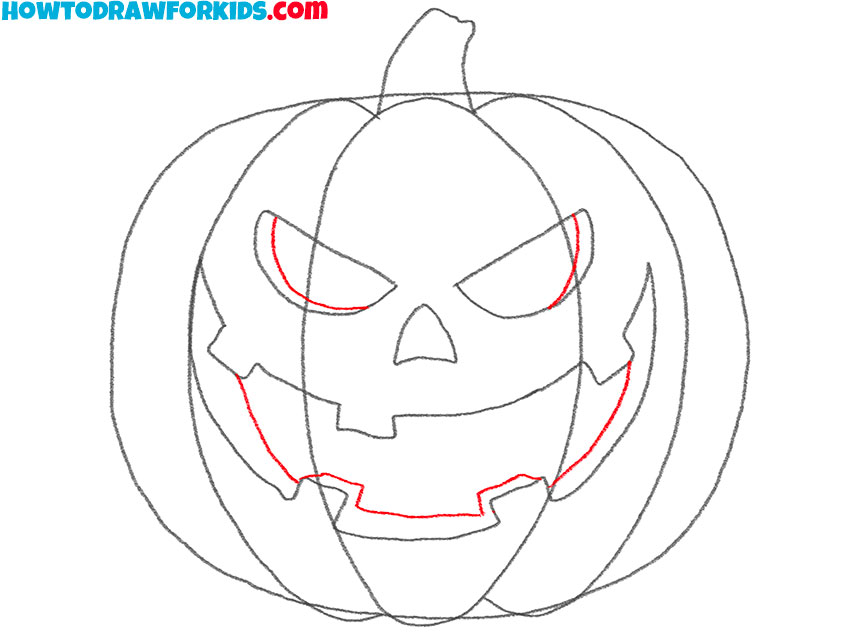
- Illustrate the thickness of the pumpkin.
To add depth and volume to your Jack-O-Lantern, draw lines inside the eyes and mouth. These lines will represent the inner edges and contours, giving your drawing a more three-dimensional appearance. You can also add scratches or other textures for added realism.
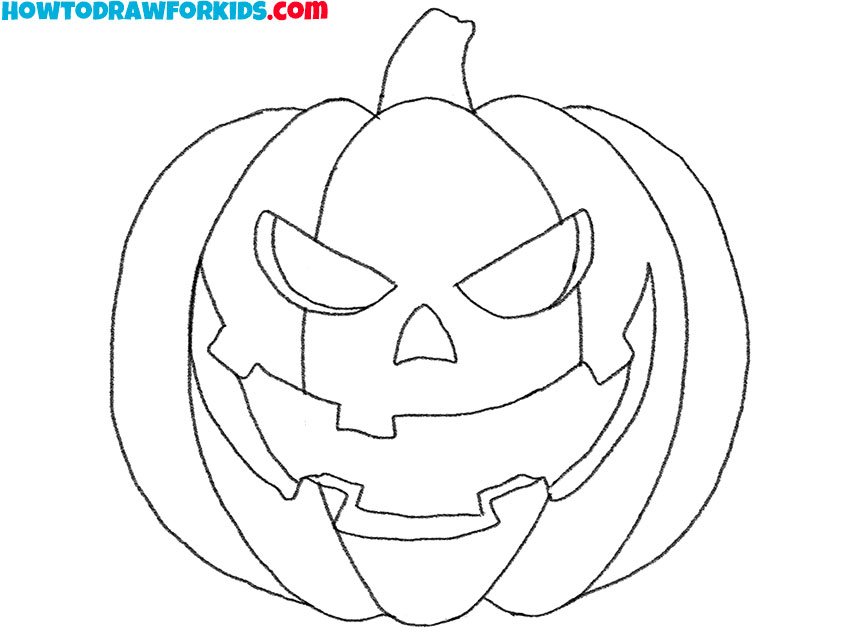
- Review the artwork and correct inaccuracies.
Refine the facial features by adding more details and adjusting the shapes. Ensure the eyes, nose, and mouth have clean, sharp edges. This is the time to erase any unnecessary guidelines or rough sketches that were initially drawn to help form the pumpkin.
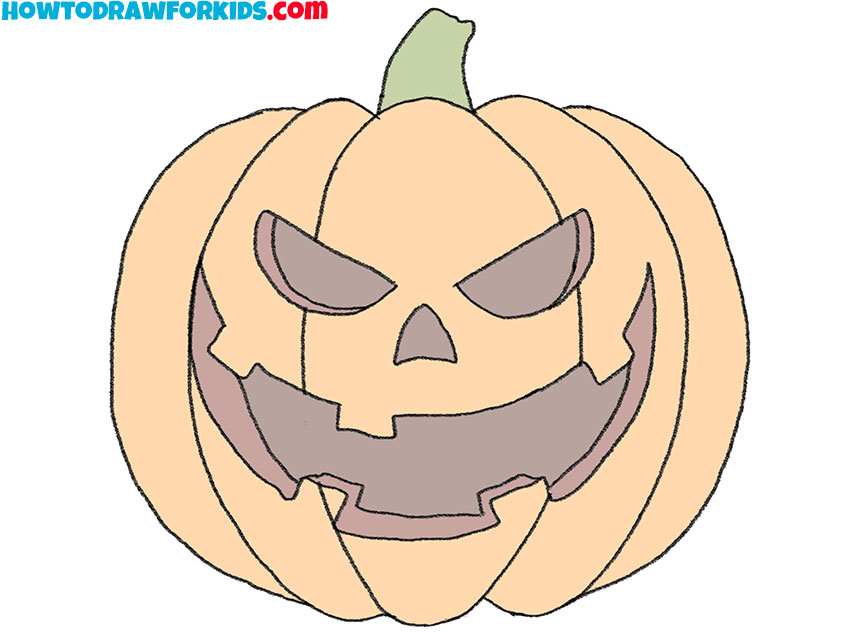
- Color the Jack-o’-Lantern drawing.
Use shades of orange for the pumpkin. You can use darker tones in the grooves and lighter tones on the raised sections to create a three-dimensional effect. Color the stem green or brown, and add darker shades around the eyes, nose, and mouth.
Additional Content
Your Halloween pumpkin drawing is complete! I hope you put your best effort into each stage of the process and are pleased with your final artwork. I invite you to download a PDF file that includes detailed illustrations of each step in the tutorial, a coloring page to add vibrant hues to your Jack-O-Lantern, a tracing worksheet to help refine your lines, and a grid drawing worksheet to improve your proportion sketching.
How Draw Jack-o’-Lantern: Alternative Techniques
So, there are quite a few ways to draw a very simple pumpkin for Halloween. Here I will show a few more. I tried to collect drawing guides of varying complexity so that it would be useful to any of my readers.
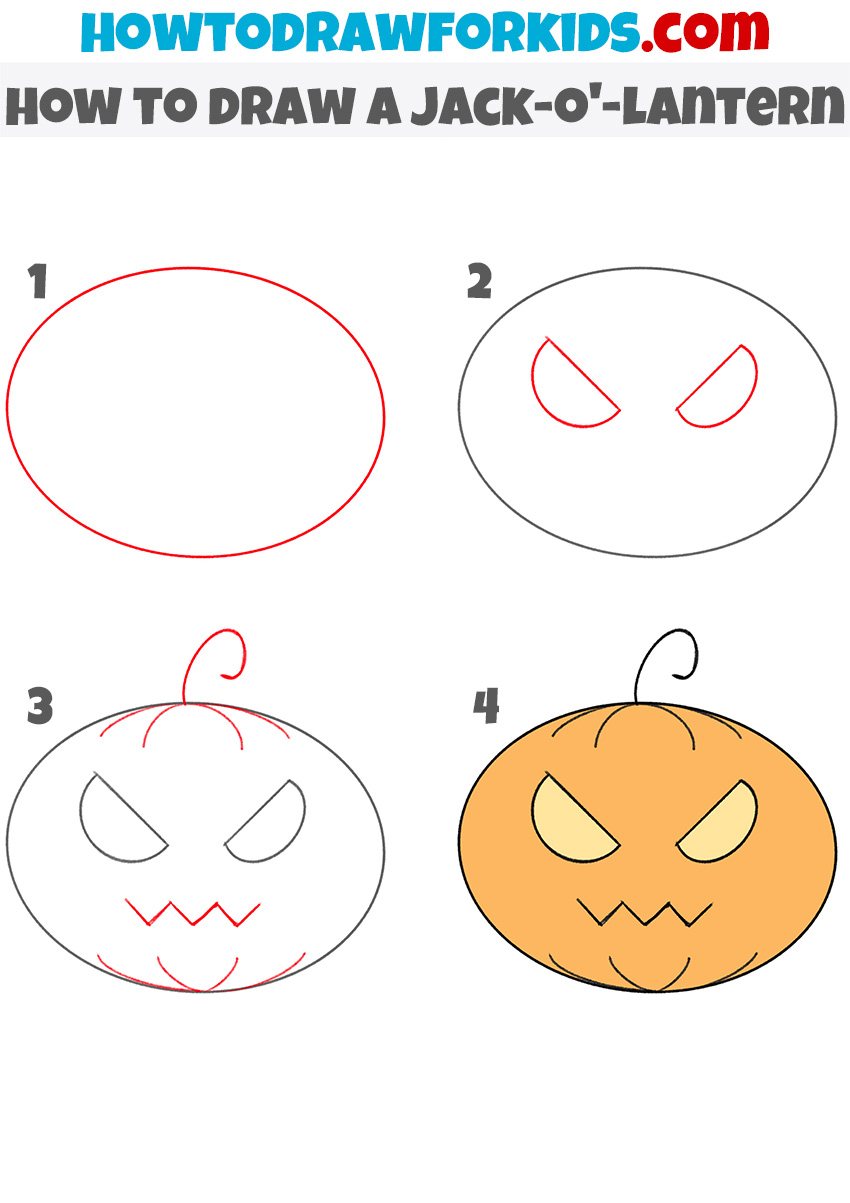
Drawing a Jack-o’-Lantern for Kindergarten
This is the easiest way to draw a scary Halloween pumpkin. You can use this guide if you have just recently started drawing. This method lacks volume and complexity, making it ideal for the artists or those just starting out. The number of steps has been greatly reduced to make the lesson as simple as possible.
To begin, draw a basic oval shape for the pumpkin’s body. Next, add simple vertical lines to create segments, without worrying about precise curvature. The stem is a basic rectangular shape on top.
For the face, draw simple triangles for the eyes and nose, and a wide, jagged line for the mouth. This minimalistic approach ensures ease of understanding and execution, making it perfect for those just started drawing.
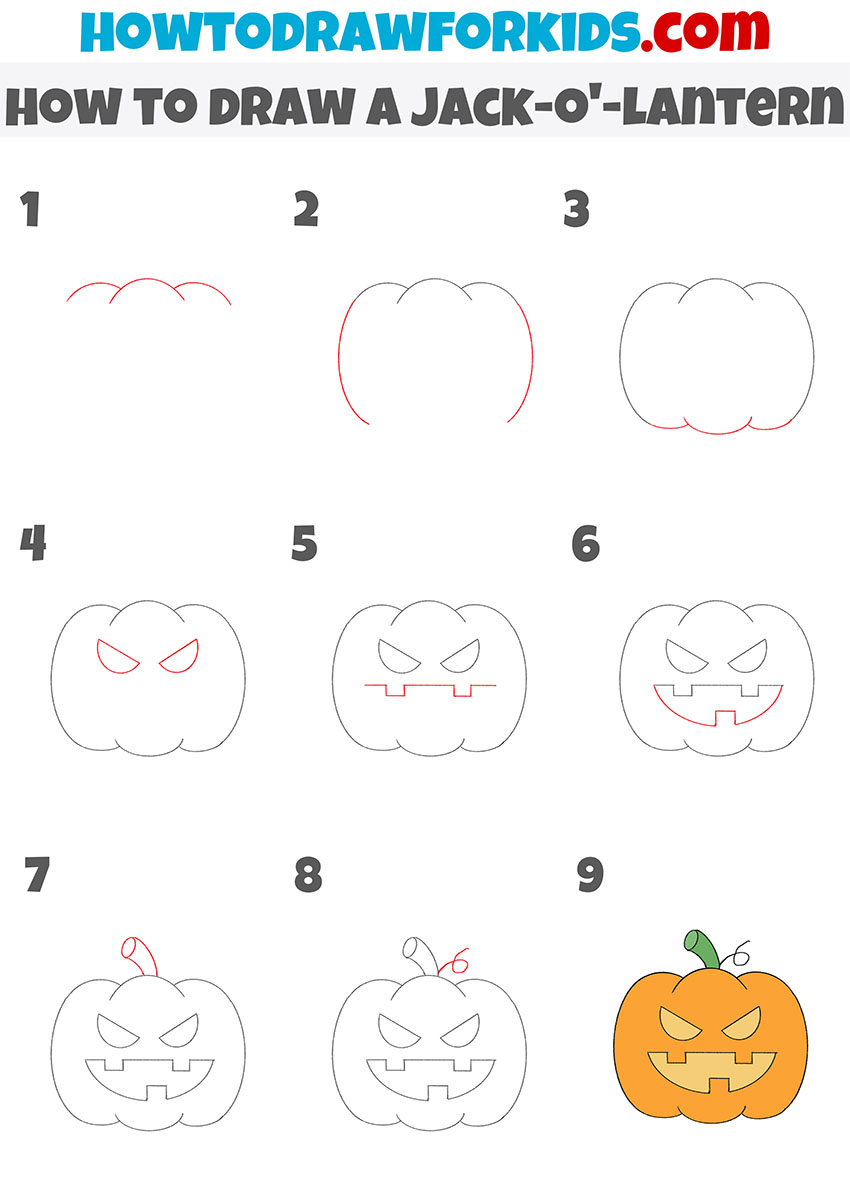
Drawing a Simple Jack-o’-Lantern
This tutorial presents another version of a simple Halloween pumpkin. I’ve broken it down into nine really simple steps, making it slightly more complex than the previous four-step lesson. This version features a more detailed mouth and a bit more intricacy in the stem.
To start, draw three curved lines to outline the top segments of the pumpkin. Then, add two curved lines on each side to complete the outline, forming the pumpkin’s characteristic segmented look. Next, sketch out the eyes by drawing two angled, almond-shaped eyes that give the pumpkin a menacing expression. Below, draw a rectangular, jagged mouth to complete the spooky face.
Add a simple, curved stem at the top, and refine the pumpkin’s shape by adjusting any uneven lines. Finally, color the pumpkin with a bright orange hue and the stem in green, to make your Jack-O’-Lantern look finished.
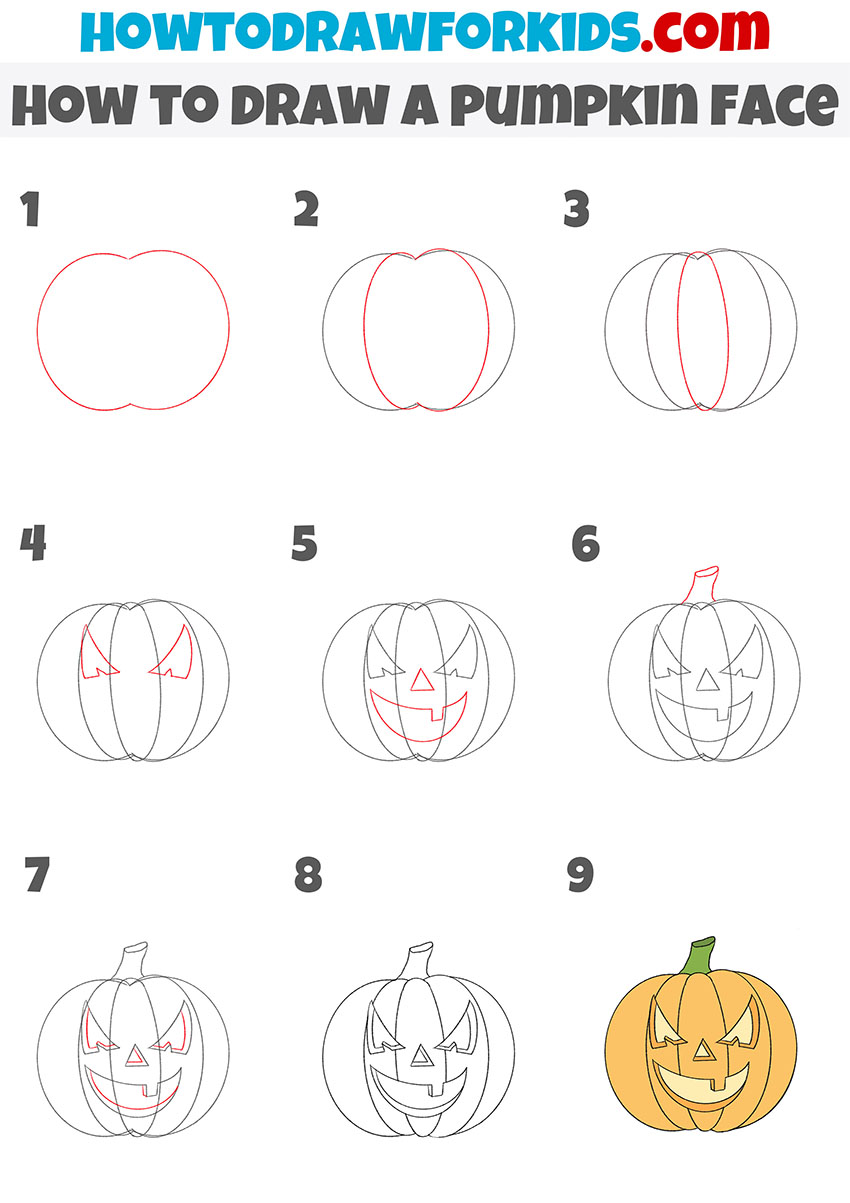
Drawing a Detailed Pumpkin Face
In this tutorial, you’ll learn how to draw a more voluminous pumpkin with a spooky face. I opted for an unconventional eye shape, resembling long, elongated triangles. Generally, these shapes tend to appear more grotesque and comical rather than outright frightening.
Begin by drawing the basic shape of the pumpkin, starting with an oval that has a slight indentation at the top and bottom. Next, add vertical lines to segment the pumpkin, ensuring they curve naturally to give a three-dimensional effect. Then, sketch the eyes as elongated triangles with sharp angles, and add a triangular nose below. For the mouth, create a wide, jagged smile with varied teeth shapes. Add a detailed stem on top, slightly curved and irregular to enhance realism.
Refine the facial features by adding depth and contour lines inside the eyes and mouth. Erase any unnecessary guidelines to clean up the drawing. Finally, color your pumpkin with shades of orange, adding highlights and shadows to create a vibrant, lifelike appearance.
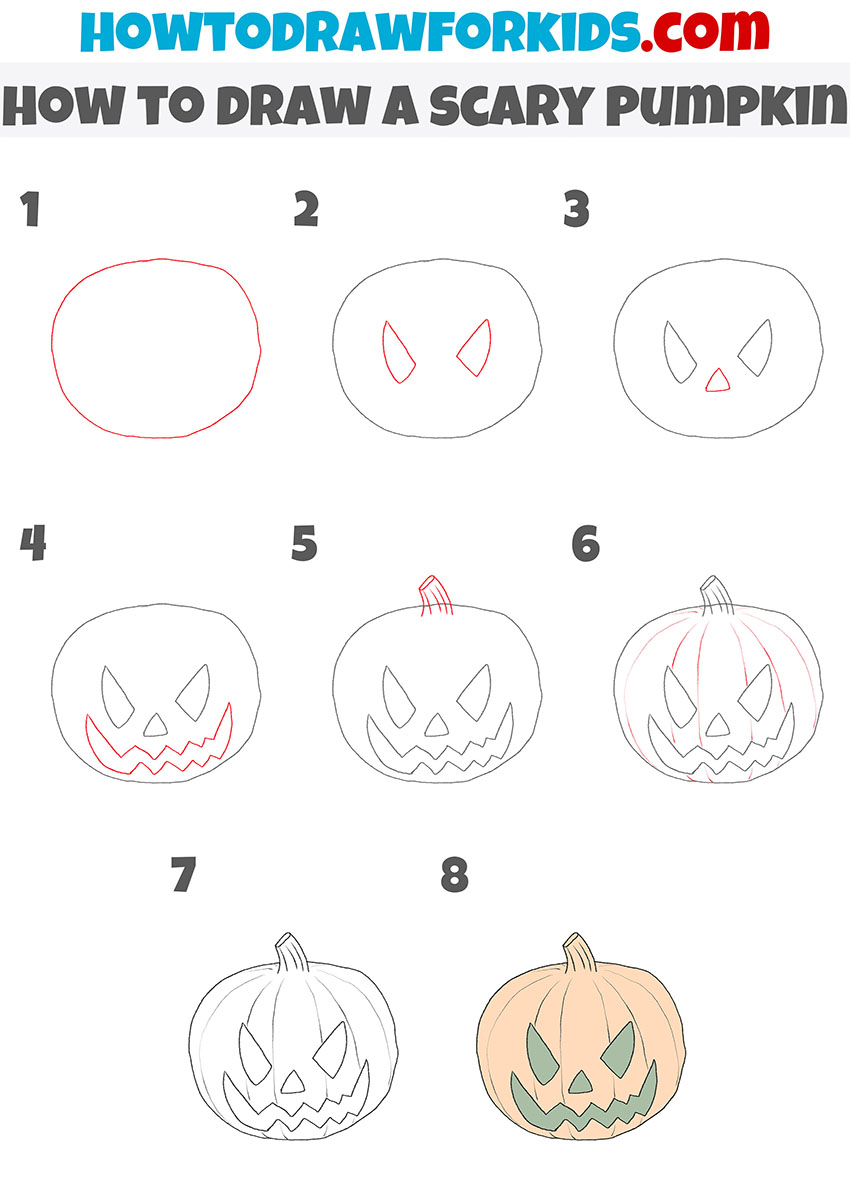
Drawing a Scary Pumpkin
Have you noticed what’s unique about this picture? It’s all about the perspective. By slightly increasing the distance from the stem to the eyes and positioning the face closer to the bottom edge, it creates the illusion that this Halloween pumpkin is leaning towards us. This gives it a rather eerie appearance, don’t you think?
Start by drawing a basic oval shape for the pumpkin. Add two angular, almond-shaped eyes to give the pumpkin a sinister look. Below the eyes, draw a small triangular nose. Next, create a wide, jagged mouth with sharp, uneven teeth to create a frightening effect. Add a simple, slightly curved stem on top of the pumpkin.
To give it more character, sketch in some light, vertical lines to suggest the pumpkin’s natural ridges. These lines should curve slightly to follow the shape of the pumpkin, adding volume without overcomplicating the drawing.
Finally, color the pumpkin with a pale orange shade and use dark tones for the eyes, nose, and mouth to accentuate the scary expression.
How to draw a Jack-o’Lantern: Adding Backgrounds
Create a spooky haunted house in the background, with eerie, broken windows and a creaky door slightly ajar. Add silhouettes of bats flying around the house and a full moon glowing ominously in the sky. Surround the house with gnarled, leafless trees and a misty graveyard to heighten the creepy atmosphere. Use dark shades of purple and blue to convey a nighttime scene, with the pumpkin’s glowing face as the focal point.
Set the scene in a lair of the witch, with a cauldron bubbling in the background and various mystical ingredients scattered around. Include a broomstick leaning against a wall, spell books on a dusty shelf, and a black cat with glowing eyes sitting nearby. The dimly lit room should have a greenish hue from the cauldron’s light, casting shadows and giving the pumpkin an even more sinister appearance.
Draw a dark, gothic castle in the background, with tall, looming towers and narrow, arched windows. Surround the castle with a moat, a drawbridge, and some ominous-looking gargoyles perched on the walls. The sky should be cloudy with lightning streaking across, casting a dramatic light on the scene. Use dark grays and blues to depict the castle, with the Jack-o’-Lantern’s glow reflecting off the stone walls, adding to the ominous mood.
Draw an abandoned barn in the background, with broken windows and doors hanging off their hinges. Add some hay bales, a rusty pitchfork, and a rickety fence surrounding the area. The scene should look neglected and overgrown, with ivy creeping up the sides of the barn. Use muted tones of brown and gray to depict the dilapidated structure, with the bright, glowing pumpkin adding a pop of color and focal point.
Conclusion
You did it! Your Halloween pumpkin drawing is complete. I hope you enjoyed following along with this tutorial and are happy with your final artwork. Remember, practice makes perfect, so feel free to draw as many Jack-o’-Lanterns as you like to train your skills.
Don’t forget to download the PDF file at the end of the lesson, which includes all the steps, a coloring page, a tracing worksheet, and a grid drawing worksheet. These additional materials are great for extra practice and will help you improve even more.