How to Draw a Pumpkin
If you want to learn how to draw a pumpkin, you’re in the right place. I’ve created some very simple but interesting drawing lessons for you.

How to Draw a Pumpkin: Introduction
So, how to draw a pumpkin easily and without mistakes? As I mentioned earlier, I’ll show the easiest drawing method. I enjoy creating different pumpkin illustrations this way, and I will teach you to do the same.
Phone this page I’ll demonstrate different methods. Some techniques involve drawing the final outlines of the pumpkin step by step. In other cases, basic geometric shapes are sketched first, and then details are added. In a third approach, markings are initially made using straight lines to indicate the placement of different parts of the drawing.
One way or another, when drawing a pumpkin, remember the fundamental principles that remain the same regardless of the version you choose. A pumpkin has a round or oval shape, a convex texture, and a thick, curved stem.
In any case, all of these lessons will show you in the most detailed way how to draw a pumpkin. Additionally, they will be very useful if you want to draw a Jack-o’-Lantern.
Pumpkin Drawing Tutorial
Materials
- Pencil
- Paper
- Eraser
- Coloring supplies
Time needed: 25 minutes
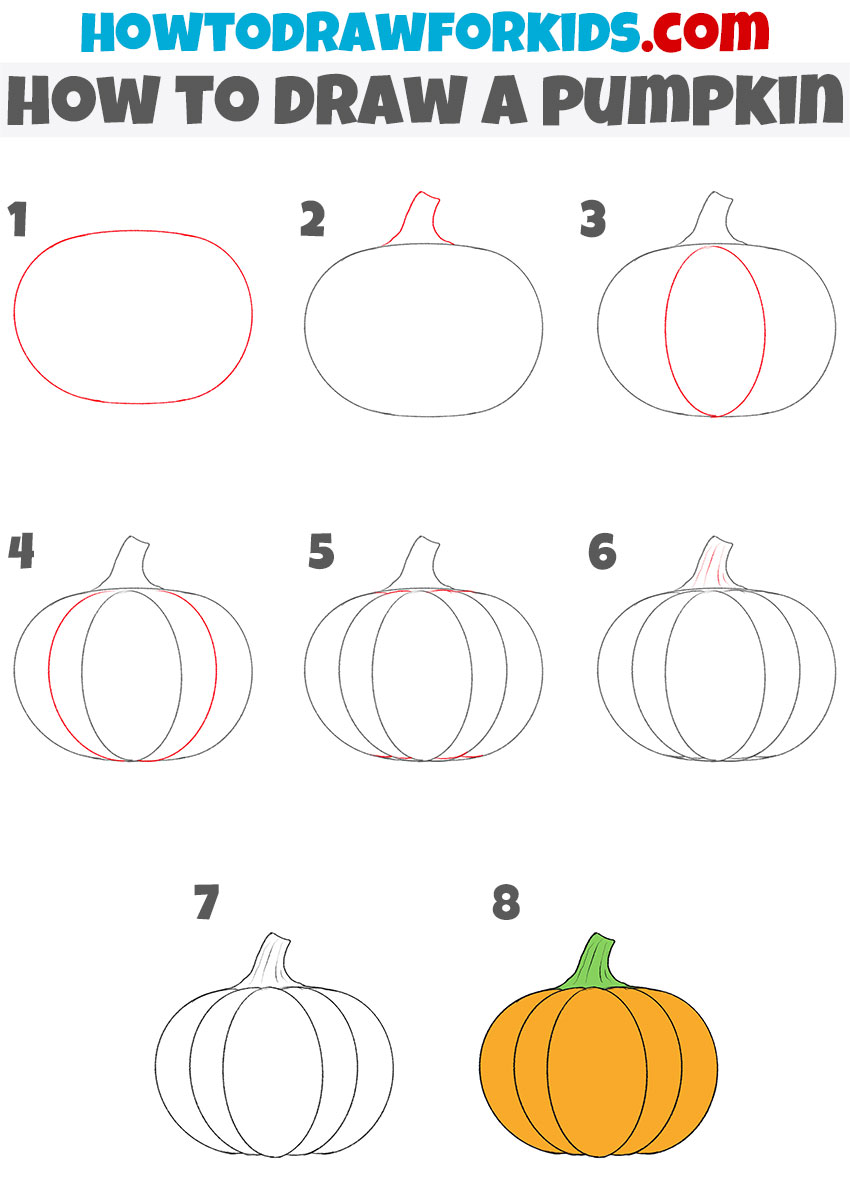
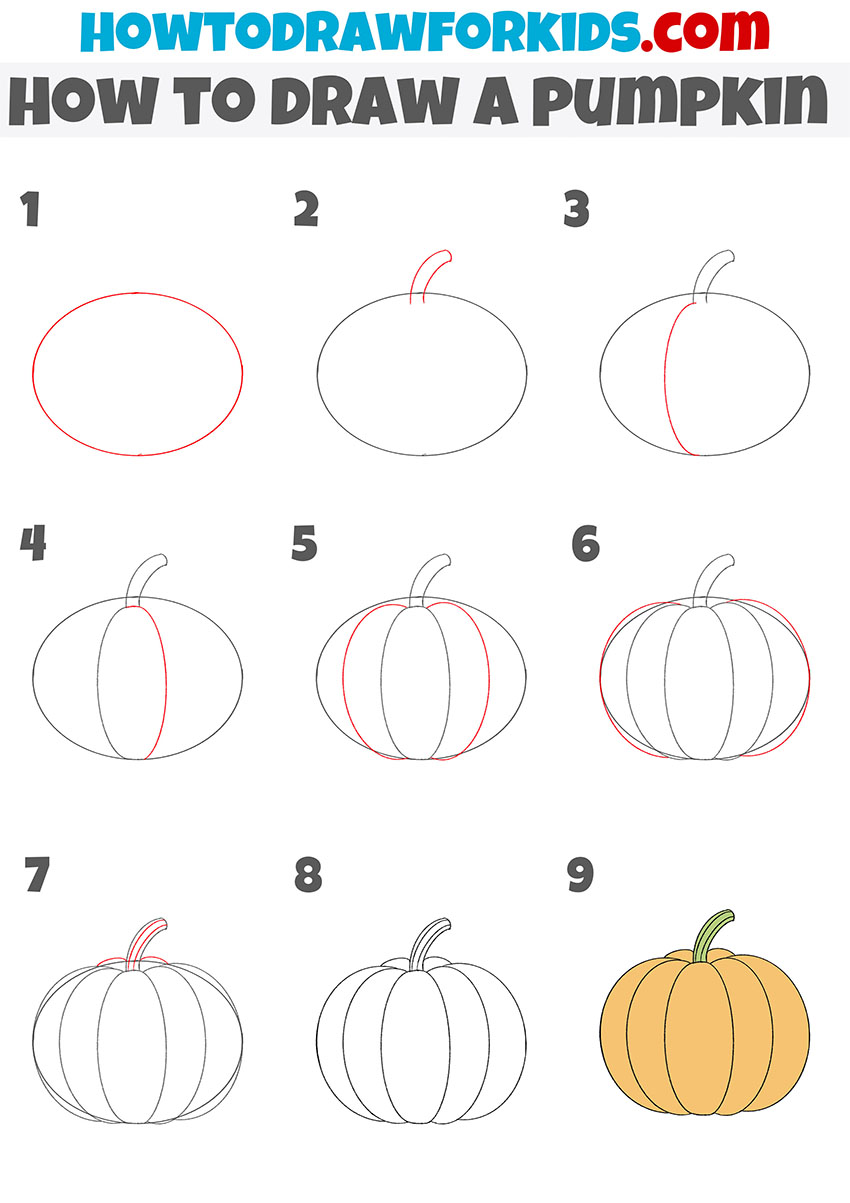
How to Draw a Pumpkin
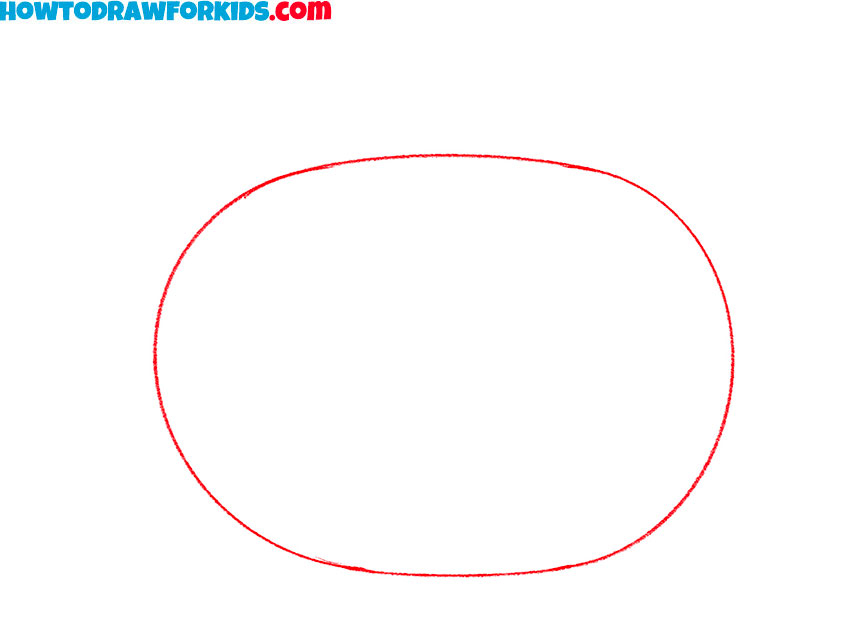
- Draw the basic shape of the pumpkin.
Start by sketching an oval shape for the base of the pumpkin. This helps to maintain proper proportions as you add details. Keep your lines light and smooth so that adjustments can be made easily. The oval should be slightly wider than it is tall, but you can give your pumpkin drawing a different shape.
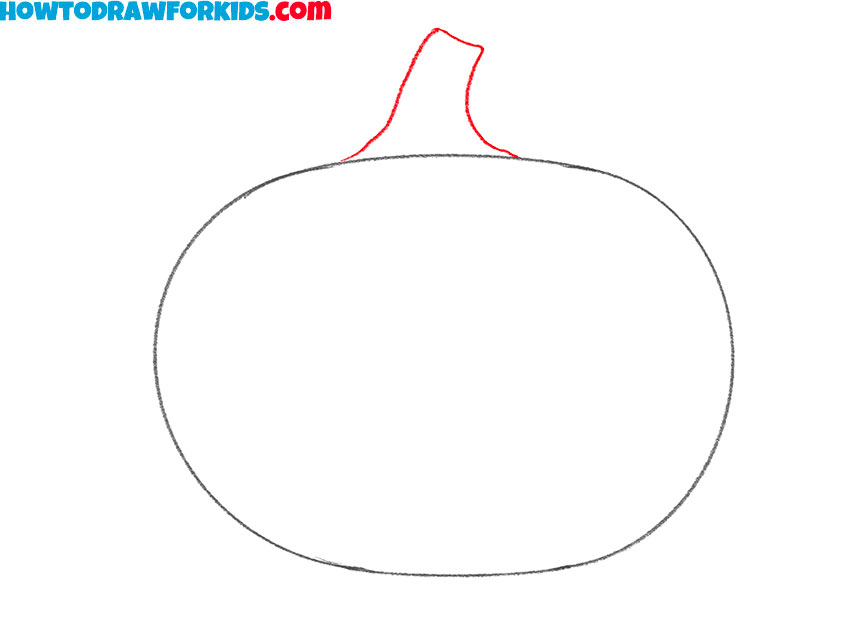
- Add the stem at the top.
Next, sketch a slightly curved shape that extends upward to draw the stem of the pumpkin. The stem should have an irregular, organic form, as pumpkin stems are not perfectly straight. A good tip is to keep the base of the stem slightly wider than the top part.
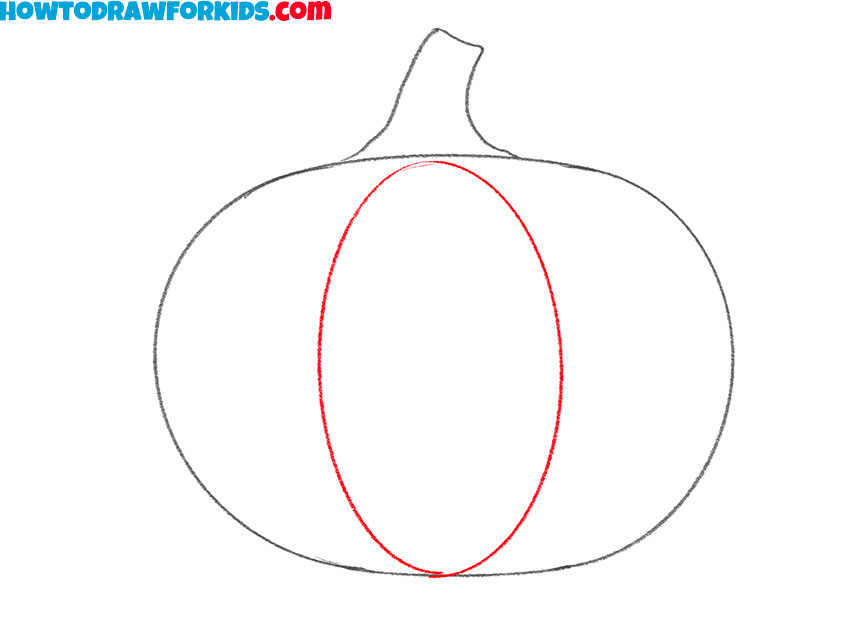
- Sketch the center section.
Now, begin defining the pumpkin’s ridges by sketching an elongated oval shape in the middle of the pumpkin. This oval represents the central section of the pumpkin and serves as a guide for the additional curved lines that will be added later.
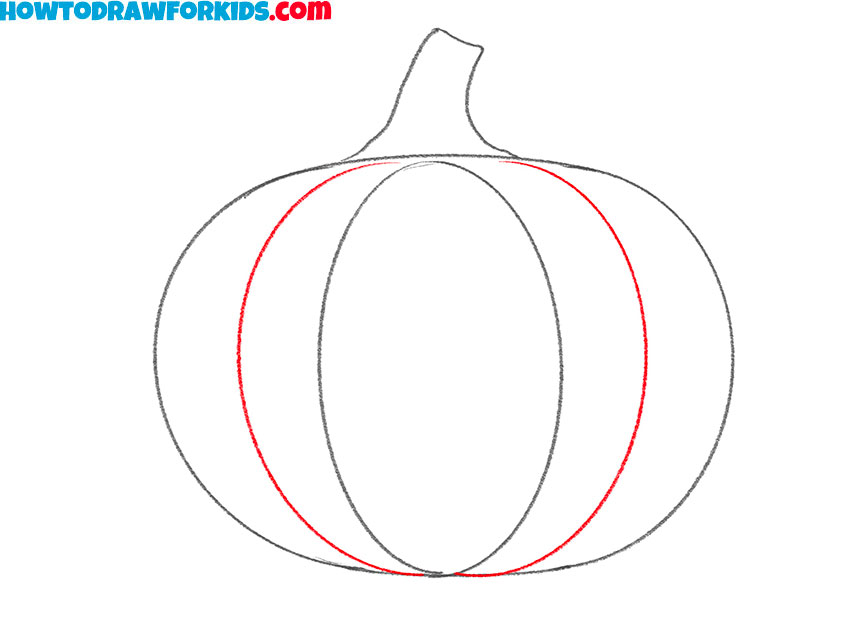
- Add the side sections.
To make the pumpkin look more natural and full, add two curved sections on either side of the central oval. These sections should start at the base of the stem and curve outward before tapering back in towards the bottom. They should be symmetrical but not identical, as pumpkins have a slightly uneven structure.
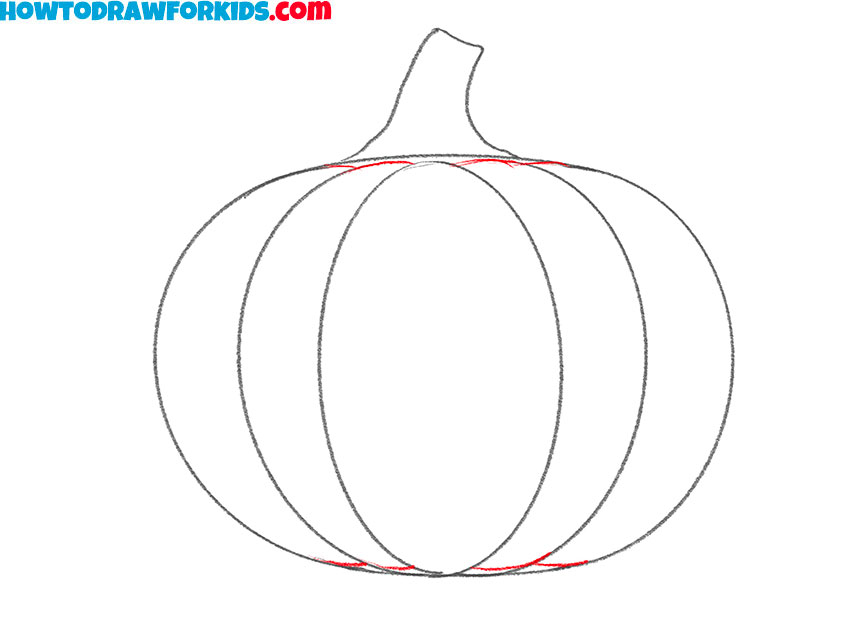
- Refine the top and bottom.
Now, refine the pumpkin’s structure by adding curved shapes at the top and bottom of the ridges. These lines should connect the existing sections, giving the pumpkin a more natural. The pumpkin should now be clearly divided into noticeable segments.
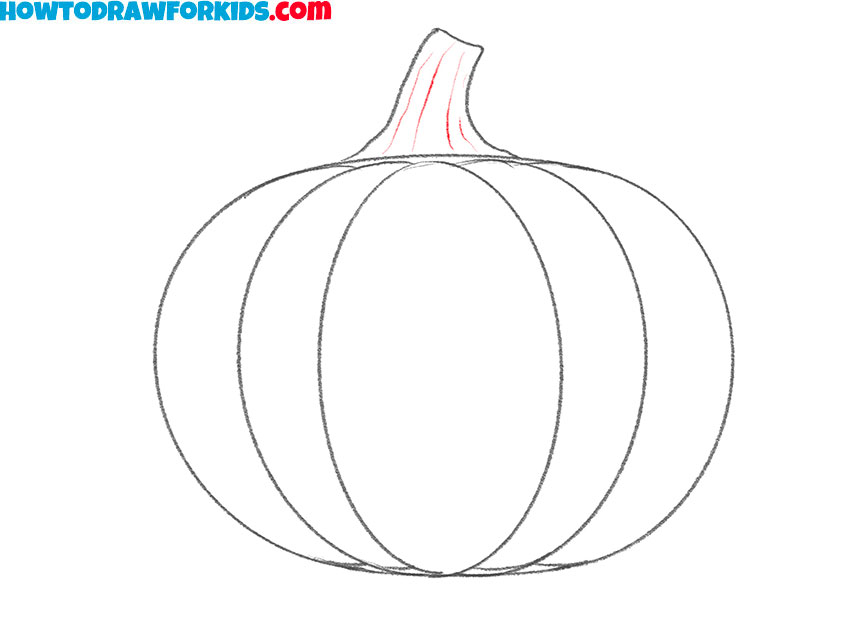
- Add texture to the stem.
Draw a few curved lines running from the base of the stem to the top, following the natural curvature. These lines should be slightly irregular, as pumpkin stems have a rough, fibrous texture. You can make some lines slightly thicker or more curved than others to give it an organic feel.
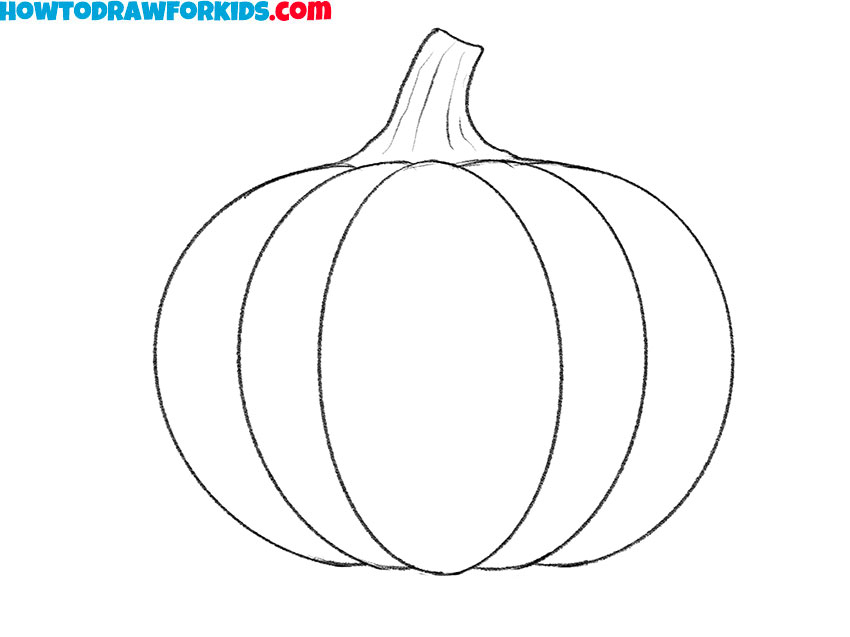
- Refine the outline of the pumpkin.
To give your pumpkin drawing a finished look, erase any unnecessary guidelines or overlapping lines that are no longer needed. If any sections appear too thin or too wide, adjust them accordingly to balance the overall shape. You can also slightly darken the final outlines to make them look more finished.
- Color your pumpkin drawing.
Use a bright orange shade for the body of the pumpkin. You can make the central sections slightly lighter to create the illusion of highlights. For the stem, use green or brown. You can add slight variations in tone to make your pumpkin drawing more natural.
Additional Content
Great job! I think you’ve created a great drawing of a bright and appealing pumpkin. Leave your comments on this lesson and share your ideas for new step-by-step drawing lessons. I have created a PDF file with a shortened version of this tutorial for your convenience. You can download this file and return to this tutorial whenever it’s convenient for you.
How to Draw a Pumpkin: Additional Techniques
Here I will show you drawing some more pumpkins with slight differences. Try to use each method to understand how to draw more conveniently and easily. Each of these methods is a different variation of the step-by-step method that I talked about at the beginning of this article.
Simple Pumpkin Drawing Tutorial
This method for drawing a pumpkin is very similar to what we have already created. However, it includes segments around the stem, making the pumpkin look more rounded and voluminous. The color scheme is also lighter.
Start this tutorial on how to draw a pumpkin by sketching an oval shape as the base of the vegetable. Add a vertical oval in the center to outline the middle section. Extend curved lines from both sides of this central shape to form the pumpkin’s ridges. Complete the overall form by refining the bottom and top edges where the ridges meet.
Draw a short and slightly curved stem on top. Erase any unnecessary guidelines to clean up the drawing. Finalize the shape, darkening the lines of the pumpkin drawing. Add color by filling the pumpkin with a light orange shade and the stem with green.

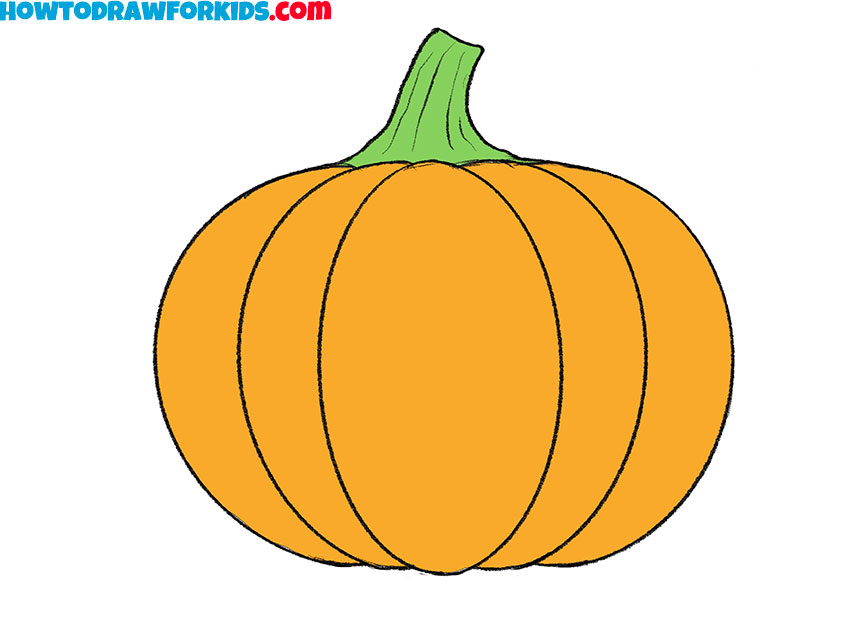
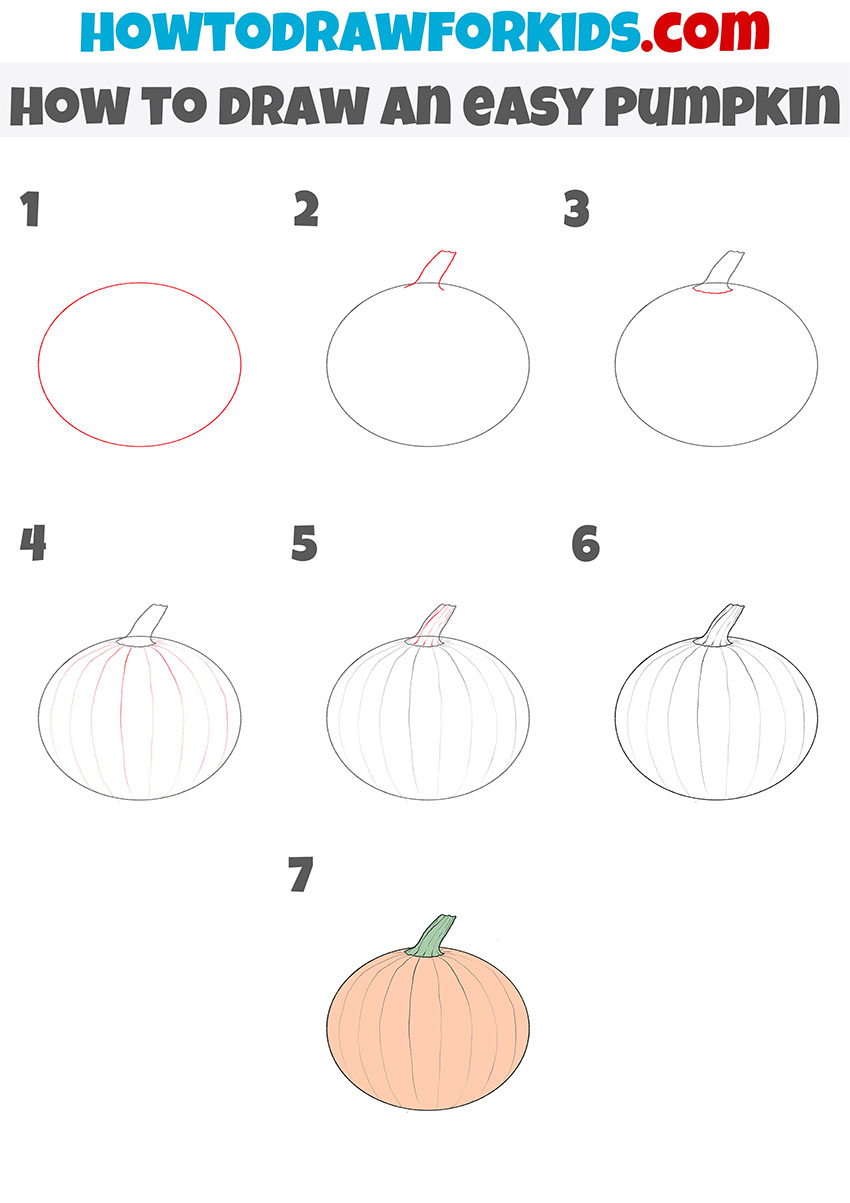
Easy Pumpkin Drawing Tutorial
There are also small details in this step-by-step pumpkin drawing method. This version resembles a different type of pumpkin with more segments. Additionally, each segment is smaller and thinner. I included this variation so you can draw this vegetable in more than just its most familiar and classic form.
Sketch a large oval as the base of the pumpkin drawing. Add a slightly curved stem at the top. Next, refine the stem by adding a base where it connects to the pumpkin. Draw thin vertical lines from the top to the bottom of the pumpkin to create multiple small segments. These lines should follow the curve of the pumpkin to give it a rounded look.
Add details to the stem by adding texture lines along its length. Erase any unnecessary guidelines and clean up the pumpkin drawing. Finally, color the pumpkin with a light orange shade and the stem with green.
Alternative Pumpkin Drawing Tutorial
The third pumpkin drawing lesson introduces a new method. Here, the drawing starts with the basic oval shape, similar to the previous versions. However, unlike the previous approaches, the sections are drawn immediately in their final form. Additionally, the overall shape of the pumpkin will be noticeably different.
Begin this tutorial on how to draw a pumpkin by sketching an oval as the base of the pumpkin. Draw a slightly curved stem at the top, tilting it for a more natural look. Draw the first section of the pumpkin along one center of the oval. Add another curved section on the opposite side, ensuring symmetry. Continue adding curved sections. The last sections should curve slightly outward, giving the drawing a rounded appearance.
Add details to the stem and refine its connection to the pumpkin. Erase unnecessary guidelines to clean up the drawing. Darken the final lines to make the shape clearer. Complete this pumpkin drawing tutorial by coloring the pumpkin in a warm orange tone and the stem in green.
Conclusion
Drawing any vegetable or fruit may not always be easy. You might make mistakes in shape or symmetry, and the final result could turn out uneven. The step-by-step methods from my tutorials help you focus on each individual step, making it easier to spot and correct mistakes.
To continue learning how to draw different plants, visit my rose drawing tutorial or try drawing a flower using another step-by-step drawing lesson. You can also combine these subjects and create a still life composition featuring a pumpkin surrounded by flowers.
I hope you achieve a great result. I also look forward to reading your comments on my website and social media.


i like to learn new stuff like drawin