How to Draw a Running Dog
Movement is an essential part of a dog’s behavior, so in this tutorial I’d like to show you how to draw a running dog step by step.
In this tutorial, I’ll show you how to draw a dog in motion, giving this cute animal a dynamic look. You don’t have to be a professional artist to do this job. The running dog drawing tutorial can be completed by a child or anyone who has no artist experience.
Dogs are one of the most common pets. Many owners consider these pets to be very loyal. Did you know that dogs are instinctively attached to humans? Even as a puppy, a dog can become attached to its owner if feels his kindness.
This time you will learn how to depict a moving object. Following this simple instruction, you can easily draw a running dog step by step.
Materials
- Pencil
- Paper
- Eraser
- Coloring supplies
Time needed: 25 minutes
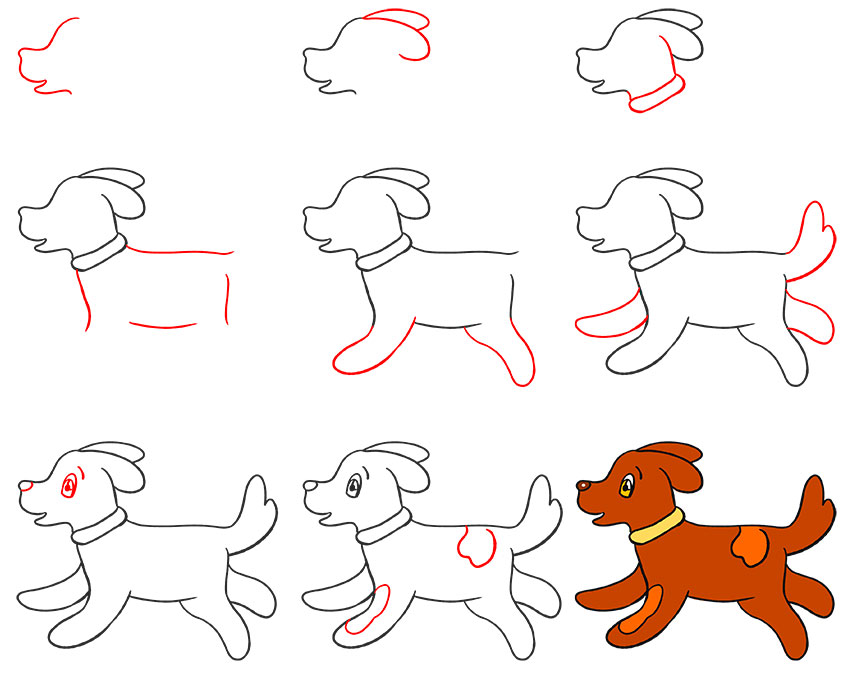
How to draw a running dog step by step
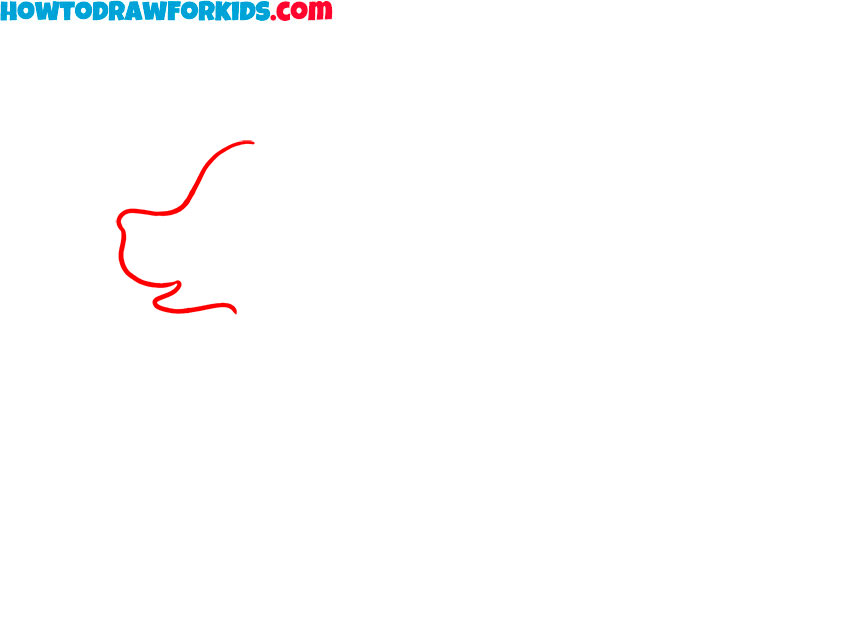
- Start with a simple snout curve.
First, draw the dog face to establish the overall direction of the running pose and gives you a base for the rest of the drawing. Begin by sketching a small curved shape for the snout, trying to male the line smooth and rounded. Add a gentle slope upward for the forehead and a short curve under the mouth to show the bottom jaw.
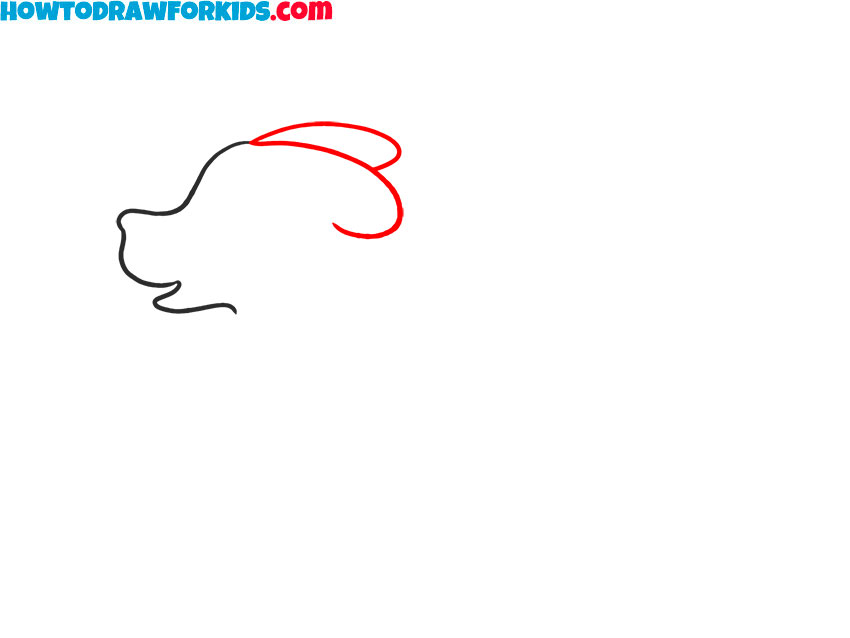
- Draw the running dog’s ears.
Continue sketching the running animal by adding the top of the head and drawing the dog ears. Sketch a smooth curve that rises gently from the forehead. Then, sketch the second ear behind the first one. The ear should trail backward to convey movement.
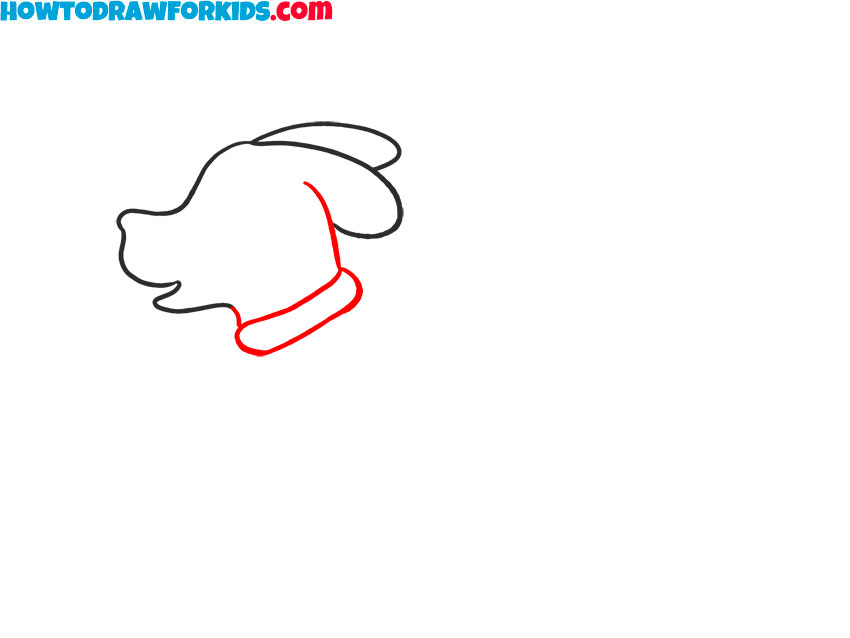
- Add in the neck and small collar.
The next step is to illustrate the place of attachment of the head to the body. Sketch two short curved lines extending downward from the head to illustrate the neck. After that draw a dog collar by sketching a thin rounded band around the base of the neck.
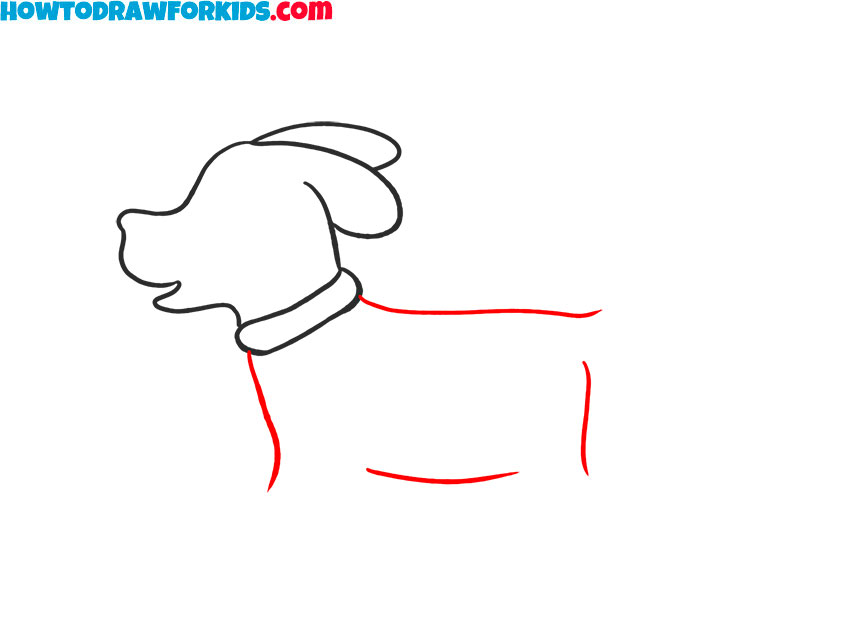
- Draw the torso of the running dog.
Now, sketch the basic body shape with long and curved torso lines. First, outline the dog’s back with a long, smooth line extending from the collar toward the tail. Next, outline the chest with a line extending downward from the collar. Then, outline the belly with a long, very smooth curve.
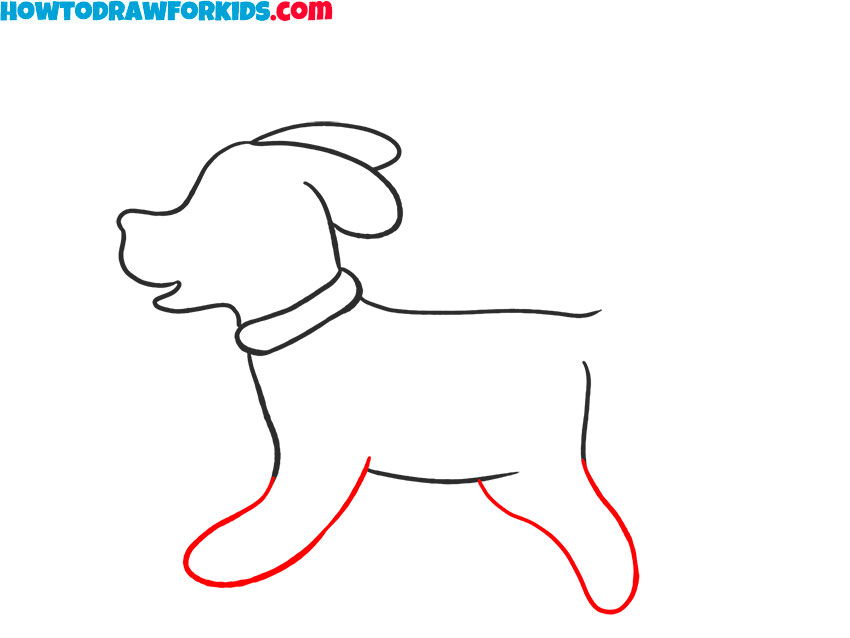
- Start sketching the legs in motion.
Start drawing the dog’s limbs by sketching a curved line that extends forward from the chest, illustrating a step mid-stride. Shape the leg with a rounded form. Next, draw another leg at the back of the body using a long, smooth line similar to the front one.
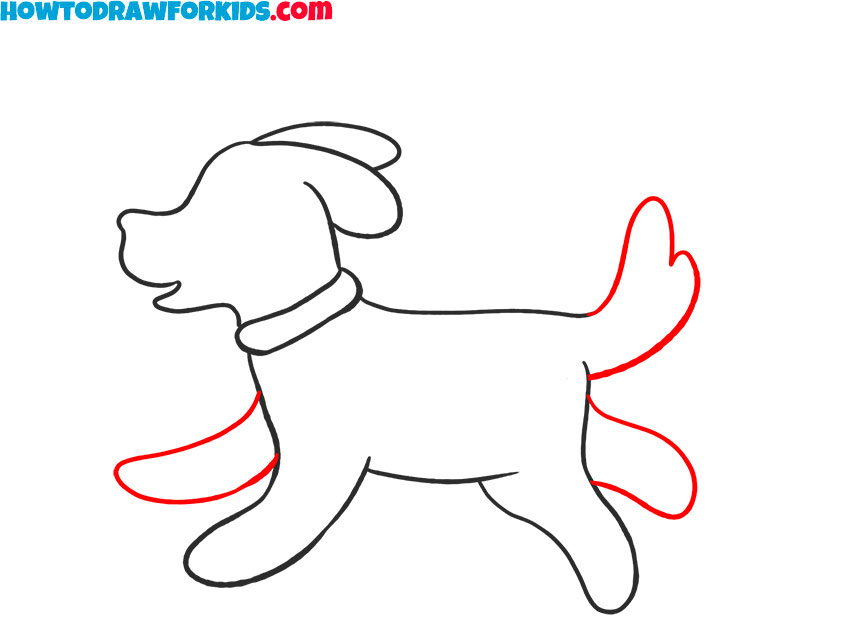
- Sketch the lifted tail and remaining legs.
Now that the closest legs are sketched, draw the distant legs and tail. First, outline the second front leg, repeating the appearance of the previous leg but placing it slightly higher. Next, draw the second hind leg with another smooth line and draw the tail above it.
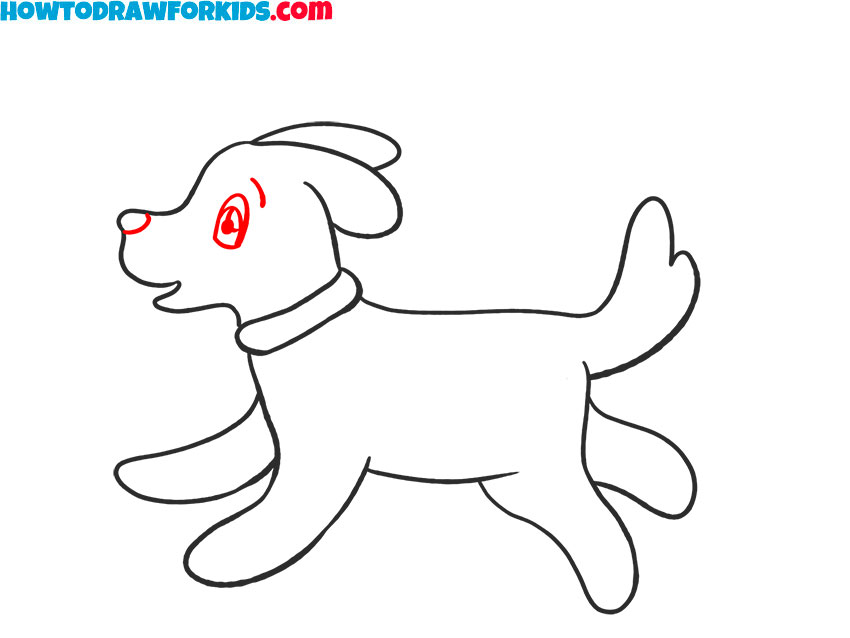
- Draw the eye and small nose.
With the main body shape and limbs are complete, illustrate the face details and fur patterns. First, draw the dog eye by creating a simple oval near the front of the head. Add a small circle for the nose at the tip of the snout.
- Sketch the body patches.
Before finishing the line art, sketch simple markings on the body of the dog. Draw rounded patches on the back or leg using smooth, irregular shapes. Avoid making the markings perfectly symmetrical, because natural variation looks more believable.

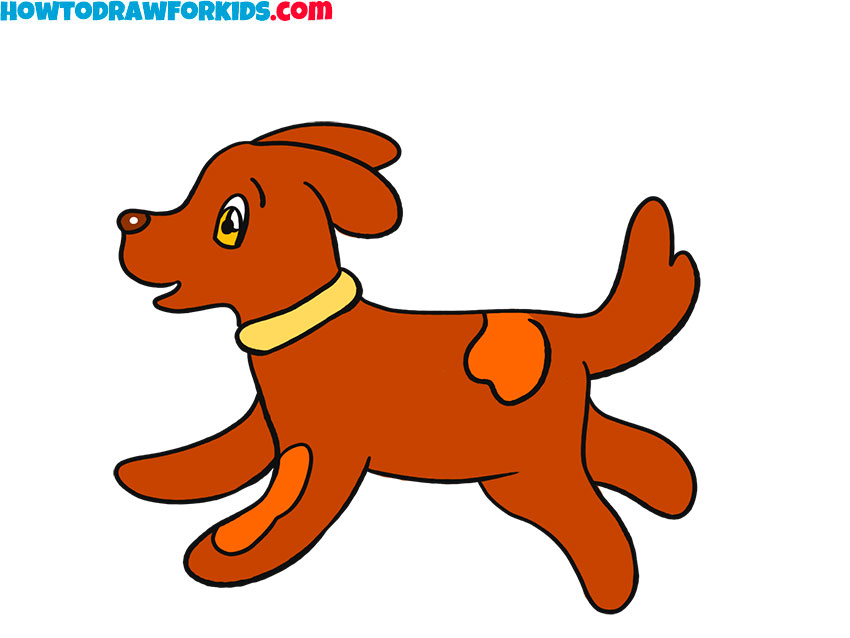
- Finish by coloring the running dog drawing.
To complete the running dog drawing, apply simple, clear colors. Start by coloring the body with a warm brown tone and fill the collar with another bright color. Add a lighter shade for the spots and pupils. Review the entire drawing once more to ensure all areas are colored consistently.

Fine! Here you have drawn a running dog. I hope you did a great job and did not have any difficulties while doing this work.
If you liked the running dog drawing tutorial, then share it with your friends. Don’t forget to follow us on social media.
I have also compiled a PDF file for your convenience. You can download this file and use it anytime!