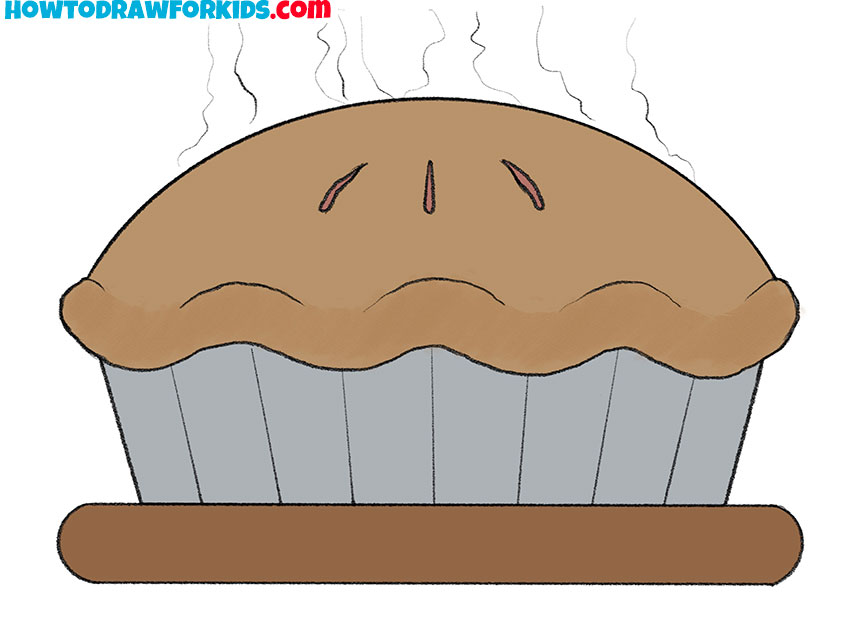
How to Draw a Pie
Hello, friends, today I’m thrilled to share my secrets on how to draw a pie, straight from the art studio that smells like a bakery. Each step in this lesson is a layer of flavor, adding to the delicious final drawing. We’ll capture the essence of a freshly baked pie, with a crust that’s just right and a filling that’s full of flavor.

How to Draw a Pie: Basic Information
Welcome to my kitchen of creativity where I’ll teach you how to draw a pie, warm and inviting. This lesson is baked with love, providing a simple method that even beginners can follow with ease. I have tailored this lesson so that anyone can translate the warmth of a freshly baked pie onto paper with a series of easy steps.
Notice the details that make this pie special: the crimped edges, the steam vents that promise a hot, baked filling. These small touches are what transform a simple sketch into a mouth-watering masterpiece. My approach breaks down each part of the pie into easy-to-follow steps, ensuring your drawing is as satisfying as the real thing.
By the time we finish, you’ll know how to draw a pie that could be the star of any feast or the perfect comfort food on a chilly day. I crafted this tutorial so you can share the joy of drawing with friends and family, or simply savor the pleasure of creating something delightful on your own.
Pie Drawing Tutorial
Materials
- Pencil
- Paper
- Eraser
- Coloring supplies
Time needed: 20 minutes
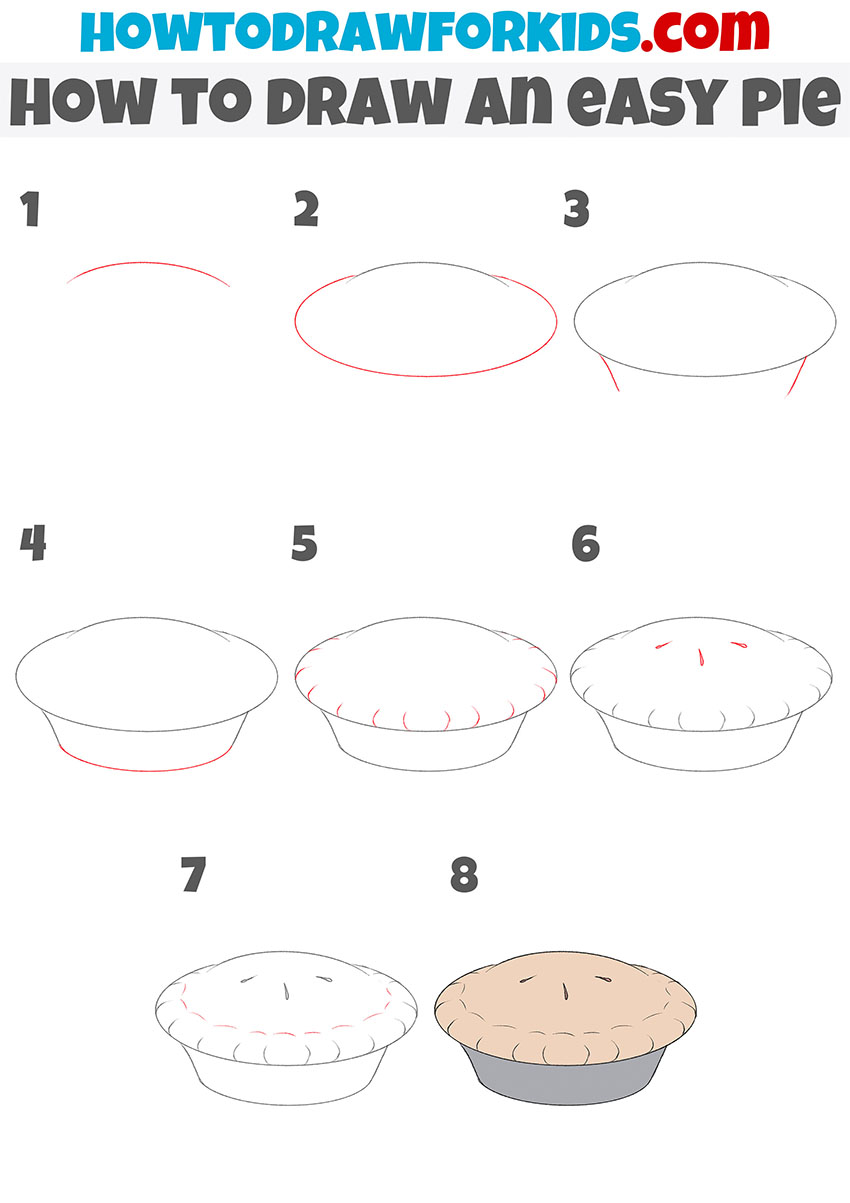
How to Draw a Pie
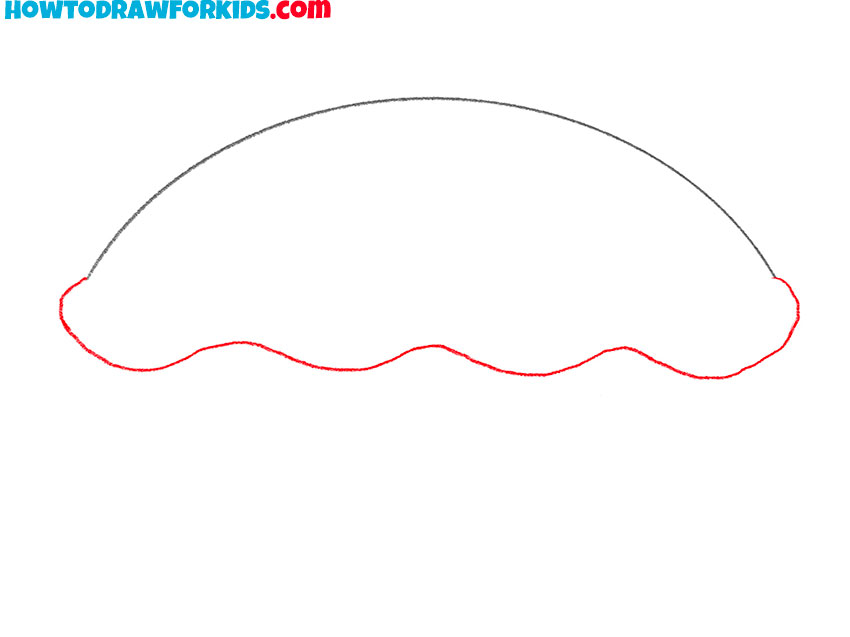
- Draw the top outline of the pie.
Sketch out a smooth rounded line.

- Depict the figured edge of the pie.
Draw a wavy line to make a closed loop.
- Add the relief to the surface of the cake.
At this stage, depict a few thin rounded lines.
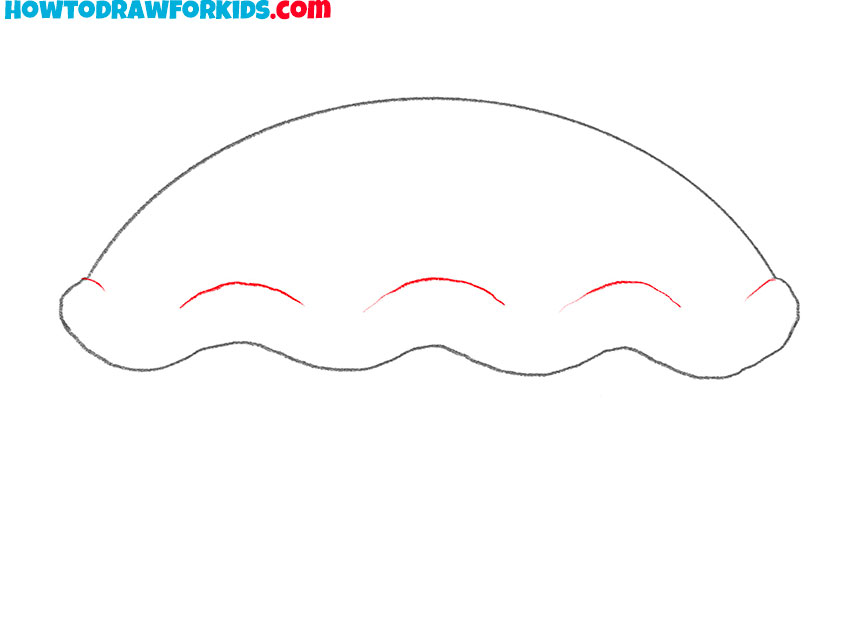
- Detail the surface of the cake.
Sketch out the three small folds.
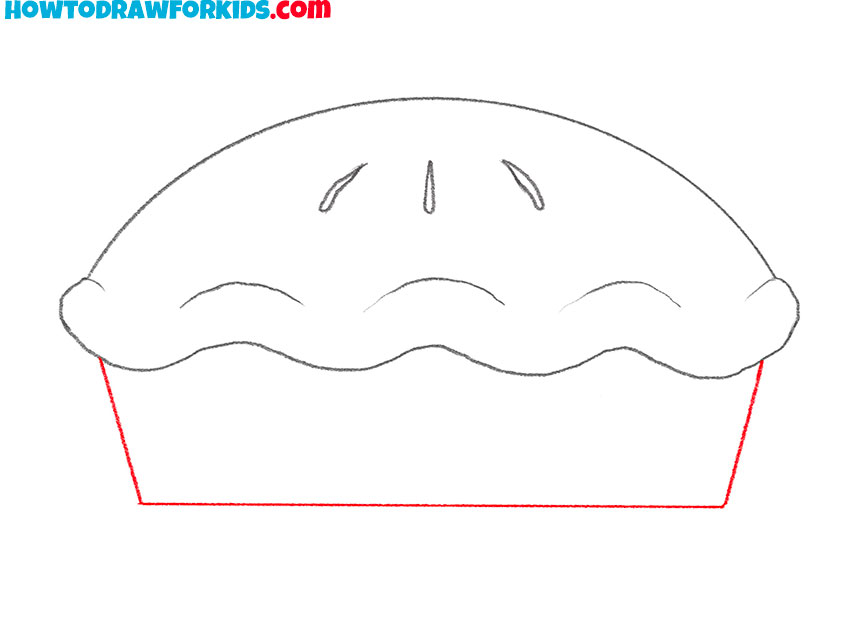
- Draw the shape that the cake is in.
Use even, straight lines to draw the shape.
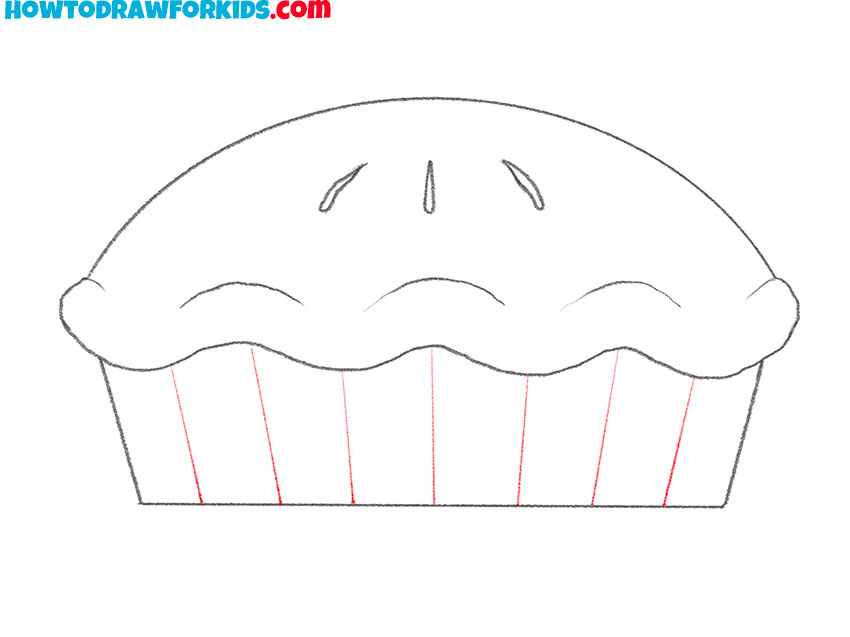
- Add details.
Sequentially depict thin straight lines on the surface of the form.
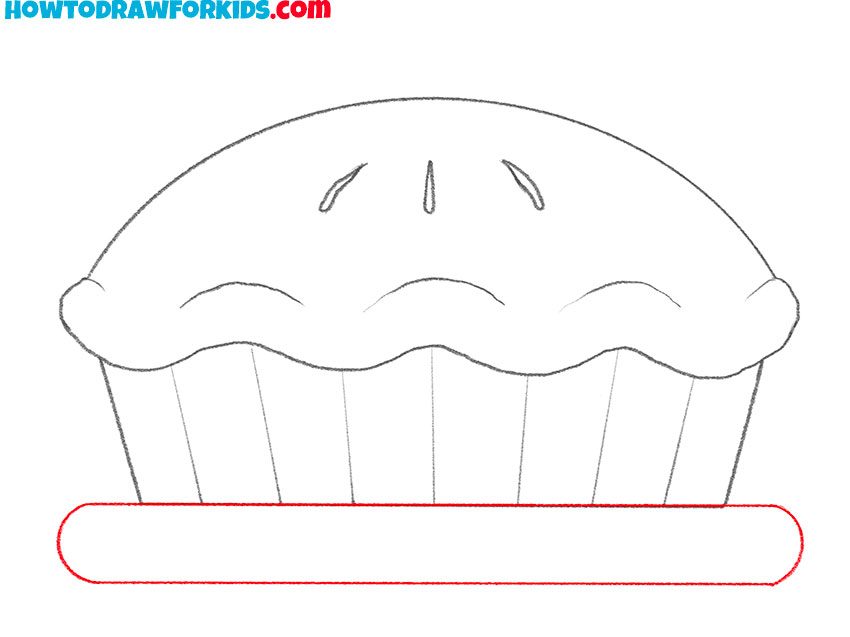
- Sketch out the stand.
Using straight and rounded lines draw the wide stand on which the cake is located.
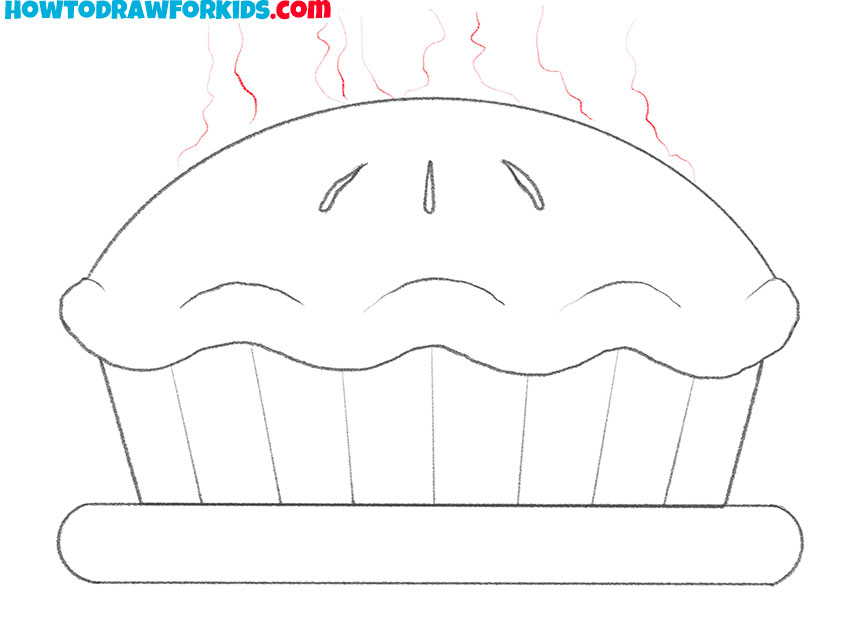
- Depict the steam.
Above the surface of the cake, draw thin, free-form lines.
- Color the pie.
Choose any colors you like.
Additional Content
Additionally, to aid your learning journey, a complimentary PDF version of this pie drawing lesson is available. It’s a concise iteration, packed with all the essential information, and it’s yours to download and use offline.
This means you can keep honing your pie-drawing technique, whether you’re in a sunny park, on a quiet train ride, or just at home away from the digital world. The aim is to provide a resource that is as accessible as it is helpful, enabling you to reinforce what you’ve learned and to take pleasure in drawing without any barriers.
Alternative Drawing Technique
In my commitment to your artistic development, I’ve not only provided the primary technique for drawing a pie but also crafted an alternative approach. This second method is another avenue for you to practice and enhance your drawing skills, adding another layer of proficiency to your artistic repertoire.
It’s designed to give you a broader range of techniques, allowing you to experiment with different styles and find what truly resonates with your personal touch. By trying out this method, you’ll be able to see which strokes and shapes best capture the essence of a pie as you perceive it, and in doing so, refine your skill set even further.
Learn to Draw Another Pie
This method is a simplified approach designed to teach you how to draw a pie. We start by creating a basic curved line for the pie’s dome, gradually building the shape with an oval outline and then adding the pie’s crust.
Detailing is minimal, focusing on the pie’s essential features, making it ideal for beginners or young artists. By the end of this tutorial, you will have learned to depict an appetizing pie complete with a flaky crust and a hint of filling showing through the slits at the top.
Refine Your Pie Artwork
As we put the final touches on our freshly drawn pies, let’s reflect on how we can elevate these sketches from good to great. Here are some artistic tips to enhance your drawing:
- Enhance the Crust: Practice drawing different types of crusts, from lattice to crimped edges, for variety.
- Highlights: A touch of highlight on the top of the pie can suggest a glossy, baked finish.
- Create a cozy kitchen setting: Draw a wooden table with a checkered tablecloth, with a plate holding the pie as the centerpiece.
- Serving Tools: Sketch a pie server or a slice removed to invite viewers into the scene.
- Beverages: A steaming cup of coffee or tea, perhaps with a hint of steam rising, can complement the homely feel of the pie.
- Fruit Bowl: Place a bowl brimming with fruit nearby to suggest the pie’s fresh ingredients.
- Flowers: A vase with wildflowers or a potted plant can bring a splash of color and life to the composition.
Imagine these items as the chorus to your pie’s solo, enhancing the overall harmony of the scene. As your artistic journey continues, let these inspirations be the ingredients that you blend into your evolving portfolio.
Conclusion
As we conclude our culinary sketching journey with pies, remember, this is just a taste of the creative feast awaiting you. On my website, you’ll find a smorgasbord of tutorials, ranging from the energetic bound of a kangaroo to the peaceful embrace of a forest.
Make sure you’re following me on social media to catch every announcement and sprinkle of new content. Your desires and feedback light the way for our next creative journey, so don’t hesitate to leave a comment with the scenes or subjects you’re dreaming of mastering. Together, let’s sketch a path to new artistic discoveries.


real cool