How to Draw Santa Claus
Few symbols are as closely tied to Christmas as Santa, and this tutorial explains how to draw Santa Claus using four very simple methods.

How to Draw Santa Claus: Introduction
Perhaps there is no more beloved and recognizable Christmas and winter character in the world than Santa Claus. Although this character appeared in his canonical form relatively recently by historical standards, specifically in the late 19th century, he quickly gained widespread popularity and became firmly associated with the winter holidays and even with cola.
In various works of art, from films, books, games, and cartoons to advertisements, Santa Claus is portrayed in many different ways. This lesson is created to cover a range of approaches to drawing Santa Claus and to give you tips for creating your own version of this well-loved character.
At the end of the lesson, you’ll also find several bonus and very important instructions with extra points and aspects to consider.
Santa Claus Drawing Tutorial
Materials
- Pencil
- Paper
- Eraser
- Coloring supplies
Time needed: 40 minutes
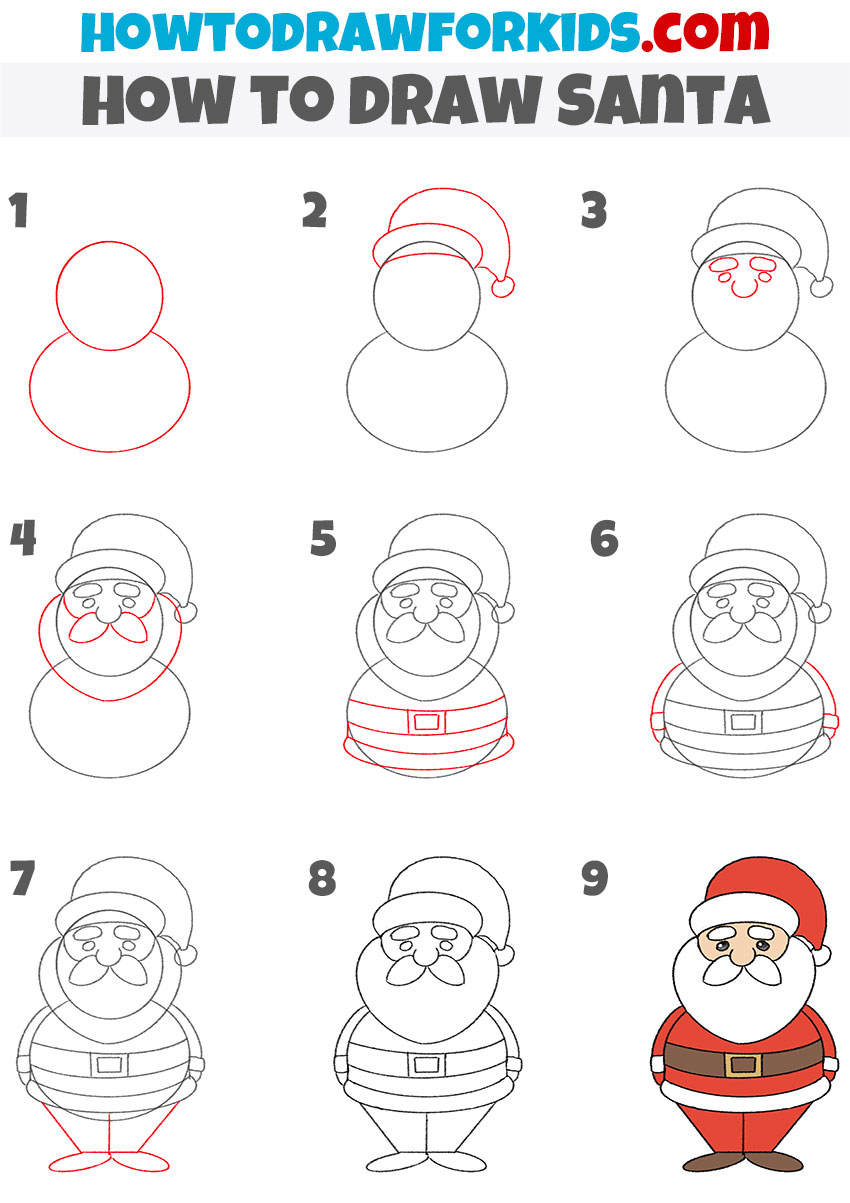
How to Draw Santa Claus
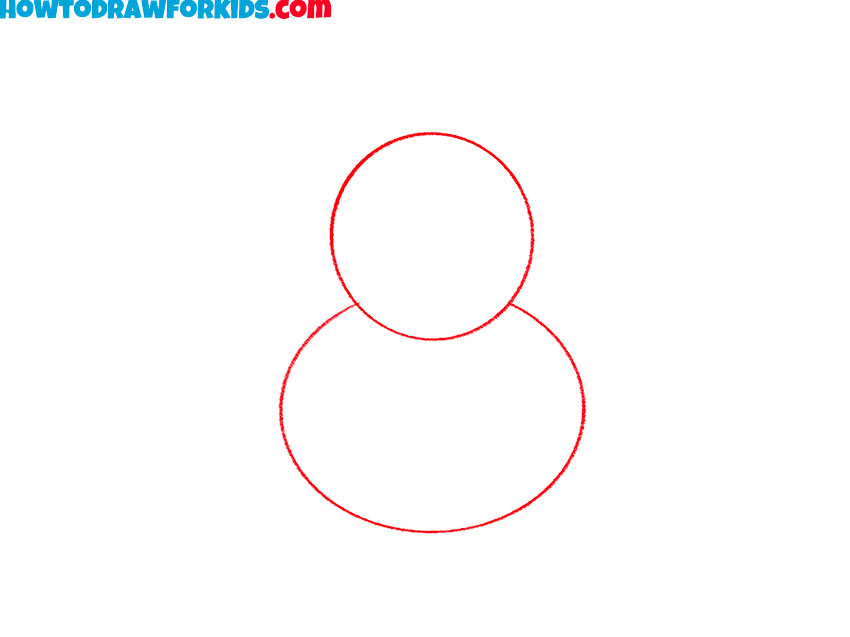
- Outline Santa’s head and body.
Sketch two simple circles, one for the head and one for the body of Santa. Place the body circle slightly larger and lower, letting them overlap a little. If you want to draw Santa Claus in a more realistic style, make the head a little smaller and the torso a little larger than in my example.
- Sketch the hat with pom-pom.
On top of the head, draw a slightly curved band for the hat’s brim. Above it, sketch the rounded main part of the hat bending over to one side, ending in a small pom-pom. To make your Santa drawing look more realistic, you can add a couple of folds to the hat.

- Add the main face details.
Inside the head shape, lightly sketch the main facial elements: two oval eyes, small curved brows above them, and a rounded nose. If you’re working on a Santa illustration for the first time, don’t stress about exact placement, you can refine proportions as you go.

- Draw Santa Claus’ fluffy beard.
Around Santa’s lower face, draw a wide, fluffy beard that extends down to overlap the top of the body circle. Inside it, sketch a large mustache made from two curved shapes meeting in the center above the mouth. You can experiment with the mustache style or add some texture to the beard.

- Sketch the belt and jacket trim.
Across the center of the body circle, draw a horizontal belt with a large rectangular buckle in the middle. Curve the belt’s edges to match the roundness of Santa’s body. Below the belt, draw the bottom trim of the jacket with smooth links.

- Shape the arm and hands.
On both side of the Santa’s body, sketch the arms ending in mitten-like hands. You can leave the hands simple as in my example, or add small fingers to make it more detailed. If you want to make variations, you can change the arm position to hold a sack or wave.

- Sketch the legs and boots.
Beneath the body, sketch two small triangular shapes for Santa’s legs, adding rounded boots at the bottom. If you want to change the stance, you could angle the legs. Also, you can make the shies more detailed, adding buckles or trims to the boots.

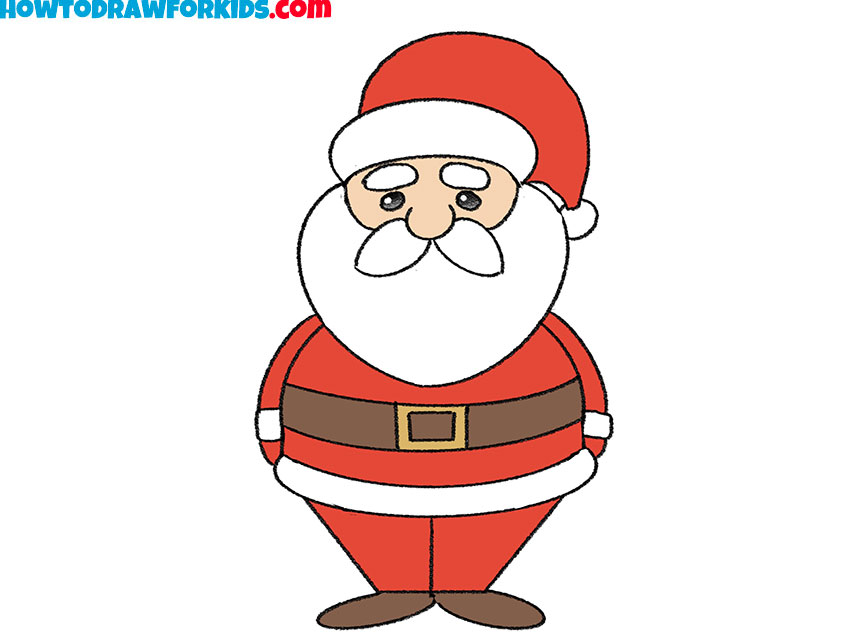
- Finalize all contours and details.
Go over your Santa Claus sketch, smoothing out shapes and removing any remaining extra guidelines. Check that the sketch looks symmetrical and correct. Also, you can add some extra details or write some inscriptions on your sketch at this stage.

- Add classic Santa colors.
Fill in the drawing with the classic Santa colors, such as red for the hat and coat, white for the fur trim, black or brown for the boots and belt, and gold or yellow for the buckle. The face can be a light peach tone with a touch of pink on the cheeks.
Additional Content
And as always, I want to present a PDF version of this tutorial, where I’ve combined the main steps in a clear, simplified format for offline use. It includes also includes additional materials, like a coloring page, tracing worksheet, and a grid drawing worksheet. And of course, it is absolutely free to download and use offline.
How to Draw Santa Claus: Alternative Techniques
After completing the main Santa Claus drawing tutorial, you can try several additional versions that vary in style, detail, and step sequence. These include designs with accessories like a gift bag, simpler cartoon-style figures, and cartoon versions without basic construction shapes. These methods offer different approaches and allow you to choose one that matches your skill level or experiment with new ways to draw Santa.
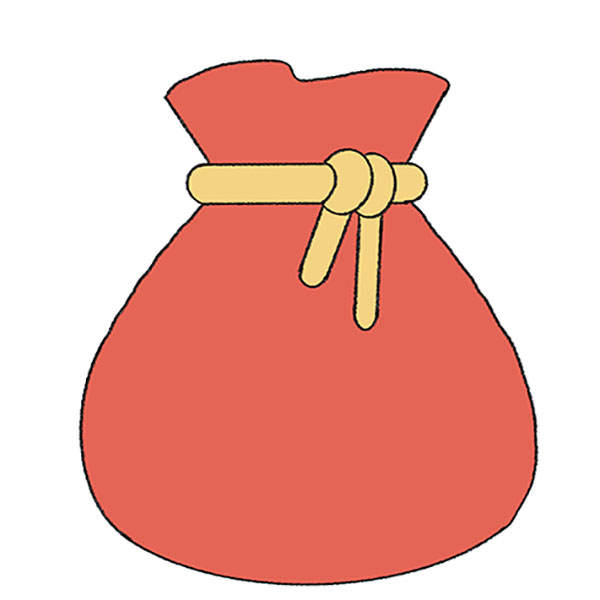
How to Draw Santa Claus with a Bag of Gifts
This additional Santa Claus drawing tutorial is a variation of the main lesson, with the most noticeable change being the large gift bag resting on Santa’s shoulder. The step sequence is arranged differently, adding facial guidelines before adding details.
First, draw Santa Claus’ head as a rounded shape connected to a wide body outline. Add the arms on each side, with one bent upward to hold the gift bag. Draw the legs as short blocky shapes at the bottom. Outline the face, including the beard, mustache, and smiling expression, then add the hat on top with a pom-pom at the end.
Shape the large gift bag over Santa’s shoulder. Add the belt, coat trim, and simple folds to the clothing. Once all details are in place, trace the lines neatly, erase any guidelines, and color Santa’s suit in red, the bag in green, and the boots in brown.

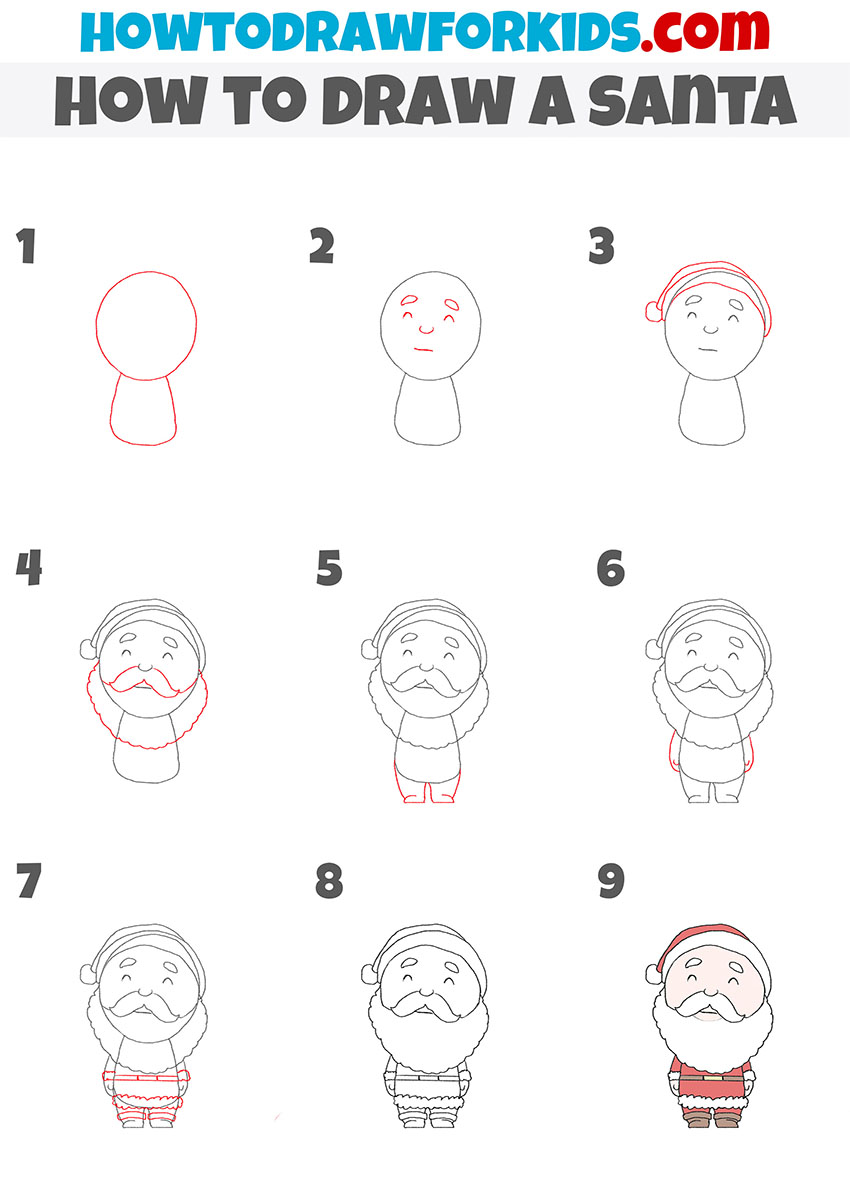
Cute Santa Claus Drawing Lesson
Let’s draw Santa Claus again, but using a completely different style. This additional tutorial is simpler than the previous versions and uses a different style. The sequence of steps avoids starting with basic geometric shapes, instead building the figure directly by adding features and clothing details one by one.
Begin with the facial features, drawing two small eyes and a round nose in the center. Add the lower edge of the hat just above the eyes, then complete the tall, pointed hat with a pom-pom at the tip. Draw the large, pointed beard shape beneath the face, followed by a simple curved line for the smiling mouth.
Add the collar at the base of the beard, then outline the small rounded body and arms, including the belt and cuffs. Finish by adding short legs with simple boots. Trace the lines, erase extra marks, and color the hat and suit red, leaving the beard, hat trim, and cuffs white, and the boots brown.

How to Draw Chibi Santa Claus
In this last alternative technique, I walk you through drawing more simplified and cute Santa Claus, characterized by his exaggerated and adorable features. Compared to the main version, the proportions are even more exaggerated, and the details are even more simplified.
Draw Santa Claus’ head as a rounded shape connected directly to a tapered body outline. Add the facial features, including two small eyes, a short curved mouth, and eyebrows. Sketch the hat above the head with a wide brim and a small pom-pom at the tip. Outline the beard as a large rounded shape covering most of the lower face, and add the mustache in the center.
Draw the short legs at the bottom, then add the simple arms along the sides. Include Santa’s belt, coat trim, and other small clothing details. Finish by tracing the outline, erasing extra lines, and coloring the hat and coat red, the trim and beard white, and the boots brown.
Conclusion
If you’d like to place your Santa into a full holiday scene, a Christmas tree makes the perfect background element – you can follow my Christmas tree drawing tutorial to build it step by step.
For extra variety and practice, you can also check out my collections of Santa coloring pages and Christmas tree coloring pages. These can be a good way to practice color choices and shading without having to redraw everything from scratch.
Combining drawing practice with coloring is something I often recommend in class, as it helps develop both basic line drawing and an eye for color. Keep your sketches, compare them over time, and don’t be afraid to experiment with new poses or outfits for your Santa.


SO BASICALLY YOU DRAW SO AMAZING WILL YOU MERRY ME!!!
Thank you for the kind words, Lilly. I’m glad you enjoy the drawings, that’s what matters most.
I LIKE ART
That’s great to hear!