How to Draw a Standing Person
Here I’ve created an extension of the basic person drawing tutorial to teach you how to draw a standing person in detail.

How to Draw a Standing Person: Introduction
So, I am glad to bring to your attention an interesting and useful lesson on how to draw a standing person. As I said above, this lesson is a separate addition to the lesson on drawing a person, and here I want to focus your attention specifically on the standing pose.
In this lesson, the human figure is presented in a cartoon form, so it has unrealistic proportions. The person has a large head and a relatively small body. Here we will use the proportions from the boy drawing lesson, so you can check that out too. Try to keep these proportions in your drawing.
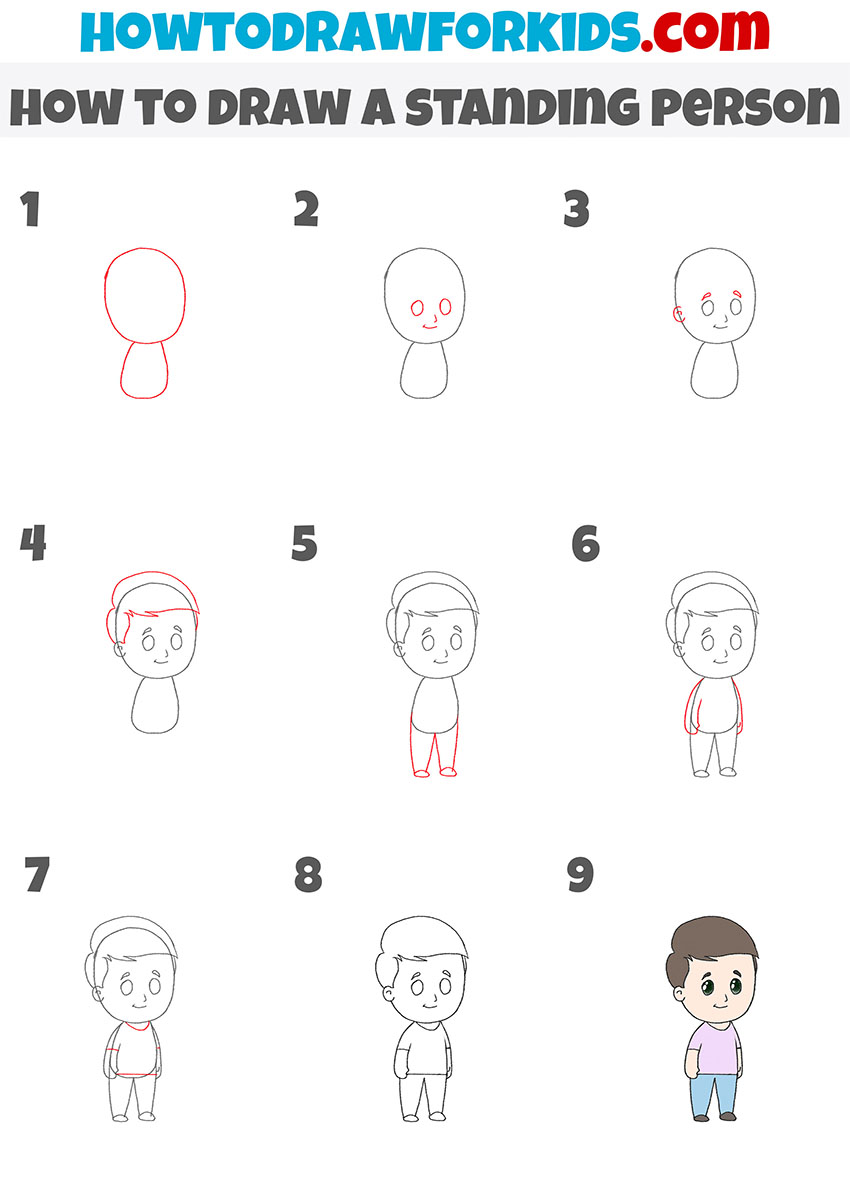
The instruction includes nine steps, each of which is visualized and supplemented with a small hint. Be attentive and patient at every stage of drawing to achieve the best results. Now prepare all the necessary art materials and start this lesson.
Standing Person Drawing Tutorial
Materials
- Pencil
- Paper
- Eraser
- Coloring supplies
Time needed: 35 minutes
How to Draw a Standing Person
- Sketch a rounded head and body forms.
Sketch two simple shapes that will serve as the base of your drawing of a standing person. The head can be sketched as an oval, while the torso is shaped like a small, slightly wider oval or teardrop beneath it. Compare this to drawing a balloon on top of a bean. Since this is a standing person drawing, keep the torso upright.

- Sketch the standing figure‘s facial features.
Now that the base is ready, start giving your standing person a face by drawing two round eyes in the middle of the head and a small curved mouth just below. At this stage, you’re simply sketching basic circles and a short line or curve, nothing complicated.

- Draw the ears and eyebrows of the person.
Next, draw small ears on each side of the head and sketch in two short eyebrows above the eyes. Ears usually line up between the eyes and the bottom of the nose, even in cartoon-style drawings. Eyebrows are equally important, and even just two short lines can change the character’s expression.

- Sketch the hair shape.
Move on to sketching the hairstyle. Add the hairline above the forehead and draw the top of the hair flowing over the head. Different hair shapes can immediately make the same standing figure look like a completely different person. Short hair, longer hair, or a fringe all change the impression.

- Draw straight legs under the body.
Since this is a person standing still, make sure both legs are even and pointing straight down to the ground line. Don’t bend the knees. For variation, you can draw them close together or far apart. This step is perhaps the most important, because it is here that we will give the person a standing pose.

- Shape the arms on both sides.
Draw two arms extending downward from the sides of the torso. Since this is a standing person at rest, the arms should hang naturally. They can be slightly curved but not stiff. The arms should reach about halfway down the thighs when drawn on a standing figure. It’s an easy way to check proportions.

- Illustrate clothing details.
Now add the main clothing outline. Sketch a simple shirt over the torso and illustrate pants that cover the legs. Clothing is what makes the standing person look less like a mannequin and more like a character. Clothing should follow the body shape underneath. Don’t add extra folds.

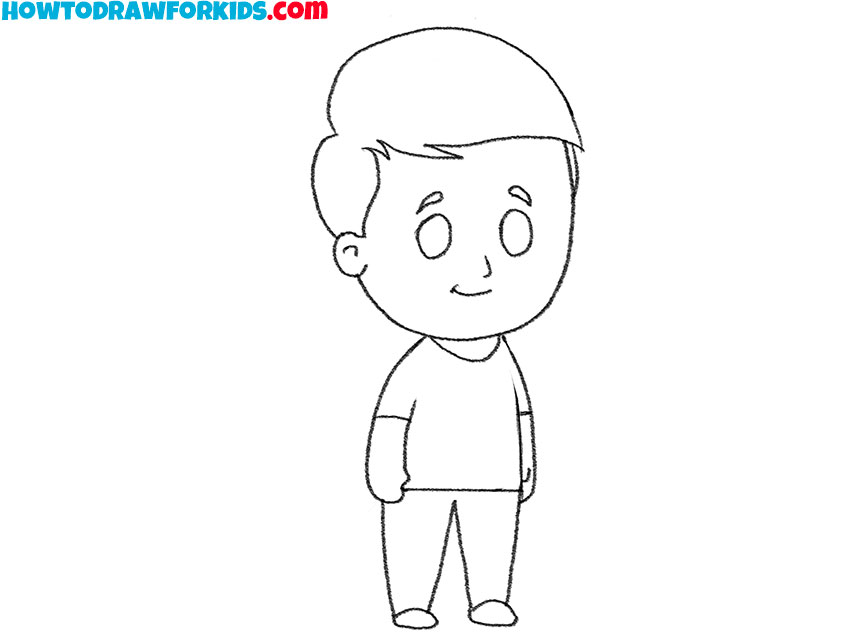
- Erase guidelines and smooth the outline.
Now, erase extra guidelines and trace the main lines of your standing person drawing. If you see that one leg looks shorter or the torso tilts, correct it now. Make sure that the legs and arms are the symmetrical, as a mistake here can make your drawing look wrong and unconvincing.
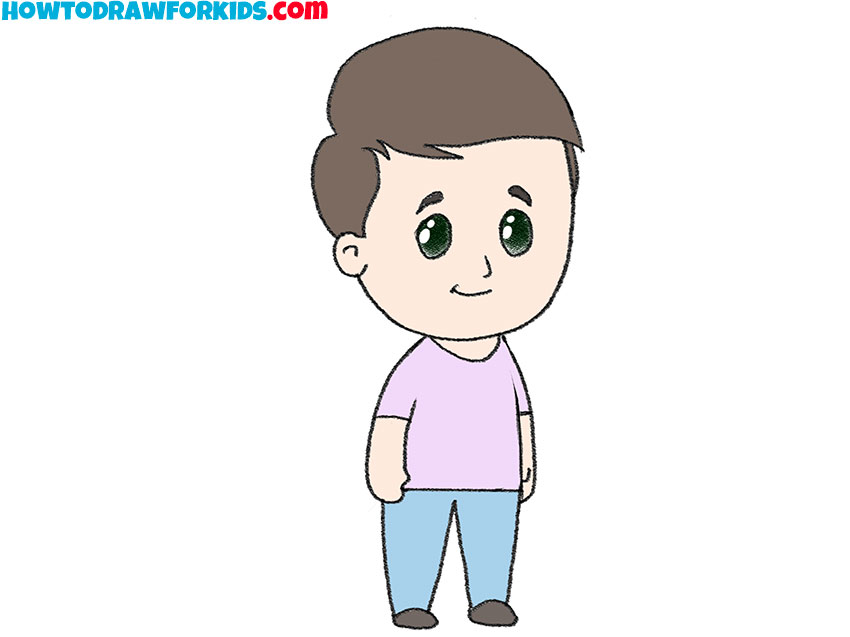
- Fill in the standing figure with colors.
The final stage is adding color to complete your standing person drawing. Apply natural skin tones to the face and hands, choose a shade for the hair, and fill in the shirt, pants, and shoes with simple colors. To further emphasize the standing position, you can add a shadow under the person’s feet.
Additional Content
That’s the end of a simple lesson on how to draw a standing person. I hope you did your best at each stage and can now admire the result. As always, at the end of the lesson I’ve prepared a PDF file that includes a shortened version of this tutorial along with some additional practice materials. Be sure to download the file so you’ll always have access to this lesson, even without an internet connection.