How to Draw a Toothbrush
Even the most ordinary things can serve as good drawing subjects, which is why today we will study how to draw a toothbrush.
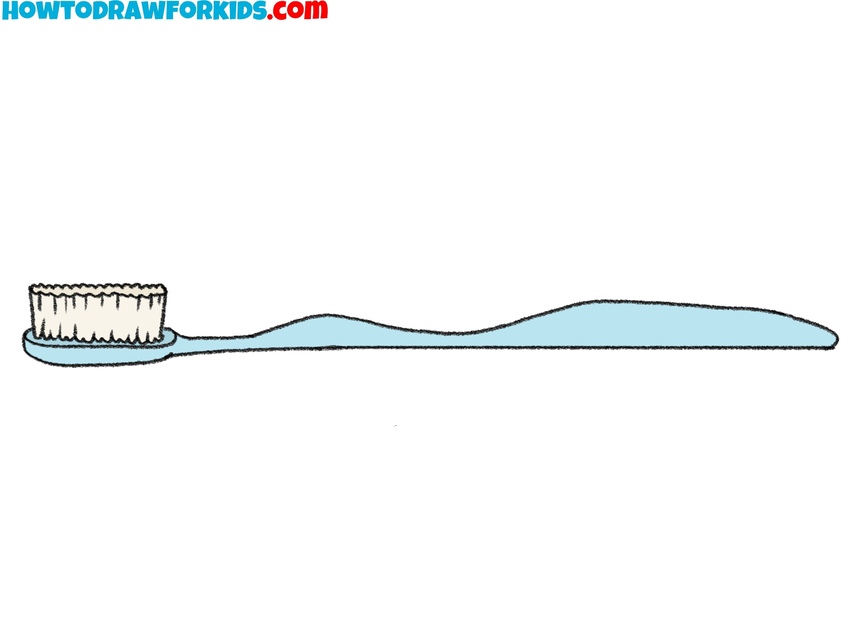

Now I will show you how to draw a toothbrush. This is an item that both adults and children use every day. A toothbrush helps us take care of oral hygiene and helps keep our teeth healthy and strong.
You know that toothbrushes are different – large and small, with different bristles, multi-colored. In the picture, you see the most common toothbrush. The handle of the brush has a curved shape, making it comfortable to hold in your hand. Medium bristles.
This lesson has six steps. Each step includes one simple action, so you can easily draw this item. In the course of the lesson, you will see that it is very simple and you will get a beautiful toothbrush.
Materials
- Pencil
- Paper
- Eraser
- Coloring supplies
- Ruler (optional)
Time needed: 15 minutes
How to Draw a Toothbrush
- Sketch two straight lines for the handle.
Every object starts with a base structure, and for the toothbrush that begins with two long parallel lines. Lightly sketch these lines across your page, leaving a little space at each end for later details. These guidelines will serve as the body of the toothbrush handle.

- Mark the brush head section.
With the handle set, mark out where the bristle section will go by sketching two short vertical lines across one end of your guidelines. This boxed-off area will become the toothbrush head.

- Draw the bristles of the toothbrush.
To make the toothbrush recognizable, draw the bristles inside the head section. Use short, vertical lines closely spaced together to convey the tufts of bristles. Keep them even in height, forming a rectangular cluster. Lightly mark the top edge of the bristles with a straight line first, then fill in the strokes up to that boundary. This will keep the overall look tidy.

- Outline the brush head shape.
Now outline the full head of the toothbrush, connecting it to the bristle area. Add slight curves at the edges instead of leaving them as sharp corners, since toothbrush heads are usually rounded for safety. Make sure the head extends slightly beyond the bristles to create a border.

- Shape the top of the handle.
To give the handle a more natural look, add a wavy line running along the top side of the guidelines you sketched earlier. This creates the ergonomic contour often found on toothbrushes, making them comfortable to hold. This line should begin near the head and run most of the length of the handle before tapering off.

- Shape the bottom of the handle.
Now repeat the same process along the bottom side of the handle. Draw another wavy line, meeting neatly at the end to form a smooth shape. This completes the outline of the ergonomic handle.

- Erase unneeded head and handle guidelines.
The toothbrush is fully shaped, so it’s time to erase the construction lines that are no longer needed. Carefully remove the two original parallel guidelines that ran through the handle, since the curved contour now defines its shape. Erase the vertical dividing lines on the brush head that were used to mark its section earlier, leaving only the smooth outline around the bristles.

- Fill the bristles and handle with basic colors.
And now, to finish the drawing, paint the handle with a bright shade, such as blue or green, leaving the bristles white or paining them light gray. You can darken the bottom side of the handle to illustrate shadow and give it more dimension. If you like, you can also add small details like stripes or grip textures.

Bonus: Easy Toothbrush Drawing Tutorial
First sketch a straight horizontal line to define the base of the toothbrush handle. Next, add another line above it with a few slight curves to show the ergonomic shape.
Then draw a small oval on the left side for the base of the bristle section. After that, add short vertical lines for the bristles, making them slightly uneven to look more natural. Continue by adding another row of bristles behind the first to give the drawing some more realism.
Once the basic form is complete, go over the outline to make the toothbrush neat and clear. Finally, color the handle in a solid shade, leaving the bristles lighter.

Conclusion
Fine! You have learned how to draw a toothbrush. I think that you completed this task very quickly and are satisfied with the result of your work. Now you have gained useful skills and you can even draw your own toothbrush or any brush of a different shape and color.