How to Draw a Whale
Although a whale is large, we won’t need much effort to learn how to draw one with this tutorial, which includes two simple methods.

How to Draw a Whale: Introduction
In this lesson, I’ll show you how to draw a whale in our usual simplified style, slightly resembling a cartoon character. We won’t focus on excessive details or try to illustrate every small feature of this giant creature. Instead, we’ll use only the most important elements that will clearly indicate to anyone looking at your drawing that it is a whale and not some other animal.
Next, as usual, to reinforce what we’ve learned, we’ll try drawing the whale again but in a slightly different manner. However, keep in mind that everything shown in the lesson serves as a basic guideline, and you can modify the details to make your whale more unique.
For example, you can make it less cartoonish and more realistic by adjusting the proportions and giving the face a more natural look. Additionally, you can change the position of the tail or other features.
All of these adjustments will help make your drawing distinct – not only from mine but from any other as well. And, of course, in the process of drawing a whale, you will gain many important drawing skills.
Whale Drawing Tutorial
Materials
- Pencil
- Paper
- Eraser
- Coloring supplies
Time needed: 30 minutes
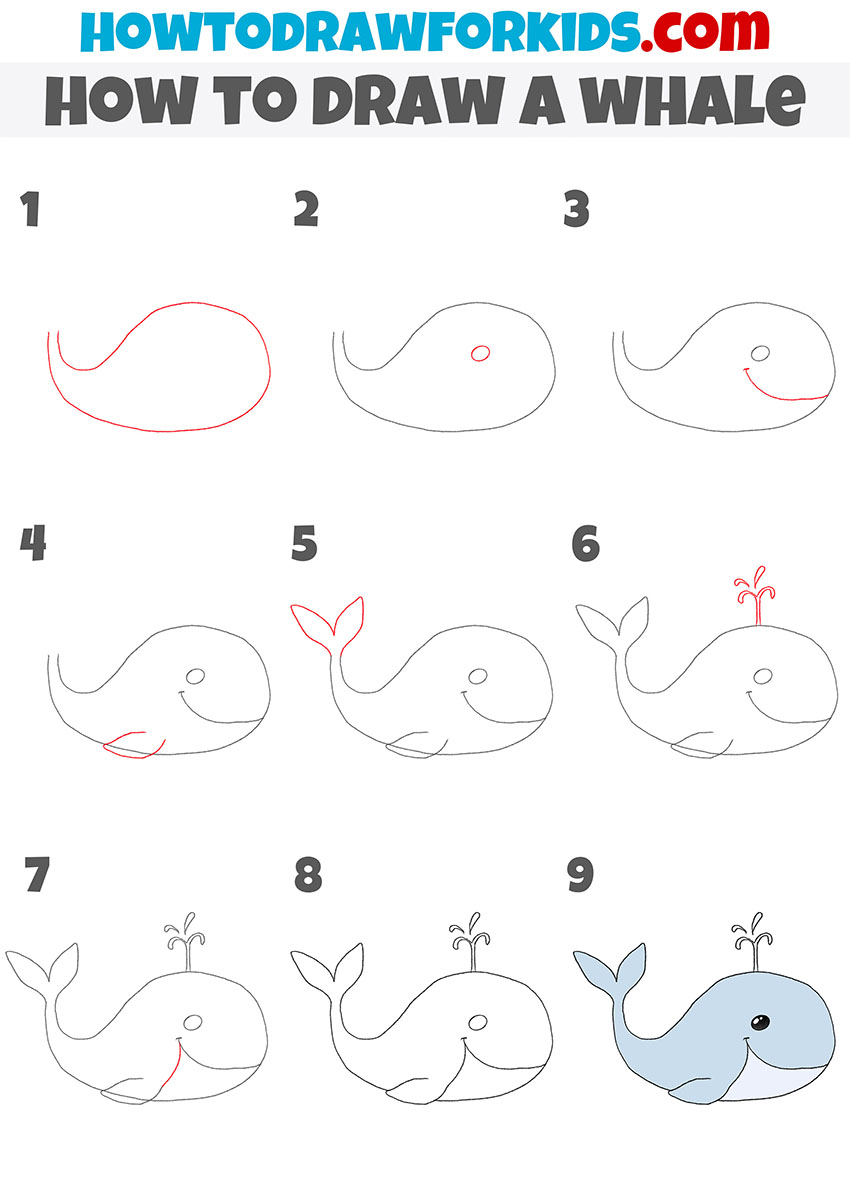
How to Draw a Whale
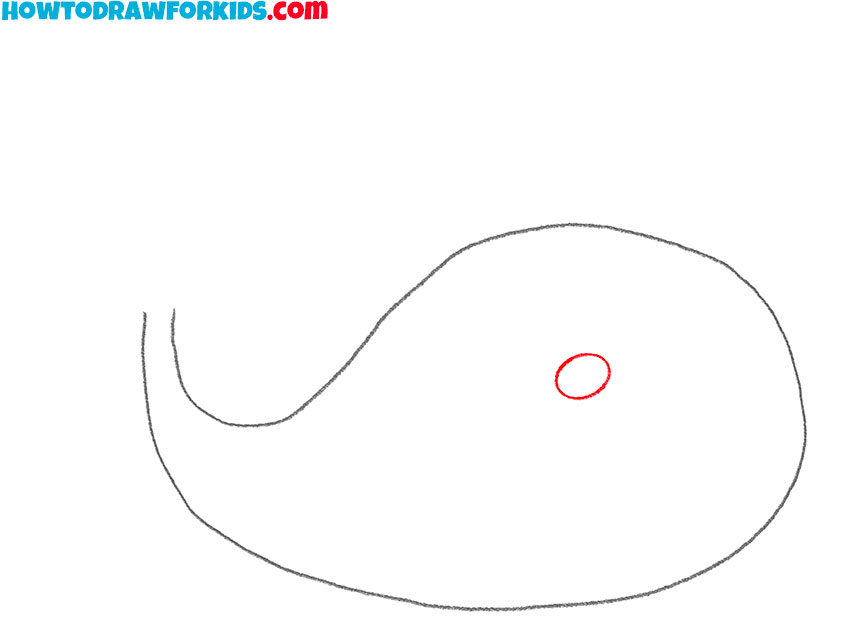
- Draw the whale’s torso.
Begin the whale drawing with a kidney-bean-like shape, which forms the body. The left end should taper into a small curve, forming the whale’s tail base. This simplified shape will serve as the foundation for your drawing. Keep the lines light and loose, as you might need to refine them later.

- Illustrate the eye.
Now that you have the base of the whale’s body, it’s time to add details. Place a small circle slightly above the middle of the body, toward the front for the eye of the whale. If you want to make your whale drawing more unique, you can adjust the eye size or placement slightly.
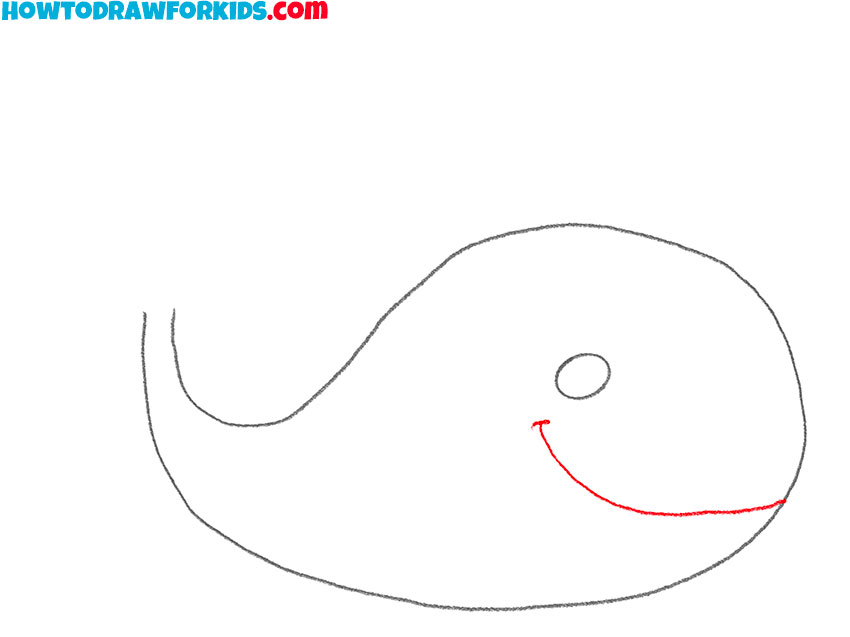
- Sketch the mouth.
To continue learning how to draw a whale, add a simple curved line for the mouth. If you prefer a different look, you can adjust the mouth shape – making it more curved for a bigger smile or slightly flatter for a calmer expression.
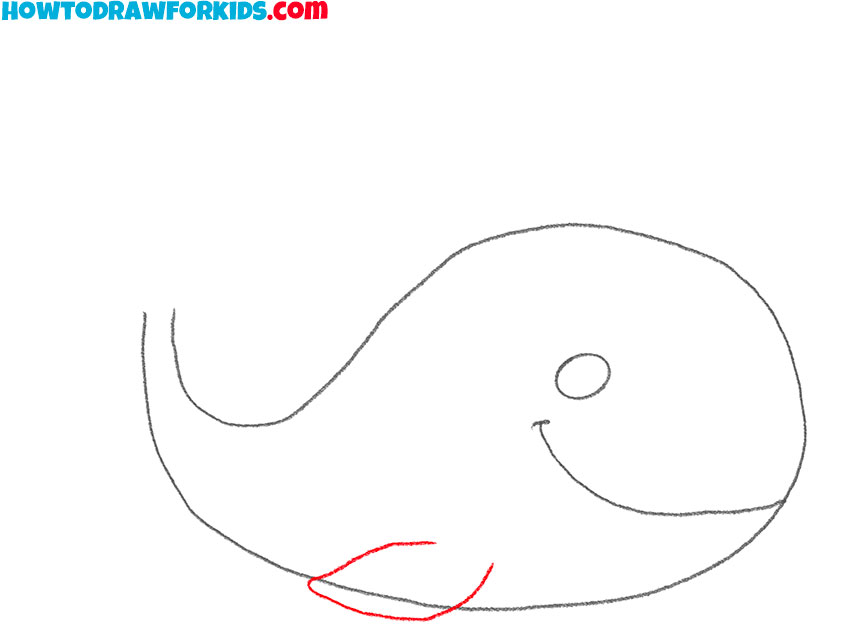
- Add the pectoral fin.
Now, it’s time to give your whale some fins! Draw a small curved shape near the bottom of the body to create the pectoral fin. This flipper should follow the whale’s rounded form. You can add a second curved line on the opposite side of the body to represent the far fin.
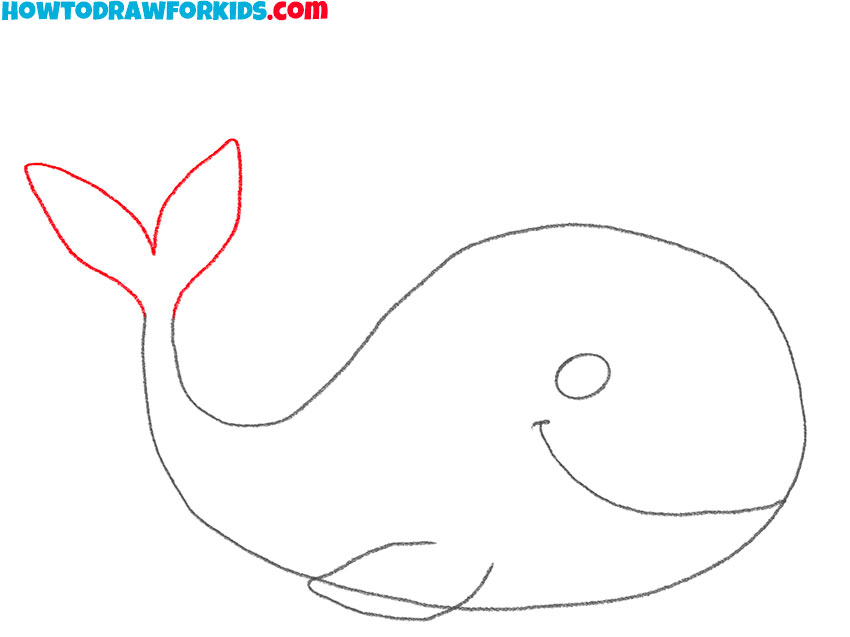
- Draw the tail of the whale.
A whale’s tail is one of its most distinctive features, so let’s add it now. Extend two curved shapes from the tapered end of the body, to form the tail flukes. The tail should look wide and slightly wavy, giving it a natural appearance. If you want, you can make the tail slightly larger or adjust the curve to create different styles.
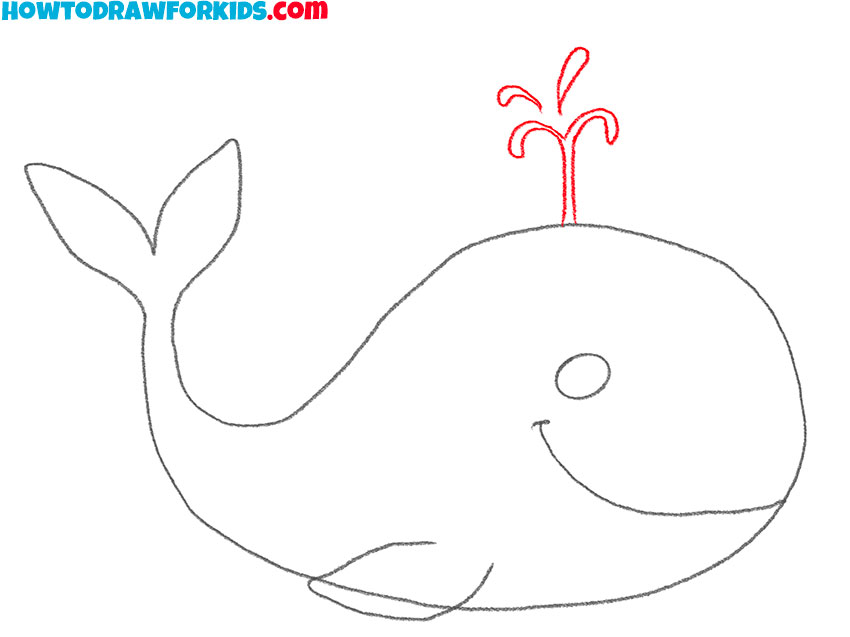
- Add the water spout.
Whales are known for blowing water from their blowholes, so let’s add a fun water spout! At the top of the whale’s head, draw two short vertical lines to represent the spout’s base. Then, sketch a few curved lines branching outward to depict water droplets spraying upward.
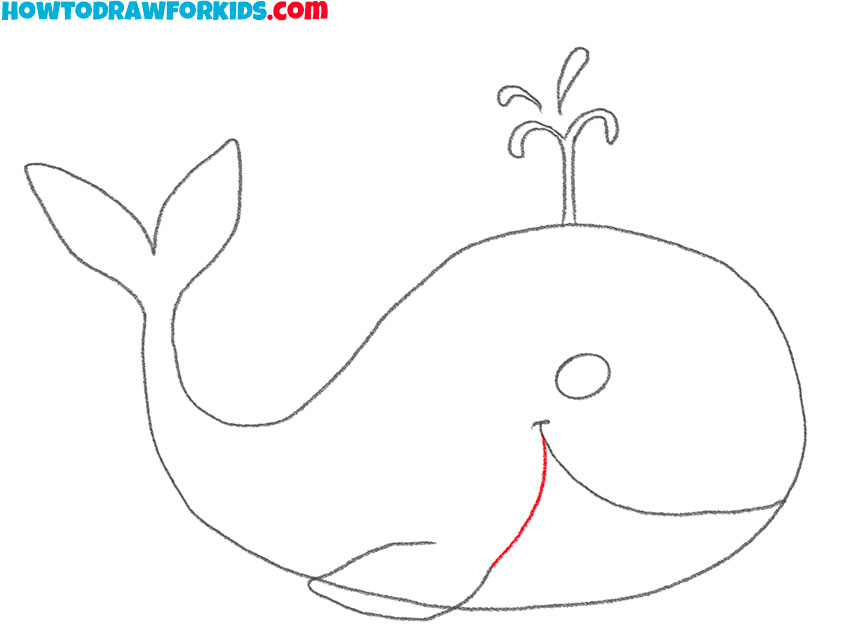
- Add some final details.
Now, add an extra curved line extending from the whale’s mouth toward the bottom of the body. This additional detail helps define the whale’s lower jaw and creates a separation between the top part of the whale and the belly.
- Finalize the sketch and correct inaccuracies.
Check out all the shapes and lines that make up the whale drawing. Look at the proportions, evaluate the entire drawing as a whole. Check if any lines need smoothening or slight adjustments to improve the overall look. Refining the outline helps your drawing appear cleaner and more finished.

- Color the whale drawing.
Use light blue or gray for the main body, leaving the belly a lighter shade or white. The eye can be black with a small white highlight. If you want, you can add shading to give the drawing more realistic look. The water spout can be light blue or a soft grayish-blue for a realistic look.

Additional Content
A free PDF file is available for this drawing lesson. It is a condensed version of the full tutorial, containing the steps for drawing a whale.
This downloadable guide can be used by kids at any time and in any place, even without an internet connection. They can download and print it to follow the steps offline.
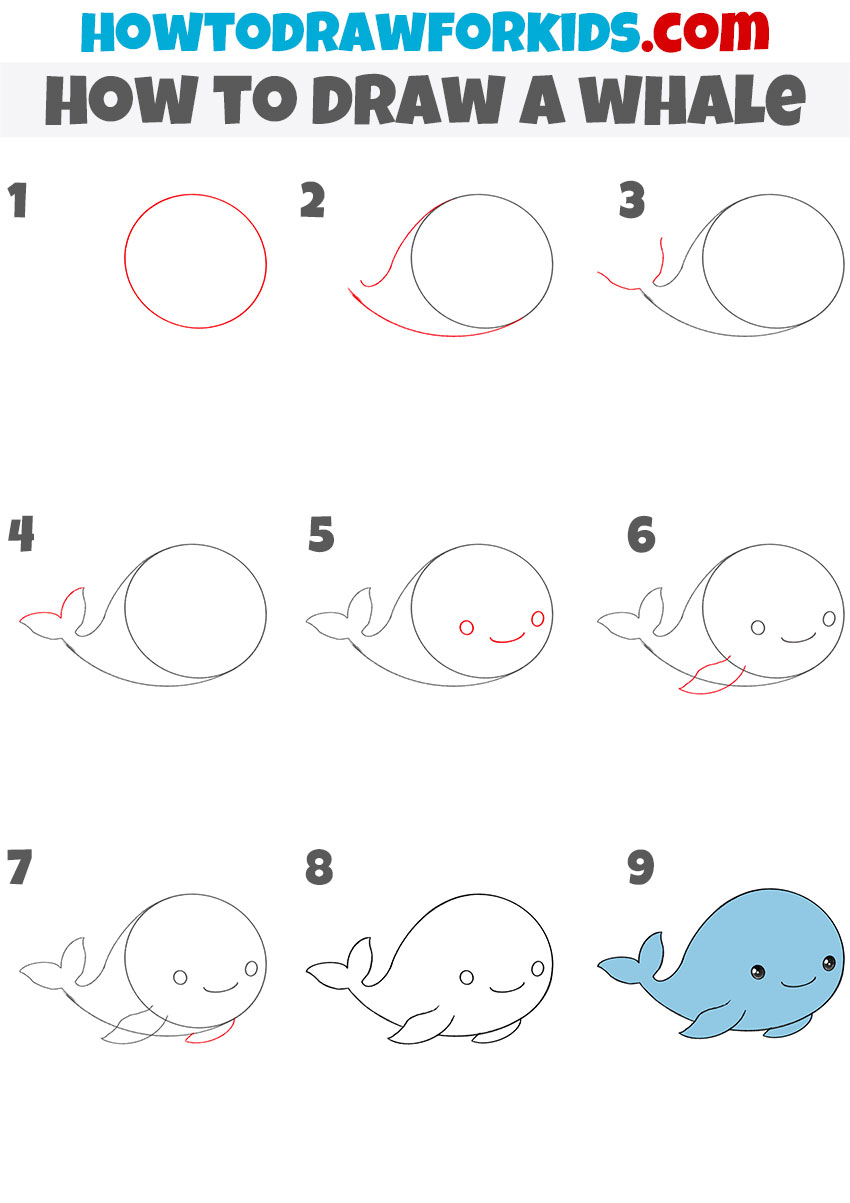
How to Draw a Baby Whale
This method of drawing a whale uses a circular base for the head, making the design more compact and rounded compared to the first tutorial, which had a longer body shape. The features in this tutorial are simpler and demonstrates a cute, stylized look. The tail is positioned slightly higher, and the fins are drawn in a minimalistic way.
To begin learning how to draw a baby whale with this method, start by drawing a large circle for the head. Add a curved line extending from the lower left side to form the body and tail. Draw another small curve to shape the upper tail fin. Extend the lines slightly to define the whale’s back. Sketch the tail flukes by adding curved shapes on both sides. Place two small circles for the eyes and draw a simple curved line for the mouth.
Add a small fin on the side of the body and another slightly hidden one behind it. Draw a curved line under the head to indicate the lower part of the mouth. Clean up the lines, remove unnecessary guides, and ensure all shapes look smooth. Finally, color the whale with a light blue shade, leaving the lower part slightly lighter. Additionally, you can draw fishes around and color the background light blue to indicate water.
Conclusion
Today, we learned how to draw a whale, the largest creature living on Earth. We explored two different methods, each with its own features and details. These two approaches provided knowledge and reinforced your skills in depicting this deep-sea inhabitant on paper.
Did you draw your whale on paper or a digital tablet? What colors did you use for shading and coloring? Which of the two whale drawing tutorials did you like the most? Were these lessons challenging for you, or did you complete them without difficulty? Write about all this in the comments below this article.
If you have any other thoughts, share them in the comments. Also, let me know what other drawing tutorials you would like to see on my website. Your feedback is important, and every comment helps improve both new and existing content.
To continue learning, visit my website for more lessons. For example, you can draw a bear, if you want more animal tutorials, or draw a rose, to train your flower drawing skills. Also, follow my social media accounts to stay updated on the latest tutorials.