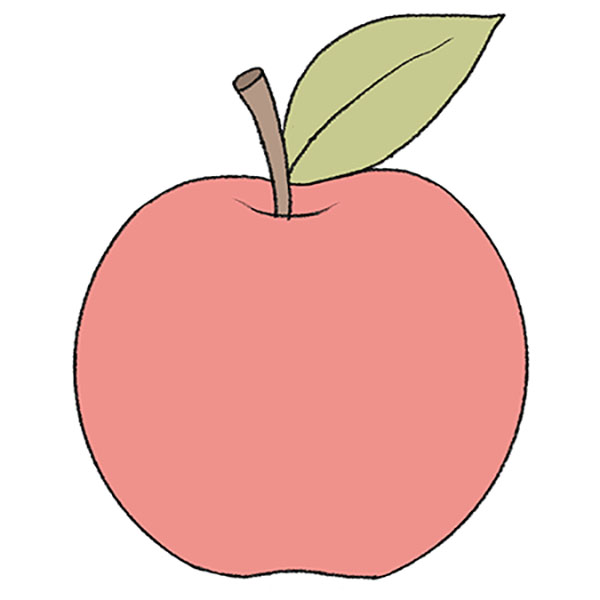
How to Draw an Apple
Calling all young creatives! Learn how to draw an apple with our interactive guide, providing four different methods to sketch this juicy fruit. Each technique is designed to be kid-friendly, ensuring a fun and successful drawing experience.
Unleash your inner artist with my comprehensive tutorial designed to teach you how to draw an apple. We guide you through each friendly step, ensuring even the youngest artists can follow along. You’ll learn to craft the basic shape, add details, and bring your apple to life with color.
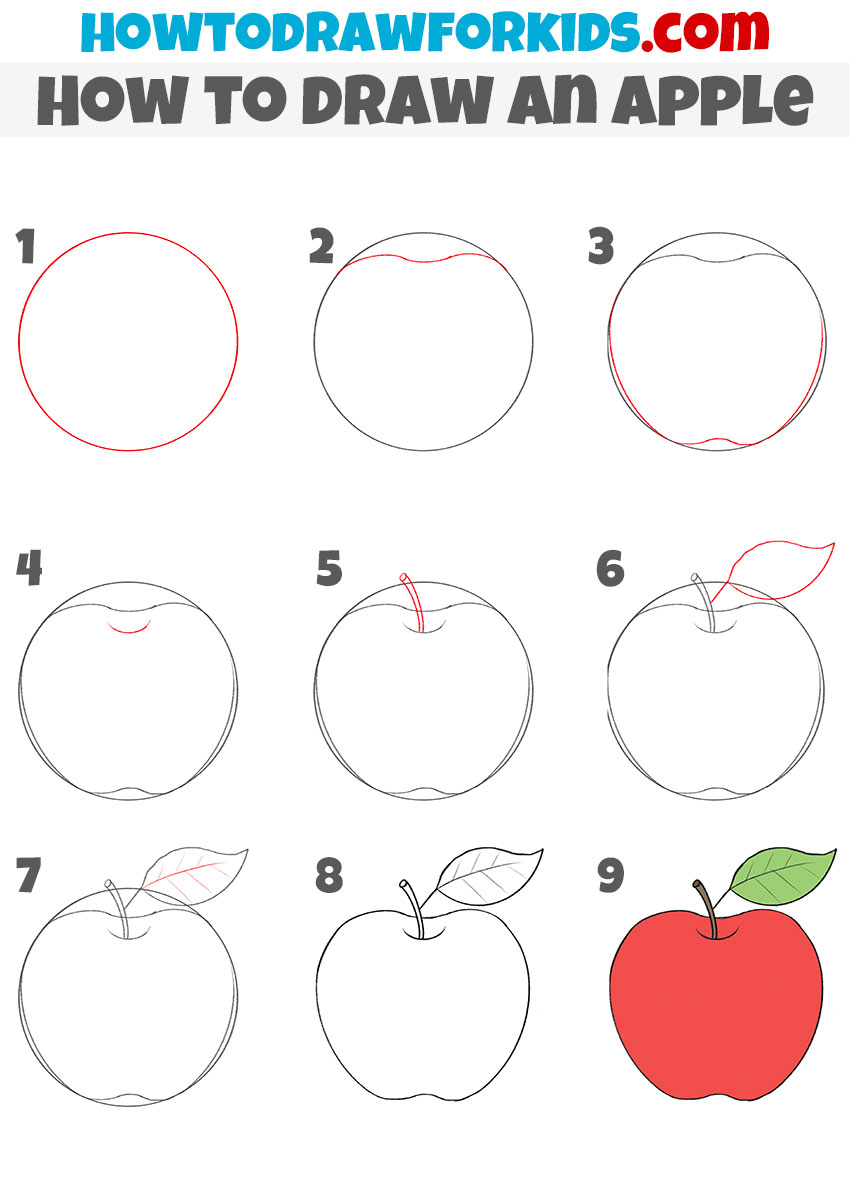
How to Draw an Apple : Basic Information
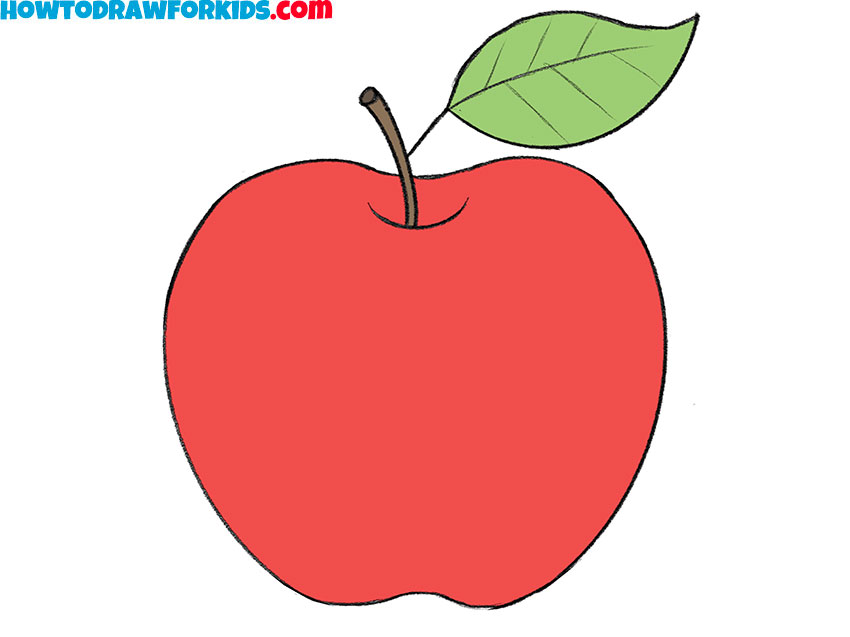
Today’s art adventure is all about learning how to draw an apple, and I’m here to guide you through each simple step. We’re going to turn a basic circle into a scrumptious apple that you’ll almost want to take a bite out of. This lesson is designed to make drawing easy and enjoyable, especially for you, the amazing young artists.
As we add each curve and line, you’ll see your circle transform as you draw an apple with a realistic shape, complete with a little stem and a leaf. Drawing an apple is not just about making it look good, but also about understanding how to bring fruit to life on your page with your artistic touch.
And when you finish, you’ll not only have a delightful apple drawing to show off but also some neat skills to apply to your next drawing project. So let’s grab our art tools and depict an apple that could be the star of any fruit bowl or painting!
Apple Drawing Tutorial
Materials
- Pencil
- Paper
- Eraser
- Coloring supplies
Time needed: 20 minutes
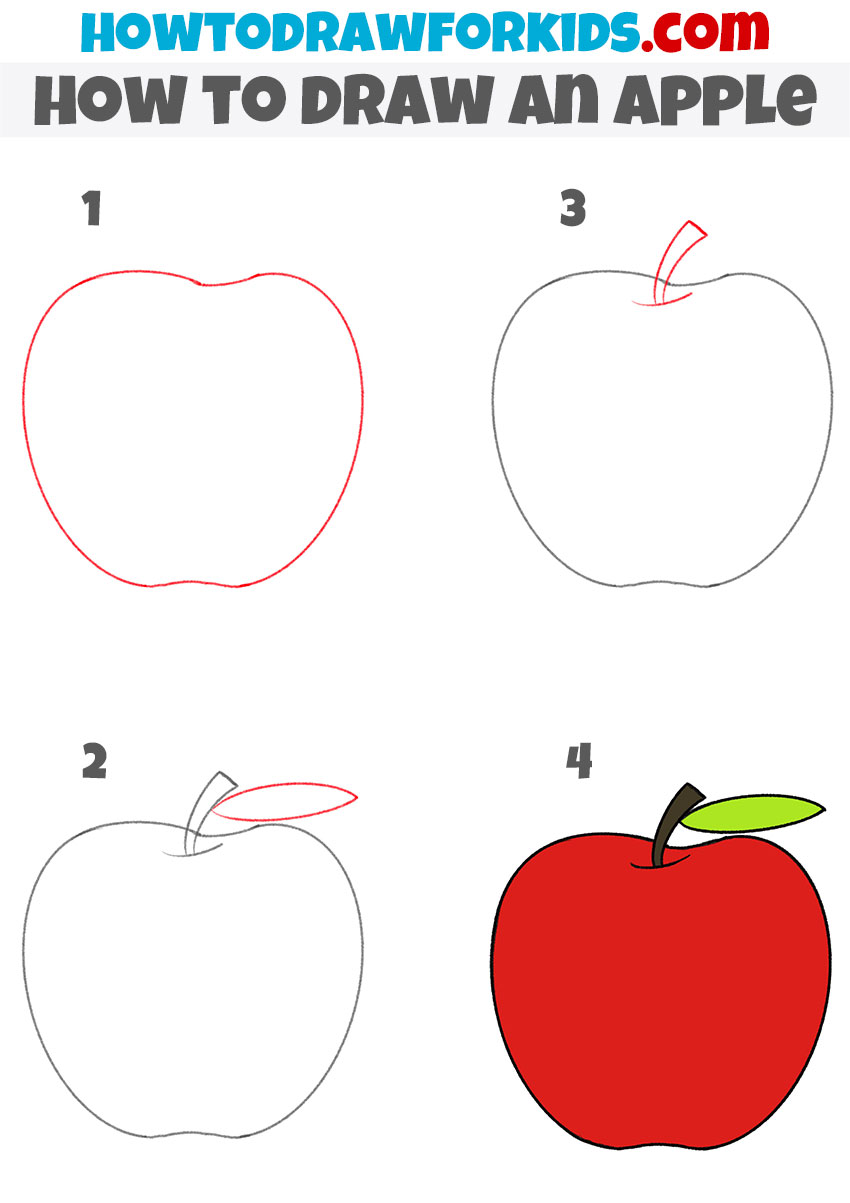
How to Draw an Apple
- Draw an auxiliary outline.
First outline a circle – it will be the base of the apple you are going to draw.

- Add the top outline of the apple.
To complete this step, draw a wavy line at the top of the previously drawn circle.

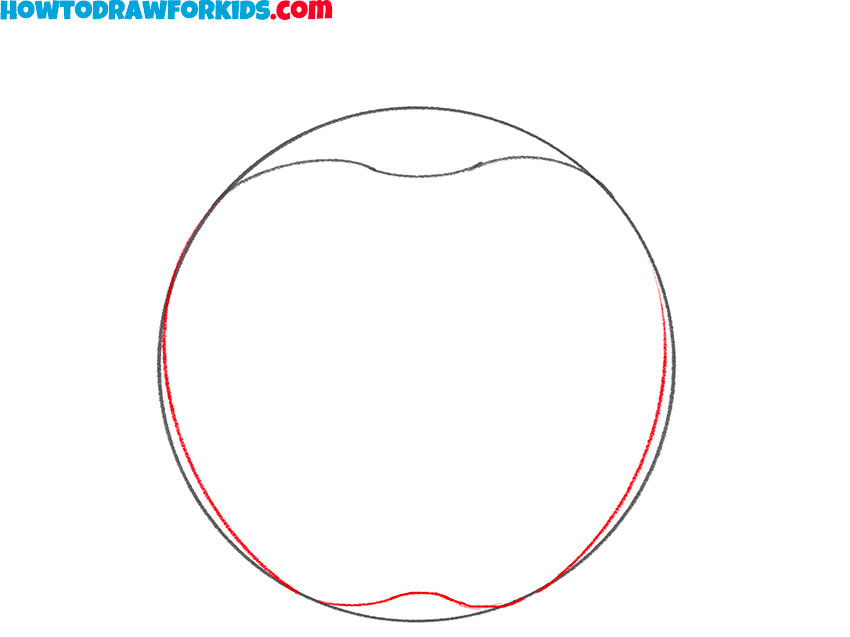
- Draw the bottom outline of the apple.
Use the curved line to draw the sides and bottom of the apple.
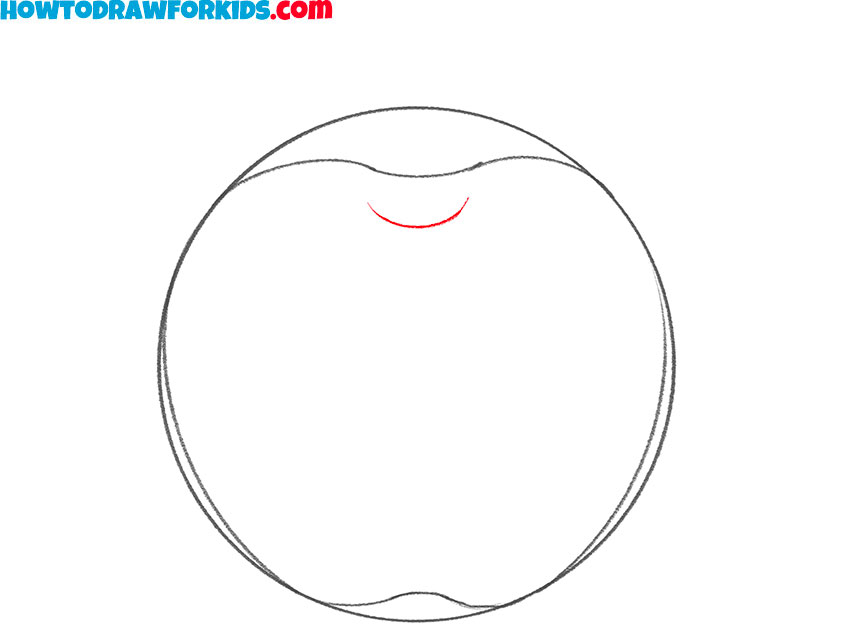
- Add one more element.
Draw a curved line at the top of the apple to make it look three-dimensional.
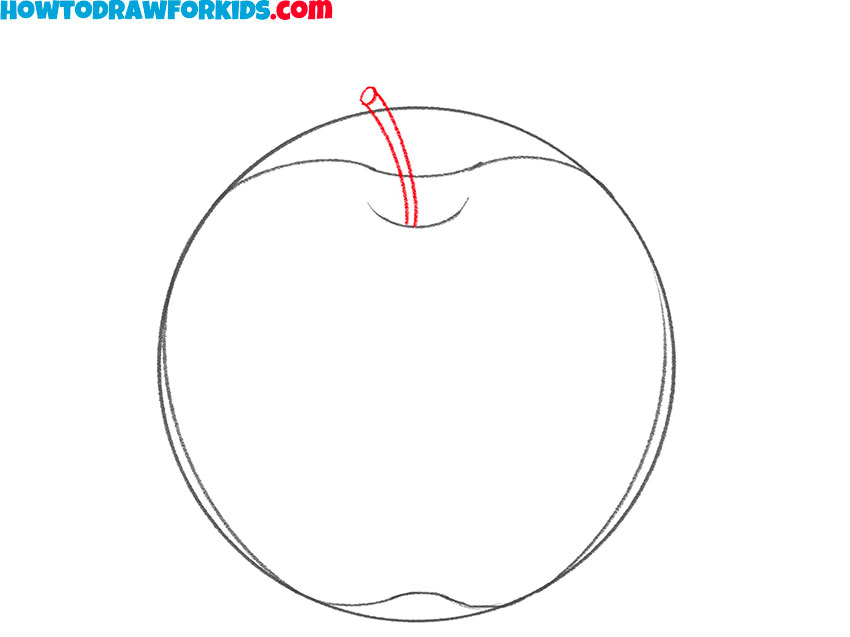
- Depict the stalk of fruit.
Add this detail to the top of the apple, using a few curved lines.
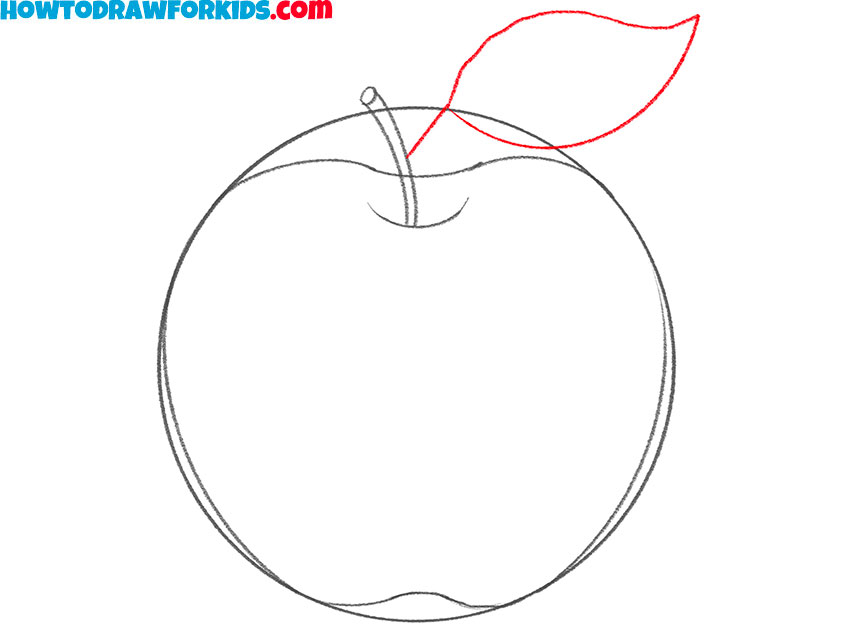
- Draw the leaf.
Add a pointed leaf to the previously drawn stalk using curved lines.
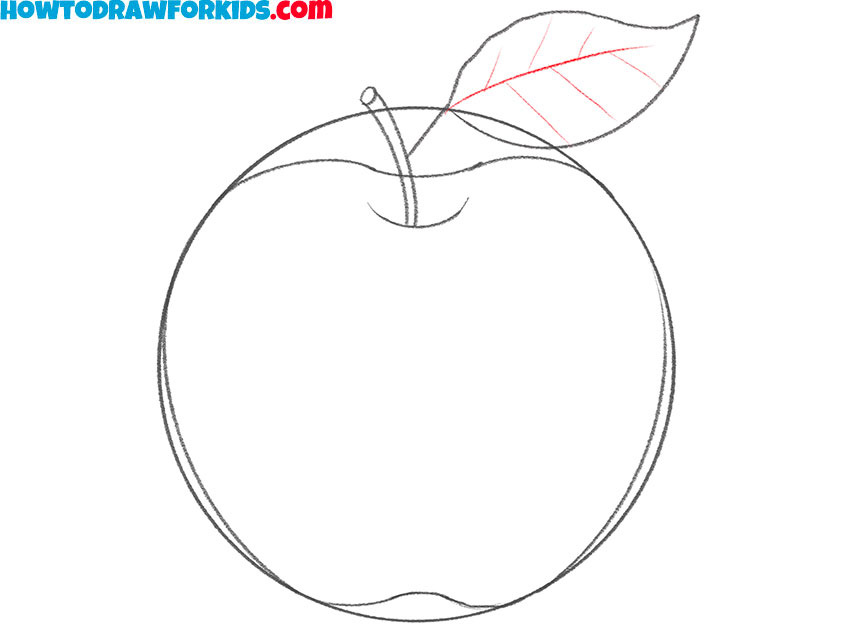
- Paint the veins on the leaf.
Add straight and curved lines to the previously drawn leaf.
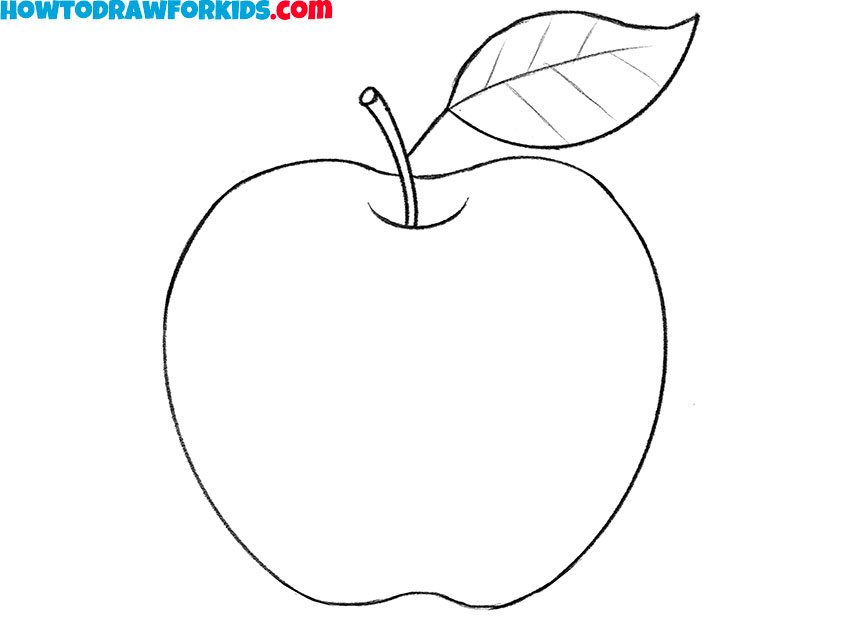
- Erase the auxiliary lines.
Remove any unnecessary lines from the drawn apple with an eraser.
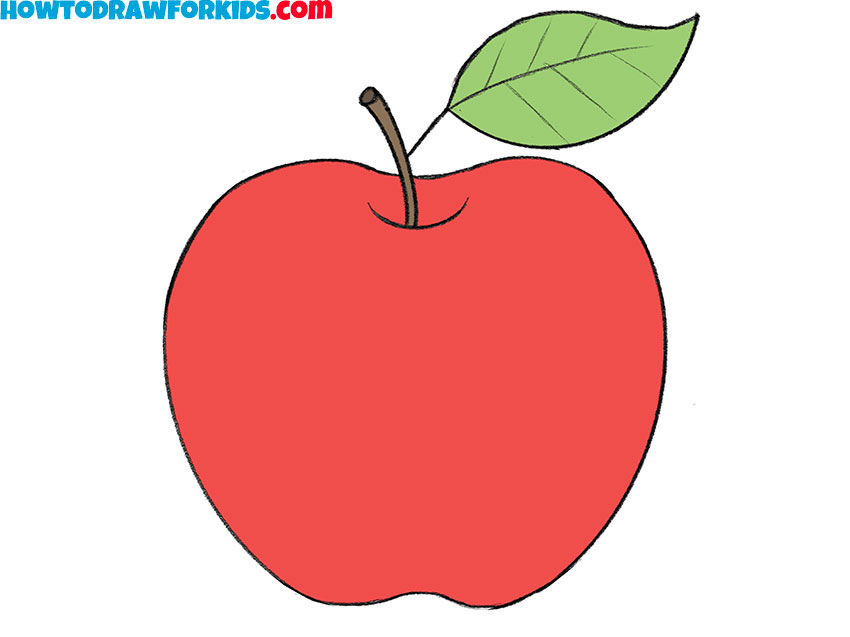
- Color the drawing.
You can use red, brown, and green to color the apple.
Additional Content
Great news for aspiring artists! I’ve created a free PDF file for this lesson. It’s a concise version of the tutorial, perfect for downloading and using anytime, anywhere — even when you’re offline. This handy guide makes it easy for you to practice drawing an apple at your own pace. Get your copy now and enjoy learning to draw!
Alternative Drawing Techniques
I’ve developed several unique drawing techniques for creating an apple, designed to give you more opportunities to practice and enhance your artistic skills. These methods vary in style and complexity, ensuring that artists of all levels can find new and engaging challenges.
By exploring these different approaches to drawing an apple, you’ll not only enjoy the creative process but also see noticeable improvements in your drawing abilities. So grab your sketchpad and let’s dive into these techniques, perfect for sharpening your skills and bringing those apples to artistic life!
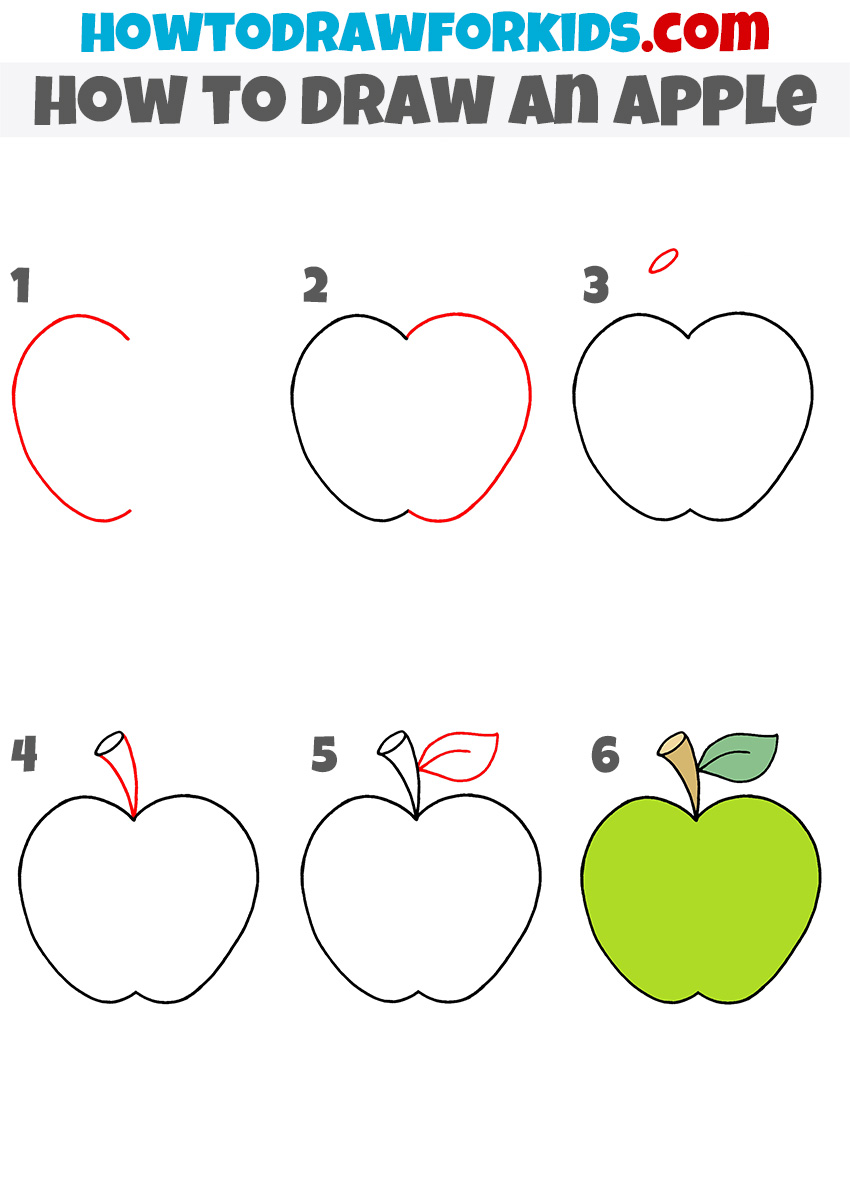
Apple for Kindergarten Drawing
In the second drawing technique, suited for kindergarteners, the steps are reduced to make the activity more approachable for young children. Instead of starting with a circle, this method shapes the apple immediately with its characteristic curves at the top and bottom.
It bypasses the initial detailed sketching of dimples and indentations seen in the first method, moving directly to the addition of a simple stem and leaf. With less focus on precision and more on basic forms, this method is a wonderful way for kindergarteners to depict an apple easily, boosting their confidence and enjoyment in drawing.
Simple Apple Drawing
This drawing method for an apple streamlines the process into fewer steps, ideal for young artists eager to see results quickly. Starting with the heart shape rather than a circle for the fruit’s body gives the apple a more defined top and bottom. The single leaf sprouts from the simplified stem, adding a touch of realism.
This technique also opts for a vibrant green, bringing a fresh, lively look to the drawing, differentiating it from the more traditional red apple in the first method.
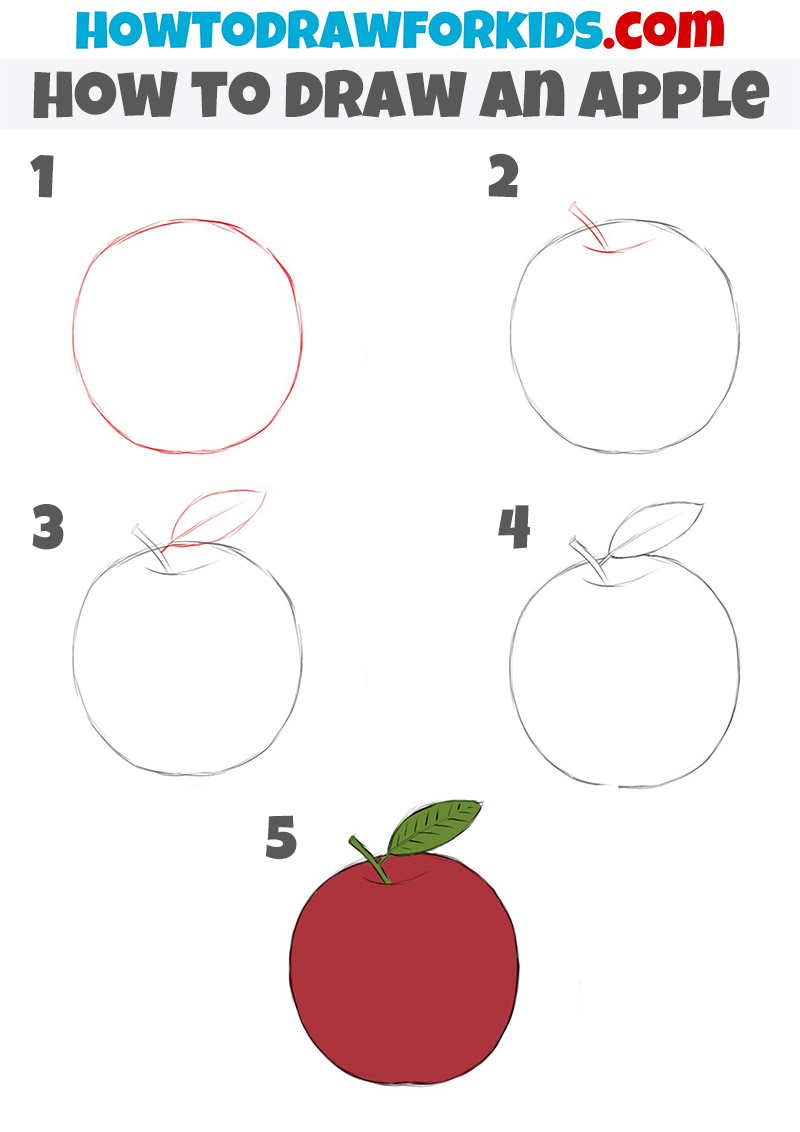
Another Way to Draw an Apple for Kids
In this alternative apple drawing method, the process is condensed into fewer steps, allowing for a quicker creation while still capturing the essence of the fruit. The approach starts with a simple circle and then carves out a small section to suggest the apple’s dimple at the top.
The singular leaf and stem are added next, giving it a stylized appearance. The final illustration is rendered in a rich red, capturing the classic look of an apple with efficiency and ease, making it a great option for young artists to practice their drawing skills.
Conclusion
And there you have it, a juicy apple drawn by your own hand! But don’t stop there, the orchard of creativity is vast and full of different fruits to try. Why not branch out on my website and learn how to draw a sturdy tree or a delicate rose next? Each lesson is a step forward in your artistic journey.
Don’t forget to follow me on social media to stay updated on the latest tutorials. You’ll be the first to know about new lessons. Keep those pencils sharp and your imagination ready – there’s so much more to create!

