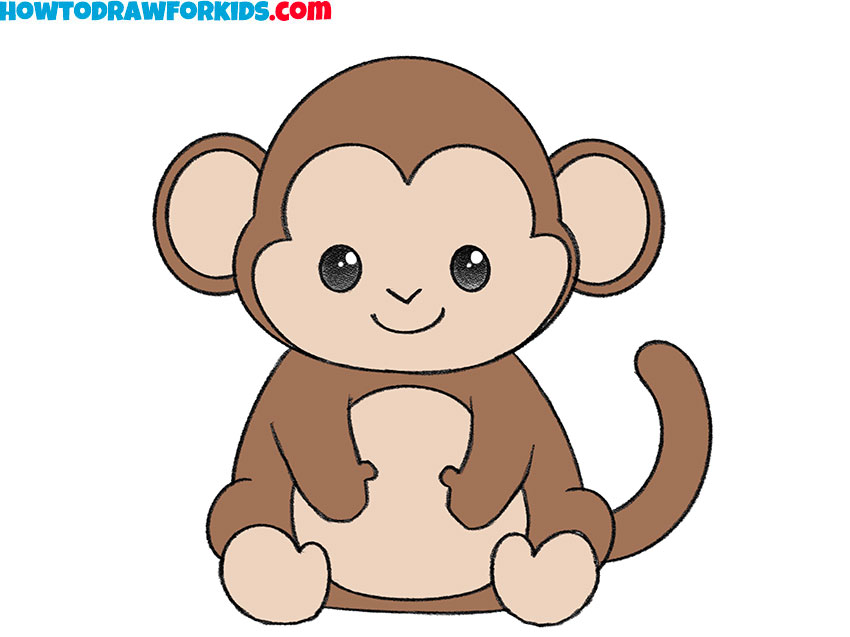
How to Draw a Monkey
I have prepared a few simple and interesting instructions for you that will demonstrate how to draw a monkey, the closest relative of humans.
How to Draw a Monkey: Introduction
The monkey, as I already mentioned, is the closest relative of humans from a biological and evolutionary standpoint. If you already know how to draw a person, this lesson on how to draw a monkey will be easier for you. However, a monkey is a different species than a human, which means there are many nuances and important factors in drawing a monkey that we will study today.
We will depict the characteristic body shape of this adorable animal, draw its cute face, and add its long, twisting, distinctive tail.
It is very important to remember that monkeys are a vast group of animals with incredible diversity, and one monkey can look drastically different from another. This means that developing your monkey-drawing skills in a way that allows you to depict any species is crucial.
To make this task as easy as possible for you, I have prepared several additional instructions, each featuring a monkey drawn in a slightly different way.
Monkey Drawing Tutorial
Materials
- Pencil
- Paper
- Eraser
- Coloring supplies
Time needed: 30 minutes
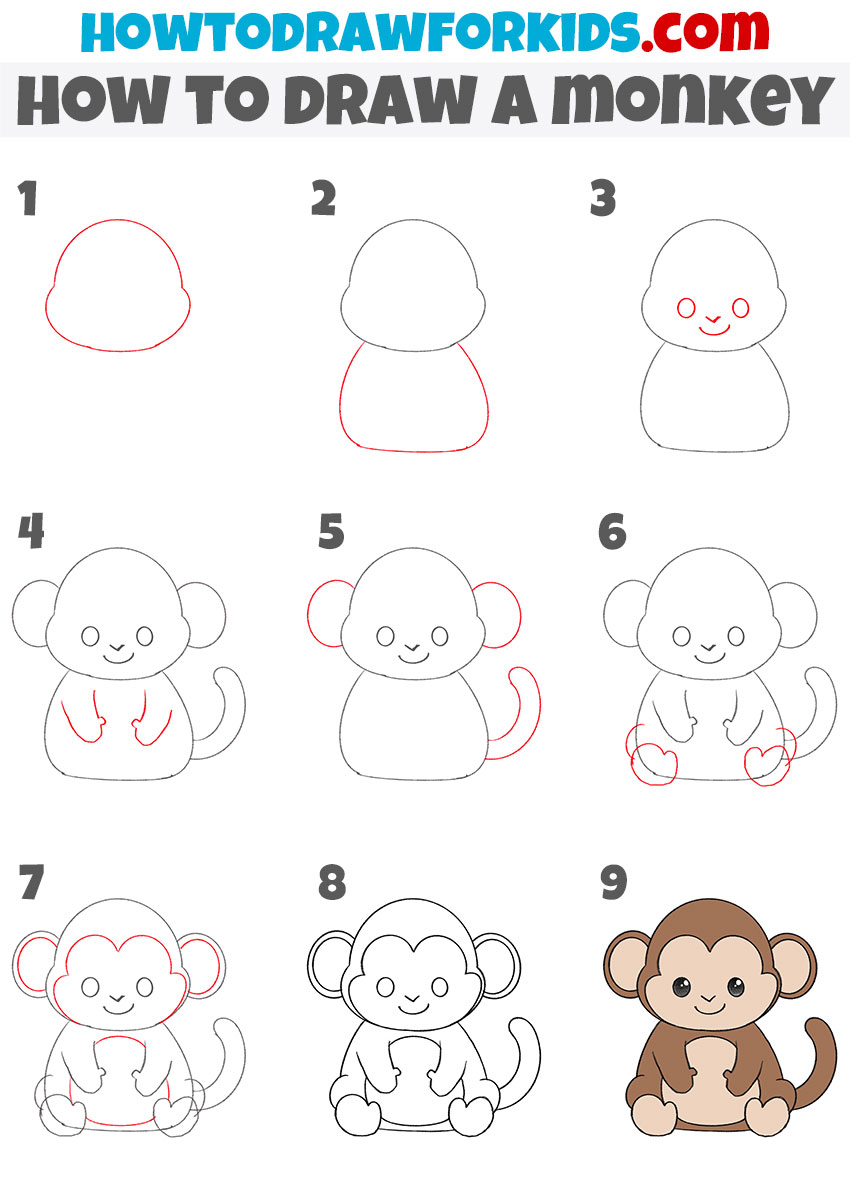
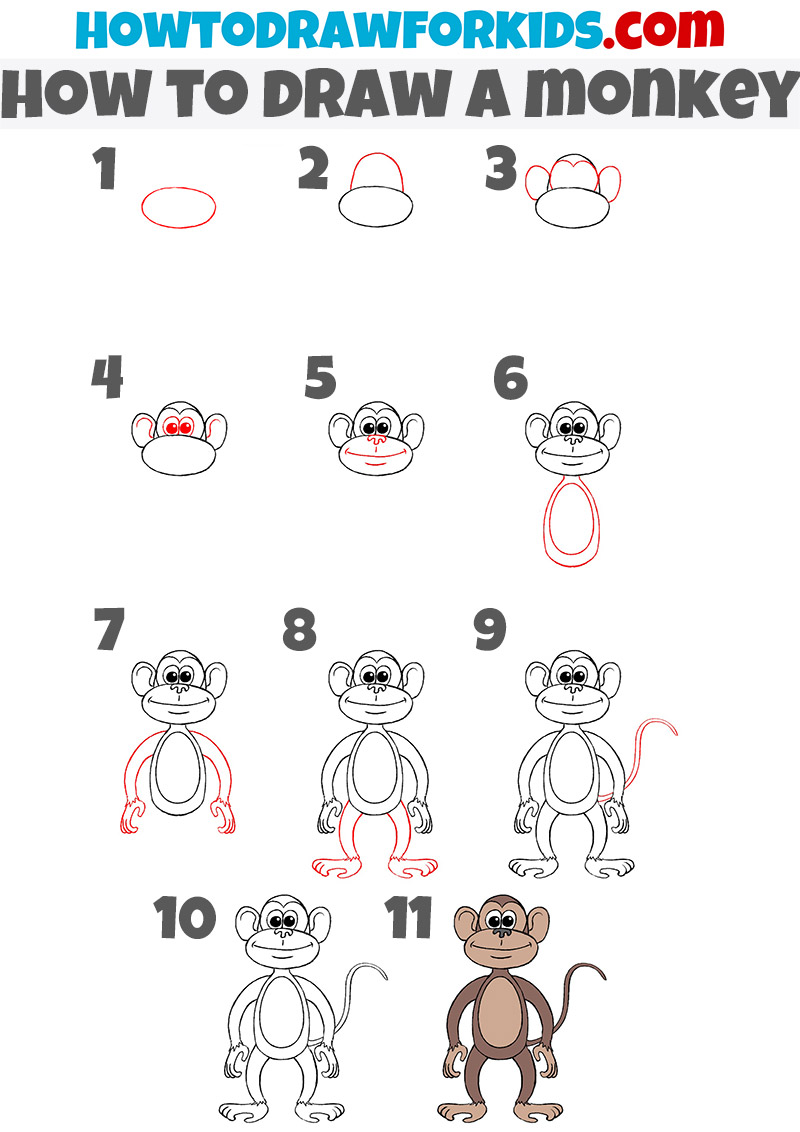
How to Draw a Monkey
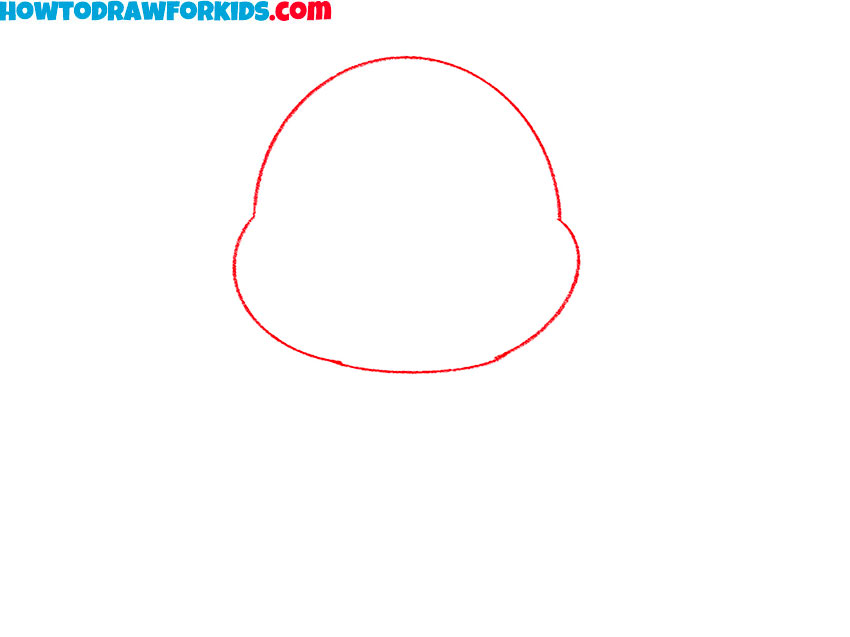
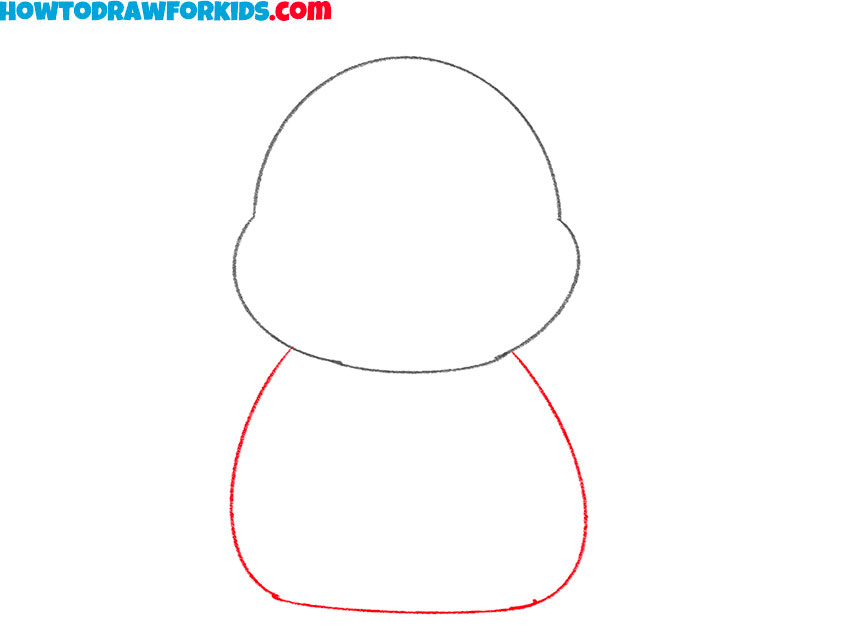
- Draw the head outline.
First, draw a rounded shape for the head of the monkey. Add two small bulges on the sides to indicate the cheeks of the animal. The shape should resemble an oval with a wide bottom part. The shape of the monkeys’ head should resemble a pear at this step.
- Draw the monkey body.
Below the head, sketch a rounded shape for the body. The body should be slightly wider at the bottom and narrower toward the top, resembling a pear or a rounded rectangle. The body should be proportionally smaller than the head, keeping the cartoonish style intact.
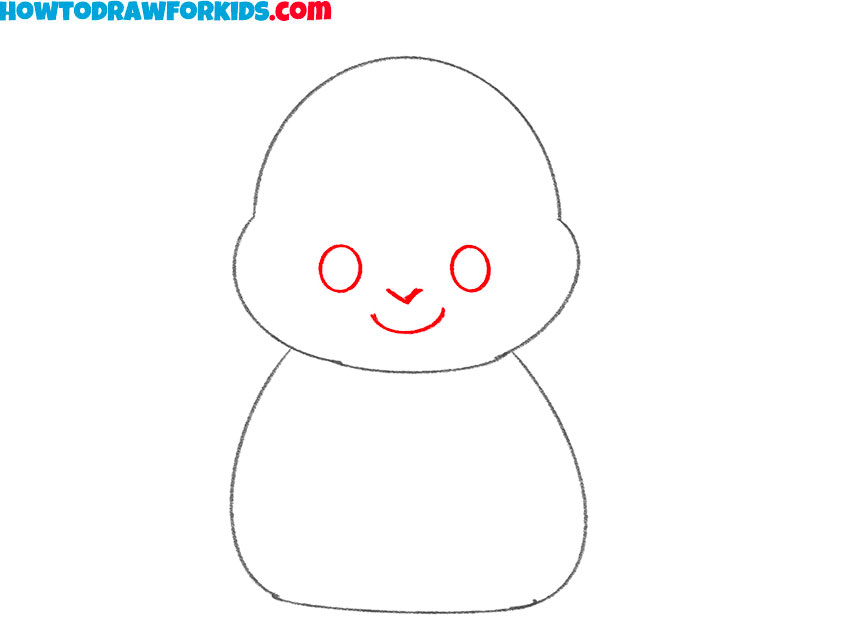
- Add the facial features.
Draw two small circles for the eyes of the monkey. Place them closer to the middle of the face to give the monkey a cute expression. Below the eyes, add a tiny shape for the nose, and just beneath that, sketch a simple curved line for the mouth. Keep the facial features minimal.
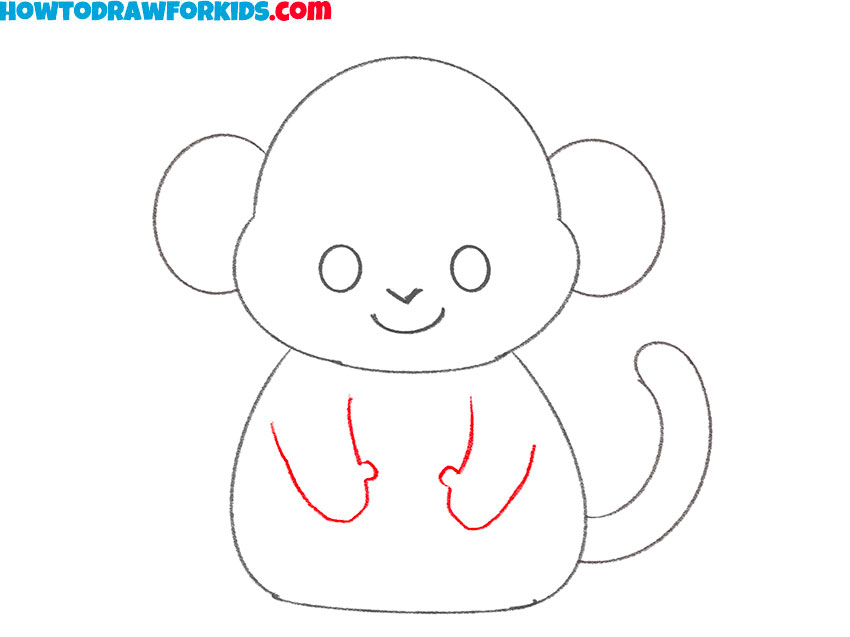
- Add the arms and hands.
Sketch the monkey’s short and rounded arms extending from the sides of the body. Draw slightly curved lines for each arm, keeping them relatively short to match the cartoonish style. At the ends of the arms, draw simple rounded hands with small fingers.
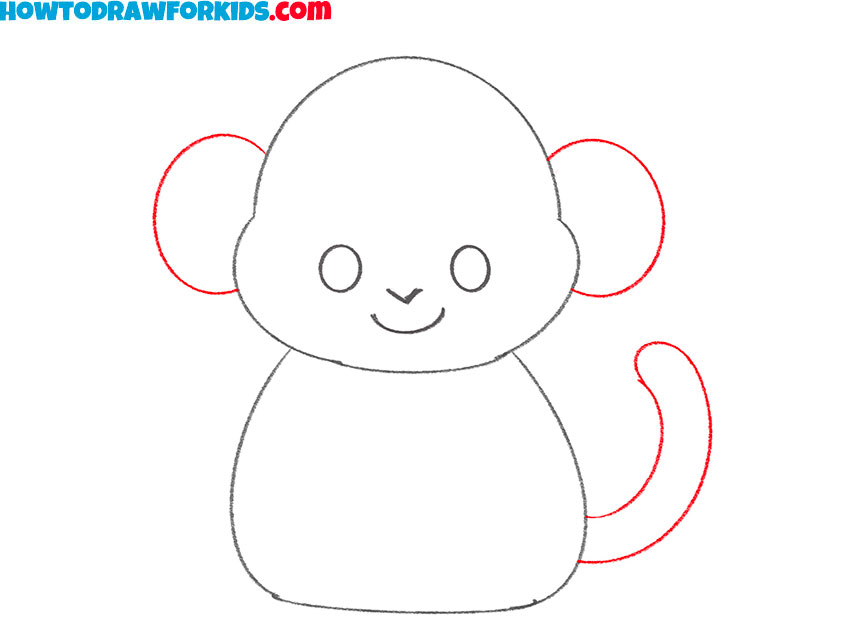
- Add ears and tail.
Next, draw the monkey’s large, round ears on both sides of the head. The ears should be slightly above the middle of the head and protrude outward. Keep them rounded and slightly overlapping the head. Inside each ear, you can add a smaller curved line to give them more natural look.
- Draw the monkey feet.
Draw two rounded shapes at the bottom of the body, making sure they are positioned symmetrically on either side. The feet should be slightly larger than the hands, giving the monkey a cartoonish look. Inside each foot, add small curved lines to illustrate the toes. Keep the toes minimal and rounded.
- Add facial and body details.
Draw a wavy outline around the upper part of the face to indicate the separation of fur colors. The pattern should follow the contour of the head, framing the face nicely. Then, add similar curved outlines on the belly and inside the ears to create a lighter fur section.
- Finalize the line work.
Go over the entire monkey drawing, cleaning up any unnecessary guidelines. Darken the main outlines and erase any unnecessary guidelines. Make sure all parts of the monkey, including the head, body, arms, legs, and tail, look smooth and finished. If needed, adjust the thickness of certain lines.
- Color the monkey drawing.
Use a warm brown shade for the main body of the monkey. For the face of the animal, inner ears, and belly, use a lighter beige or tan shade. Color the eyes black leaving small white highlights to give the monkey more adorable look.

Additional Content
At the end of the lesson, you will find a link where you can download a PDF file with a shortened version of the monkey drawing lesson. This file includes quick instructions, a coloring sheet, a tracing worksheet, and a grid drawing worksheet. These are the essential materials needed to complete the lesson at any convenient time.
How to Draw a Monkey: Alternative Techniques
Now that you have completed the first tutorial and learned how to draw a monkey with simple proportions, you can try alternative methods to boost your skills. The following guides offer different styles, step sequences, and levels of simplification, allowing you to experiment with various ways to draw an easy monkey while keeping the process straightforward and fun.
Detailed Monkey Drawing Tutorial
This method demonstrates a cartoon-like monkey with simplified shapes and proportions. Note that the monkey has relatively long upper limbs and arms that are at hip level. The feet are wide and point in opposite directions, with the big toes on all limbs being large and positioned opposite the other toes.
Start this tutorial on how to draw a monkey by sketching an oval for the lower part of the head. Add a curved line on top to finish the shape of the head. Draw large round ears on both sides and connect them to the head. Inside the head, draw two circles for the eyes and smaller circles inside for the pupils. Next, add the nose and mouth. Extend a long oval for the torso.
Draw the arms with curved lines extending from the upper part of the body and add simple fingers. Sketch the legs extending downward with rounded feet. Draw a long, curved tail on one side of the body. Review the entire drawing and smooth the lines. Erase unnecessary guidelines. Finally, color the monkey with brown shades, keeping the muzzle, belly, hands, feet, and inner ears lighter.
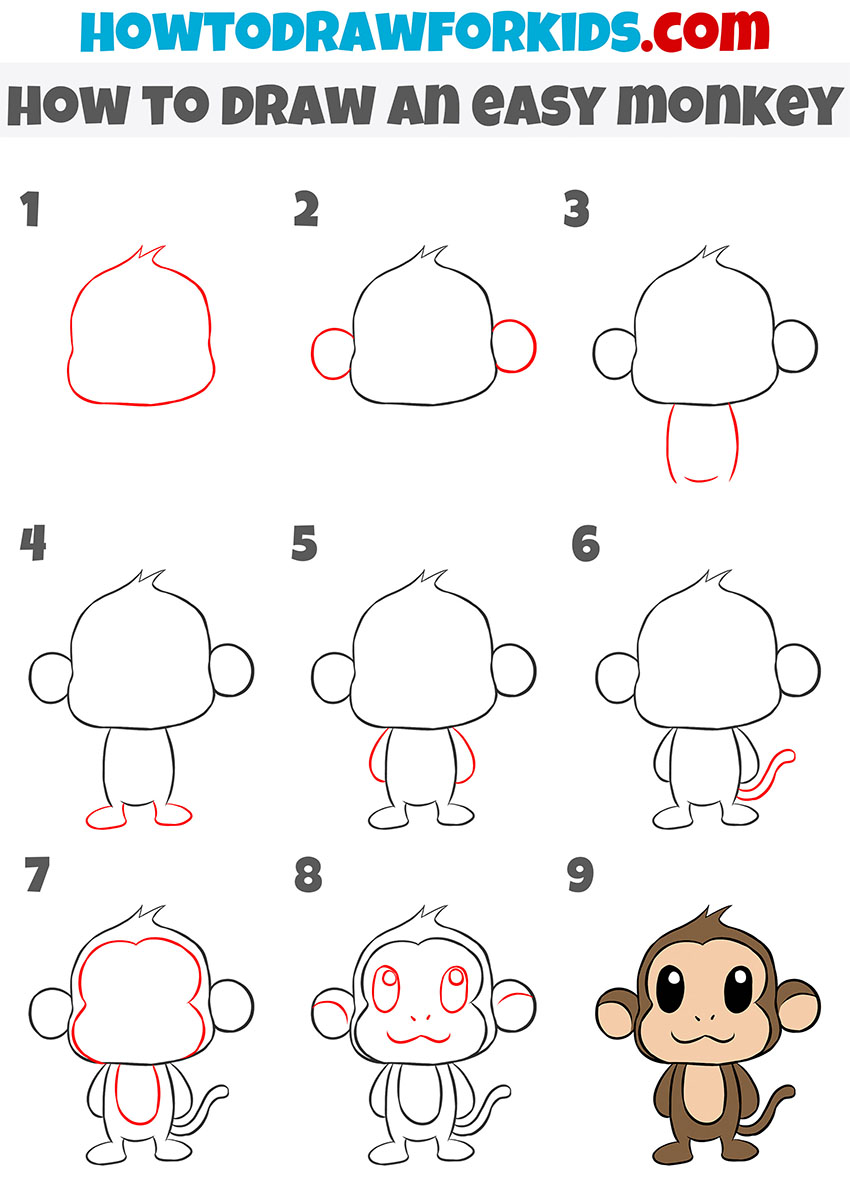
Simple Monkey Drawing Tutorial
This tutorial on how to draw a monkey demonstrates a simplified and cute animal with exaggerated proportions. In the drawing, you see a simple monkey in a standing position. The monkey looks very funny and cute. Pay attention to body proportions. The monkey has a large head, a relatively small torso, and short limbs. Try to keep these proportions in your drawing.
First, sketch a large circle for the head. Below it, add two slightly curved lines for the torso and connect them at the bottom. Draw two short legs with small rounded feet. Sketch the arms on the sides of the torso, keeping them simple and short. Add round ears to the sides of the head, slightly lower than the midpoint. Inside the face, draw two small dots for the eyes and a simple curved line for the mouth.
Outline the fur pattern on the head with a wavy curved line. Draw a small curved tail extending from the side of the body. Check the entire monkey drawing and erase unnecessary lines. Finally, color the monkey in light brown tones, keeping the face, belly, and inner ears slightly lighter.
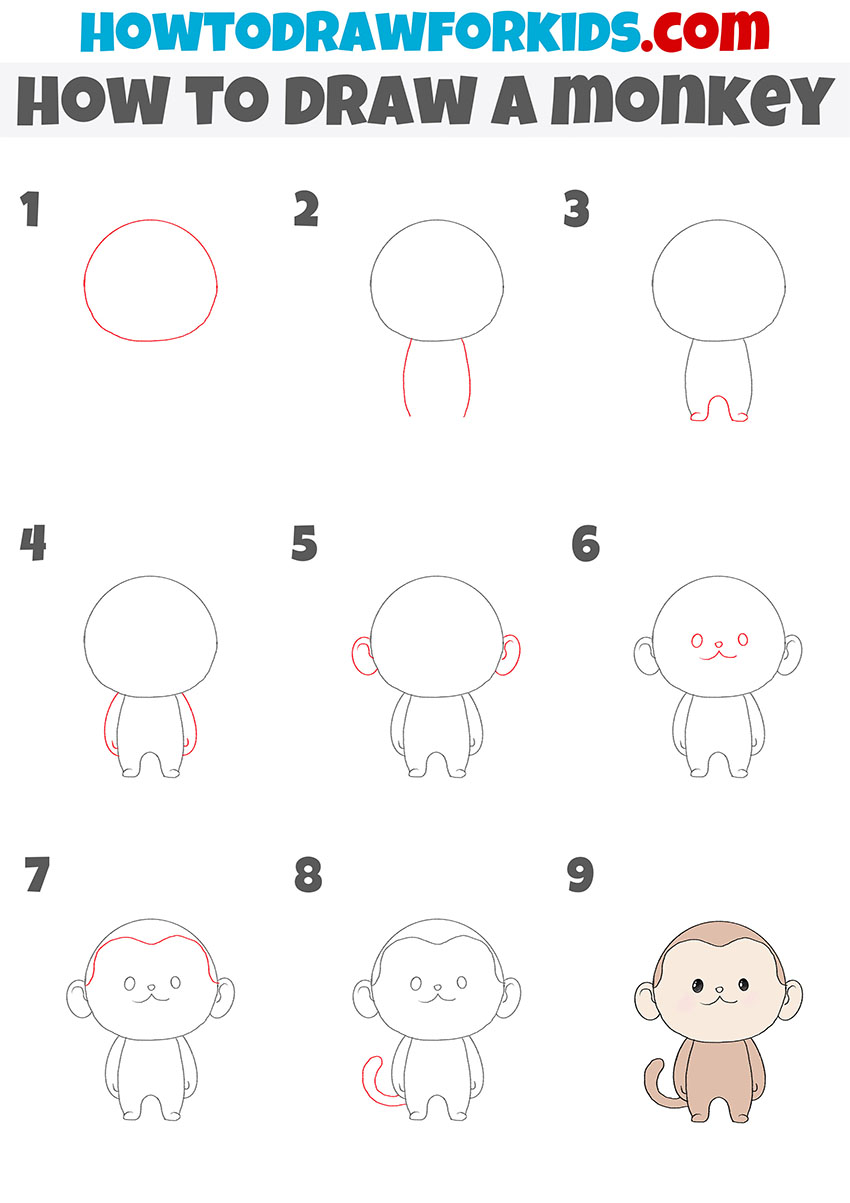
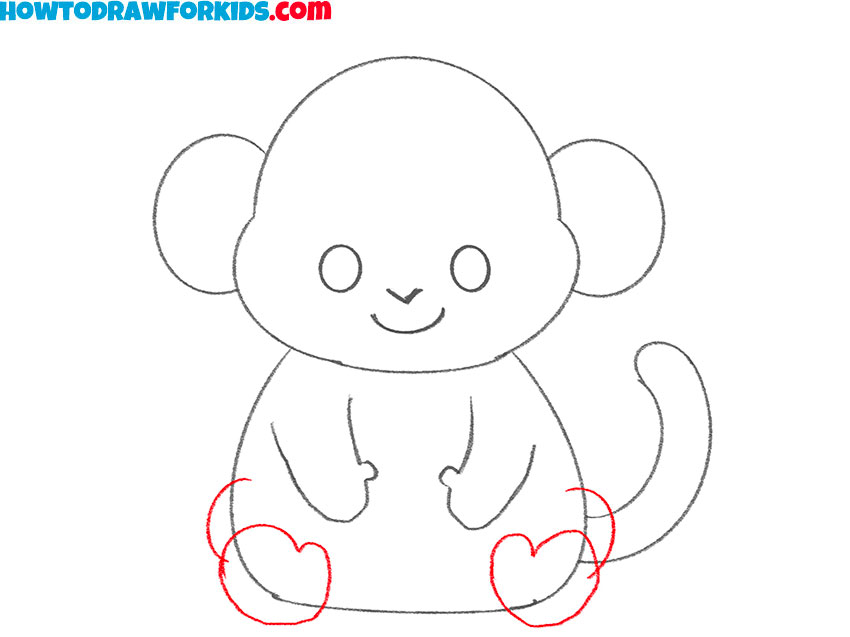
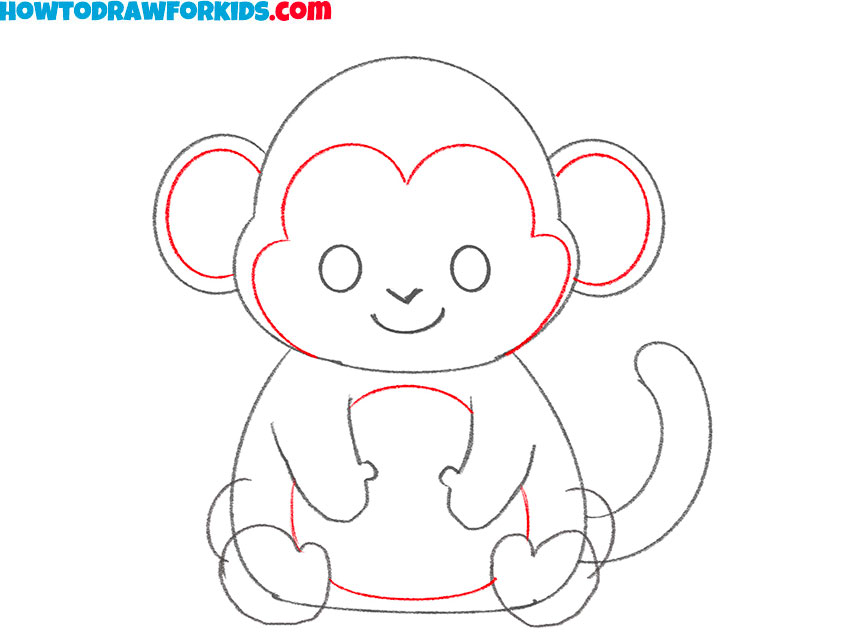
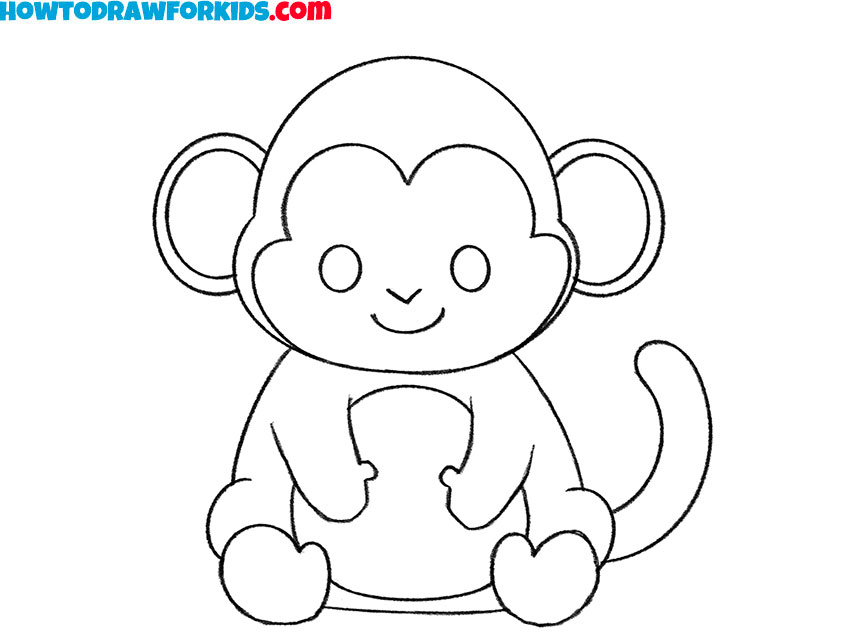
How to Draw a Baby Monkey
This method focuses on drawing a baby monkey in a cartoon style with exaggerated proportions. Since this monkey is drawn in a cartoon style, its head will look quite large relative to its body size. The most noticeable differences from the first monkey drawing tutorial are the rounded and soft shapes, simplified body structure, and the sitting position.
Begin this tutorial on how to draw a monkey by sketching a large rounded shape for the head. Below it, sketch a smaller shape for the body, keeping the proportions exaggerated. Add a curved outline on the face to define the lighter fur pattern. Draw small, round ears on the sides of the head. Inside the face, place two small circles for the eyes, a tiny oval for the nose, and a curved line for the mouth. Add short strokes at the top of the head to create a fur texture.
Draw the front limbs with simple curved lines extending downward. Sketch the back legs bent at the sides of the body with small rounded feet. Attach a long, curved tail on one side. Check the entire drawing for smoothness and erase unnecessary lines. Finally, color the monkey in brown shades, using a lighter tone for the face, inner ears, and belly.
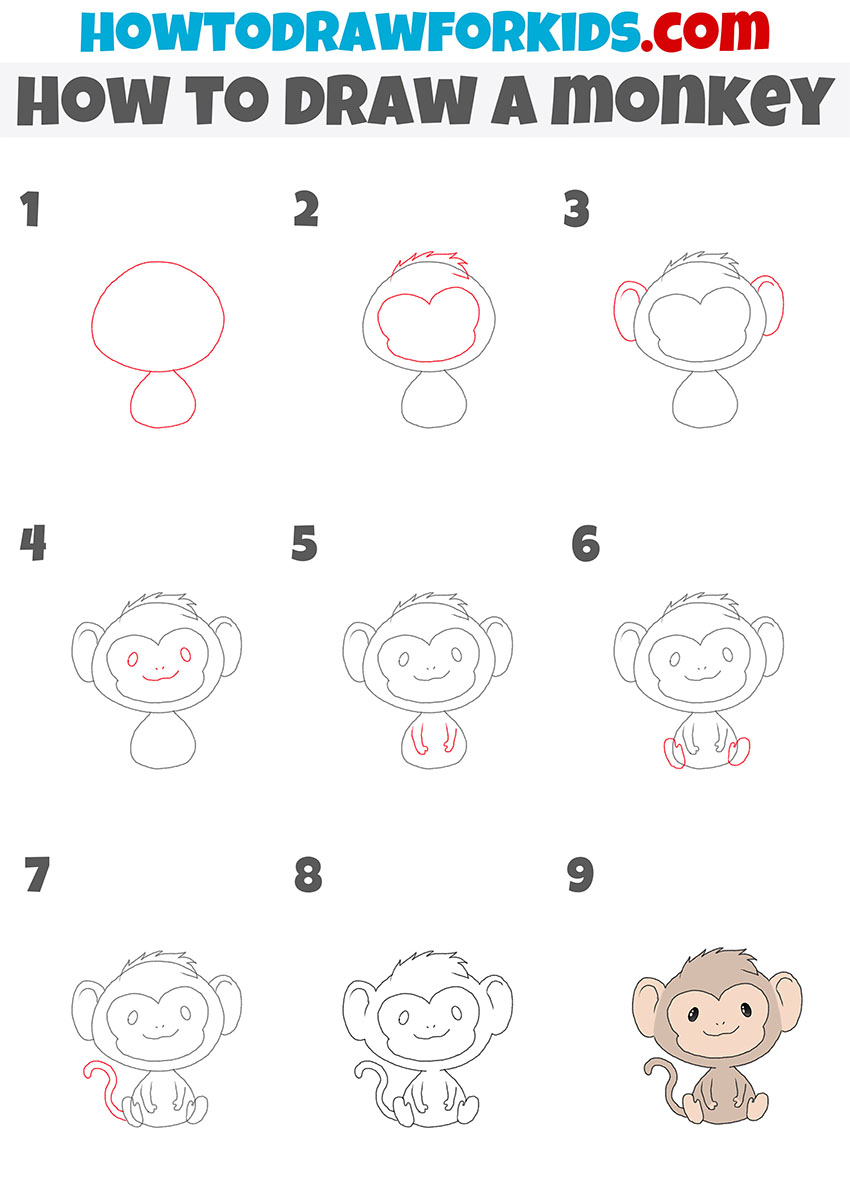
Alternative Monkey Drawing Tutorial
This is an alternative method with a different step sequence and style. The monkey in this tutorial is drawn with a rounded, cartoon-like appearance and a simplified structure. The head is large compared to the body, and the features are minimalistic. Unlike the first drawing tutorial, this method starts with the general shape of the head before adding the ears and body.
Start by sketching the outline of the monkey’s head, keeping the shape rounded with slight irregularities for a natural look. Attach two circular ears on the sides of the head. Draw the body below the head, making it significantly smaller in proportion. Add short, curved legs with small feet. Draw two short arms along the sides of the body. Sketch a thin, curved tail extending from the lower body.
Outline the monkey’s face, adding a rounded muzzle shape in the center. Draw large oval eyes with small pupils, a tiny nose, and a curved mouth. Add an inner fur pattern to the head and belly. Check the drawing for smoothness, erase unnecessary lines, and color the monkey using brown tones with a lighter shade for the face and belly.
Conclusion
So, dear young artists, did you enjoy this lesson on how to draw a monkey? Which of the variations presented on this page did you like the most, and which one did you draw? Be sure to let me know in the comments and share your finished drawing with me and other readers of my website on Pinterest.
There, you can also see the drawings created by other young artists. To further develop your skills in drawing animals, be sure to check out the other articles I publish just for you. With their help, you can learn to draw a dog, create very convincing drawings of wolves, and depict other well-known animals.