How to Draw a Nose From the Front
Today you will learn how to draw a nose from the front easily and quickly. Start this simple step by step tutorial and get useful skills.
Now I will show you how to draw a nose from the front. This is a very useful lesson and the acquired skills will definitely come in handy in the future when you draw portraits of people. All facial features must be drawn accurately and beautifully, you also need to be able to draw the nose correctly.
With this step-by-step guide, you will easily draw a human nose. First, you will draw guidelines to help you navigate and draw the nose symmetrically. Auxiliary lines should be straight and even. All other lines are smooth and rounded.
Remember all the steps of drawing, so that later you can correctly draw characters or portraits of real people. Finally, I want to give you one recommendation.
When you draw a nose in the future, always pay attention to the features of the structure, because each person has an individual shape of the nose. It is very important to correctly convey the shape of the nose, then the portrait will look more realistic.
Materials
- Pencil
- Paper
- Eraser
- Coloring supplies
Time needed: 20 minutes
How to Draw a Nose From the Front
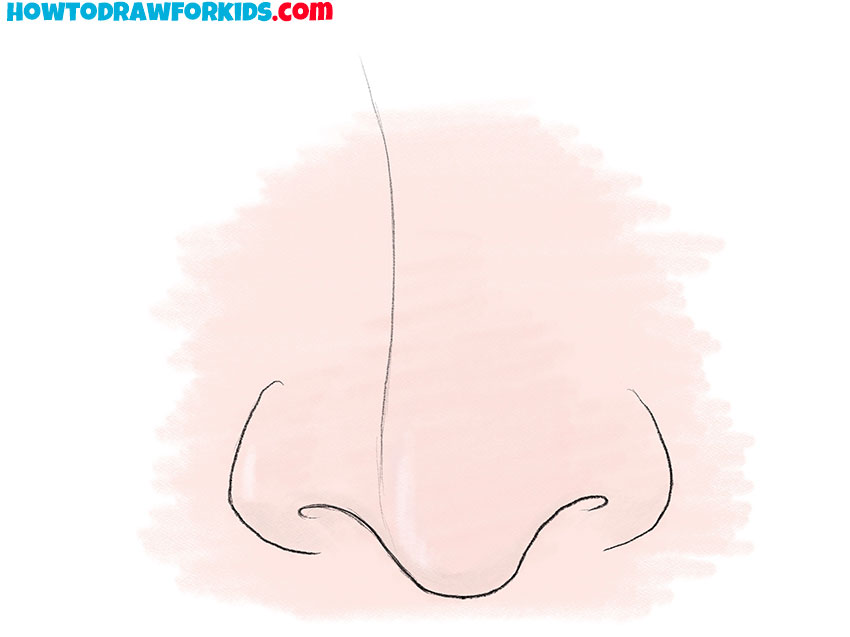
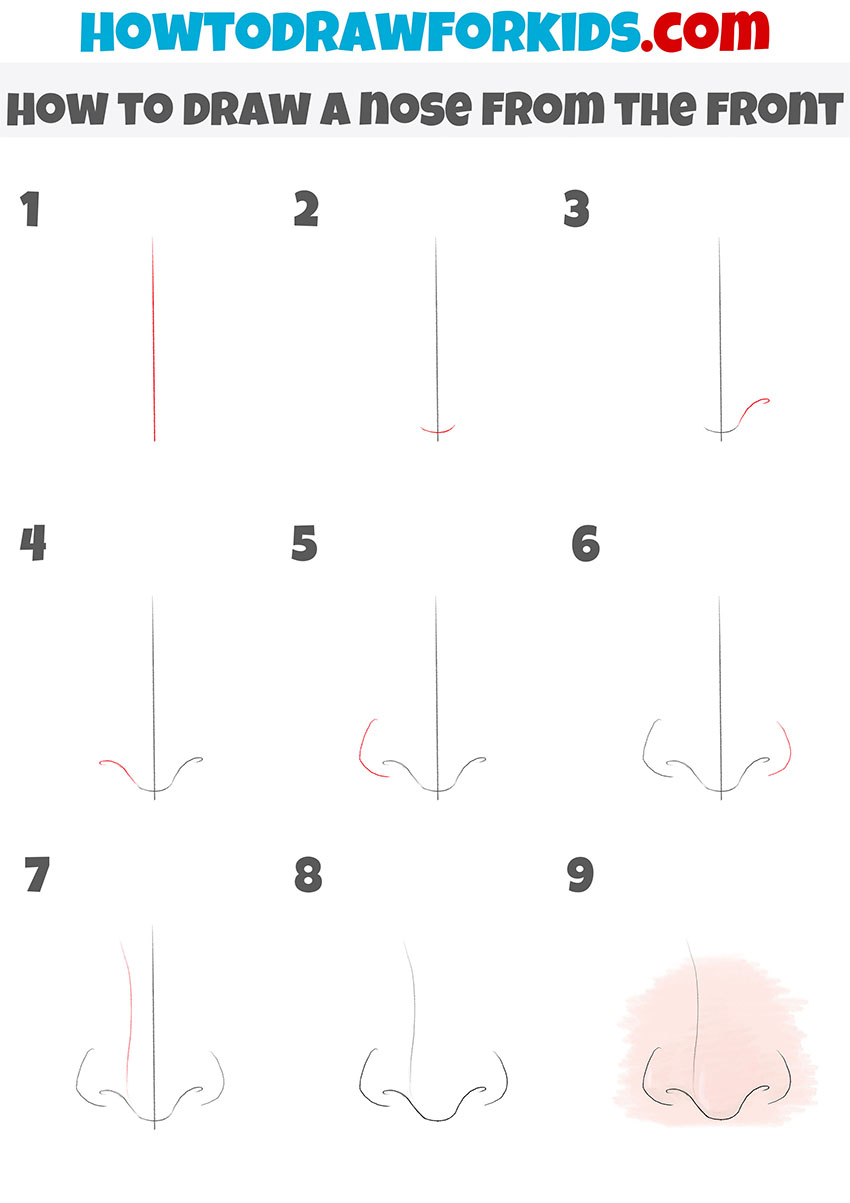
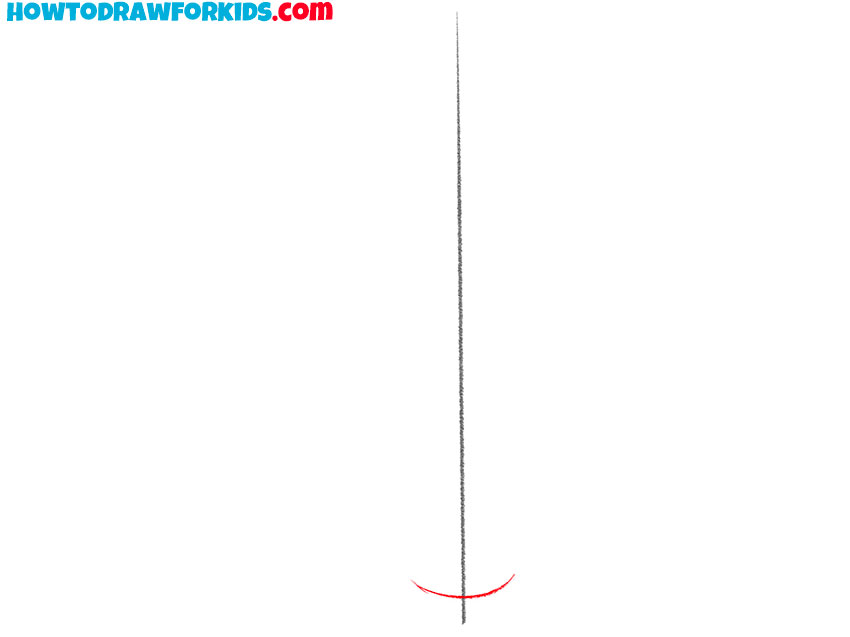
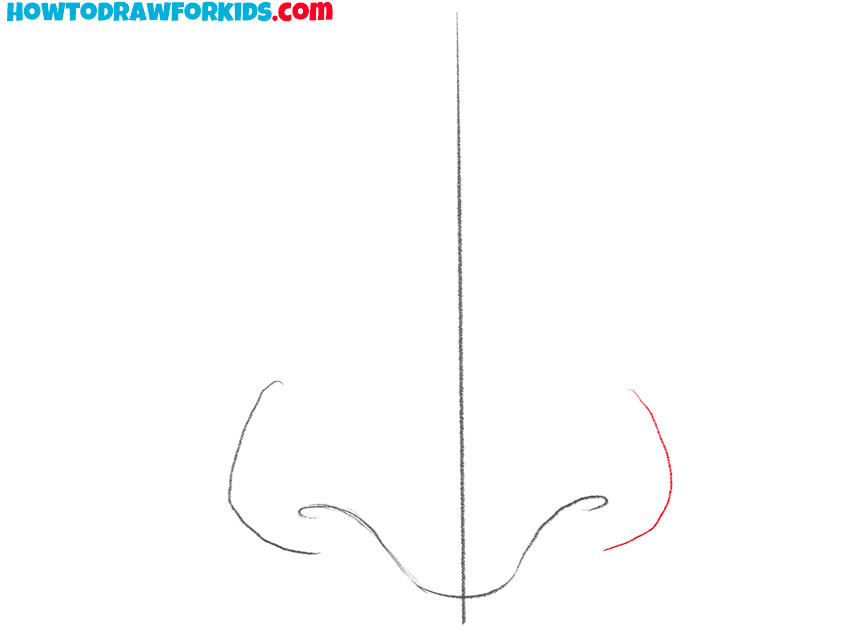
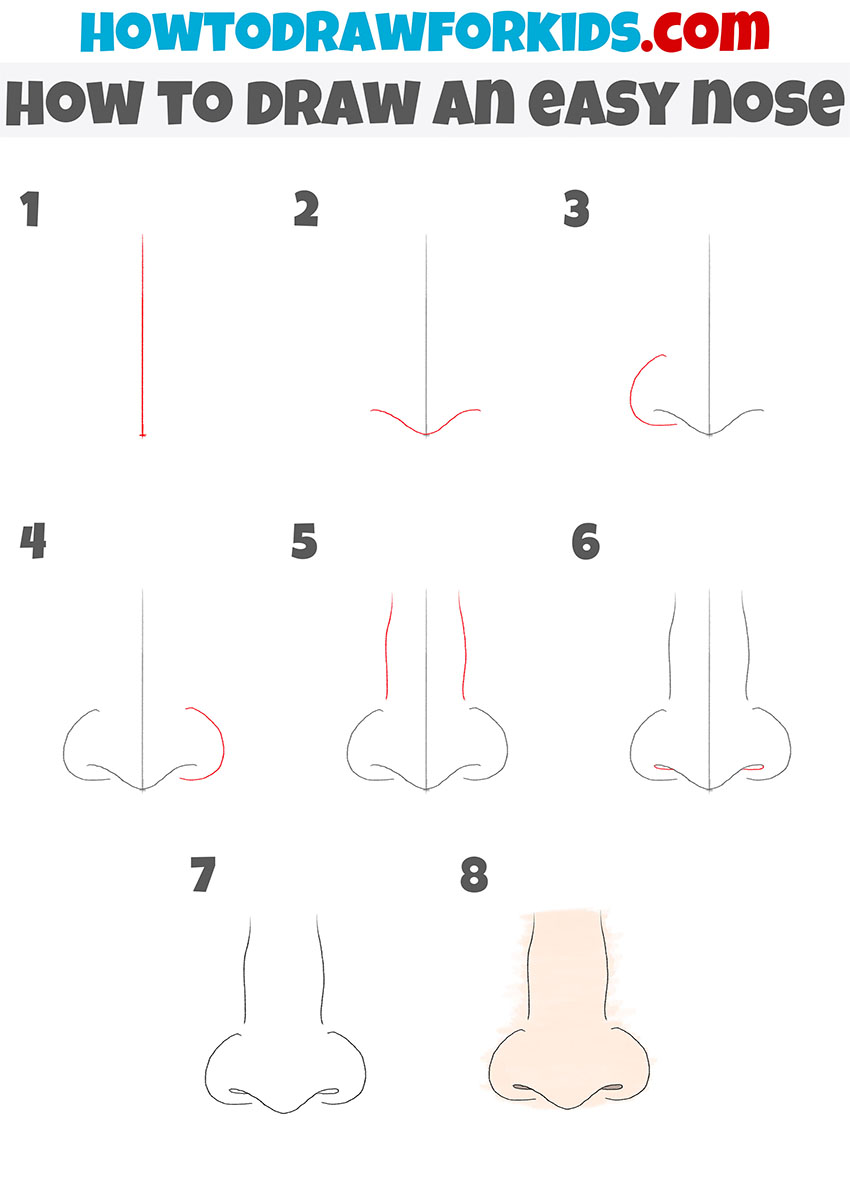
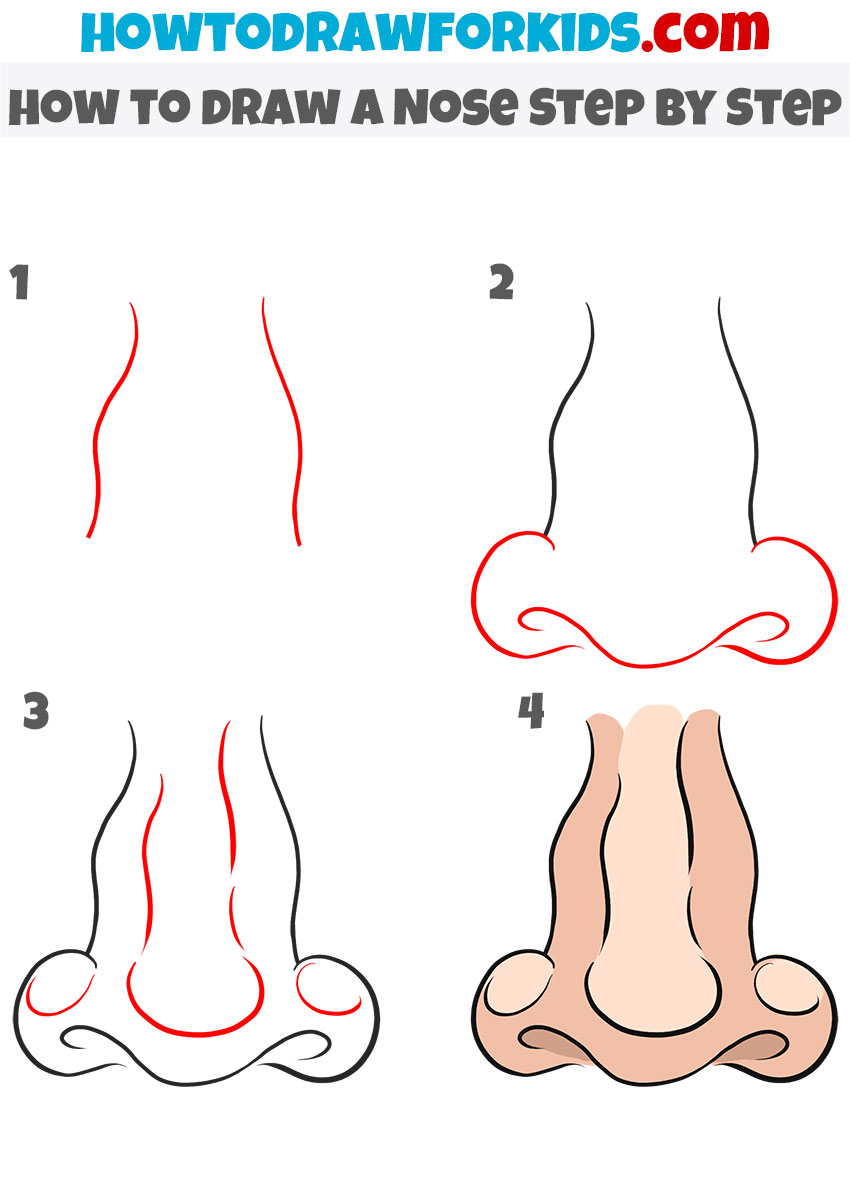
- Draw an auxiliary line.
Determine the location of the nose and draw a straight vertical line.

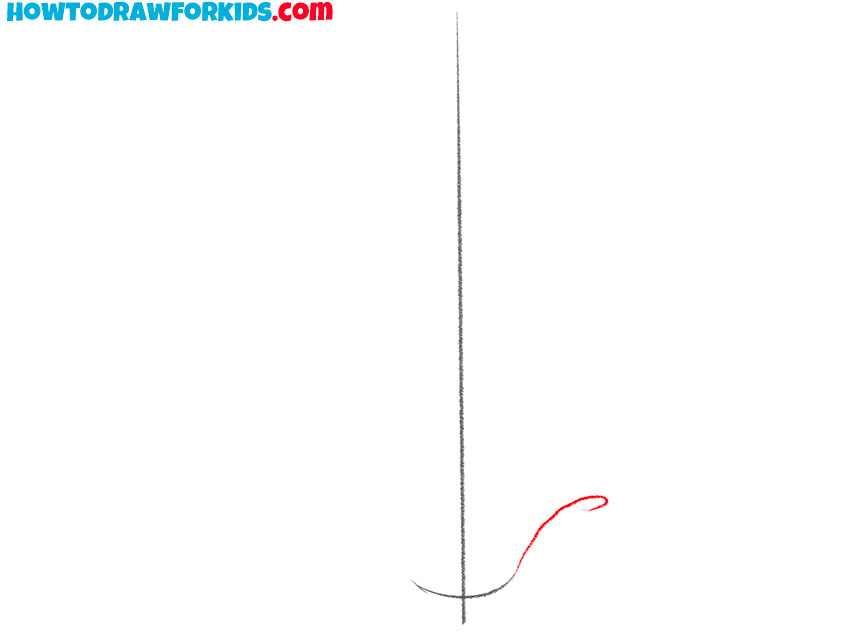
- Depict the tip of the nose.
Draw a small semicircular line.
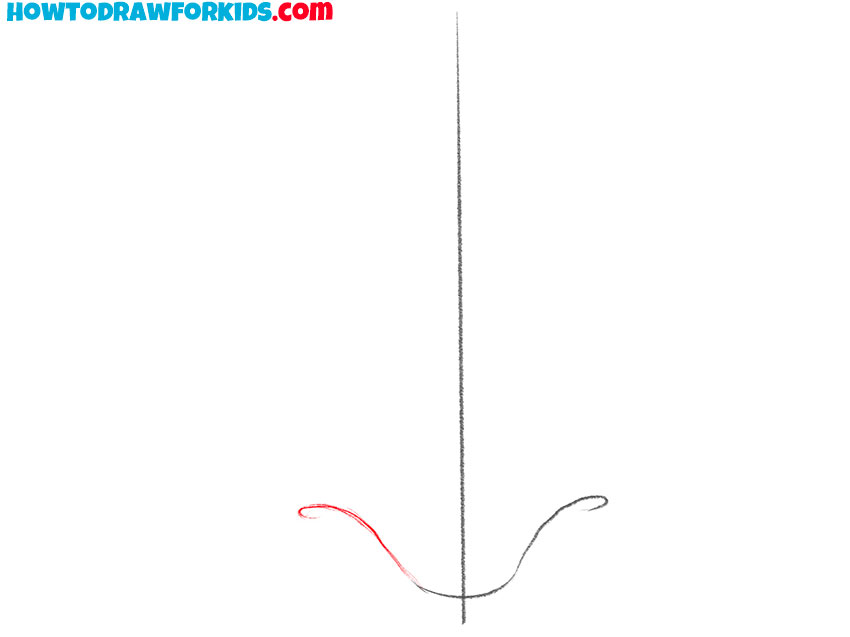
- Add the nasal opening.
From the tip of the nose, draw a smooth curved line to the side.
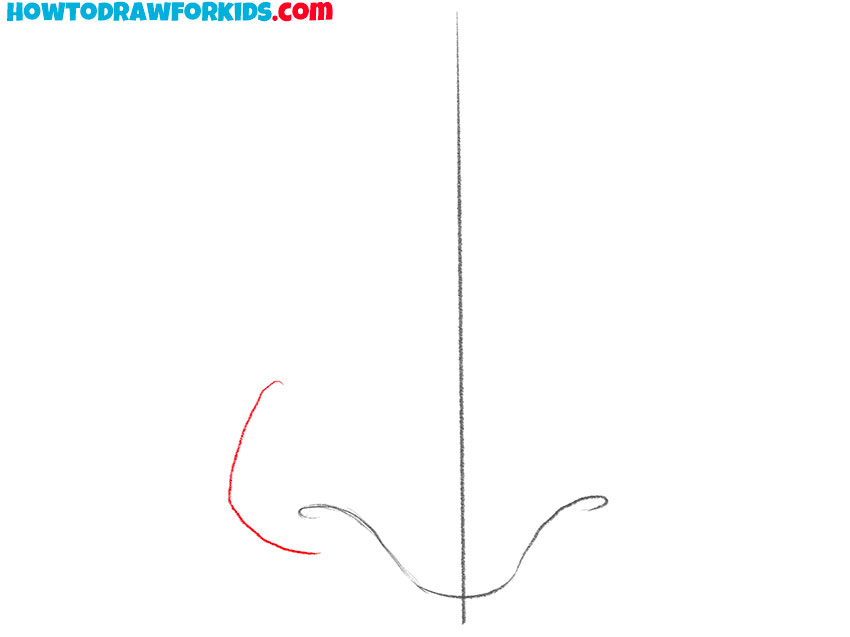
- Draw the nasal opening on the other side.
Repeat the previous step and draw the nasal opening on the other side.
- Sketch out one nostril.
On one side, draw a smooth rounded line, as shown in the example.
- Depict the second nostril.
Draw the same line on the other side.
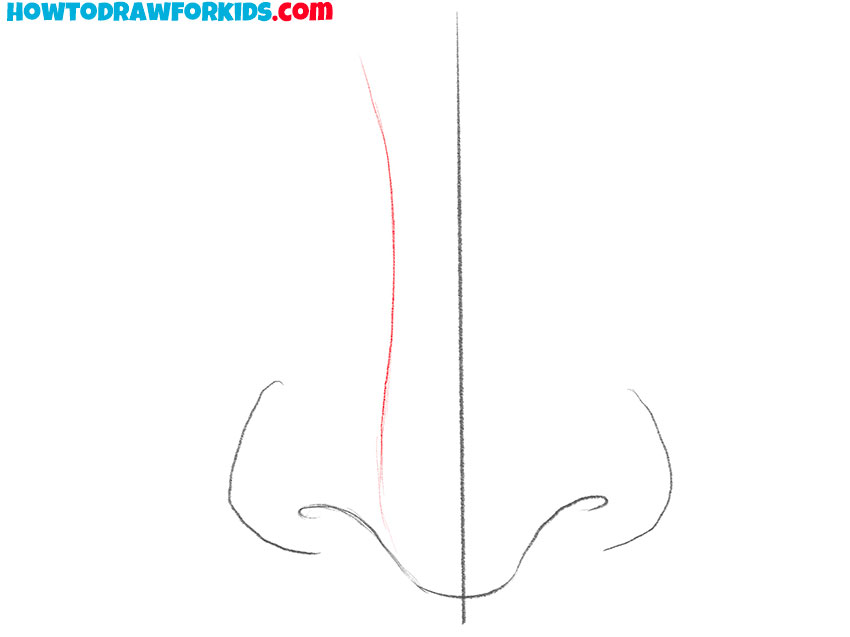
- Add the middle part of the nose.
Depict a long, thin line to indicate the shape of the nose.
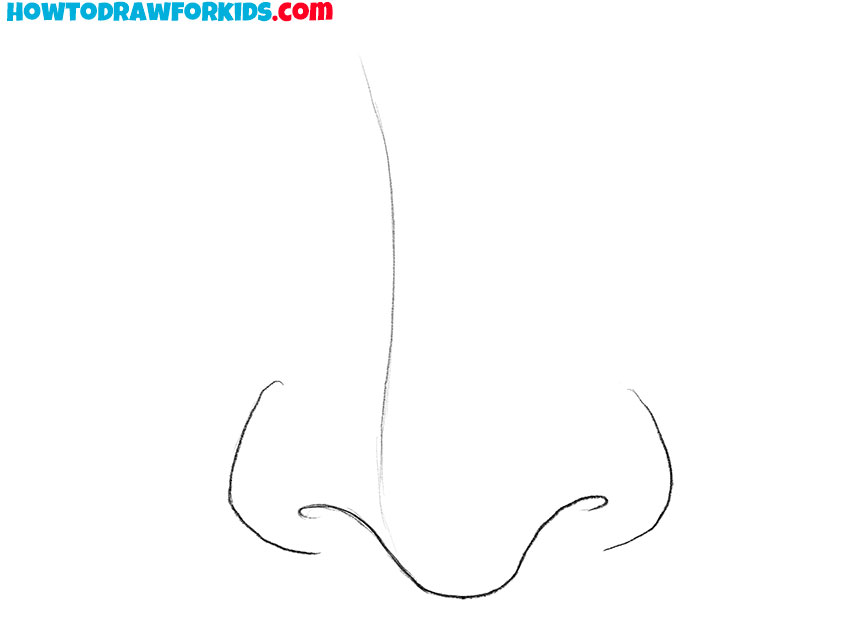
- Correct inaccuracies.
Remove the auxiliary lines.
- Color the nose from the front.
At this stage, use any color for the skin.
At the end of the lesson, I have prepared a PDF file for you, in which you will find a short version of the guide and additional materials.
How to Draw a Nose From the Front: More Practice
Now let’s slightly change the drawing style and at the same time the shape of the nose that we will draw.
Nose From the Front: Cartoon Style
Of course, any artist should be able to draw parts of a person’s face in completely different styles. Let’s look at the cartoon method.
Conclusion
In this tutorial, you have learned the basic skills for drawing a nose. Keep in mind that every person has different facial features, and the nose can have a wide variety of shapes. It can be narrow or wide, short or long, small or large. When in the future you want to draw a person’s nose, then be very careful, your task is to determine the individual facial features and depict them correctly. Practice drawing facial features and each time the portrait will turn out to be more realistic.