How to Draw a Train
In this lesson, we will study two techniques that will help us learn how to draw a train in a simple and recognizable form.

How to Draw a Train: Introduction
A train is one of the most recognizable types of transportation, with a shape familiar to all of us since childhood. It features a horizontally elongated rectangular body with a row of round metal wheels at the bottom and a chimney at the top. In this lesson, we will recreate this classic and recognizable design as we learn how to draw a train.
Of course, if you look closely at a train, you will notice a massive number of small details. However, in this lesson, we will simplify the entire design to its minimal form so that even the most inexperienced artist can draw a train without any difficulty.
If you want to make your train drawing more complex and realistic, you can add any details you like. To do this, you can either study real trains or look at pictures online to see what details are commonly found on trains.
Additionally, you can make your train as long as you want. To do this, simply add one or more train cars to the front section we will be drawing today, depending on what you prefer.
Train Drawing Tutorial
Materials
- Pencil
- Paper
- Eraser
- Coloring supplies
Additional Content
In addition to our online tutorial, I’ve developed a complementary PDF file, a compact version of the lesson to draw a train, which you can download for artistic ventures off the grid. It’s crafted to be a portable treasure trove of drawing enrichment, available whenever the mood strikes, with or without internet connectivity.
Time needed: 30 minutes
How to Draw. Train
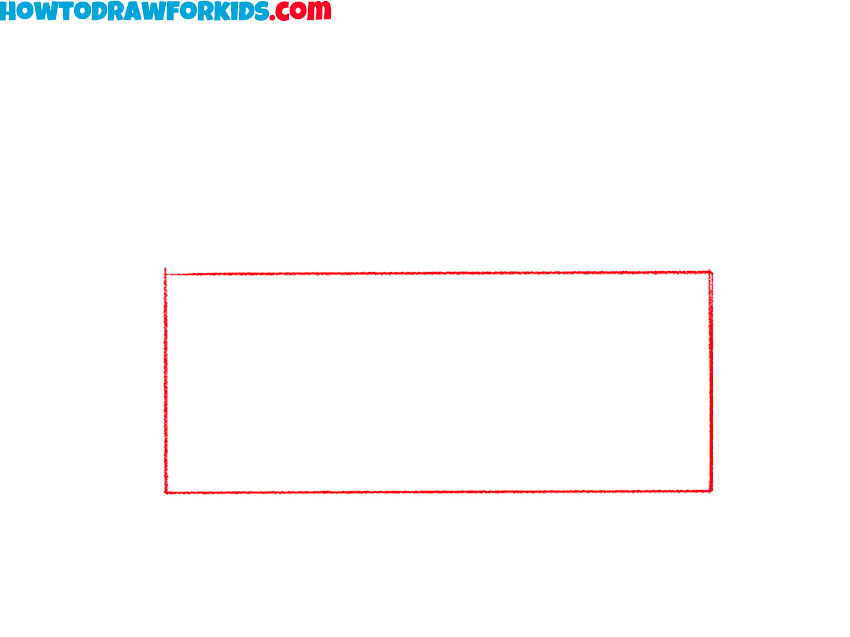
- Draw the train’s base.
To begin this tutorial on how to draw a train, sketch a long, horizontally stretched rectangle. This shape forms the main body of the train. The rectangle should be relatively wide, as trains are long. Make sure to leave enough space above and below for additional details like the wheels and chimney.
- Sketch the train’s cabin.
Draw a smaller rectangle at the left side of the large rectangle you previously sketched. This section gives the train its recognizable look, making it look more realistic even at this early stage of the train drawing tutorial. Use straight and angular lines.

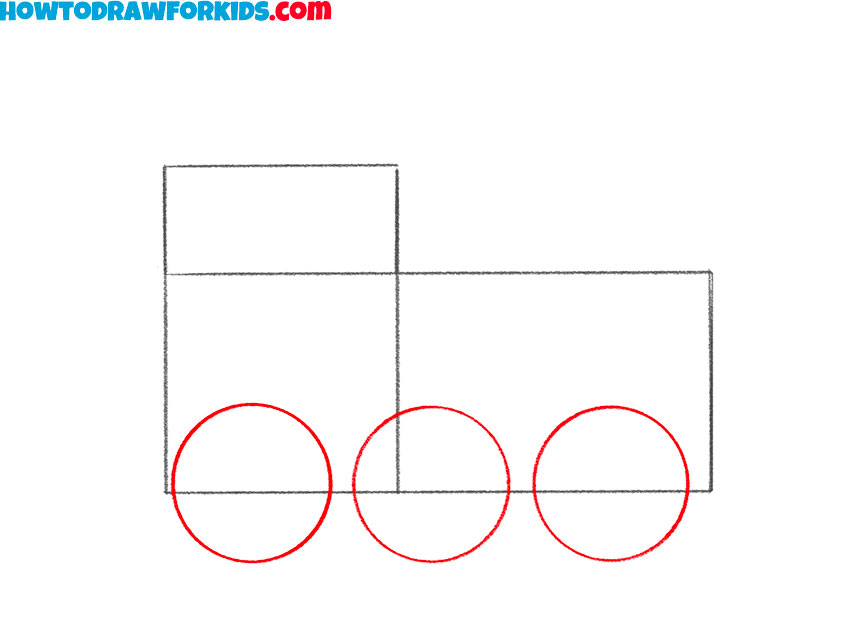
- Add the train’s wheels.
Now, let’s move on to one of the most distinctive parts of a train – its wheels. Draw three evenly spaced circles along the bottom of the train’s body. To draw the train wheels symmetrical, you can lightly sketch a guideline to help place them evenly. The circles should be equal in size and shapes.
- Detail the wheels of the vehicle.
At this stage, refine the train’s wheels by adding an inner circle inside each existing wheel. Trains often have reinforced wheel structures, so drawing these additional circles helps make your train drawing more accurate. These circles also would be identical in shape and size.

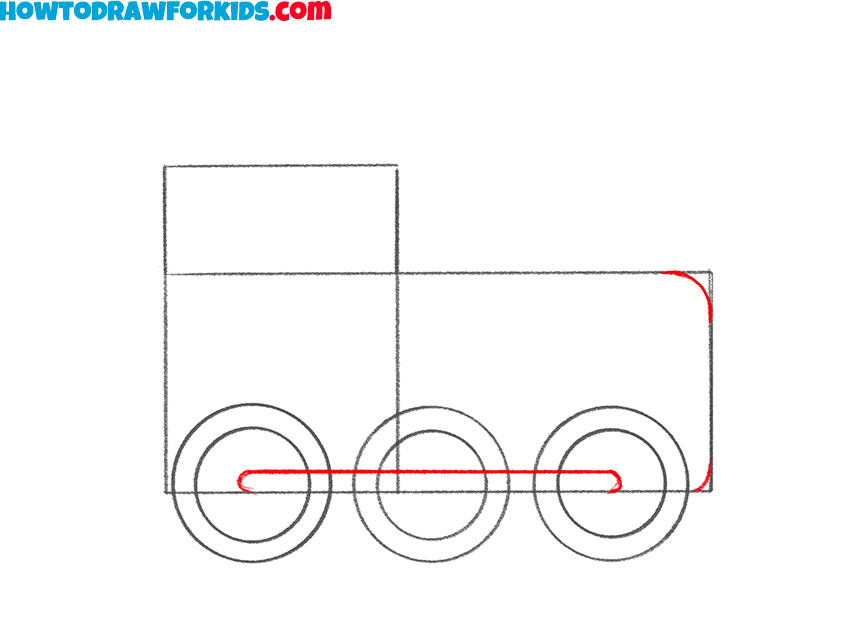
- Detail the front and add the connecting rods.
Now, give the train more natural shape by adding curved lines at the front corners of the body. On the wheels, draw a horizontal line connecting them, which represents the connecting rods that help trains move smoothly on tracks. These rods are a very important mechanical feature of real trains.
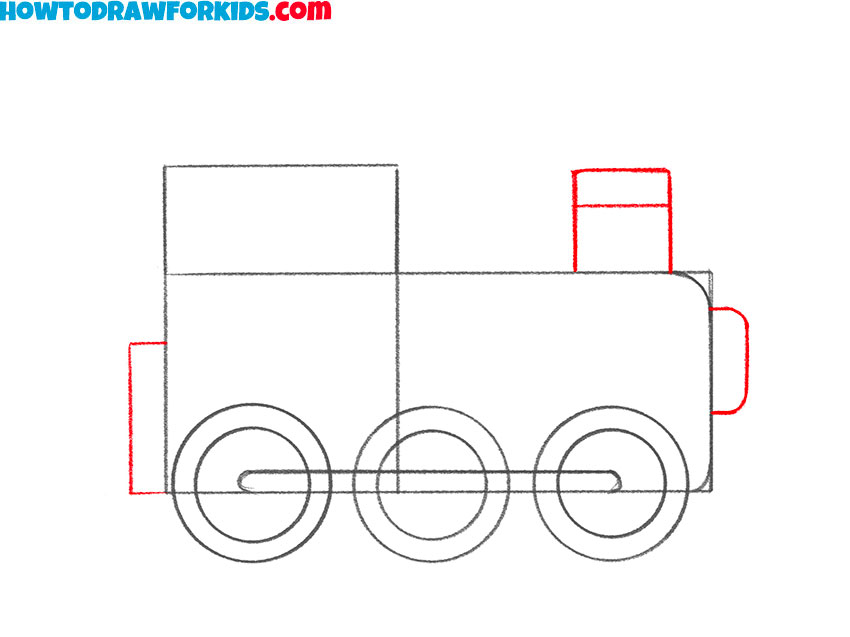
- Sketch the chimney and headlight.
Draw a small rectangle on top of the train’s cabin. This will serve as the chimney, which is a defining feature of classic steam trains. Then, draw the headlight at the front of the vehicle. Additionally, add a small rectangular box at the back of the train’s body.
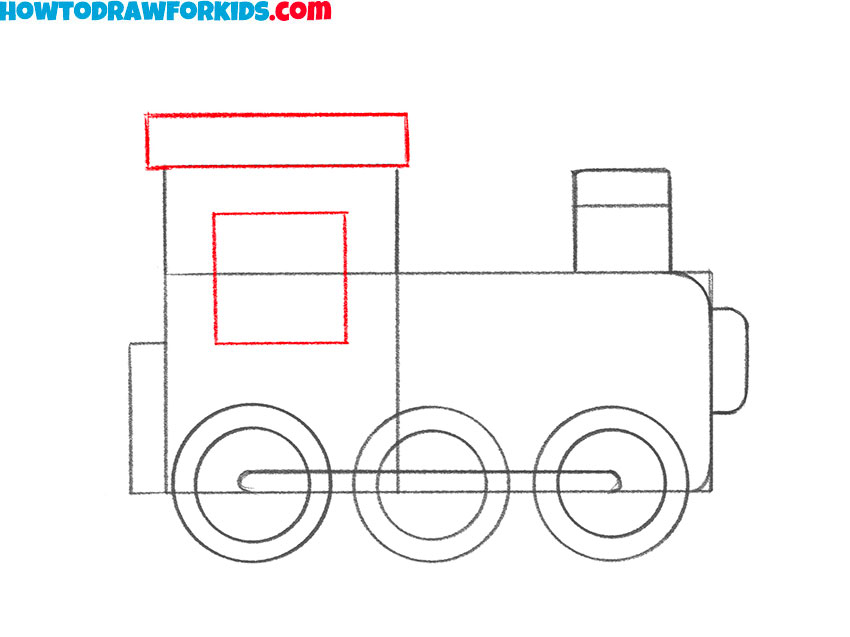
- Add the roof and window.
Draw a slightly larger rectangle on top of the cabin to create a visible roof. This simple addition makes the train look more complete. Next, add a small square window inside the cabin. You can also outline some additional sections around the cabin for a more detailed look.
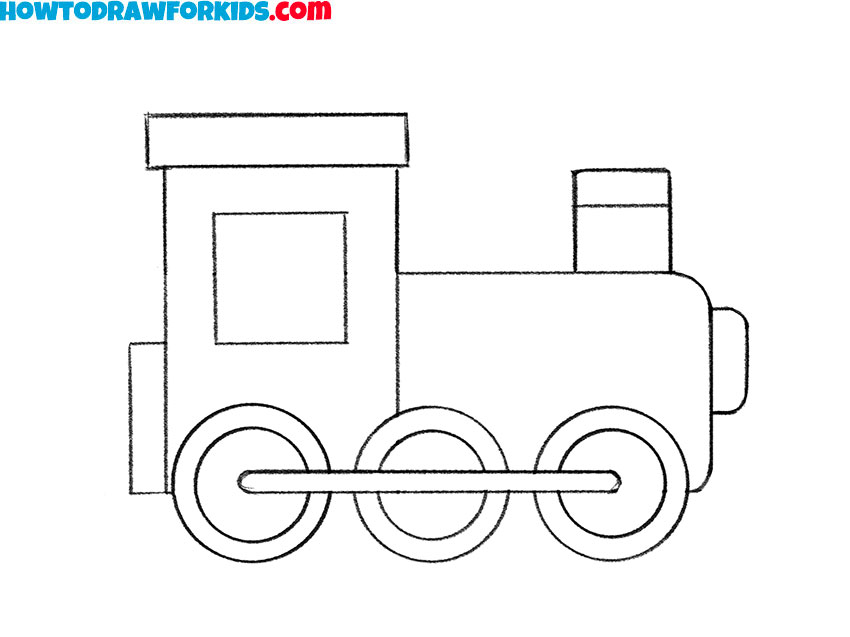
- Finalize the train drawing.
Check the proportions and erase any extra guidelines or construction lines to clean up your train sketch. If you want to make your train design more unique, now is the time to add final adjustments, such as extra compartments or decorative elements.
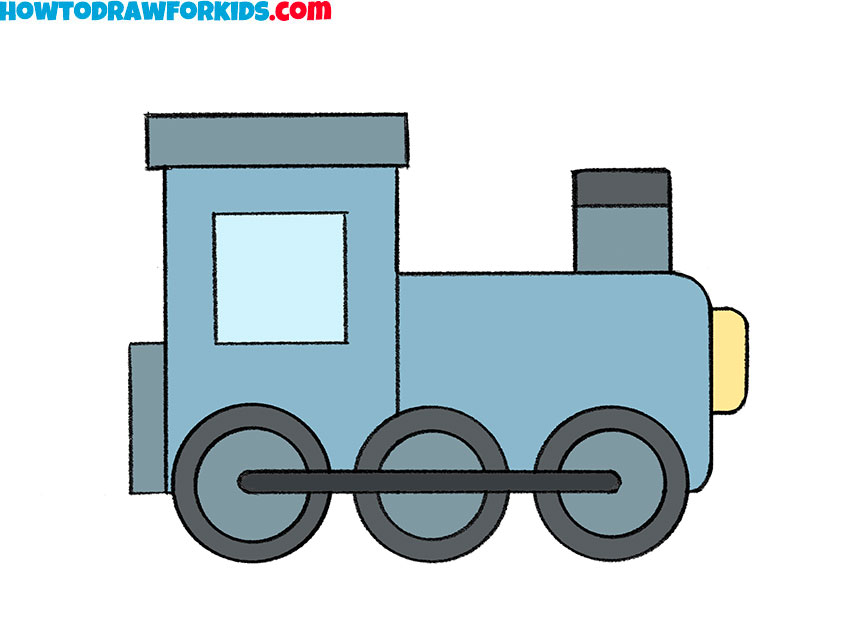
- Color your train.
Use blue for the main body, black for the wheels and mechanical parts, and yellow or red for additional details like lights and decorative features. Trains come in various colors, so feel free to get creative with your choices. You can also add shading to create a more three-dimensional effect.
Additional Content
This PDF provides additional exercises to help improve drawing skills after completing the tutorial. It includes extra materials for practice and refinement. You can use it to add learn how to color a train or practice drawing lines with the train training worksheet.
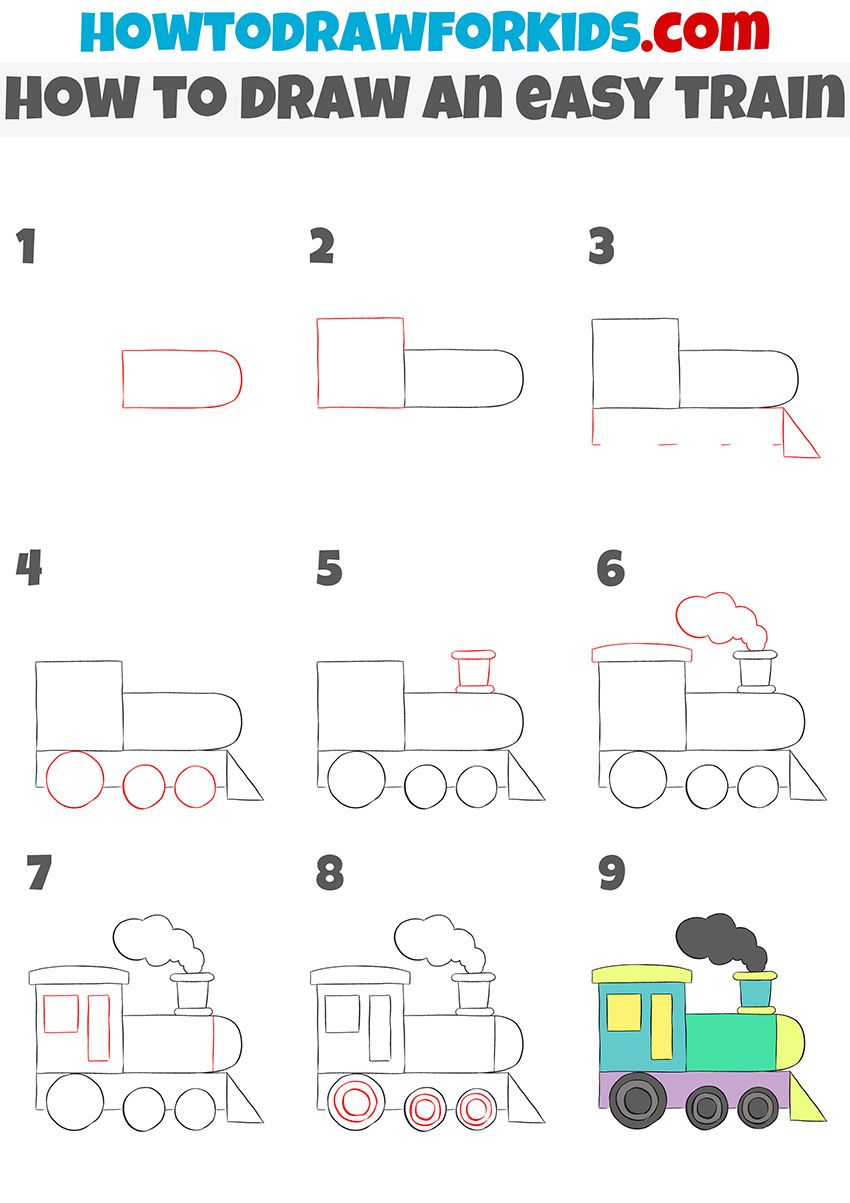
Alternative Train Drawing Tutorial
This tutorial on how to draw an easy train uses rounded and simplified shapes. Unlike the first tutorial, which features a rectangular train with distinct mechanical details, this method demonstrates soft edges, a curved front, and minimal elements. The structure of the steps is also different.
Start by drawing a horizontally stretched rounded rectangle to form the front section of the train. Add a square on the left side for the cabin. Extend a small triangular shape below the right side for the front plate. Draw three circles under the train body for the wheels. Refine the wheels by adding inner circles. Add a short vertical chimney on top of the train’s front section.
Draw a curved roof above the cabin and outline a cloud-like steam shape above the chimney. Add small rectangular windows inside the cabin. Refine the train by thickening outlines and adding extra details inside the wheels. Erase unnecessary lines and check proportions. Complete the easy train drawing by adding colors, using bright and simple shades for each part.
Conclusion
Today, we have carefully studied the process of how to draw a train in the simplest way possible. As I mentioned at the beginning, you can improve your train drawing by adding specific details or extending it with additional train cars. You can also create an interesting background for your train, and draw a sunset at the background or draw stars above the vehicle.
To further improve your ability to draw vehicles and deepen your understanding, I recommend visiting my category on Cars and Vehicles. There, you can learn how to draw a car, take your skills to the next level with an airplane drawing tutorial, or refine your techniques with a boat drawing lesson.
This is a great tutorial for kids! It’s easy to follow and they can learn a lot from it.
Thank you. Nice to see these easy guides are so useful.