How to Draw an Oak Tree
The tree that is the subject of this guide inspires respect and a desire to admire it, since now we will learn how to draw an oak tree.
Now I will show you how to draw an oak tree. This lesson will be very useful for you because in many drawings there are trees. When you master these skills, you can easily draw a landscape with trees.
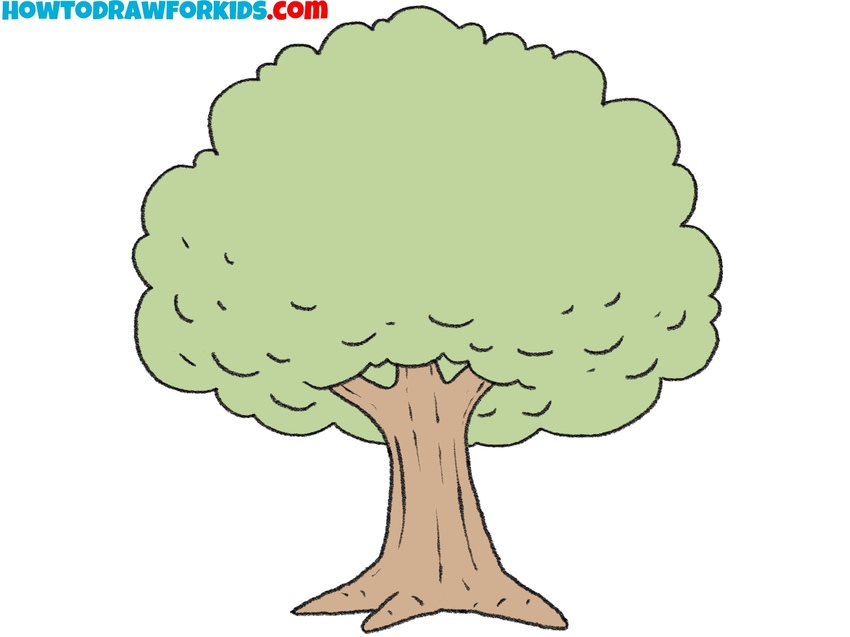
Oak is a common deciduous tree. Sometimes this tree can reach huge sizes. Oak has a wide trunk and a lush crown. In the picture, you see a beautiful oak, which consists of two main elements – the trunk and the crown.
After completing this lesson, you will see that it is very easy to draw an oak tree and you will be able to quickly draw this tree if necessary. In this lesson, arbitrary shapes and lines are allowed. You must remember the sequence of steps, and the shape of the oak may be slightly different from the one in the example.
Materials
- Pencil
- Paper
- Eraser
- Coloring supplies
Time needed: 25 minutes
How to draw an oak tree step by step
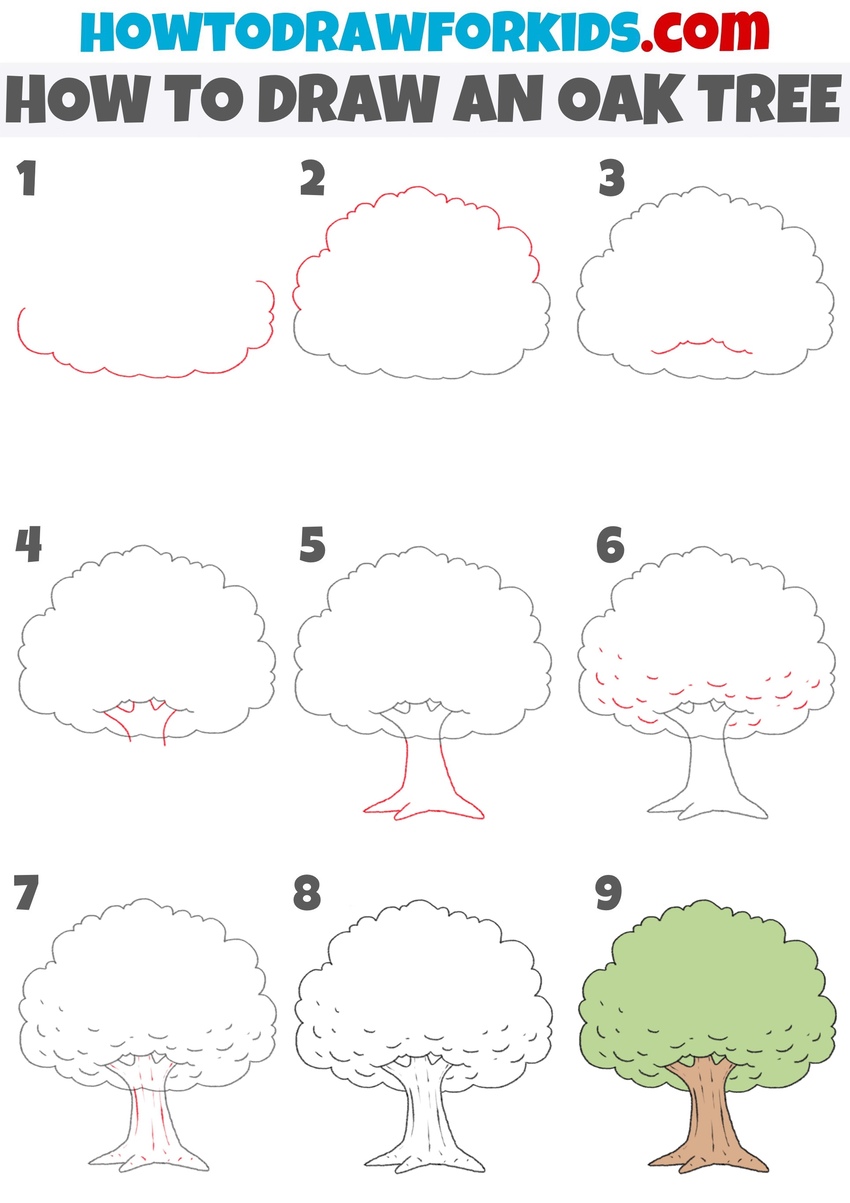
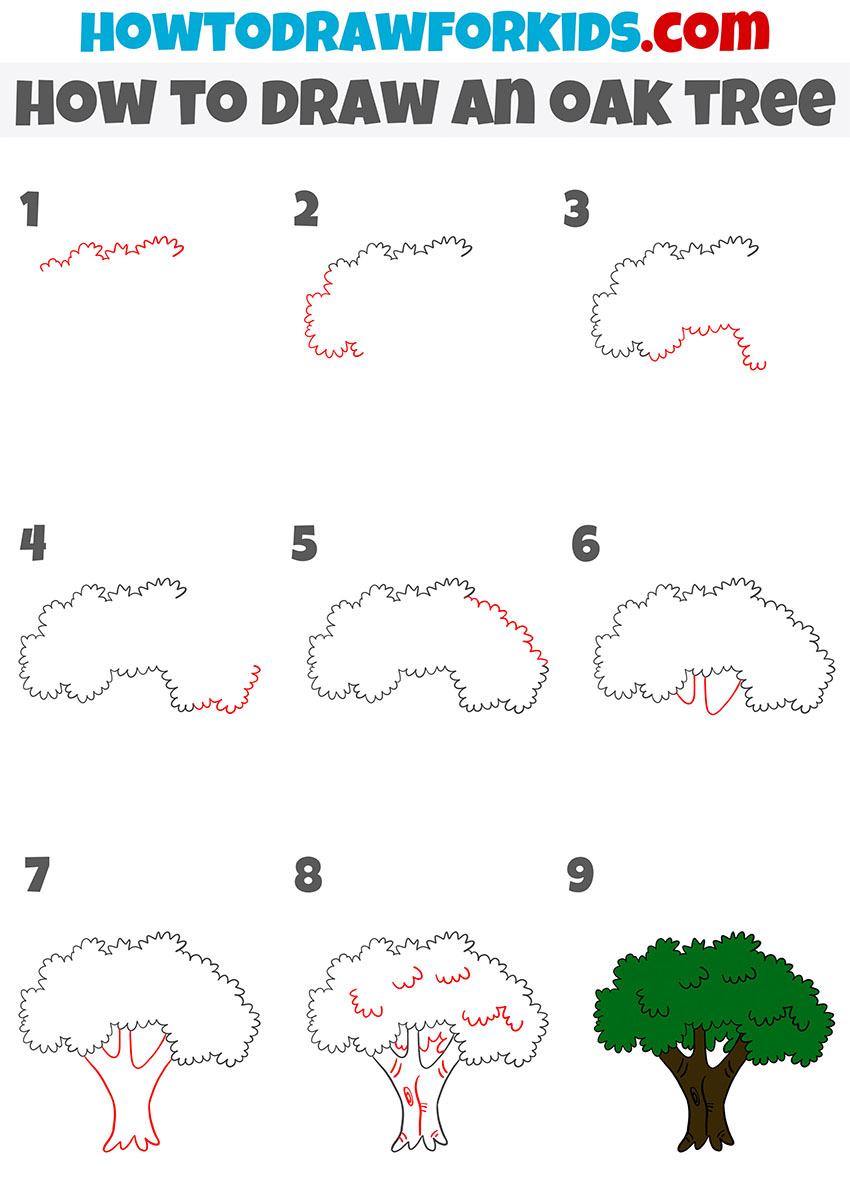
- Sketch the lower outline of the crown.
To control proportions from the start, establish the general mass of the oak’s foliage. Lightly sketch a wide, cloud-like shape that sits low and spreads horizontally; this will read as the bottom of the canopy. Keep the contour bouncy and broken. Vary the scallops so some are larger and others tighter. Avoid perfect symmetry; real oaks feel weighted but irregular.

- Complete the upper outline of the tree crown.
Before adding interior detail, close the outline so the mass reads as a single form. Using the same scalloped rhythm, draw the upper half of the canopy, letting bumps overlap slightly to represent layers of leaves. Check that the left and right sides feel roughly symmetrical but not mirrored.

- Draw the inner line of the oak foliage.
Inside the lower part of the crown, illustrate a subtle line that marks where the inner part of the foliage meets the upper branches. Draw it using a few short, wavy strokes that resemble overlapping leaves. Make sure not to make it too straight, because oak leaves grow in uneven layers, so small irregularities will make the tree look more realistic.

- Draw the branches under the oak crown.
Now define the branches that support the leafy crown. From the ends of the wavy line drawn in the previous step, extend two or three short, curved shapes downward to form the visible upper parts of the branches. Keep them uneven and asymmetrical. Avoid making the branches too thin.

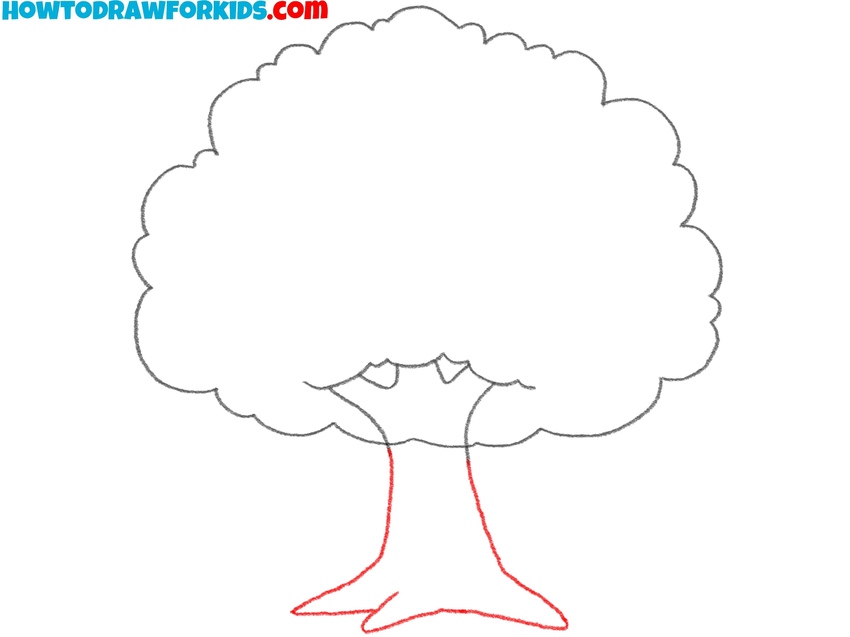
- Sketch the tree trunk and roots.
Continue by sketching the trunk of the oak tree. Draw two slightly curved vertical lines descending from the branches, making the trunk wider at the bottom. At the base, form spreading roots using a few short, uneven lines that project outward.
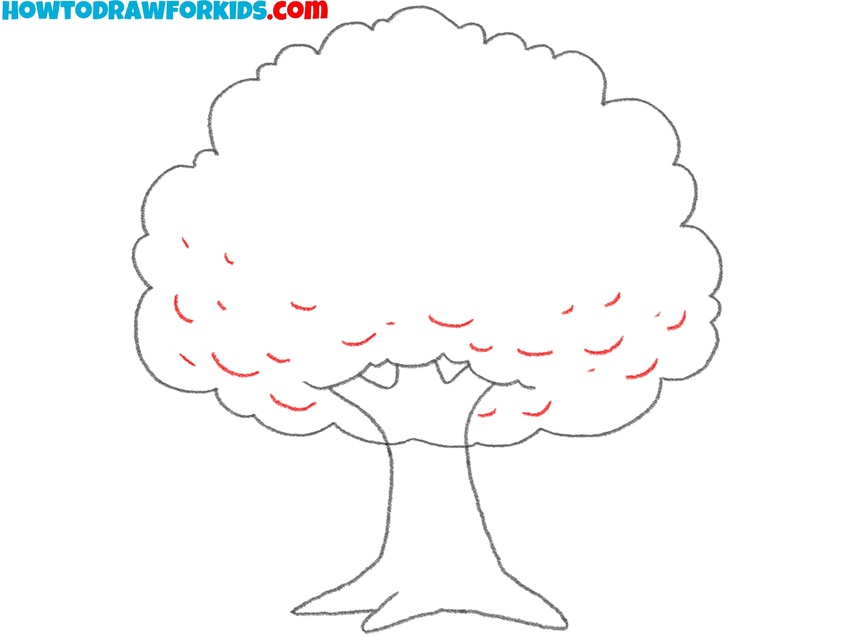
- Detail the foliage texture of the tree.
To make the crown more natural, add clusters of small curved lines within it. These marks represent the inner leaves and shaded areas. Distribute them across the bottom area of the tree foliage, avoiding perfect symmetry. Use small, repeated arcs that vary slightly in size and direction. This gives the impression of dense leaves without drawing each one individually.
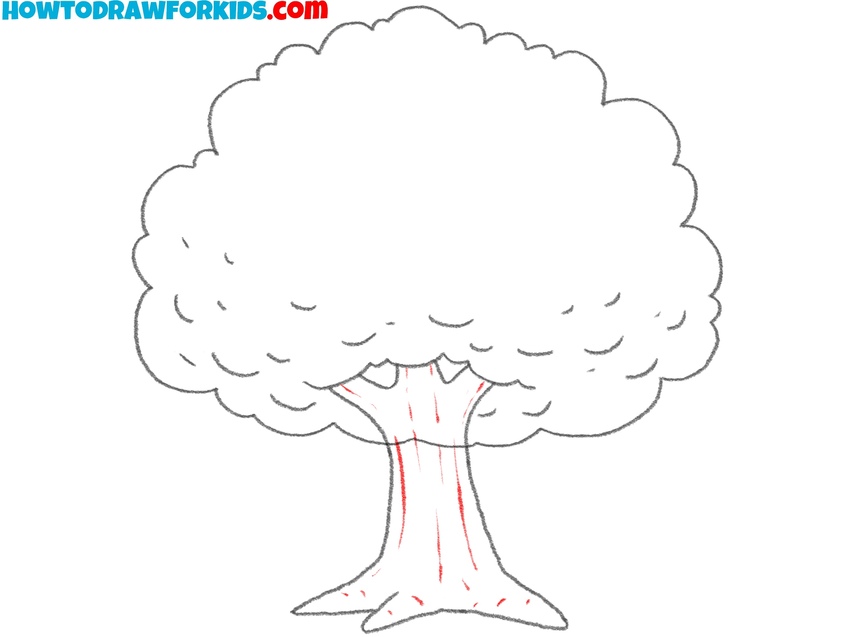
- Illustrate wood grain on the trunk.
Illustrate the bark texture by drawing several vertical and slightly wavy lines along the trunk. Keep them irregular, because oak bark is rough and uneven. Some lines can branch off slightly to represent grooves and knots. Add a few short strokes around the roots and branches to complete the wood’s structure.
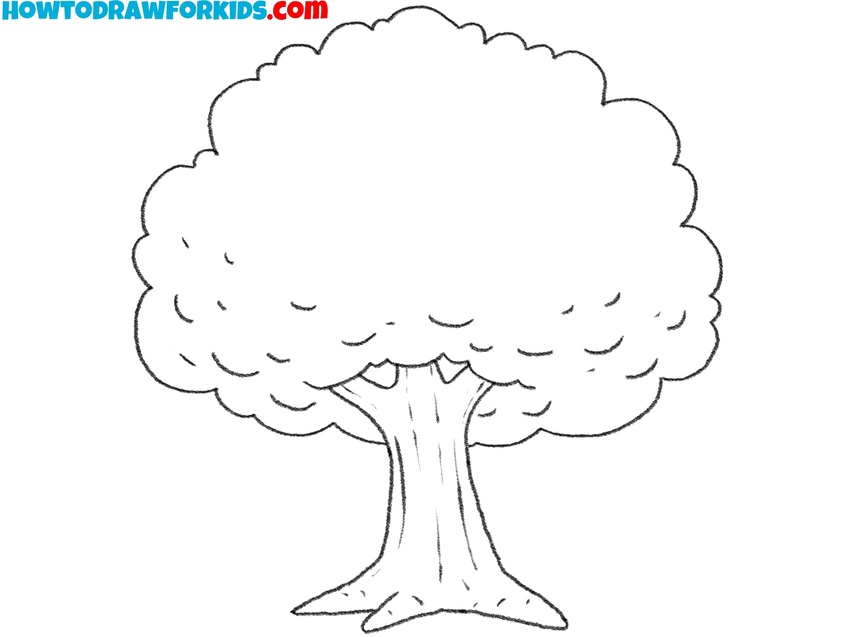
- Clean up and refine the oak drawing.
At this stage, check the entire outline of the oak tree drawing and erase unnecessary construction lines. Remove any overlapping or stray marks where branches meet the foliage. Carefully clean the edges of the crown to keep the contours smooth and unified. You can also slightly refine the texture of the trunk and inner foliage if needed.
- Color the foliage and bark of the tree.
Shade the trunk and roots of the tree with brown. You can add darker streaks to represent bark texture and subtle lighting contrast. For the crown, fill it with a uniform green color. Here, you can make the tone varied to show the difference between light and shadowed areas. Also, you can add deeper greens under the upper branches where less light reaches, and lighter ones along the top.

Easy Oak Tree Drawing Tutorial
To form the foliage, draw a wide and uneven cloud-like outline made up of many small, curved bumps that vary in size. This will help the crown look realistic. Continue extending this line to create a rounded, irregular canopy of the oak tree.
Once the leafy shape is complete, illustrate the trunk by adding gently curved lines that meet at the base. The trunk should be wider toward the bottom and taper as it reaches the canopy.
Inside this area, sketch several dividing lines to represent branches. Add a few subtle details on the bark using short, uneven lines to show natural texture.
You can also place small gaps or openings between the leaves to make the oak appear more three-dimensional. When coloring, apply a deep green for the foliage and rich brown tones for the trunk.
Lesson over! Now you know how to draw an oak tree easily and quickly. And now try to improve your drawing, add additional objects.
For example, draw grass, bushes, or draw the sky above the oak tree. Thus, your drawing will be brighter and more saturated. Share the result with your friends, rate the drawing together.