How to Draw Deadpool
Learn how to draw Deadpool, one of the most iconic and charismatic characters in the Marvel Universe, with two step-by-step methods.
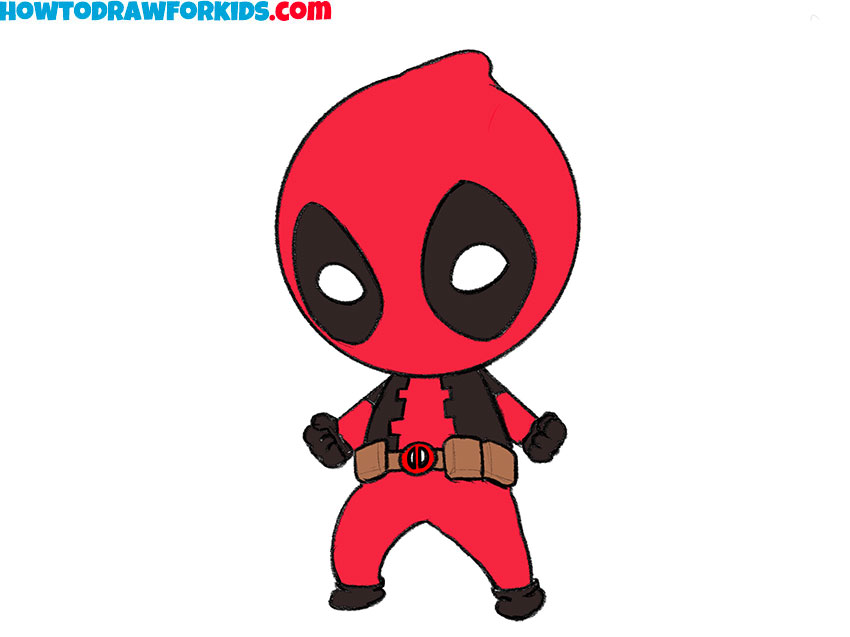
How to Draw Deadpool: Introduction
Deadpool is an unusual character in Marvel, known for cracking jokes, easily handling enemies, and breaking the fourth wall. Like many Marvel characters, Deadpool has appeared in comics for years, with many artists contributing to his portrayal, leading to various ways of drawing him.
In this lesson on how to draw Deadpool, I will demonstrate two methods. First, I will show a simple yet effective approach to drawing Deadpool in a style I often use. This method uses basic shapes and lines, resulting in a recognizable and accurate depiction.
The first method is straightforward and can be used by anyone, regardless of experience. Despite its simplicity, it produces a drawing of Deadpool that captures his most important and recognizable features.
Next, I will present a slightly different method, which will illustrate how the same character can be portrayed in multiple ways while maintaining key features. These methods show that a character can be drawn in various styles while still staying true to its essence.
Deadpool Drawing Tutorial
Materials
- Pencil
- Paper
- Eraser
- Coloring supplies
Time needed: 20 minutes
How to Draw Deadpool
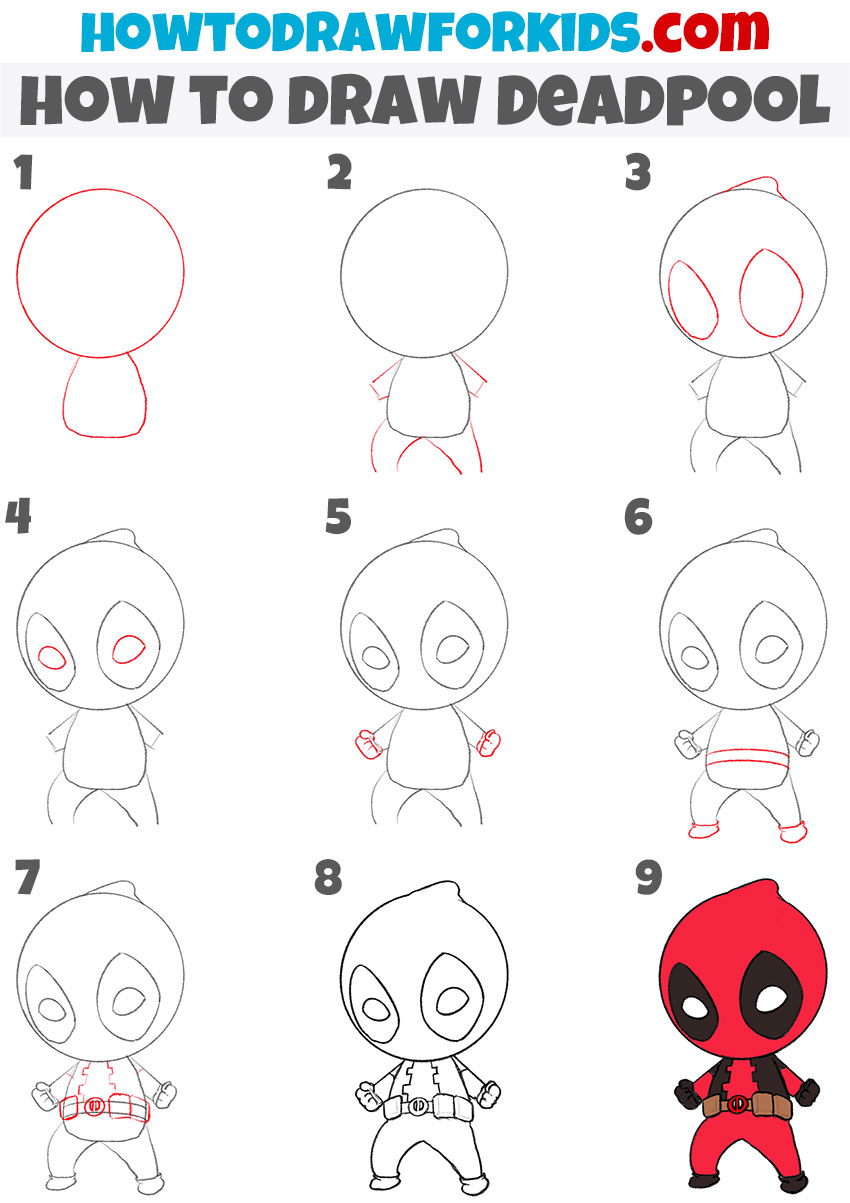
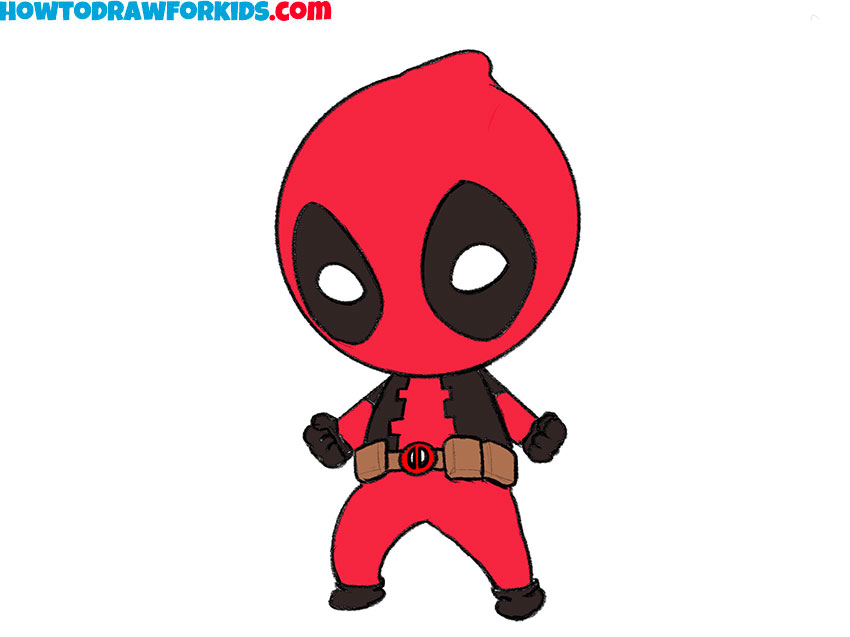
- Draw Deadpool’s head and torso.
Begin by drawing a large circle to represent the head of Deadpool. This shape will serve as the base for his facial features. Next, draw Deadpool’s torso as a slightly smaller oval. If you want to make your Deadpool less cartoonish, make the torso larger than the head.

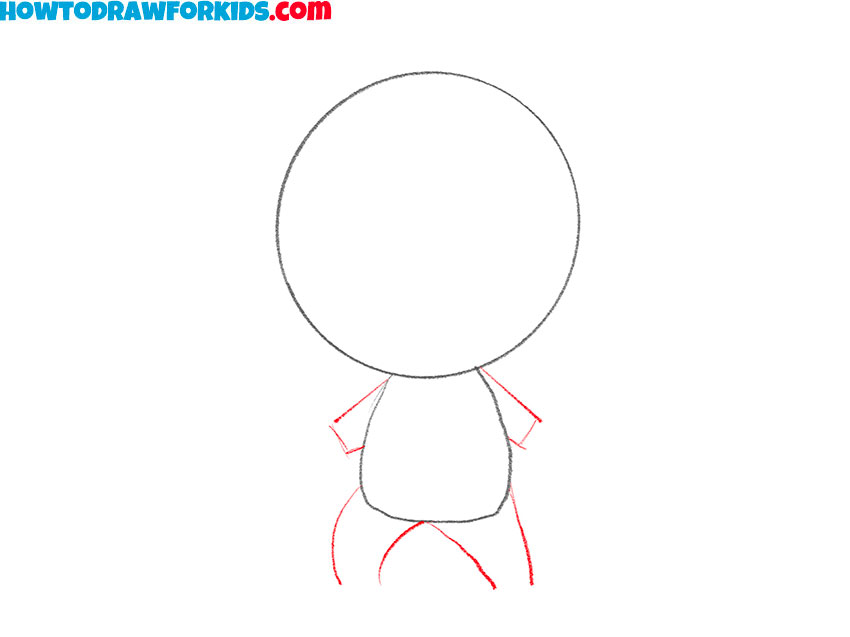
- Add the arms and legs of the character.
Sketch simple shapes for the arms of Deadpool, and two shapes to illustrate the legs. Since we are drawing Deadpool in a cartoonish and simplified style, the arms and legs, as well as the torso, should be noticeably smaller in proportion.
- Sketch the outline of the eyes and the top of the mask.
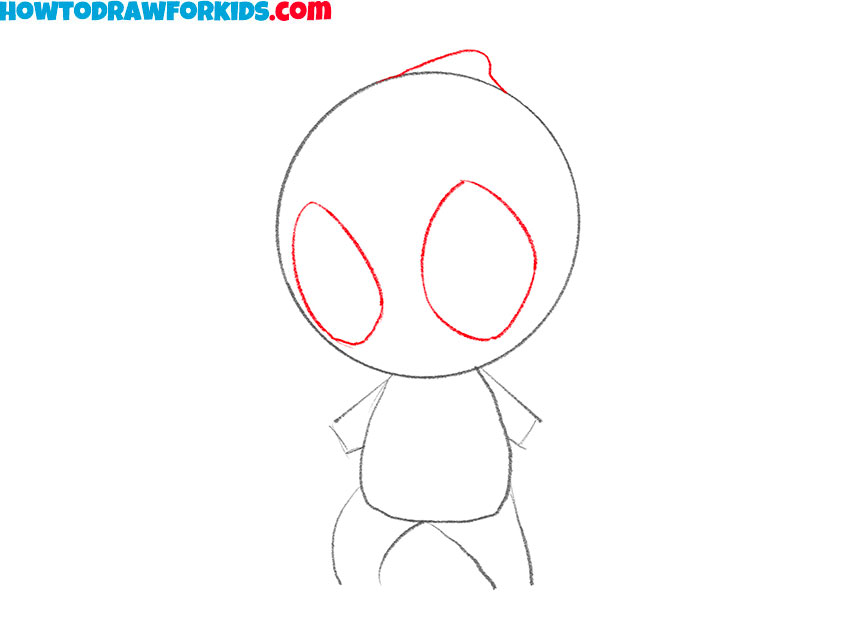
Deadpool’s most defining features are his large, expressive eyes and distinctive mask. Begin by drawing two large, oval shape for the outlines of the eyes within the head outline. Next, draw the top of Deadpool’s mask, which looks like a smooth and slightly elongated shape at the top of the head.
- Add the eyes of the character.
Now draw the eyes inside the outlines from the previous step. You can give the eyes any expression by slightly adjusting their outlines. In addition, you can slightly detail Deadpool’s face by lightly sketching the outlines of the nose and mouth under the mask.

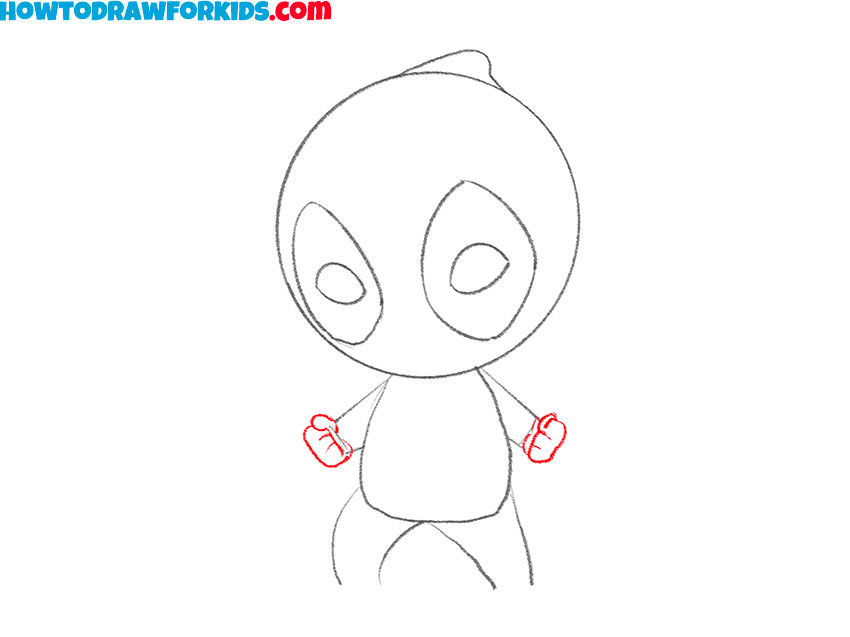
- Detail the hands of the antihero.
Now, focus on drawing Deadpool’s hands, which should be in a fighting stance. First, using smooth lines, draw the outlines of the hands, then draw the fingers with short lines. Remember that Deadpool is often shown with weapons in hand, so consider these elements when adding his gloves.
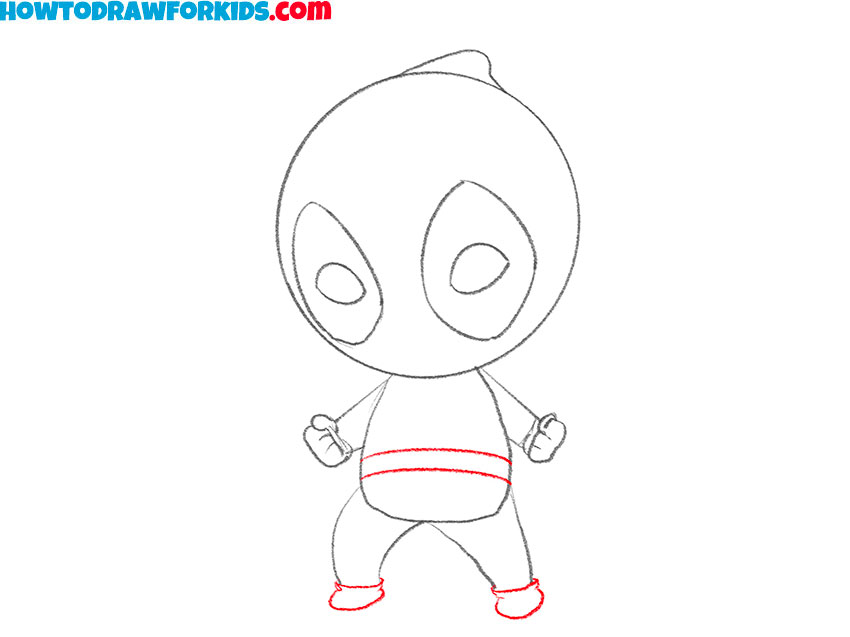
- Add the character’s belt and feet.
Next, move on to Deadpool’s costume. Start by drawing the belt around his waist, using a couple of simple parallel lines. Next, draw Deadpool’s shoes using two simple geometric shapes at the bottom of the legs. To give the shoes a more detailed look, you can add some folds.
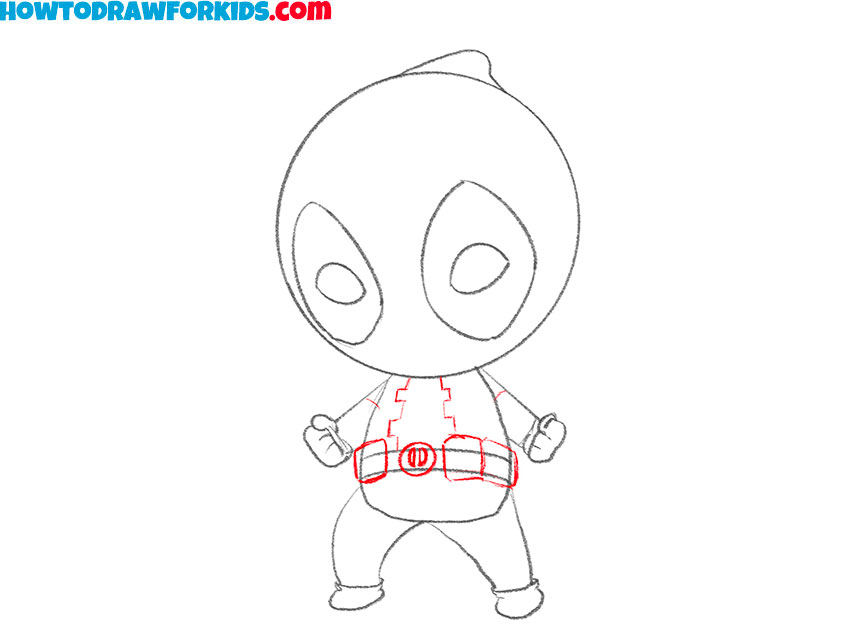
- Draw the Deadpool logo and detail the torso.
Now, draw the outline of the characteristic pattern on Deadpool’s chest. Next, draw the Deadpool logo in the center of the belt in the form of a circle with two angular eyes. After that, draw pockets on the sides of the belt for a more authentic look.
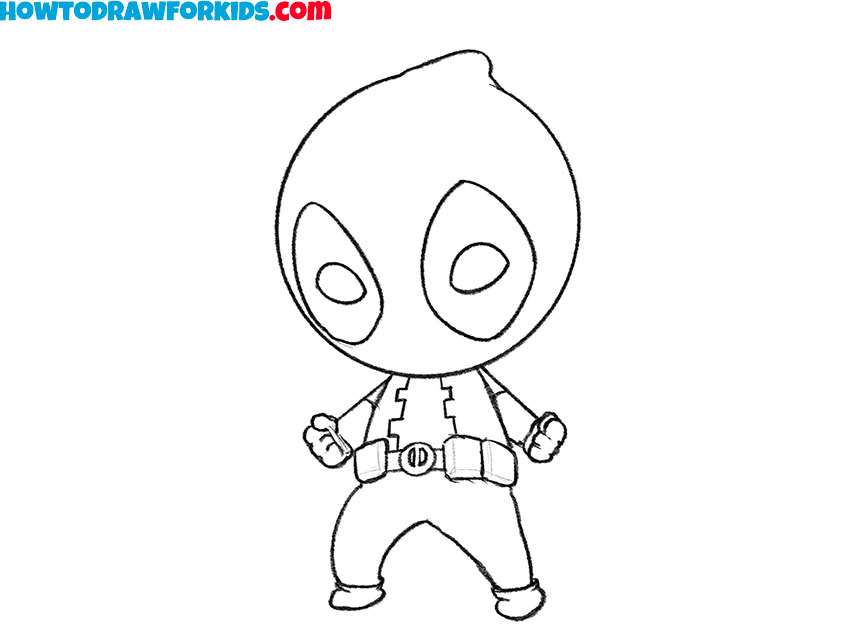
- Finalize the sketch of Deadpool.
With the basic outlines in place, it’s time to add the final touches. Carefully outline all of Deadpool’s features with bold lines, paying attention to the details in his mask, costume, and pose. Erase any unnecessary guidelines that were used to establish proportions earlier.
- Color the drawing of Deadpool.
Use vibrant red for his mask and outfit, while coloring some areas black, for example, around the eyes and chest. You can also add brown or gray for the belt and gloves. Deadpool’s color scheme is iconic, and getting the shades right will help complete the look.
Additional Content
I have prepared a free PDF that summarizes the Deadpool drawing lesson. This guide is a useful resource for young artists, allowing them to draw Deadpool’s simplified version at any time and place. If you don’t have internet access, simply download the PDF once, and you can keep it. It can be used as a reference, practice sheet, or coloring page to help maintain creativity while drawing Deadpool.
How to Draw Deadpool: Alternative Technique
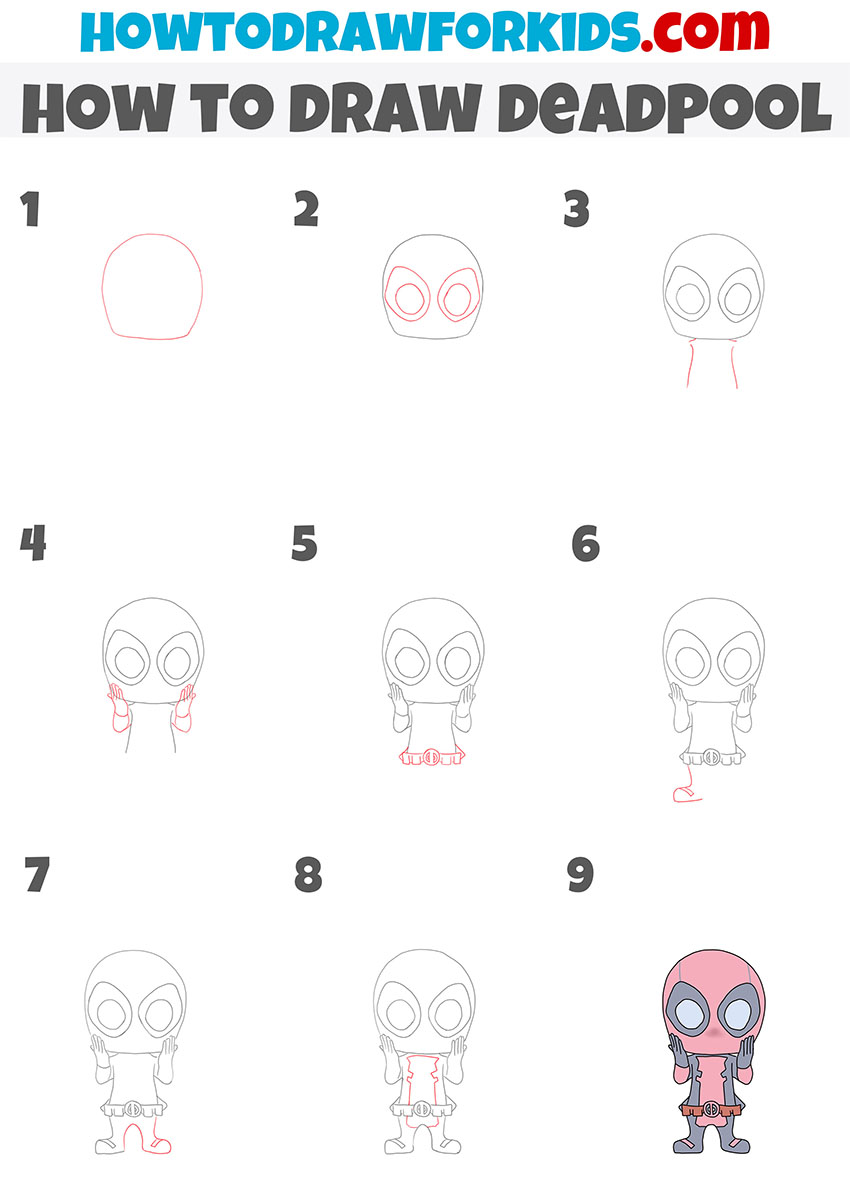
Besides the main drawing lesson, I’ve also concocted a second, alternative method to sketch Deadpool. This extra practice is intended to broaden your horizons and polish your drawing prowess. The key difference between this drawing of Deadpool and the first tutorial is the stylization. Also, this tutorial uses a completely different sequence of steps.
To draw Deadpool with this style, begin by sketching an oval for the head. Add the large eye shapes inside the head with curved lines. Then, proceed to draw the body with basic lines for arms and legs. Outline the arms, ensuring that the hands are positioned in front of the face.
Add the character’s signature belt, which should have a circular emblem in the middle. Then, draw the legs and boot of Deadpool, using smooth lines. Add the iconic pattern on the chest. Finally, erase unnecessary guidelines and complete the lines for a clear, clean look. Color Deadpool’s body in his iconic red and black combination.
Conclusion
The drawing lesson on how to draw Deadpool has concluded, and you now have the knowledge to depict him in two different styles. Both tutorials were straightforward, and I hope they were helpful to you. Please share in the comments if you were able to draw this character using the instructions provided.
If you enjoyed the lesson, visit the comics section of my site, where you can find tutorials on how to draw Spider-Man, another well-known Marvel hero, and try your skills and draw Batman, one of the first heroes of the DC Universe.
Additionally, be sure to follow me on social media, where you will find new content such as video tutorials, collages, and updates on upcoming lessons.




i love this website i am getting way better at drawing because of this web site
That’s great to hear, Kenneth.