How to Draw Groot
I’ll guide you through three simple tutorials with basic lines to help you draw Groot, a popular wooden character from Guardians of the Galaxy.

How to Draw Groot: Introduction
Today, I’ll provide a tutorial specifically for comic book fans, showing how to draw Groot, a character from Guardians of the Galaxy with bark-like skin and an unusual appearance.
In this Groot drawing tutorial, I’ll tell you about the basics of drawing this character, explaining how to depict his recognizable image using basic techniques. This tutorial also introduces methods to draw unique comic book characters with minimal effort.
Additionally, you’ll learn to create anthropomorphic characters with distinct features and unique skin textures. Besides Groot, this includes the Thing from Fantastic Four with stone skin and Colossus from the X-Men with metallic skin.
To reinforce your knowledge, we’ll conclude this lesson with two additional exercises that provide practice in drawing comic characters. These methods aim to help you draw Groot from Guardians of the Galaxy in a simplified yet authentic style.
Groot Drawing Tutorial
Materials
- Pencil
- Paper
- Eraser
- Coloring supplies
Time needed: 45 minutes
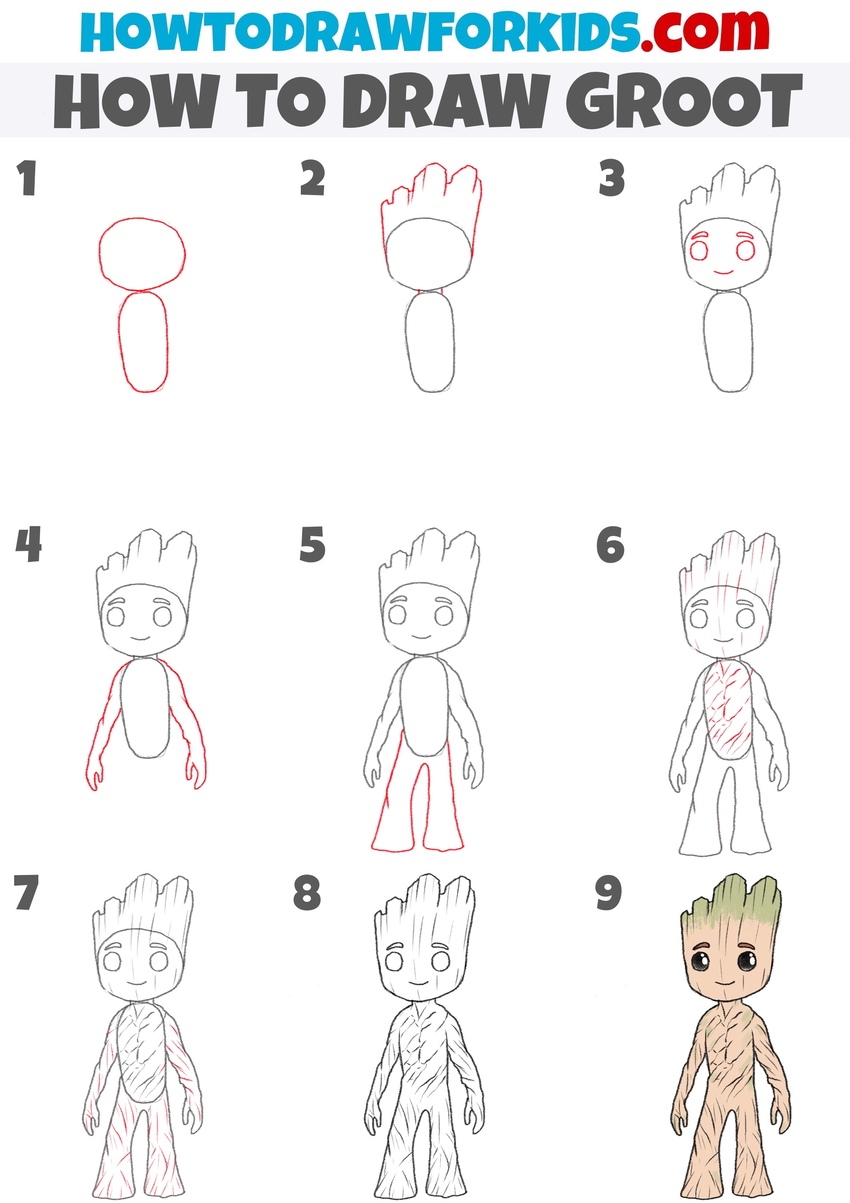
How to Draw Groot
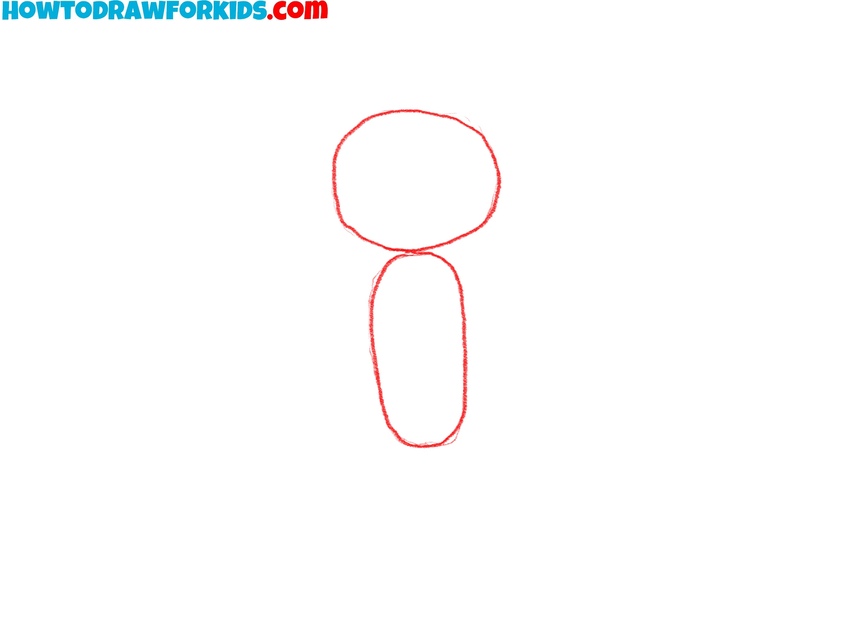
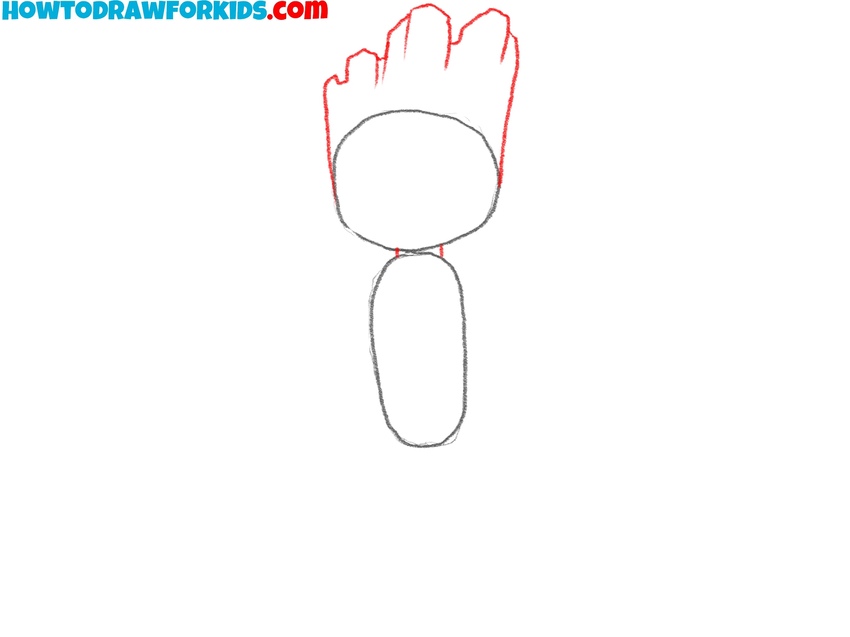
- Sketch the basic structures of the body.
Sketch a rounded oval for the head of Groot and a slightly elongated oval below for the body. Comic book characters often have unique shapes, so use light strokes to make adjustments as needed. To give Groot a simplified and cartoon look, make the head a little disproportionately large in comparison to the torso.
- Illustrate the top of the head.
Draw the top of Groot’s head, creating jagged, uneven lines to represent his wood texture. Don’t aim for symmetry – comic book characters like Groot benefit from natural, organic shapes. In general, comic book artists often use irregular shapes to illustrate nature’s randomness.
- Draw the face of Groot.
Draw the eyes as two simple oval shapes, positioned towards the middle of the head. Above the eyes, draw the eyebrows with short ovals. Below the eyes, draw a small curved line for his mouth, giving him a simple smile. Keep the facial details minimal, as Groot’s design is simple and recognizable.

- Illustrate the arms of the character.
Draw long, curved lines for the arms, extending from the shoulders. Then draw the hands as simple shapes at the ends. For comic characters, limb proportions are often exaggerated for effect, but here, keep the arms slender and tree-like to fit Groot’s appearance.

- Draw the legs of Groot.
The legs of Groot are short and slightly flared at the bottom. This gives him a rooted, solid look fitting for a tree-like character. Keep the shape simple but authentic. Comic characters often have stylized proportions, and here, you can see it very clearly.

- Add bark texture to the head and torso.
To create texture, draw light, slanted lines across the head and torso. First, draw texture on the face using vertical lines of varying length, thickness, and distance. Then repeat the same for the torso using longer lines. These lines mimic the look of tree bark, which is very important to Groot’s character design.

- Texture the arms and legs.
Continue adding texture by drawing more bark lines on Groot’s arms and legs. Use curved, slightly wavy lines that follow the shape of each limb, creating organic look. Vary the length and placement of these lines to give a natural, irregular wood texture.

- Finalize the sketch and erase the guidelines.
Smooth out any rough edges from earlier steps and ensure the lines flow with Groot’s body shape. Apply slightly more pressure on lines, or use a pen or inker for more finished look. This technique is used by comic book artists to finalize the drawing before the coloring process.

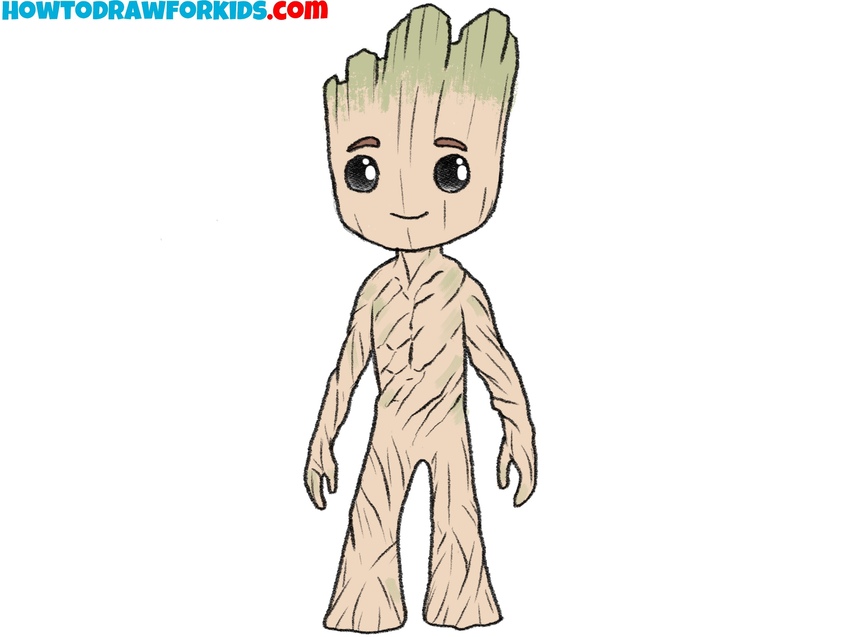
- Color the drawing of Groot.
Use light brown or tan for the body of Groot to represent the wood, with a hint of green on the top of his head to illustrate young bark or moss. Use a darker color for the eyebrows. Color the eyes with black, leaving small highlights in them.
Alternative Drawing Techniques
This tutorial covered the basics of how to draw Groot, focusing on simple shapes and foundational techniques. If you’re interested in further developing your skills, you can try two additional tutorials that provide alternate approaches to drawing Groot. These follow-up tutorials simplify Groot’s design even more, offering different styles and methods to illustrate his unique look in a simple way. Practicing these variations will help reinforce what you’ve learned in the initial tutorial while introducing new techniques suitable for different artistic styles.
Simple Groot Drawing Tutorial
The primary difference between this tutorial on how to draw Groot and the first one is the simplified structure and fewer details in the final appearance. This tutorial shows a chibi or cartoon-style version of Groot, with a larger head and smaller body ratio. The bark texture is minimal, with fewer lines and simplified shapes for features like the arms, legs, and body. The facial expression and overall form are also more rounded.
To draw Groot on this simple way, start with an oval for the head and a smaller, slightly rounded shape below for the body. Add jagged lines on the top of the head to represent the uneven wood texture. Draw two large circles for the eyes and a small curved line for the mouth. Add short, rounded legs extending from the body, then draw small, curved arms on each side.
Begin detailing the bark texture on the head and body with a few light lines to mimic wood. Draw minimal leaf shapes on the shoulders and head. Outline the torso and limbs with simple, rounded shapes to keep Groot’s cartoonish appearance. Finally, add light brown color to the body and a darker brown for the eyes to complete this version of Groot.

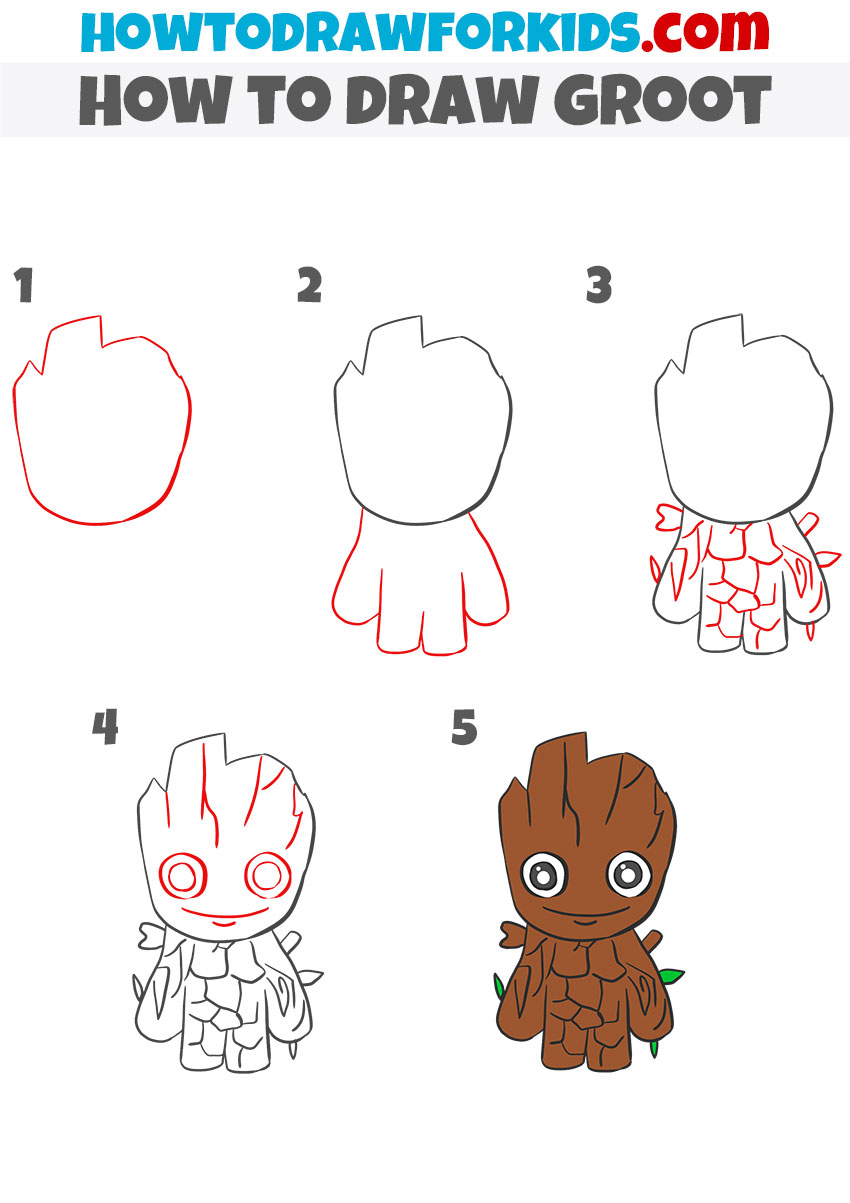
How to Draw Groot for Preschoolers
This Groot drawing tutorial is even more simplified than the previous two, using only basic shapes and minimal texture. Unlike the first tutorial, which included more realistic proportions, and the second, which featured a chibi style with rounded features, this version has a blockier form with simpler lines, fewer bark details, and minimal leaf elements. The head is large relative to the body, with a very simple facial features.
To draw Groot it this super simplified style, begin with an oval shape for the head, adding two uneven points on top to illustrate tree bark. Sketch a simple, rounded shape below for the body with short, blocky legs and arms. Add small branches and leaves along the sides to represent foliage, keeping these elements minimal for ease.
Draw two large circles for the eyes and a simple curved line for the mouth. Add minimal lines across the head and body to create bark texture without overcrowding the drawing. Finally, color the body brown, add green for the leaves, and darken the eyes to complete the drawing of Groot.
Conclusion
This tutorial demonstrated how to draw Groot in three different and interesting styles. Remember, on my website, you’ll find lessons on a variety of topics, especially on comic book characters. Through these tutorials, you can learn to draw Hulk or improve your skills in drawing Iron Man. You can also learn how to draw a galaxy to create a fitting background for your Groot sketch.
To stay updated on the latest drawing tutorials, follow my social media channels. Your participation doesn’t have to end with finishing a drawing; feel free to leave comments and suggestions for future lessons below this one. Your interest helps guide the development of content that aligns with your preferences.