How to Draw Kirby
In this tutorial, I will show you two step-by-step methods on how to draw Kirby, the well-known pink character from classic video games.
How to Draw Kirby: Introduction
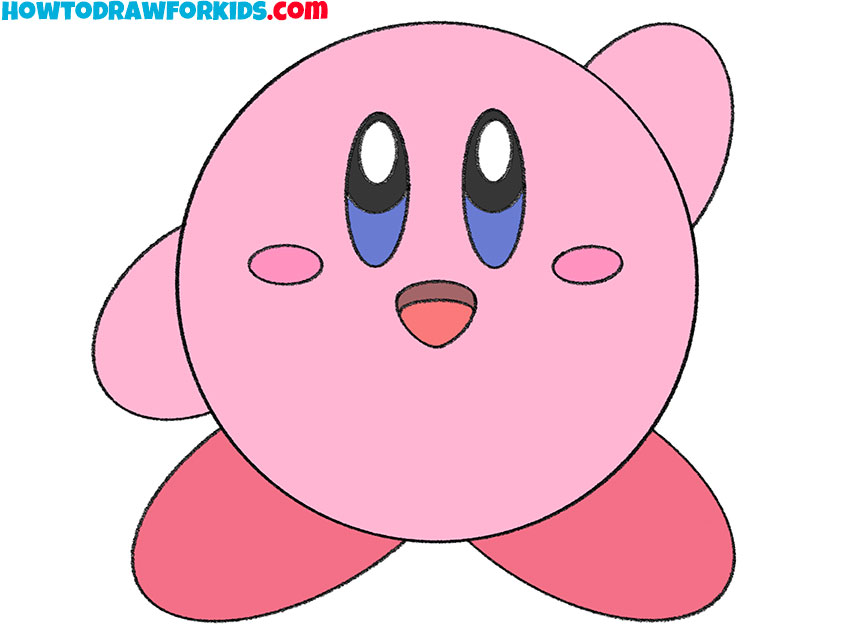
Welcome to another drawing lesson. Today, I will show you how to draw Kirby. If you are interested in video games, then you likely know this character. He is the protagonist of the video game series and is also a popular character in anime and manga.
This Kirby drawing tutorial is designed so that any beginner can easily draw this character. Kirby consists of several circles, making him simple to draw. The arms and legs are small and rounded, and the eyes are oval-shaped.
This is one of my favorite ways to show how to draw, using the most simple shapes and figures so that the beginner artist can learn how to draw a recognizable character. So this will be one of such simple but effective tutorials. Along the way, you will learn how to draw perfect circles and add symmetry to your artworks.
To demonstrate that even simple characters can be drawn in various ways, I’ve included an additional Kirby drawing tutorial at the end of the page. This version is even simpler and follows a different sequence of steps, resulting in a similar Kirby drawing.
Kirby Drawing Tutorial
Materials
- Pencil
- Paper
- Eraser
- Coloring supplies
Time needed: 25 minutes
How to Draw Kirby
- Sketch the basic outline.
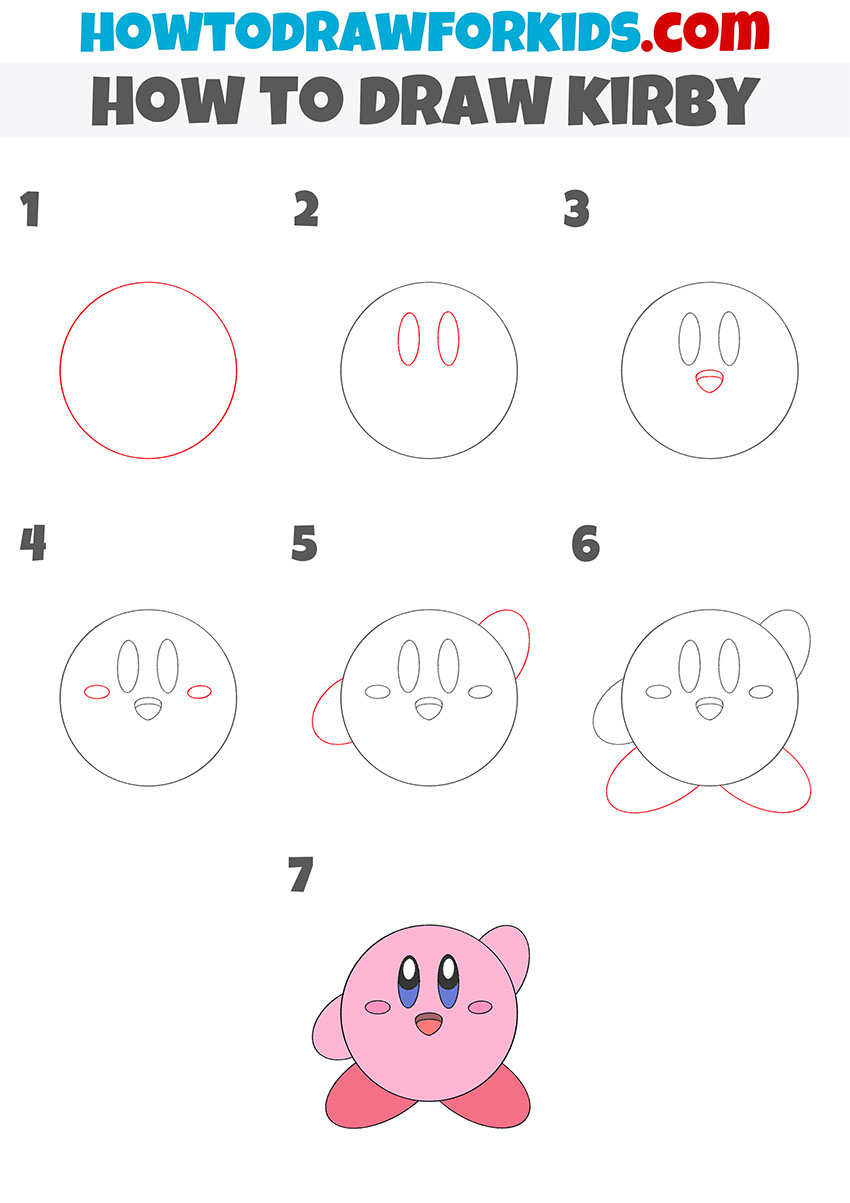
To start drawing Kirby, begin with a large circle. This circle will form Kirby’s head and body, as Kirby’s shape is simple and round. Make sure the circle is smooth and even. Use a light hand with your pencil, as you may want to make adjustments later.

- Illustrate the eyes.
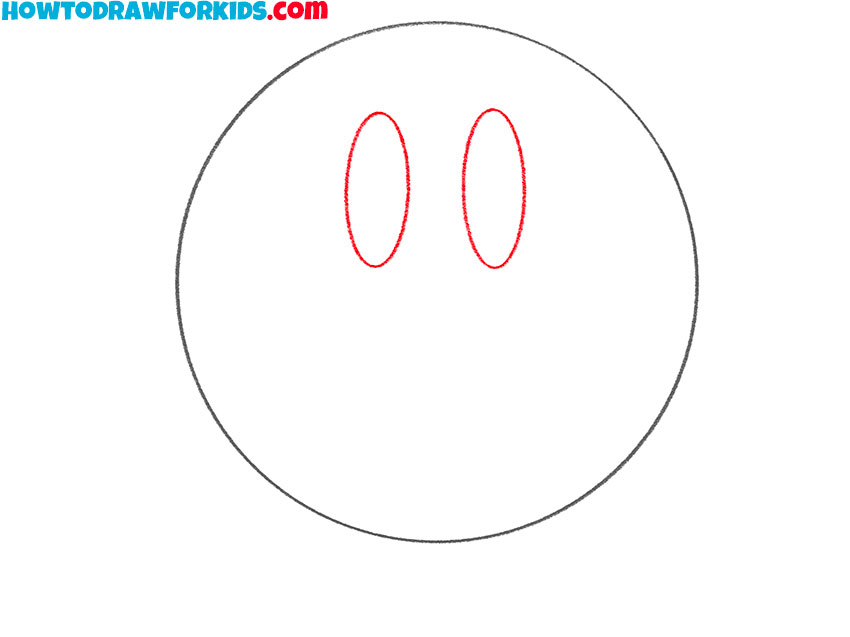
Next, add Kirby’s eyes by drawing two vertical ovals near the top center of the circle. These ovals should be placed very close to each other. The eyes should be taller than they are wide, giving Kirby a recognizable look. You can sketch a horizontal guideline before drawing the eyes for more accuracy.
- Sketch the mouth and tongue.
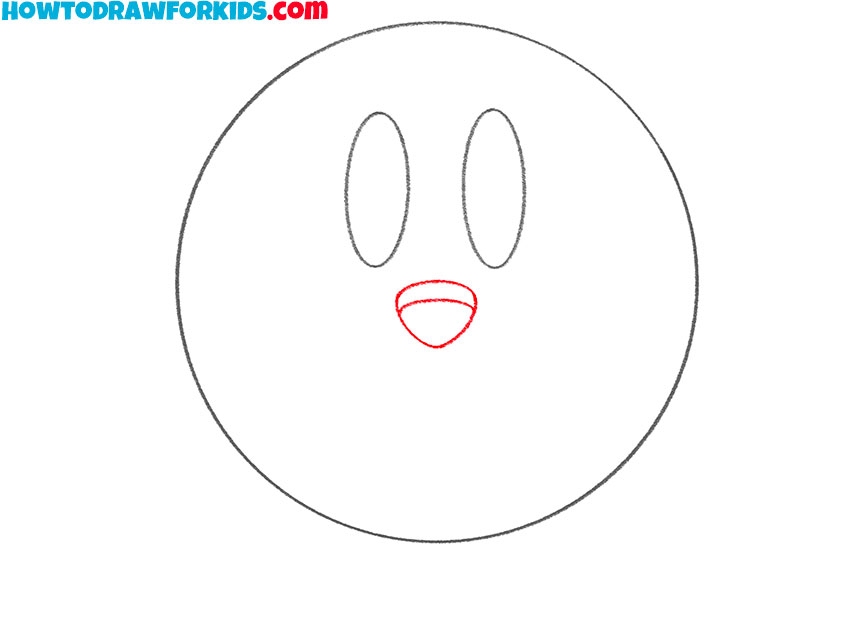
In this step, draw a small, curved triangular shape below the eyes to create Kirby’s mouth. Kirby’s mouth is open in a smiling expression, so draw it as a wide “U” shape with a slight curve at the bottom for the tongue. The mouth should be positioned right at the center of the circle from the first step.
- Sketch the cheeks.
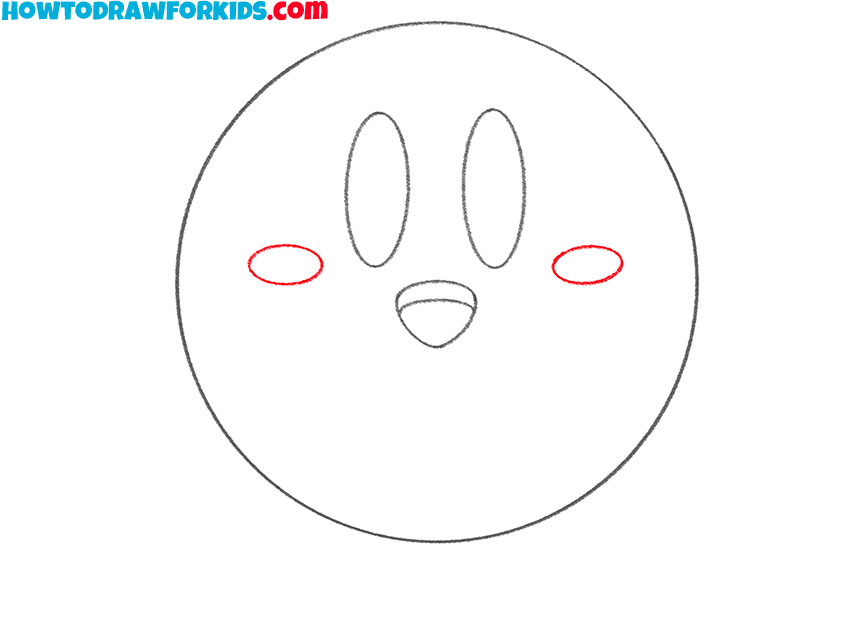
Now, add small oval shapes on either side of Kirby’s mouth to form his cheeks. These ovals are much smaller than the eyes and should be positioned just below and to the side of each eye. Adding these small elements makes Kirby’s face look more recognizable.
- Draw Kirby’s arms.
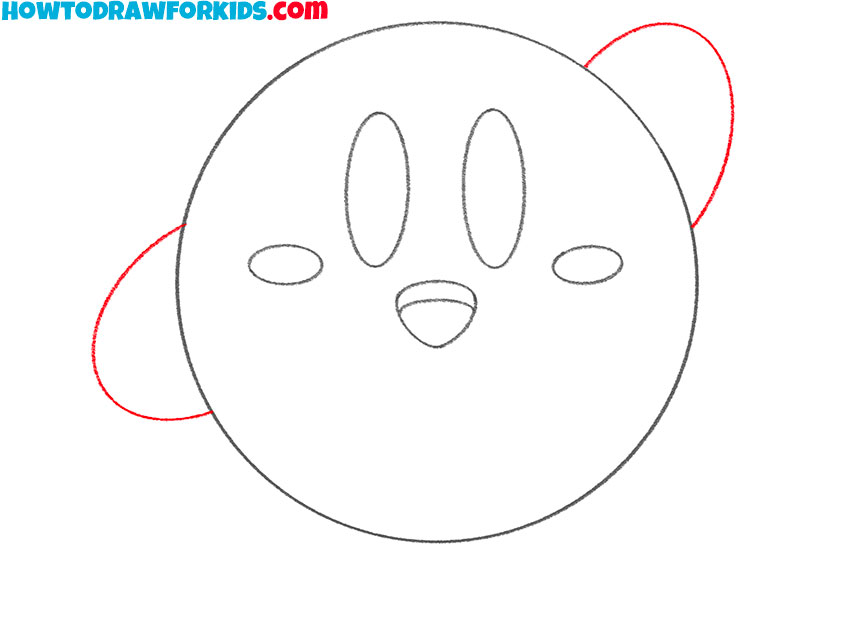
To draw Kirby’s arms, sketch two rounded shapes on either side of his head. Since Kirby consists of only a few parts, his hands are among the few elements that can be positioned with more flexibility. You can draw both hands symmetrically or position them as shown in my example.
- Draw Kirby’s feet.
To illustrate Kirby’s feet, draw two oval shapes at the bottom of the circle. Each foot should be angled slightly outward. The feet are larger than the arms. Positioning the feet in this way helps give Kirby a look, as if he is ready to move or jump.
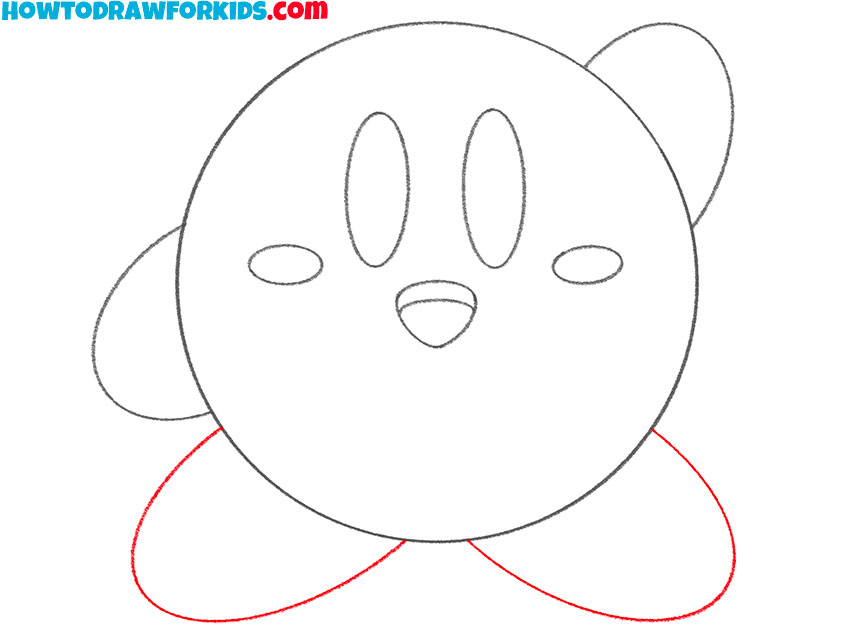
- Complete and color Kirby.
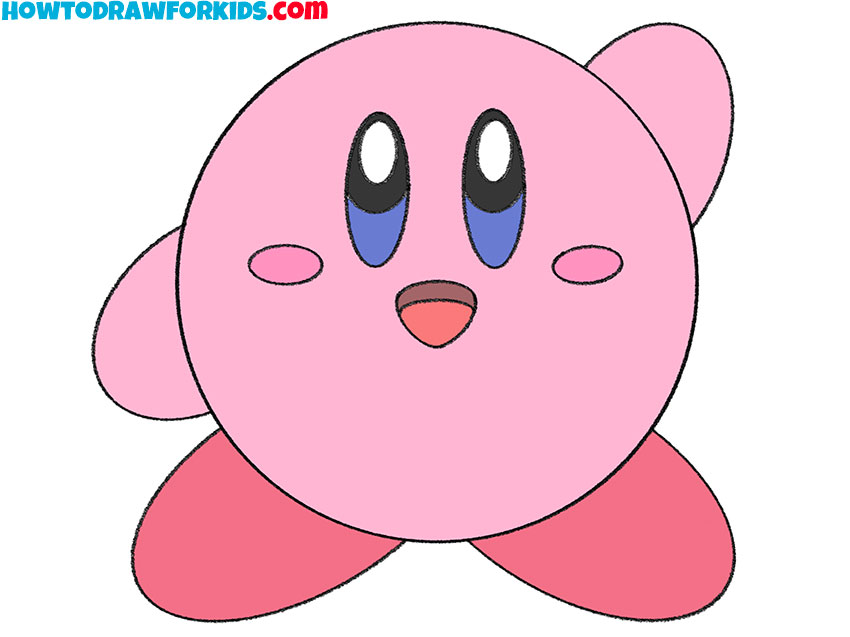
To finish drawing Kirby, outline your sketch with a darker line and erase any unnecessary guidelines. Now, add color to Kirby give him a finished look. Kirby’s body is pink, with his cheeks a slightly darker pink, and his eyes have a gradient of blue and black. His feet are a bright red.
Additional Content
For convenience, I have prepared a PDF file containing a short version of the tutorial. Along with the steps of the tutorial, this PDF file includes additional materials, such as a coloring page, a tracing worksheet, and a grid drawing worksheet. Download the file to access these useful tools at any time.
How to Draw Kirby for Preschoolers
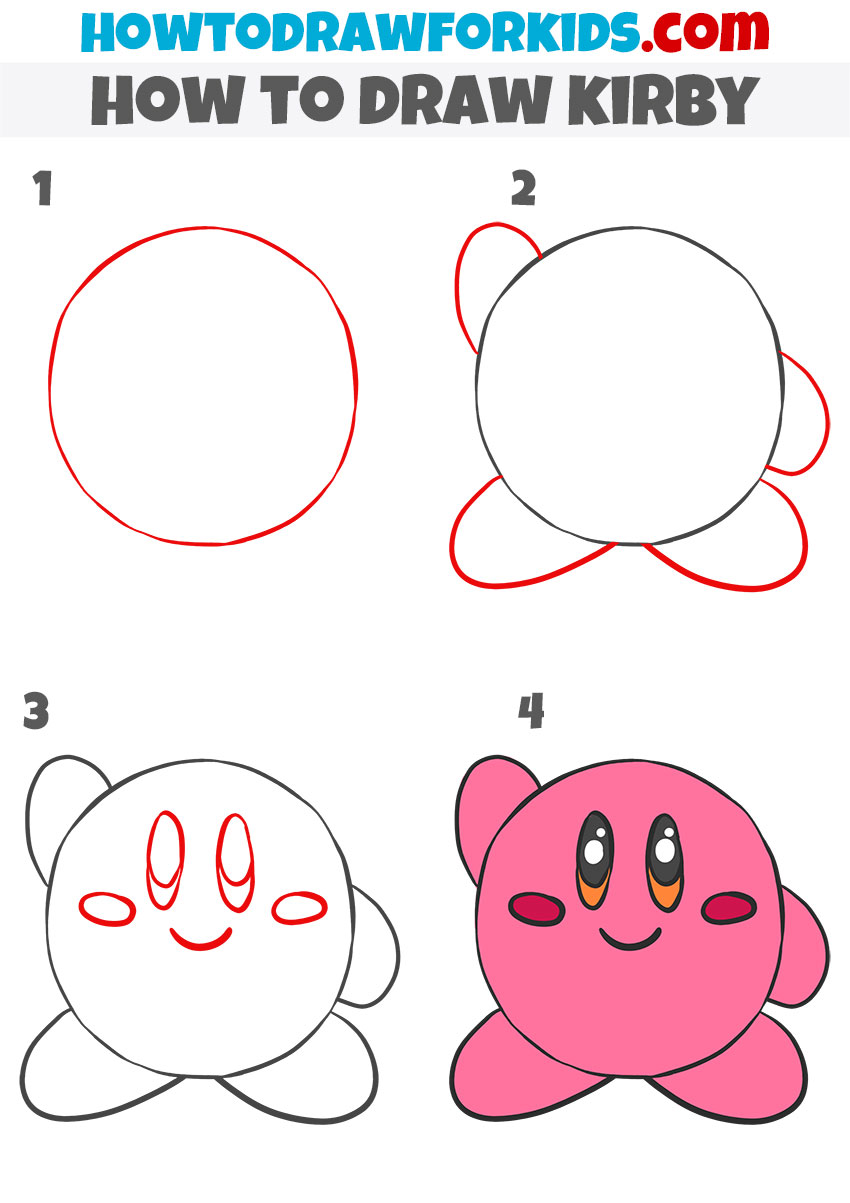
This version of the Kirby drawing tutorial is a simplified approach, suitable for preschoolers. Unlike the first tutorial, it reduces the number of steps and focuses on larger, simpler shapes, making it easier for young children to follow. However, despite using a different set of steps, the result will still be a similar Kirby drawing.
To draw Kirby using this super simplified technique, start by sketching a large circle to form Kirby’s head and body. Next, add Kirby’s arms and feet by drawing small, rounded shapes attached to the sides and bottom of the circle. Position these shapes symmetrically, with the arms on each side and the feet below.
After that, draw Kirby’s face. Place two oval shapes for the eyes near the upper center of the circle and draw a small oval on each cheek to represent Kirby’s blush marks. Beneath the eyes, add a simple curved line for Kirby’s mouth.
Once the outline is complete, go over your lines to define them, erase any extra guidelines, and color Kirby’s body in pink, the eyes in shades of black and white, and the cheeks in a slightly darker pink.
Conclusion
Now our character is complete, and you can see that the Kirby drawing tutorial was straightforward. I hope you enjoyed drawing this funny character and found this the instructions helpful.
Feel free to share your thoughts in the comments and visit other tutorials on classic game characters. In the Games section of my website, you can learn how to draw Mario from classic Nintendo games and how to draw Sonic from classic Sega games.
You’re also welcome to subscribe to my social media channels to stay updated on new content.

