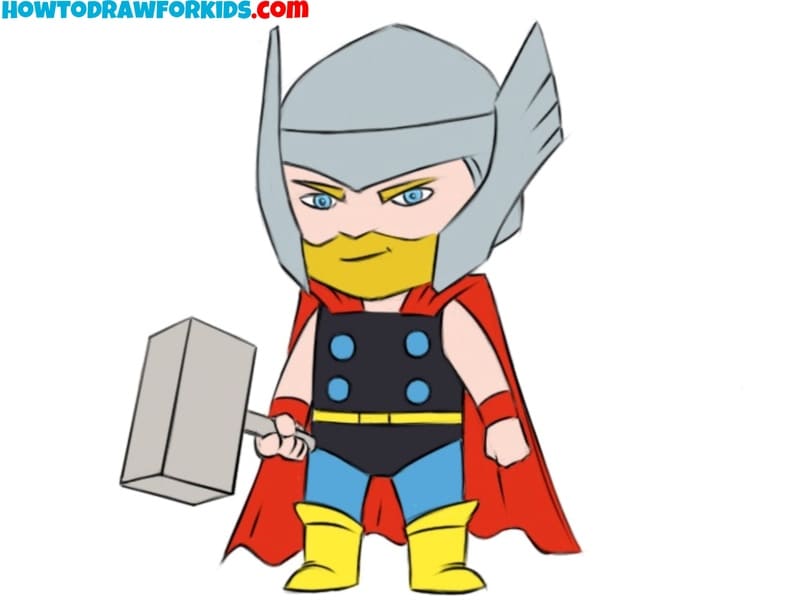
How to Draw Thor
Learn how to draw Thor from the Marvel universe with this simple, step-by-step kid-friendly tutorial and additional instruction.
How to Draw Thor: Introduction
Little by little, I began to develop my section on comic book characters. Today I will tell you how to draw Thor from Marvel Comics.
I chose the classic look of this character which you can see in the comic books of the 70s and 80s.
Additionally, in this tutorial I’ll share some tips on how to color this using different color schemes and how to illustrate this character in different costumes and environments.
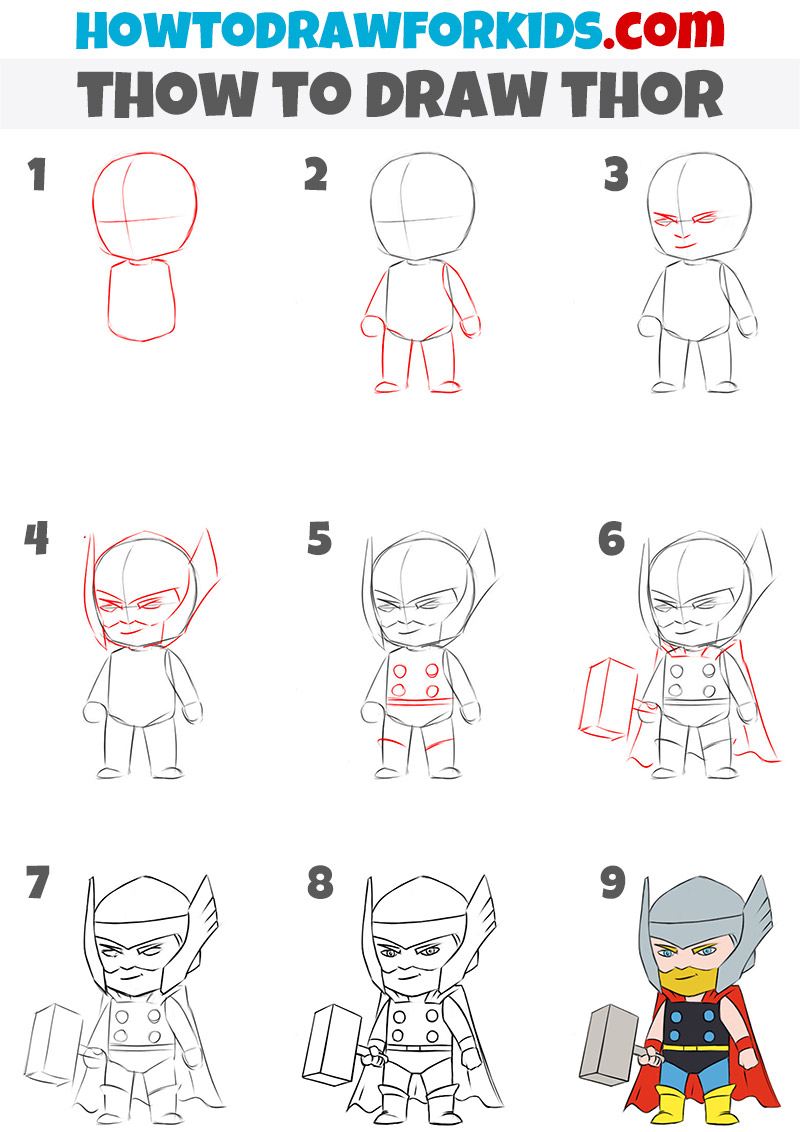
Thor Drawing Tutorial
Time needed: 50 minutes
How to Draw Thor
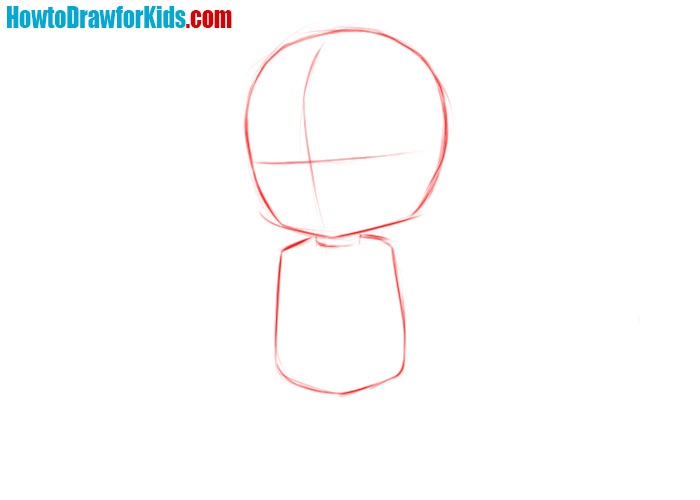
- Outline the head and body of Thor.
Draw an oval shape for the head, and a slightly narrower rectangular shape below it for the body. These two shapes will serve as the foundation for the rest of the character’s structure. Add a vertical line down the center of the head and a horizontal line across its middle, creating guidelines to position facial features.
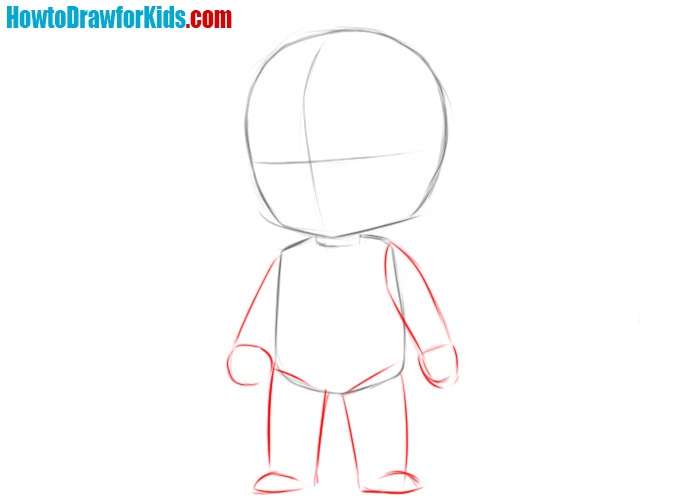
- Draw the arms and legs.
Draw two curved lines extending from the sides of the body, ending in small ovals to form the arms and hands. Then, extend two straight lines downward from the bottom of the body, finishing them with small ovals to form the feet. This step prepares the figure for more detailed work.
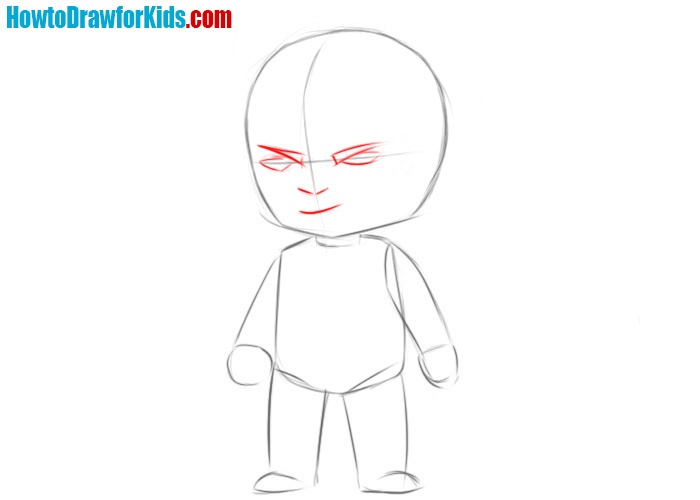
- Draw Thor’s facial features.
Place two slightly angled ovals for the eyes along the horizontal guideline, and add small dots inside to represent pupils. Sketch two slightly downward-sloping lines above the eyes for eyebrows, giving Thor a determined look. Draw a simple mouth below the eyes to complete his facial expression.
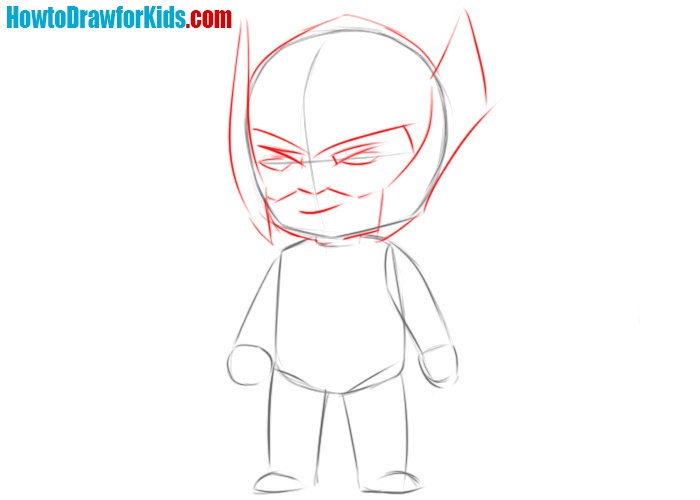
- Add the helmet.
Draw two curved lines extending outward and upward from the sides of the head, forming the wings of the helmet. Connect these with a curved line across the forehead, completing the helmet’s outline. This step contributes significantly to Thor’s superhero identity.
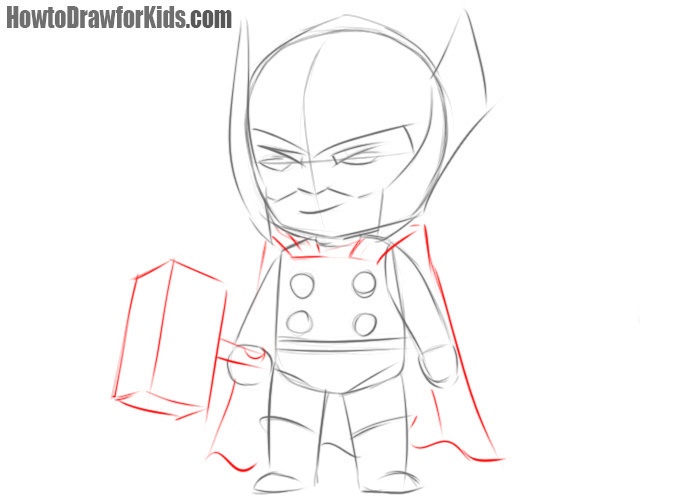
- Illustrate armor and belt.
Draw two rows of circular discs down the front of the torso, representing his chest armor. Below this, add a horizontal line to form the belt. Sketch two vertical lines down each leg to represent his pants, completing the basic costume structure.

- Add the cape and hummer.
Draw a flowing line from his right shoulder down to his feet, depicting the cape’s movement. Then, on the left side, draw a rectangular shape in Thor’s hand to represent Mjolnir, his legendary hammer. Extend a handle downward from the hammer to complete the design.
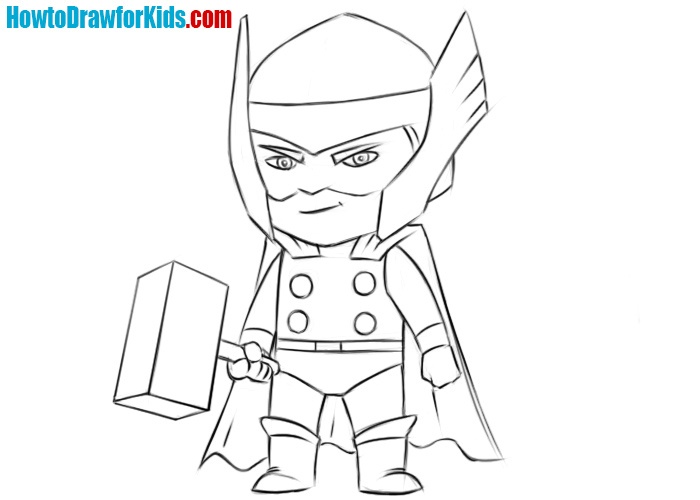
- Refine Thor’s head.
Go over the helmet, facial features, and hair to make them more defined. Smooth out the edges of the helmet, making its wings sharp and distinctive. Clean up any guidelines, leaving only the final details visible. This step polishes the head, giving it a clean and finished look.
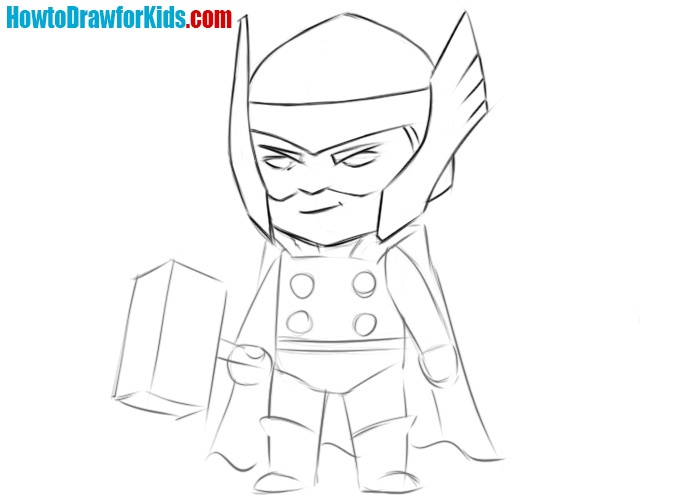
- Refine the body and remove the guidelines.
Outline the armor, cape, and hammer with smooth strokes, making their features stand out clearly. Clean up the arms, legs, and belt, ensuring all elements are recognisable. This step finalizes the overall drawing, leaving a clear and polished outline of Thor’s superhero costume.
- Color Thor.
Use a light gray for the helmet, vibrant red for the cape, and silver for the armor discs. Color the pants blue, and give Mjolnir a gray metallic tone. Add colors for his eyes, hair, and beard to further define his facial features. This final touch completes Thor’s iconic look, making him visually recognizable.
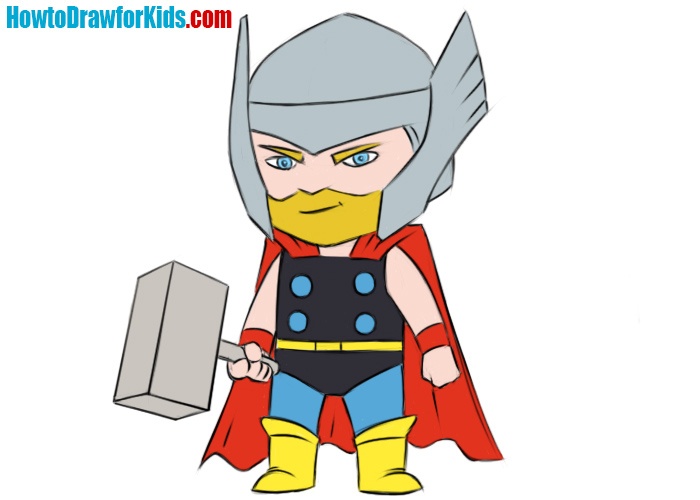
So, I hope that you have a great superhero. Despite the cartoon style, our Thor is very recognizable.
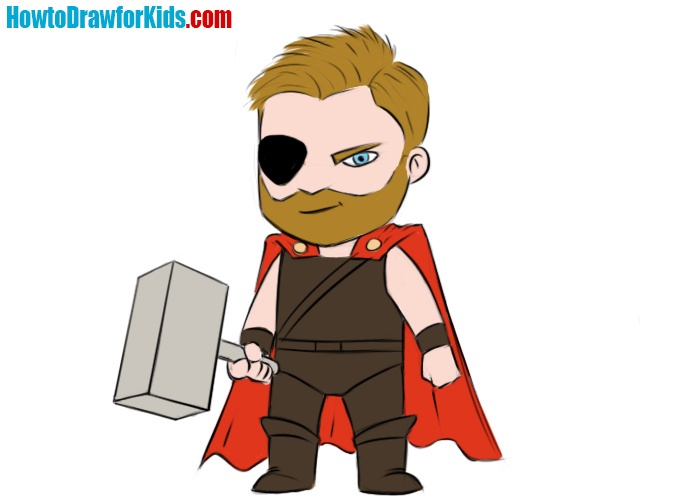
Remember the appearance of Thor from the movie Thor: Ragnarok? You can easily draw the same hero with the help of my lesson. You only need to paint another armor and eye patch.
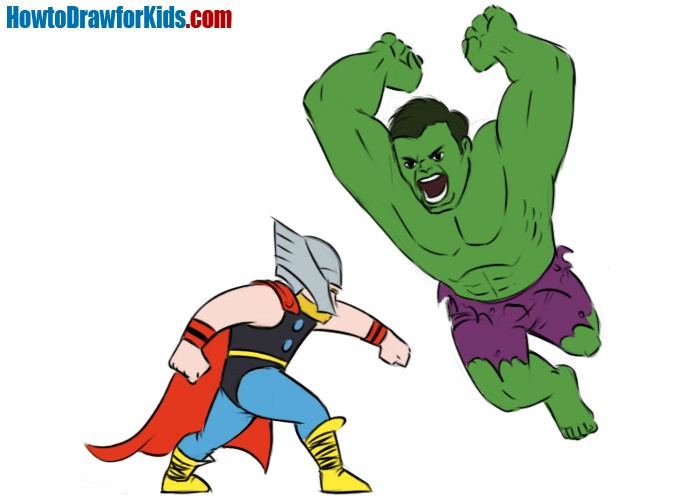
And another small scene from the iconic fight of Thor against Hulk. This is not only a comic book classic, it is also a scene from a famous movie.
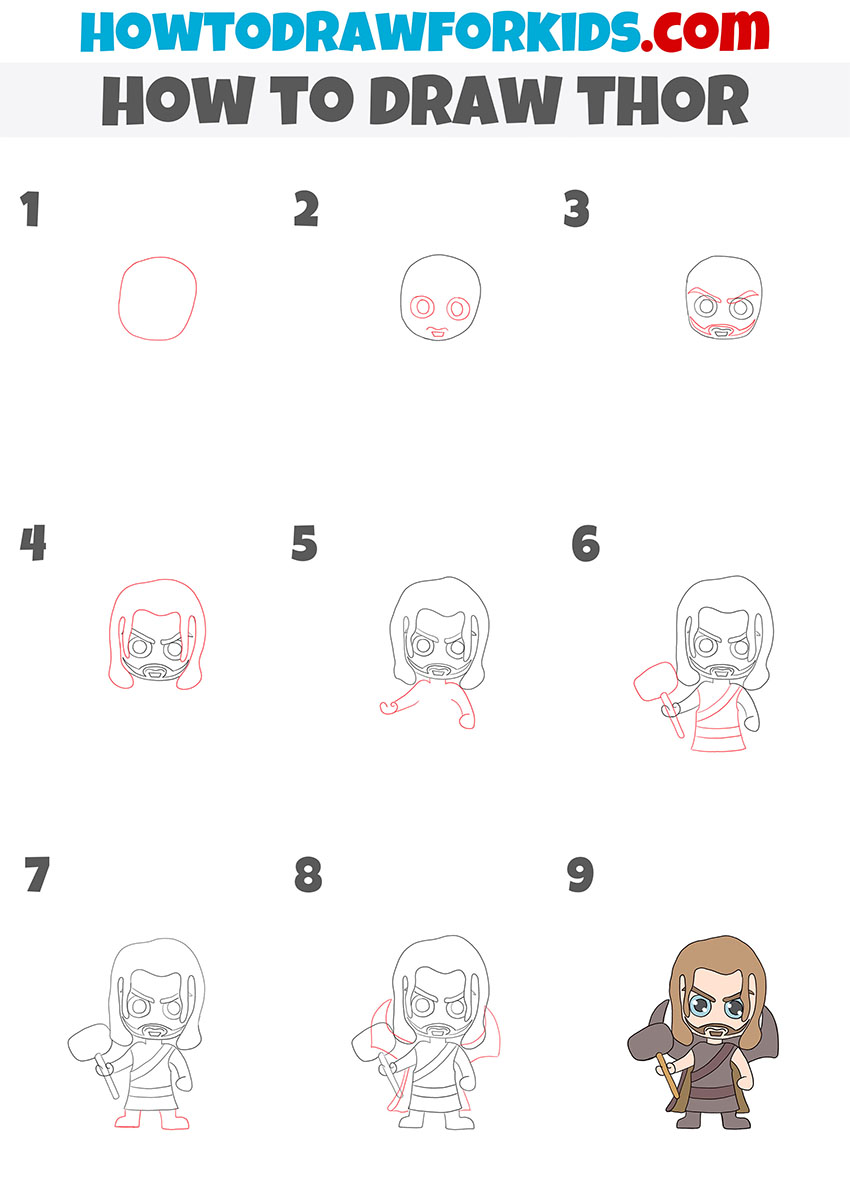
How to Draw Thor: Additional Method
This additional tutorial focuses on a simplified method to draw Thor. Compared to the first tutorial, this version illustrates basic shapes and clearer, more simple steps, making it ideal for kids. The distinctive features of this tutorial include its simplicity and the cartoonish appearance of Thor, which differs from a little more comic-book depiction in the original tutorial.
To draw Thor, start by sketching a rounded head shape. Add two large circular eyes and a small mouth. Define the face further by drawing expressive eyebrows and a beard. Next, draw Thor’s hair framing his face, followed by his body with simple lines.
Add his arm holding the iconic hammer, and sketch the rest of his outfit with minimal details, focusing on the basic shapes. Complete the figure by drawing his legs and feet. Finally, add any additional details like the hammer’s handle and shading to finish the drawing.


good job
Thanks, appreciate it.
Very cute
Thank you!
the draing was so good the colour was also good
Glad you think so, thanks.
U tried very helpful
Happy this tutorial was helpful for you.