How to Draw a Cube
Today, I want to present my detailed tutorial on how to draw a cube. This simple geometric shape is one of the most important subjects for mastering the representation of three-dimensional objects in art. My method is carefully designed to help beginners understand and grasp the fundamentals of perspective through a series of clear and simple steps.

How to Draw a Cube: Introduction
This lesson on how to draw a cube is designed to lead you smoothly from basic techniques to creating a finished, solid three-dimensional form. Drawing a cube is one of the main skills that acts as a foundation for all three-dimensional drawing.
Any artist should be able to create three-dimensional geometric figures on paper. And one of the most important exercises that all students of art schools and universities master is drawing a cube.
This exercise helps young artists understand how volume works in fine art and how to recreate it on paper. How to create volumetric drawings on paper using simple and flat lines. And how the theory of light and shadow helps us in this matter.
Cube Drawing Tutorial
Materials
- Pencil
- Paper
- Eraser
- Coloring supplies
Time needed: 20 minutes
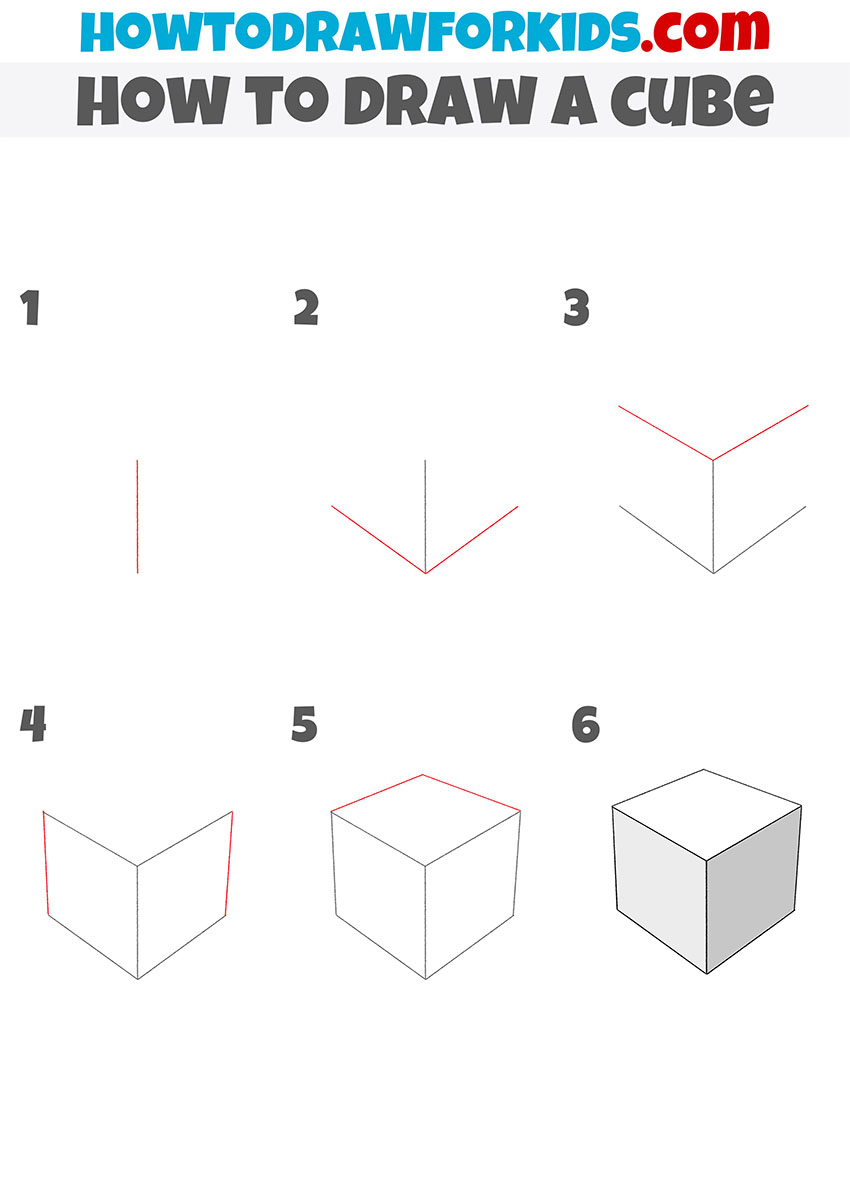
How to Draw a Cube
- Draw the line of the closest edge.
Begin by drawing a vertical line in the center of your paper. This line represents the closest edge of the cube to the viewer, serving as the anchor for the rest of the structure. Ensure the line is straight and even, as it forms the basis for aligning other edges.

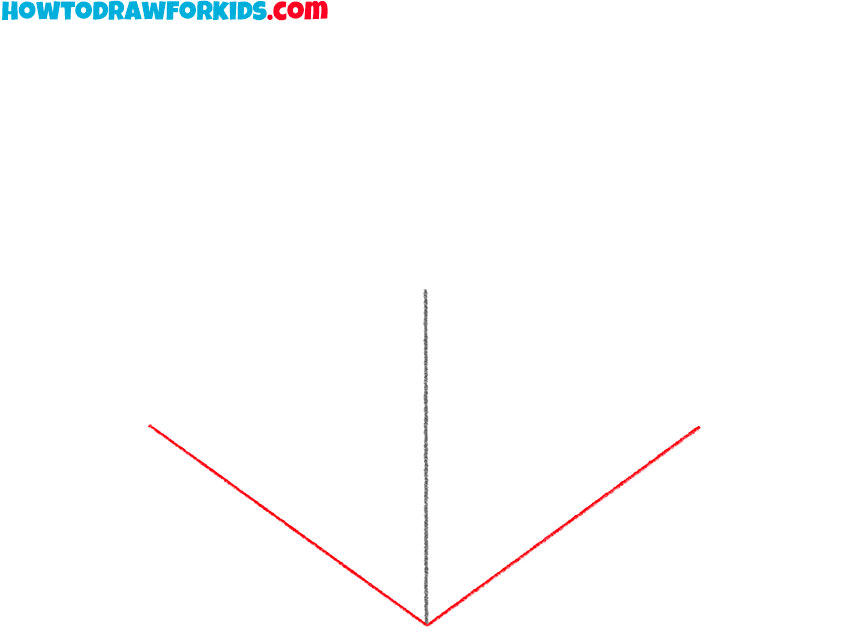
- Draw the bottom surface of the cube.
Next, draw two diagonal lines extending outward from the bottom end of the vertical line. These lines should form a symmetrical V shape, each angling away at roughly 45 degrees. This step establishes the front face of the cube, giving it a foundational perspective.
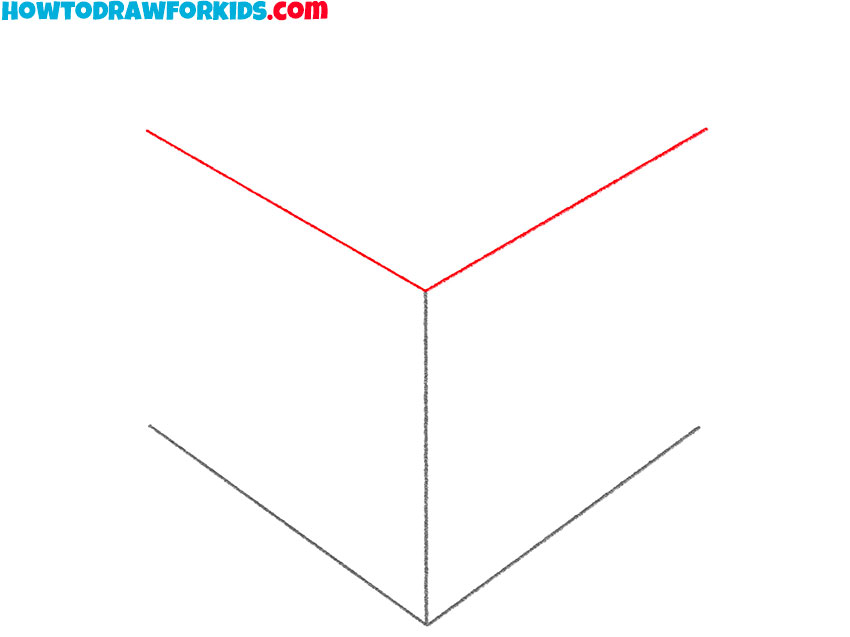
- Add the top edges.
Then, draw two diagonal lines extending from the top end of the vertical line, matching the angles of the bottom lines. The lines should also extend an equal distance as the bottom lines, creating the illusion of depth and perspective in the drawing.
- Illustrate the side edges.
To create the side faces of the cube, draw two vertical lines connecting the ends of the diagonal lines. One vertical line should connect the top and bottom ends of the left diagonals, and the other should connect the ends of the right diagonals.

- Draw the back edges.
Extend the depth of the cube by drawing two more diagonal lines connecting the ends of the front diagonal lines to each other. These lines represent the far edges of the cube and complete the top surface. Now, examine your cube drawing and correct any mistakes if there are any.

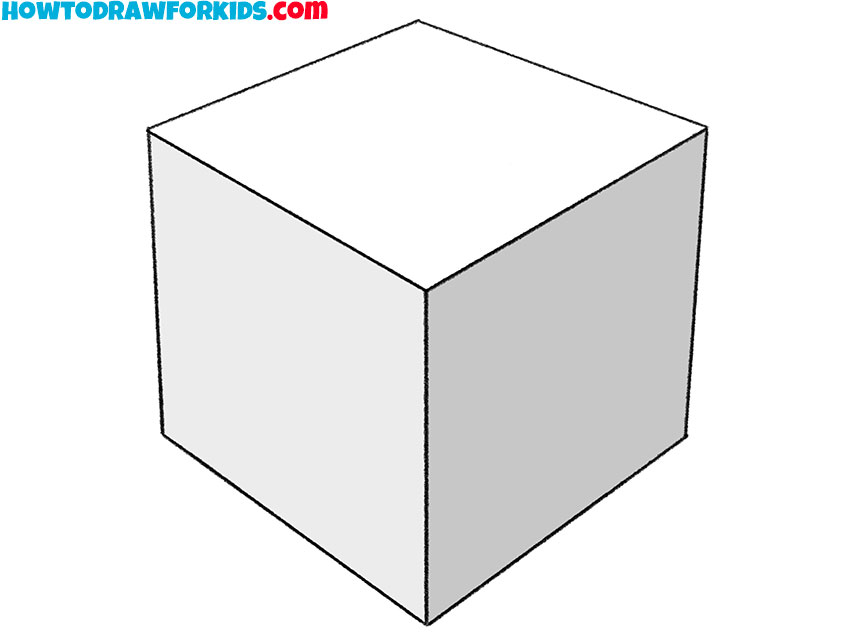
- Add lights and shadows to your cube.
To finish, add shading to the cube’s faces to give it depth and realism. Shade the right and bottom faces to suggest a light source from the upper left, enhancing the three-dimensional perspective. Adjust the shading intensity for a smooth gradient, emphasizing the cube’s volume.
Additional Content
To ensure that every budding artist has the opportunity to learn how to draw a cube, I have put together a free, downloadable PDF guide. This file is a condensed version of our full online tutorial, designed for ease of use and accessibility.
This PDF is a guide and a companion for those times when you wish to disconnect and engage deeply in drawing practice.
Download it onto your tablet or laptop, or print it out for a physical copy that can accompany you wherever you go – no internet needed. With this guide, you’re ready to continue honing your drawing craft wherever you may be, with or without Wi-Fi.
How to Draw a Cube: Alternative Methods
As part of my commitment to providing you with a well-rounded and meaningful art education, I’ve developed several alternative techniques for drawing a cube, each designed to challenge your skills and expand your artistic perspective.
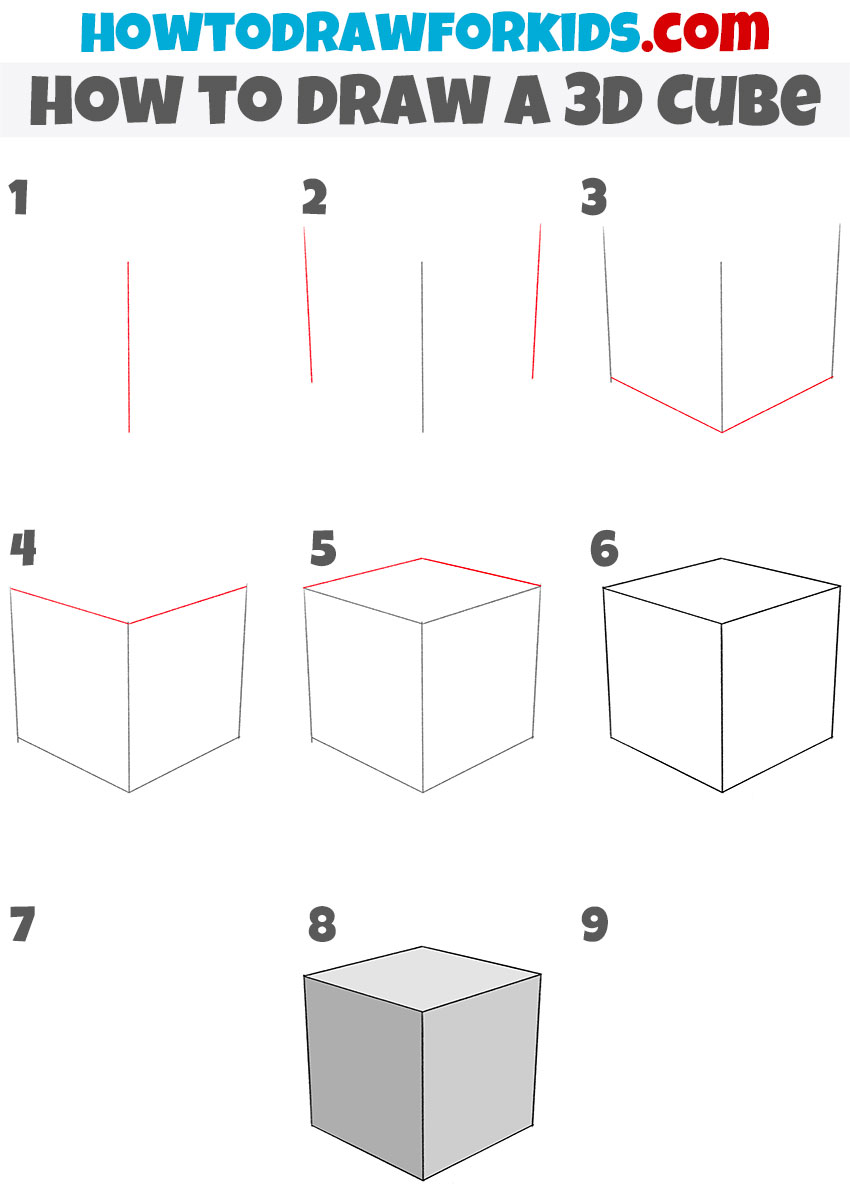
How to Draw a 3d Cube
This tutorial on how to draw a 3D cube uses a noticeably different geometric method compared to the basic cube tutorial. The key difference lies in the sequence of drawing the edges.
To follow this method and learn how to draw a 3D cube, sketch a straight vertical line for the front edge of the cube. Add two more angled lines on either side, slanting outward to begin shaping the front face. Connect the lower ends of these lines with a horizontal line to form a cornered base. Then, draw vertical lines upward from each endpoint to create the cube’s sides.
Close the top with two horizontal lines to form the upper edges, and connect the top corners with a final slanted line to complete the top face. Outline the entire shape with clean, dark lines to finalize your cube. To finish, shade the cube’s sides with different tones of gray to emphasize the 3D effect. It is this difference in lights, shadows and highlights that will give your 3D cube drawing a realistic look.
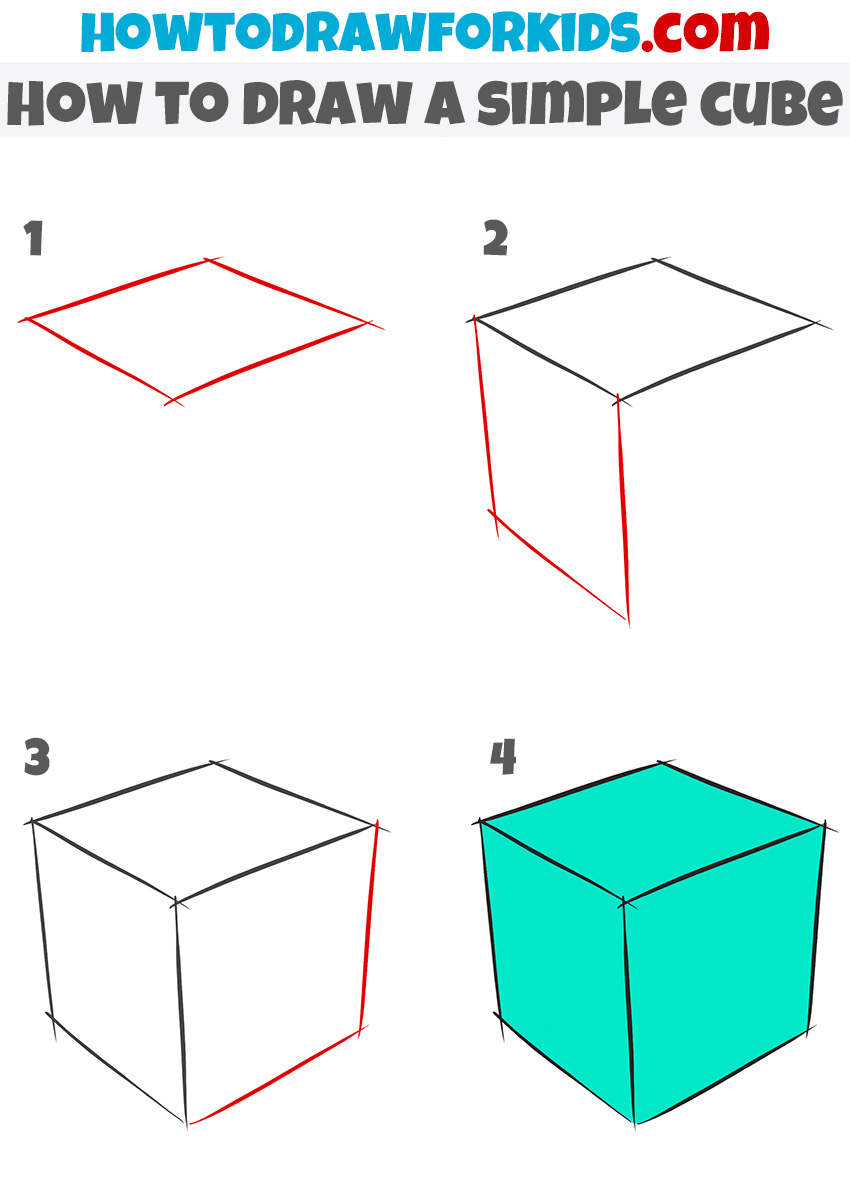
How to Draw a Simple Cube
In just four simple steps, this tutorial will guide you through the process of drawing a vibrant, colorful cube that appears to leap off the page. The first step lays the groundwork with a diamond shape, which sets the stage for a dynamic perspective. This foundational form is crucial as it determines the cube’s orientation in space.
Next, we anchor our shape in the third dimension by extending vertical lines downward from each corner of the diamond. These lines are the pillars of our cube, providing the necessary depth. The third step connects these lines at the base, closing the form and truly defining the cube’s volume.
And at the fourth step you add colours. You can live your drawings like this or add some shadows and highlights.
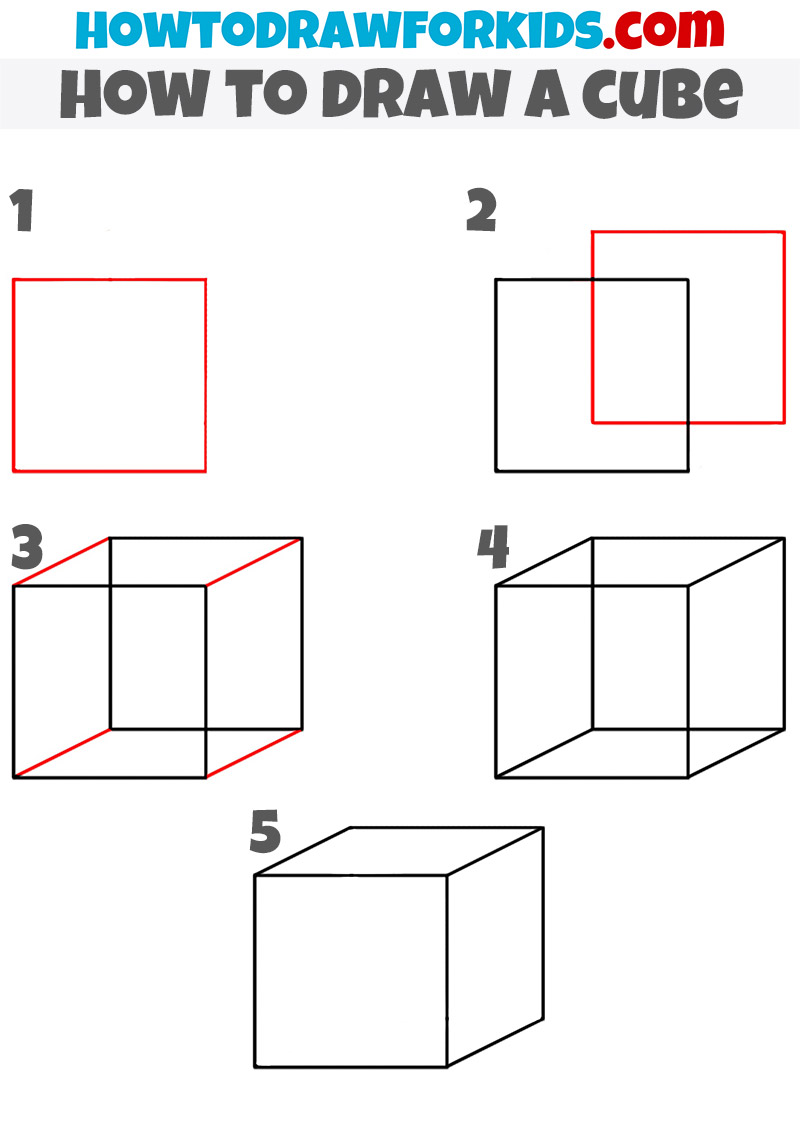
How to Draw a Cube Without a Perspective
Now let’s look at the simplest way to draw a cube that you can think of. This method becomes even easier if you draw this cube in a checkered notebook. But I still recommend not using auxiliary lines so that the drawing process sharpens your artistic skills.
Begin by drawing a square, ensuring all sides are equal and all angles are right angles. This square forms the front face of the cube. Carefully draw and check its symmetry and proportions, making adjustments if needed, as this will define the final appearance of your cube. Now draw a second square, slightly offset to the right and above the first. This second square should be of equal size, representing the back face of the cube.
Connect the corresponding corners of the two squares with straight lines, forming the cube’s edges. Examine the entire drawing to ensure all lines are straight, parallel, and proportional. Erase any unnecessary lines and guidelines used during the initial steps, leaving only the cube’s essential structure.
Conclusion
As we conclude our cube drawing tutorial, I want you to visit other pages on my website, which is full of different drawing tutorials. Why not to try your hand at sketching a tree branch, or illustrate a cute Corgi?
To ensure you’re up-to-date with the latest drawing lessons and content, follow me on social media. Your participation enriches our community, so please, share your thoughts and requests in the comments section below the lesson. Your suggestions fuel my inspiration, and they might just be the subject of my next tutorial.


Thankyou this is very helpful!😁😁😁
Thanks for taking the time to write. Great to hear that!
This is really good I can draw everything
Sounds great, Anna – it’s nice to hear you’re confident with your drawings now.
Thankyou this is very helpful!???
Happy to know it was useful for you. Thanks for visiting the site!
It really helped with my art exam. I am in grade 4 . Iam 8 years old.
Very good, Gabriella!