How to Draw a King
In a very simplified and cute style, I’ll now show you how to draw a king step by step with all the classic royal attributes.

How to Draw a King: Introduction
This king drawing tutorial will guide you through a simple sequence of steps to create a complete royal figure. You’ll learn how to outline the head, crown, and clothes and make all these parts simple yet look authentic.
The entire tutorial is based on very simple geometric shapes and lines. It follows the same structure as my basic lesson on how to draw a person but adds several distinctive features, such as a crown and royal clothing.
To make the process as simple as possible, I used only the most basic set of details, but you can add a royal scepter or other elements if you wish.
Kings have existed in many countries around the world and have been depicted in various ways depending on the culture or medium.
To help you expand your drawing skills, I’ve prepared a bonus tutorial on drawing another version of a king, which you’ll find at the end of this lesson.
King Drawing Tutorial
Materials
- Pencil
- Paper
- Eraser
- Coloring supplies
Time needed: 35 minutes
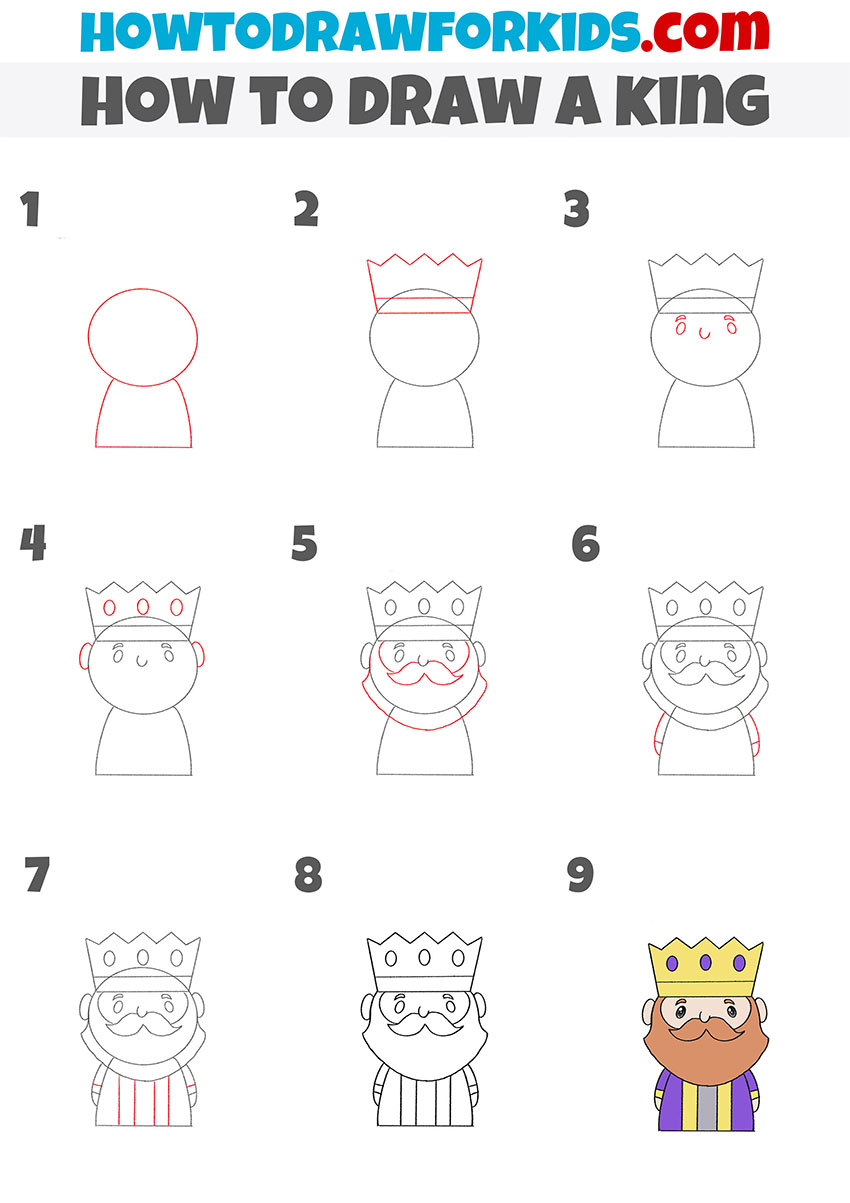
How to draw a king step by step
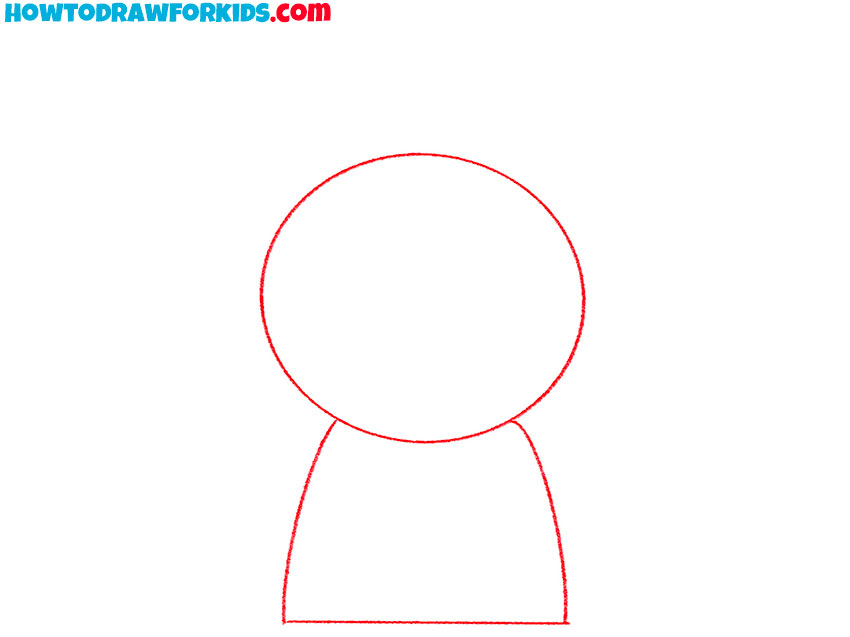
- Build the main head and robe forms.
A simple base helps proportions look consistent before adding royal details. Sketch a large circle for the king’s head. Under it, draw the torso as a short trapezoid with rounded corners; its top slightly tucks under the head. Keep both shapes centered.
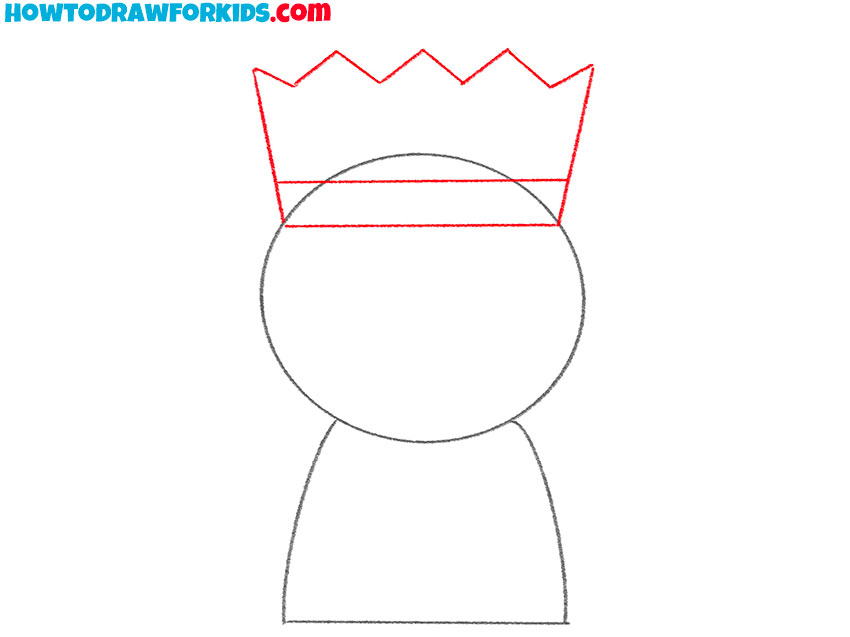
- Sketch the crown outline.
Across the upper third of the circle, draw a straight crown band. Above it, draw the king crown silhouette as a row of three or five tall triangular points. This simple shape establishes the classic monarch crown, a recognizable symbol in medieval royalty and fairy-tale illustrations.
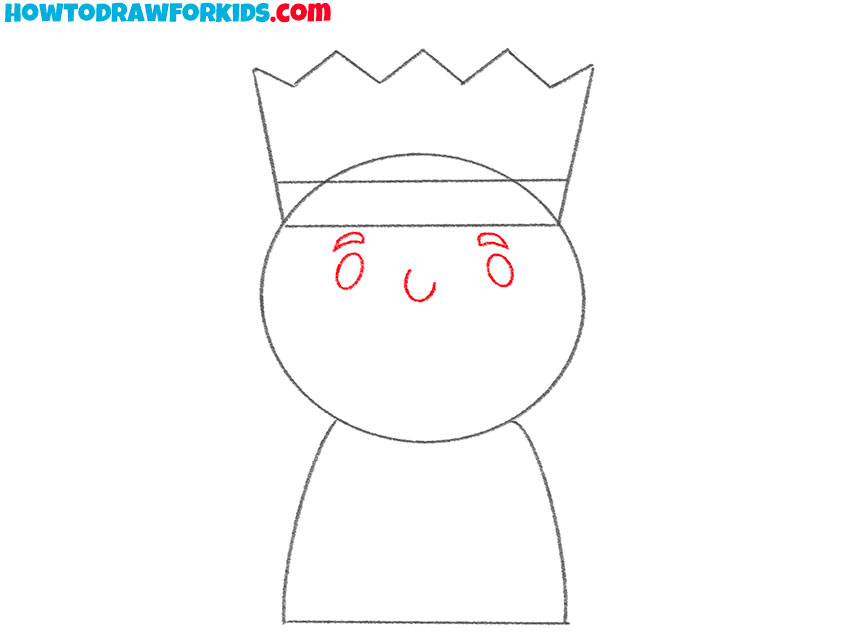
- Draw the king’s facial features.
Now, draw the eyes as two small filled ovals sitting just below the crown band. Between and slightly below them, sketch a tiny curved nose shaped like a comma. Under the nose, add a short smiling mouth.
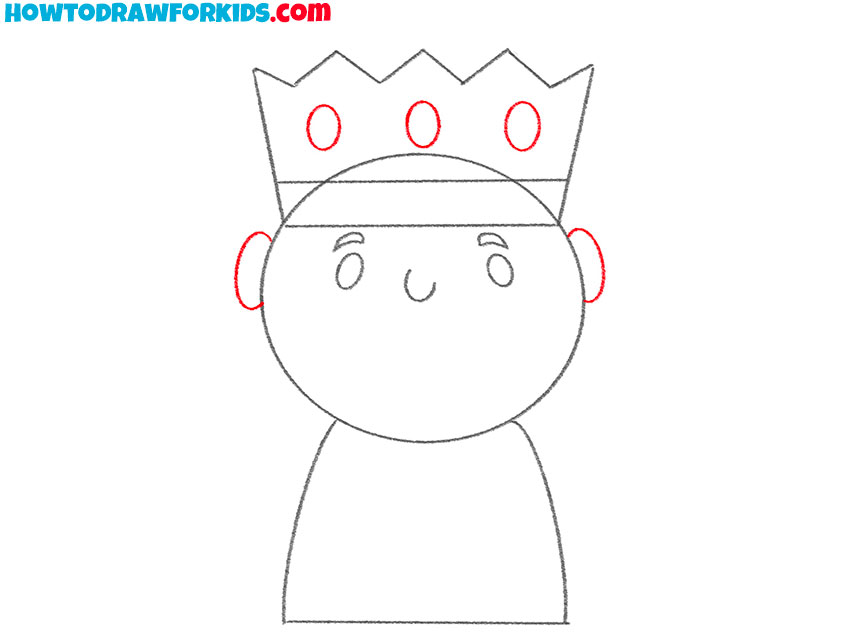
- Add the crown jewels and ears.
Small ornaments make the crown look finished. On the crown band, draw jewel settings as narrow vertical ovals across the band. At the sides of the head, add simple rounded ears whose tops align with the eye level. Indicate tiny inner-ear curves if desired.
- Sketch the mustache and beard.
Start near one cheek and draw the wide curled mustache as two smooth S-shaped halves meeting under the nose. From beneath the ears, outline the large and rounded beard that follows the jawline and dips below the chin before rising to the opposite side.
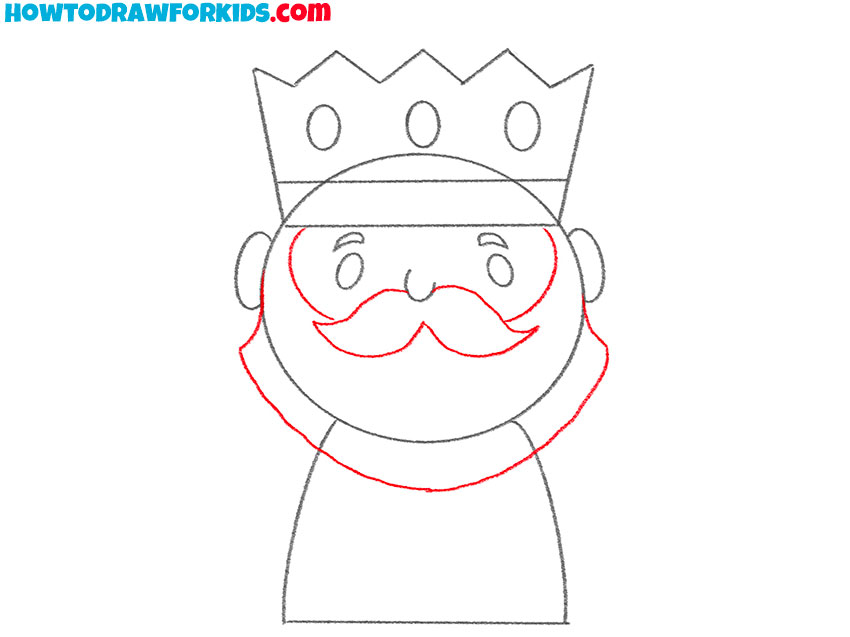
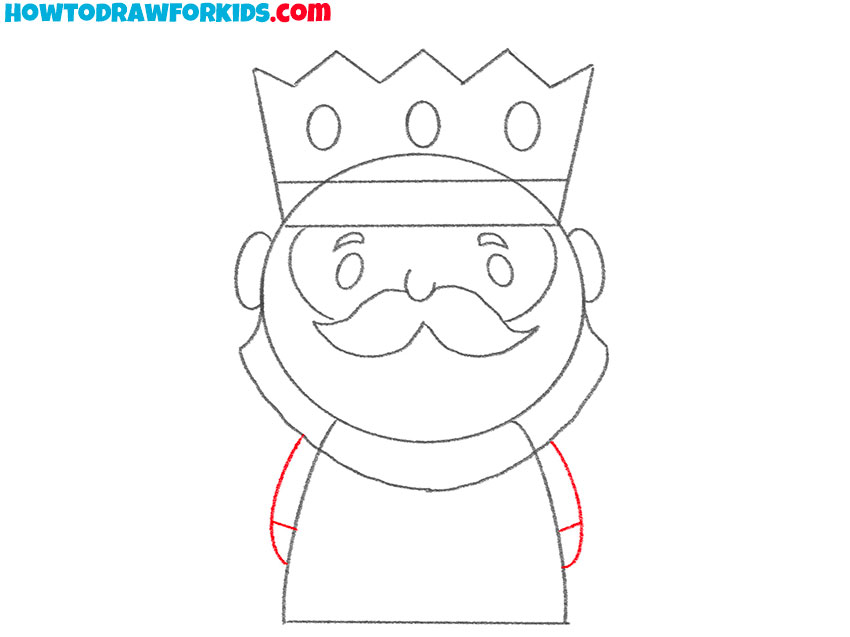
- Draw the hands of the king.
From each side of the torso, sketch the curved and simple sleeve shapes as half-ovals that attach just under the beard. You can cap each sleeve with a short cuff line. At the end of each arm, draw a hand as a short and simplified form.
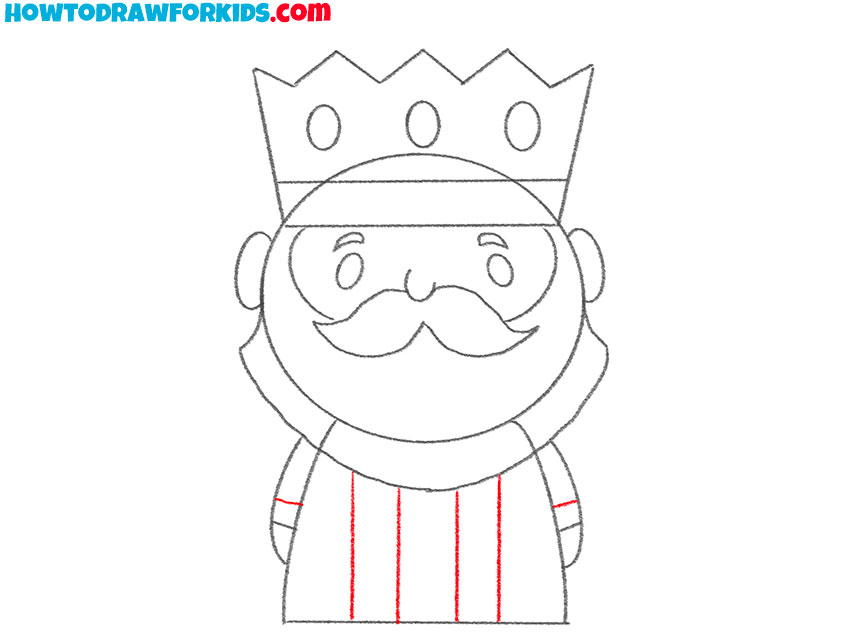
- Sketch the decorative robe panels.
Down the front of the torso, draw long vertical stripes to divide the robe into panels. Keep the center stripe aligned with the head’s center. On each sleeve, add two narrow horizontal bands to convey cuffs or trim. These panels will later alternate colors, imitating decorative fabrics or royal vestments.
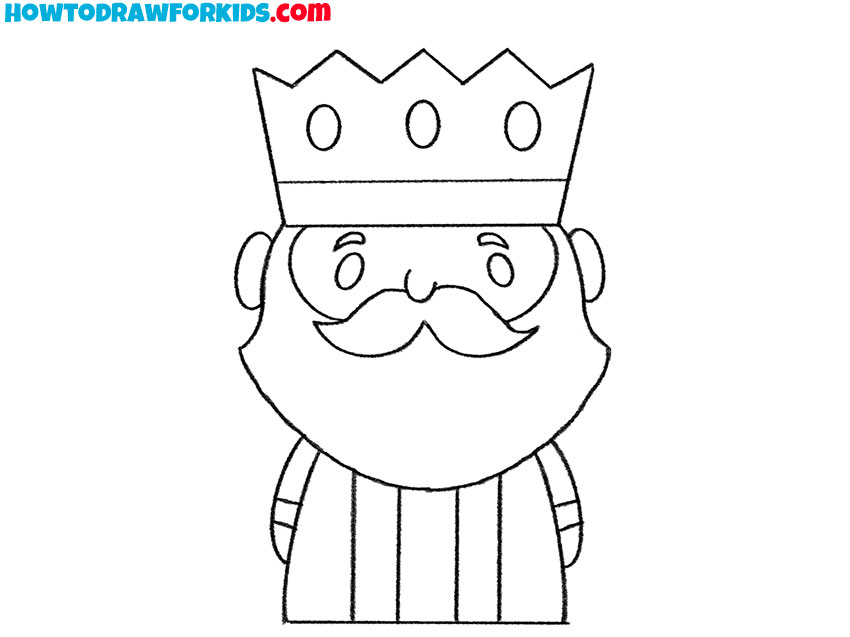
- Clarify all main shapes of the king.
Trace the final outer lines of crown, head, beard, sleeves, and robe. Then erase construction extras, removing the head circle segments hidden under the crown band and beard, delete torso edges concealed by the beard and sleeves.
- Add royal colors and tones.
Use simple flats to separate forms, painting the crown a bright yellow or gold and fill the jewels with contrasting purple tones. Color the face and ears with any skin tone. Shade the mustache and beard with a warm brown or ginger to match the sample. For the robe, alternate deep violet and rich gold on the vertical panels.

Additional Content
To make this king drawing tutorial more practical, I’ve created a downloadable PDF that combines all the main steps in one concise format.
It’s made for those who prefer to draw without distractions or want to keep the material for future reference.
Inside the file, you’ll find simplified step images, easy tracing sheet, and a grid version for practicing proportions. You can print it or use it digitally to review the key stages of the drawing and refine your skills at your own pace.
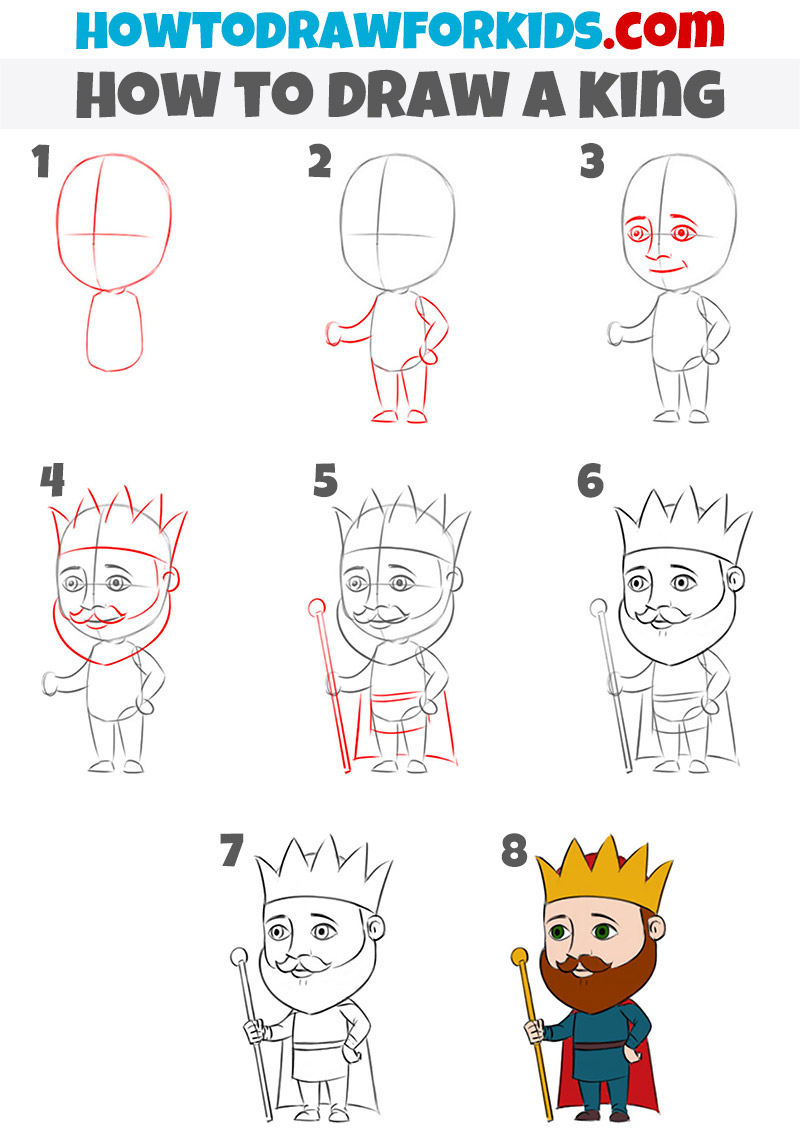
How to Draw a King: Alternative Technique
This alternative version of the king drawing tutorial shows another way to depict the character in a simplified cartoon format. The approach keeps the proportions easy to follow but adds a few extra details.
The drawing starts with the same basic shapes used in the main lesson. You’ll first outline the head and body, then refine the form with smooth lines and add facial features.
In the final steps, you can enrich the image with small details like a royal scepter or additional decorative elements.
Conclusion
This easy king drawing guide is complete, but you can continue practicing with other lessons on the website. Try drawing a queen to complement the knowledge gained in this lesson or sketch a princess to complete the royal family.
New tutorials appear regularly, so follow the updates on social media to stay informed. Your comments and feedback help determine which topics will be covered next, so feel free to share your thoughts below. Keep drawing and building your skills step by step.