How to Draw a Hedgehog
Here, you can learn to draw a hedgehog. Although the style is cartoonish and simple, if you follow all the steps accurately, your drawing will come to life and appear realistic.

How to Draw a Hedgehog: Introduction
In this tutorial on how to draw a hedgehog, I will show you how to illustrate a simplified version of this animal. There will be few details and complex shapes. Drawing a hedgehog offers an opportunity for young artists to focus on developing a range of essential skills.
As an art teacher, I often stress that learning to observe and recreate the natural world is a really important skill in any form of art. The hedgehog, with its distinct textures and simple yet recognizable shape, presents a subject that motivates careful observation, attention to detail, and deliberate practice.
One of the most distinctive aspects of a hedgehog is its spiny back, and this tutorial will demonstrate how to illustrate this feature. The ability to focus on what makes a subject immediately identifiable while not overcomplicating the drawing is a really important skill for any artist.
Hedgehog Drawing Tutorial
Materials
- Pencil
- Paper
- Eraser
- Coloring supplies
Time needed: 40 minutes
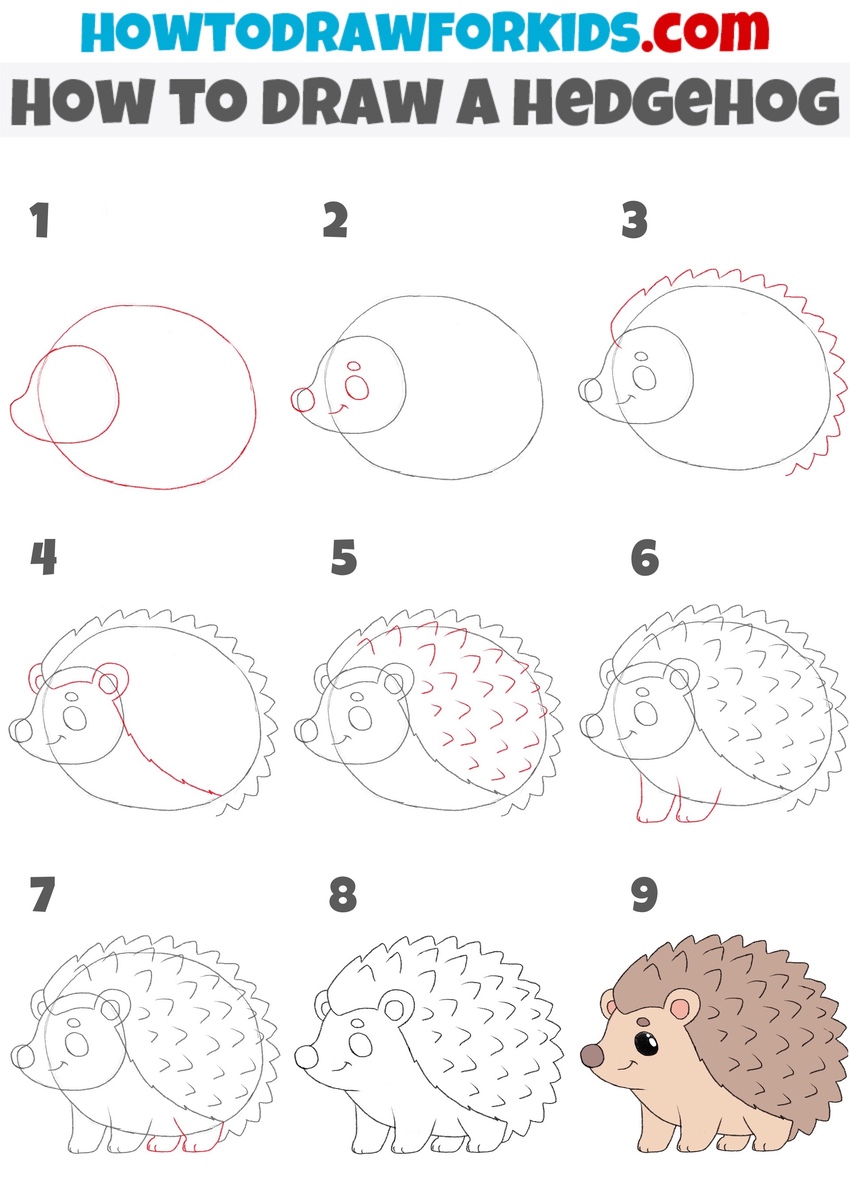
How to Draw a Hedgehog
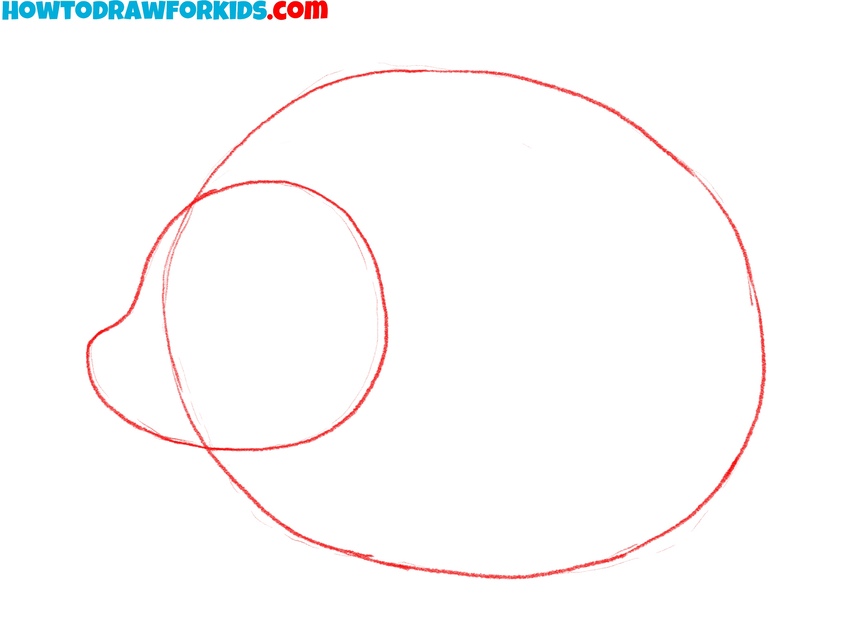
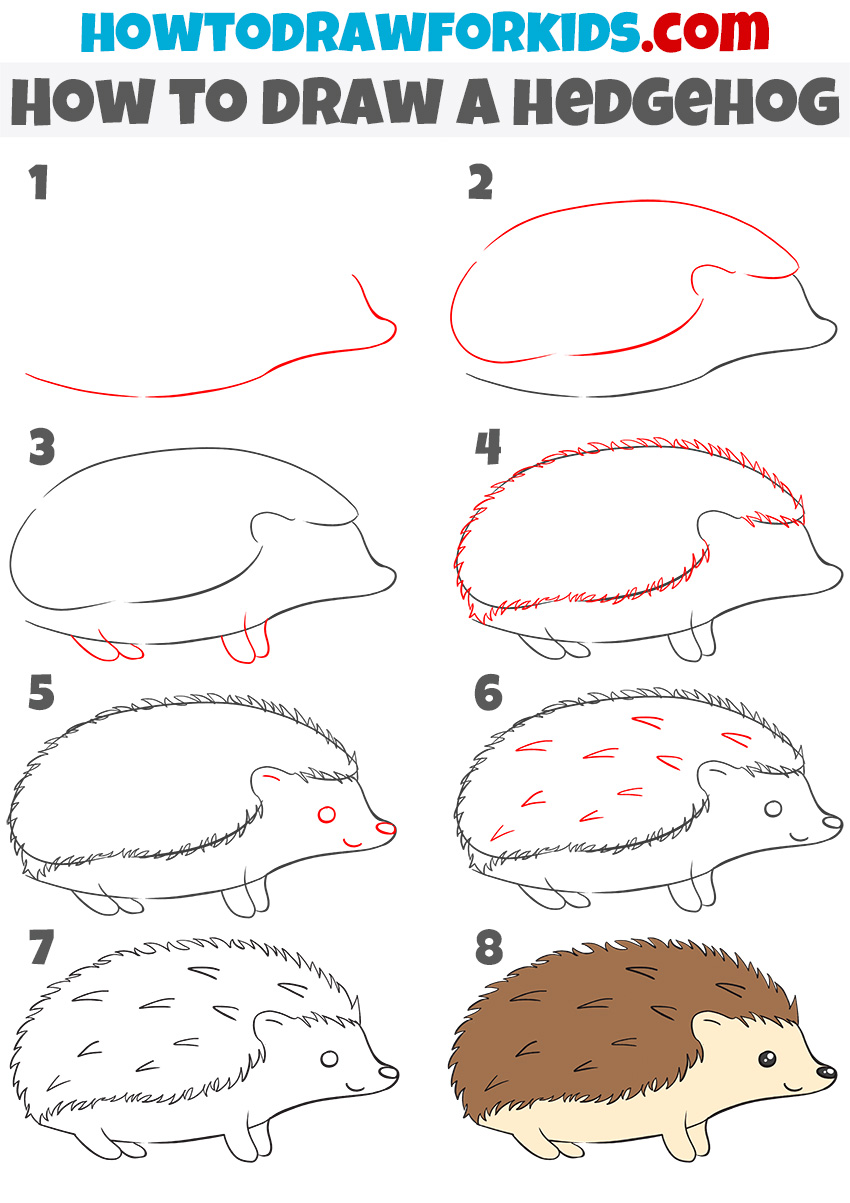
- Draw the basic shapes of the hedgehog.
Draw an oval shape for the body, with a smaller, rounded shape attached at one end for the head. These shapes don’t have to be perfect, as they will act as guidelines for the more detailed drawing in later steps. Keep your lines light, as you’ll be erasing and refining them in the upcoming steps.
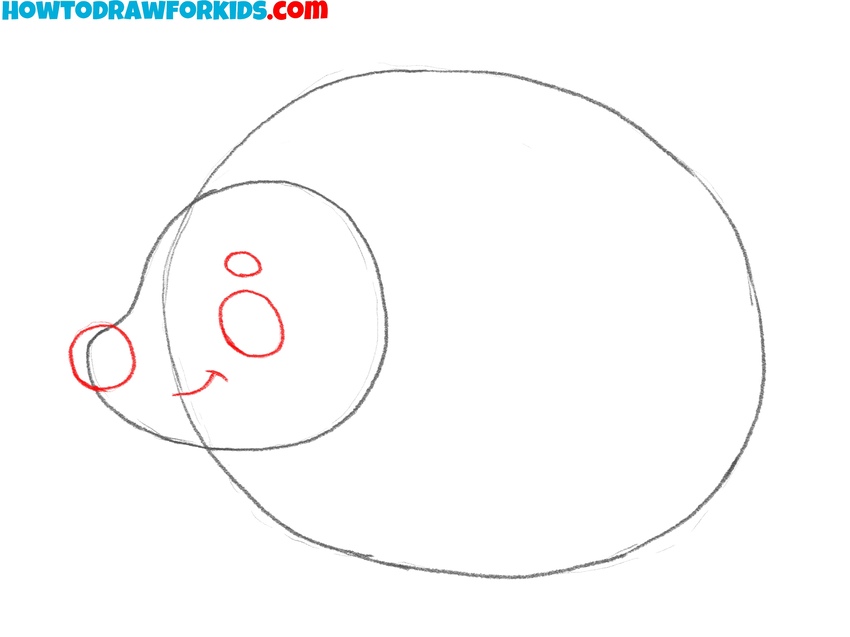
- Add the facial features.
Draw a small circle for the eye within the smaller head shape, and a tiny oval near the front of the head for the nose. Draw a small oval above the eye for the eyebrow. A curved line should be added for the hedgehog’s smiling mouth. These features are placed centrally within the head circle.
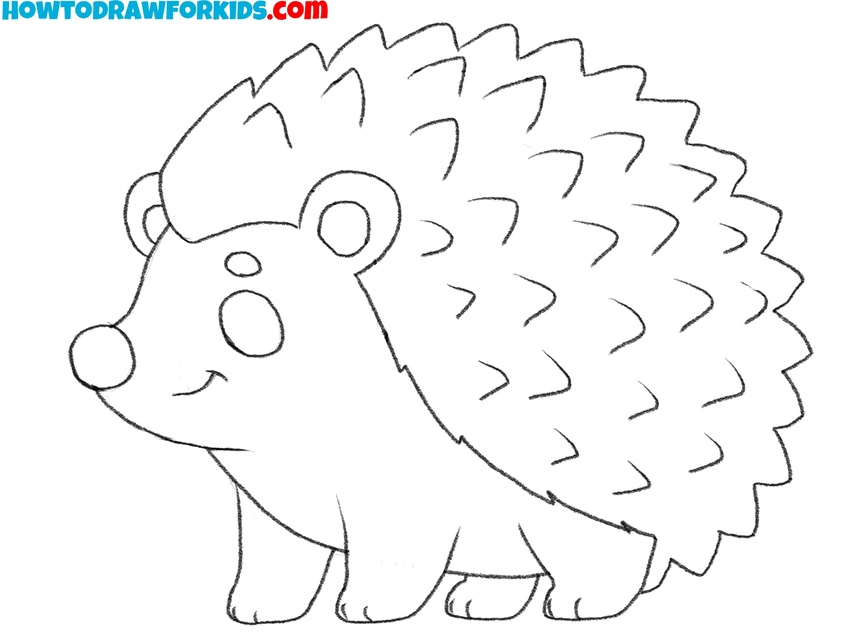
- Outline the spikes of the hedgehog.
Now, begin to draw the outline of the hedgehog’s spines along the back. Start from the top of the head, and create a zigzag line curving around the upper part of the body. This jagged line represents the hedgehog’s spines, giving it its distinctive spiky look.
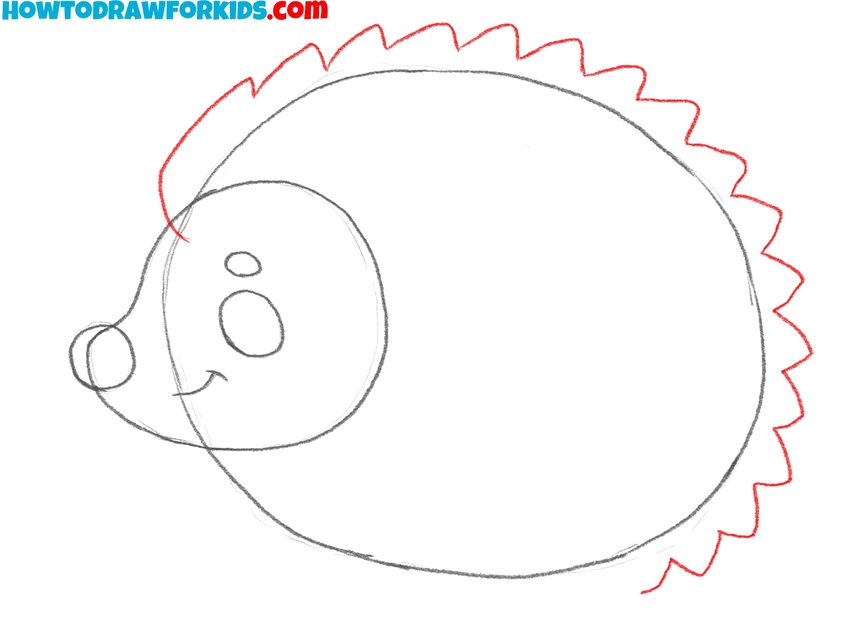
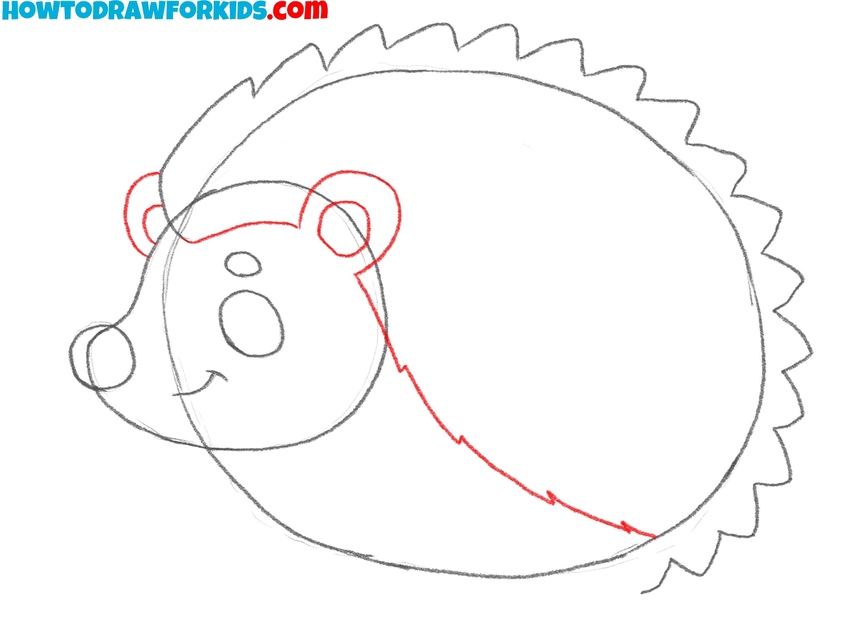
- Draw the ears of the animal.
In this step, draw the ears as two small semicircles on the top of the hedgehog’s head. The ears should be positioned above the eye, just where the head meets the spines. Then, draw a zigzag line from the right side of the head to separate the top of the torso from the bottom.
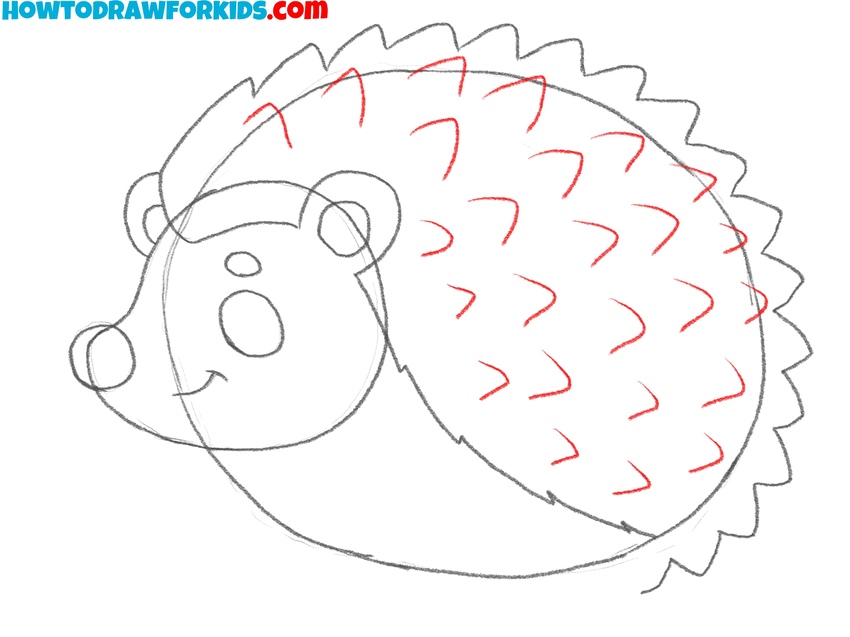
- Detail the spikes of the hedgehog.
Now, refine the spikes by adding small triangular lines inside the initial zigzag outline. These lines should fill the back area of the hedgehog, following the shape of the body. The spikes will start from the head and continue down the back.
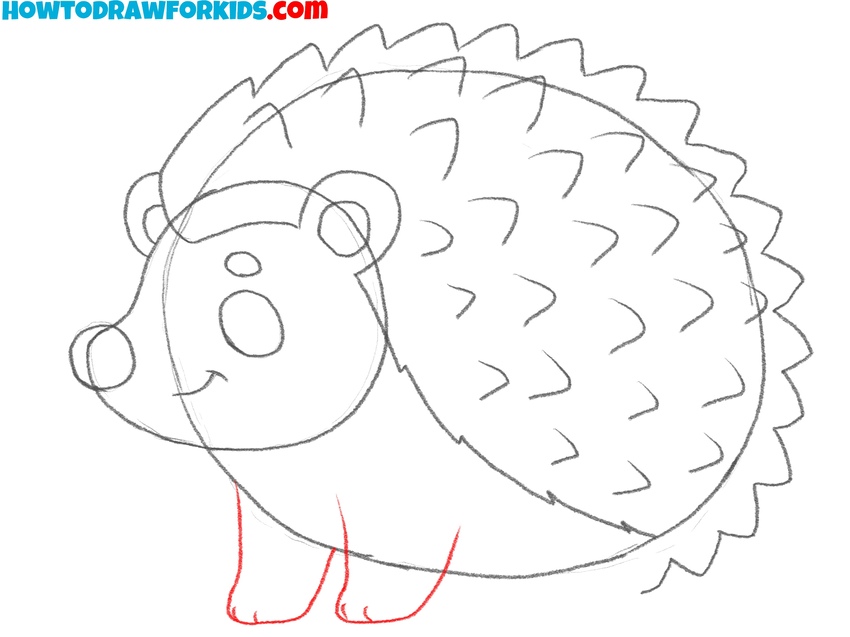
- Illustrate the front legs.
In this step, focus on drawing the hedgehog’s front legs. Sketch two small, rounded legs at the front of the body, just below the head. Then, draw the toes of the hedgehog with small curved lines. Make sure the legs match the overall style of the sketch.
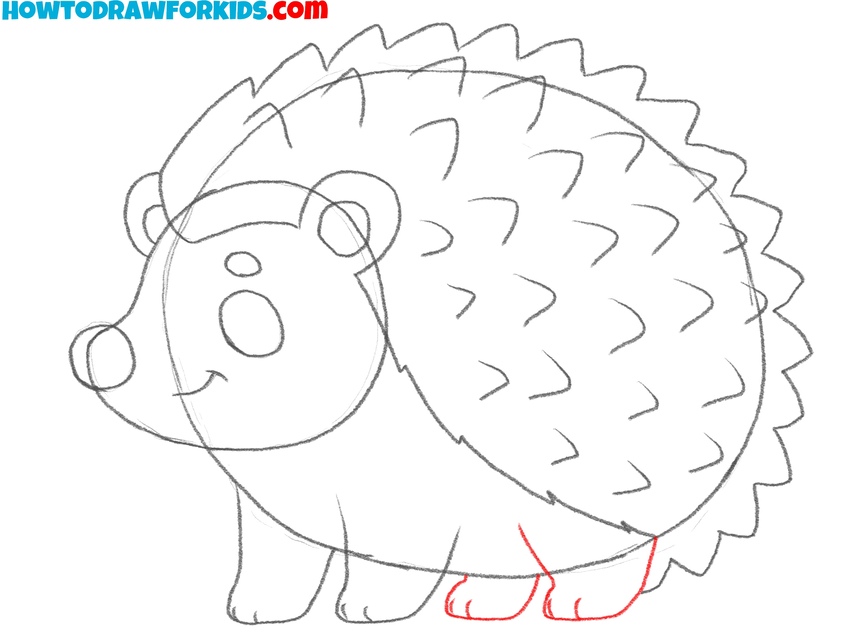
- Add the back legs.
These legs will be positioned near the rear of the body, slightly smaller and partially hidden by the hedgehog’s body. The back legs should mirror the shape of the front legs but appear shorter due to the angle. Draw the toes with the help of short curved lines as the the previous step.
- Erase the guideline and refine the sketch.
At this stage, go over your hedgehog drawing and erase any unnecessary guidelines or rough sketch lines that were used in earlier steps. Focus on cleaning up the entire outline, from the face and body to the spikes and legs. Once the drawing is neat and clear, add any final touches.
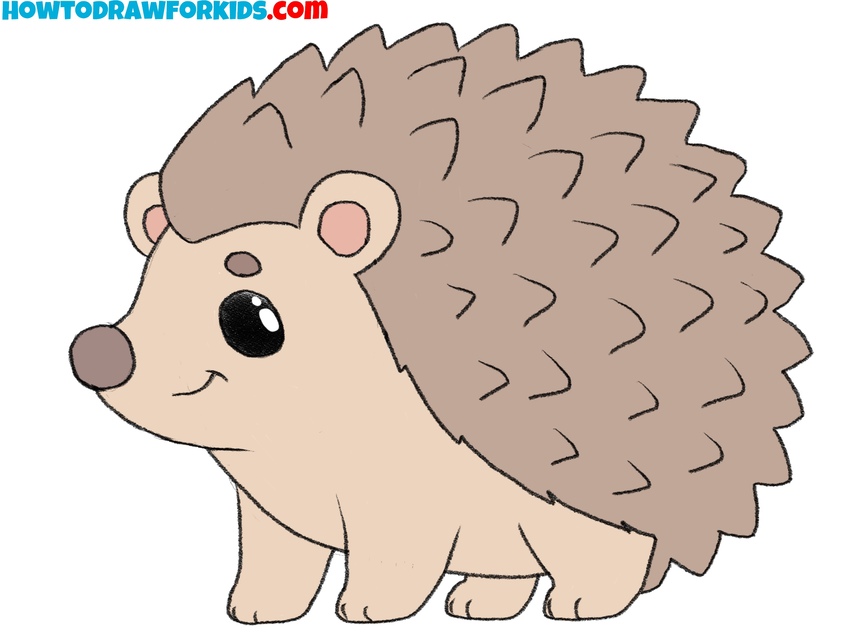
- Color your hedgehog.
Now that the hedgehog drawing is complete, it’s time to add color. Use light browns or tans for the body and legs, and a darker brown or gray for the spikes. The nose and eyes should be dark brown or black, and you can add a light pink or brown for the inner part of the ears.
How to Draw a Hedgehog: Video Tutorial
Alternative Drawing Technique
This is an additional tutorial to the first hedgehog drawing guide, offering a bit more simplified method. To start, the body is drawn as a long, smooth curve, followed by a rounded head and nose. The legs are simple, oval shapes, and the spikes are represented by a zigzag pattern along the back.
The facial features are basic – two small eyes, a simple nose, and a smiling mouth. The final step involves adding small spikes across the back and then applying color to complete the drawing.
Conclusion
In this tutorial, you learned how to simplify the form of a hedgehog, adding important details like spikes, to create a cute hedgehog drawing. Also, you learned how to draw a hedgehog in alternative way, using different method.
If you enjoyed this tutorial, feel free to share it with your friends and family. Don’t forget to subscribe to my social media channels to stay updated on new drawing guides and coloring pages. Also, don’t forget to leave a comment with your wishes, questions, or suggestions for future tutorials.
I draw it