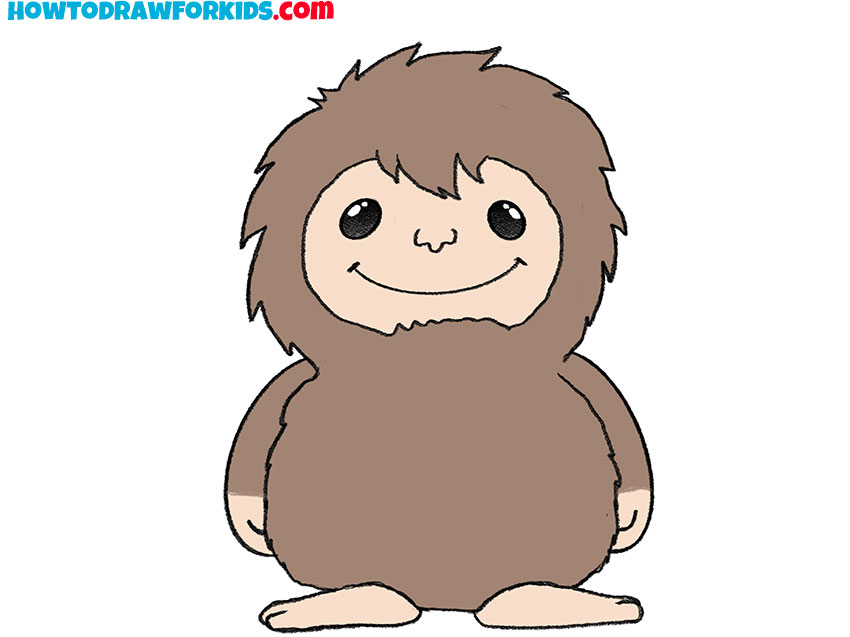
How to Draw Bigfoot
Bigfoot, also known as Sasquatch, is not something frightening. In this tutorial, I will show you how to draw Bigfoot in a simple, cute, cartoon style.
How to Draw Bigfoot: Basic Information
As mentioned, I aimed to transform the traditionally menacing character of Bigfoot into a simple cartoon style, which is traditional for my site. To achieve this, I avoided using a gloomy background and dark tones. If you want to create something scary, light shapes should be avoided, as the most frightening elements are often blurry, dark, and lacking in detail.
In contrast, I designed Bigfoot’s figure to appear light and clear. There are no threatening poses or unusual proportions; everything is open, cute, and friendly.
Bigfoot’s face is very simple, yet not surreal. Typically, surrealism combines very simple and highly detailed styles (as seen in the SpongeBob drawing, for example). This distinction is useful when creating a cartoon character meant to convey positive emotions.
To ensure that the drawing of Bigfoot doesn’t look overly simplified, we will add some small detailing. For example, we will use uneven, zigzag lines for the body contours to represent fur. These subtle details will give the drawing a simple yet interesting and professional appearance.
Bigfoot Drawing Tutorial
Materials
- Pencil
- Paper
- Eraser
- Coloring supplies
Time needed: 30 minutes
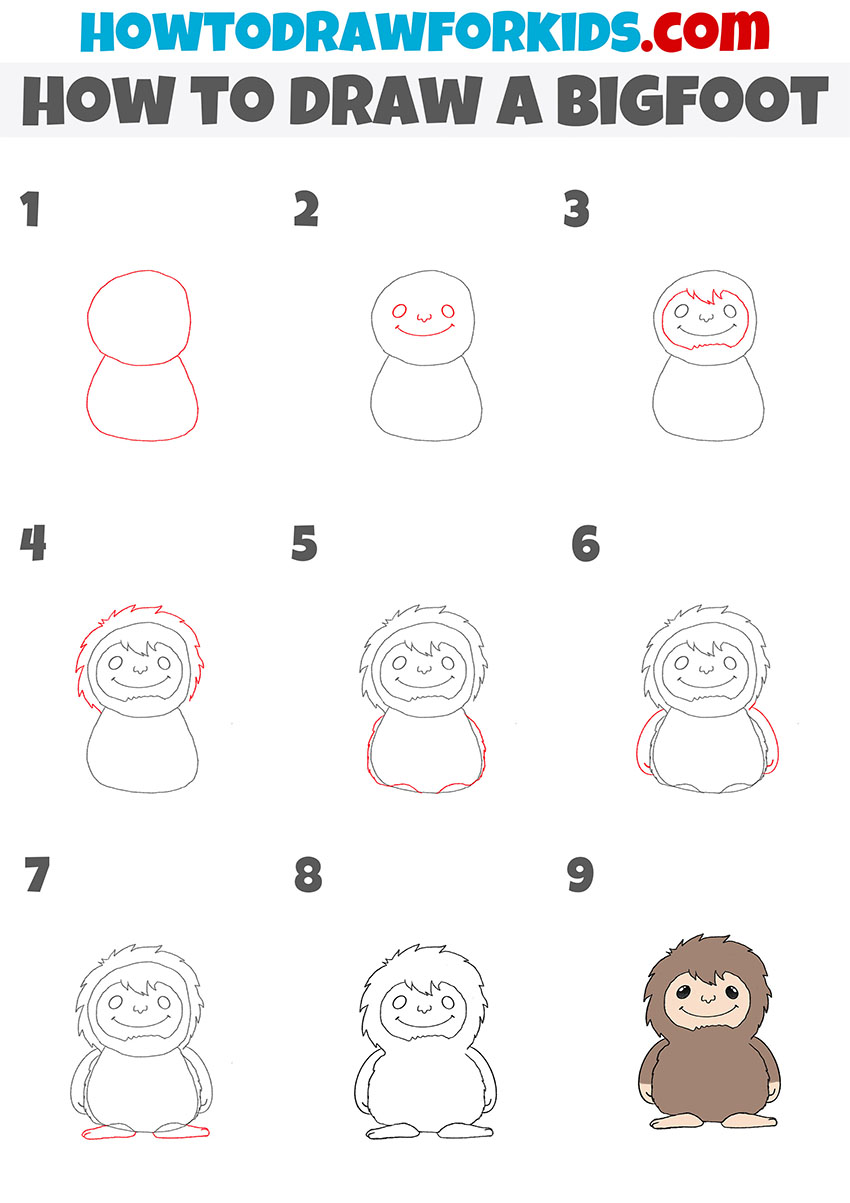
How to Draw Bigfoot
- Draw the head and torso.
Begin by drawing the basic outline of Bigfoot’s head and body. The head is a simple, rounded shape resembling an oval, and the body is another rounded shape but slightly wider at the bottom, almost like an inverted teardrop. Keep your lines light and smooth to make adjustments easier later.

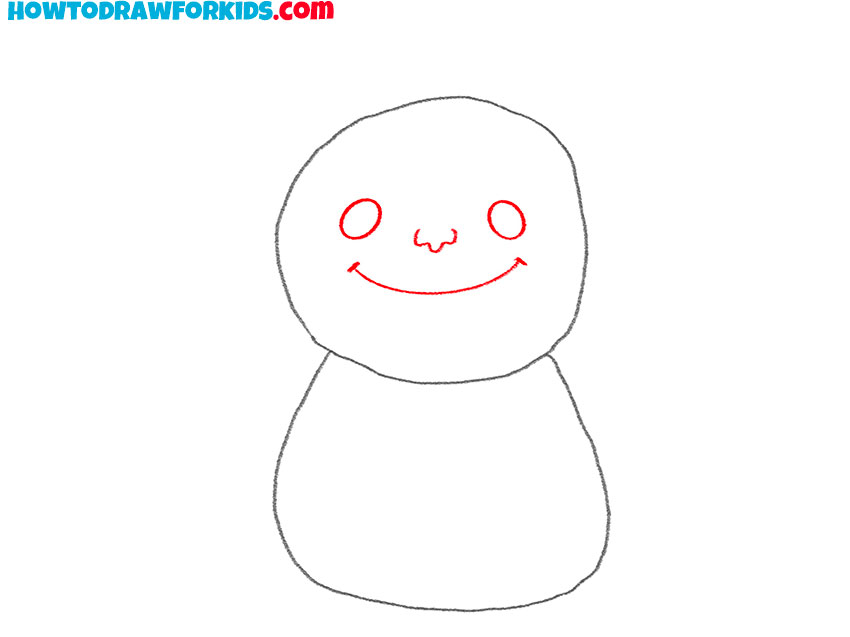
- Add the facial features.
Draw the eyes of Sasquatch as two small circles, positioned symmetrically near the upper part of the head. Then, draw the nose of Bigfoot as a simple geometric shape. Below the nose, sketch a small curved line to form a smiling mouth. These basic features will give Bigfoot a cute and non-threatening appearance.
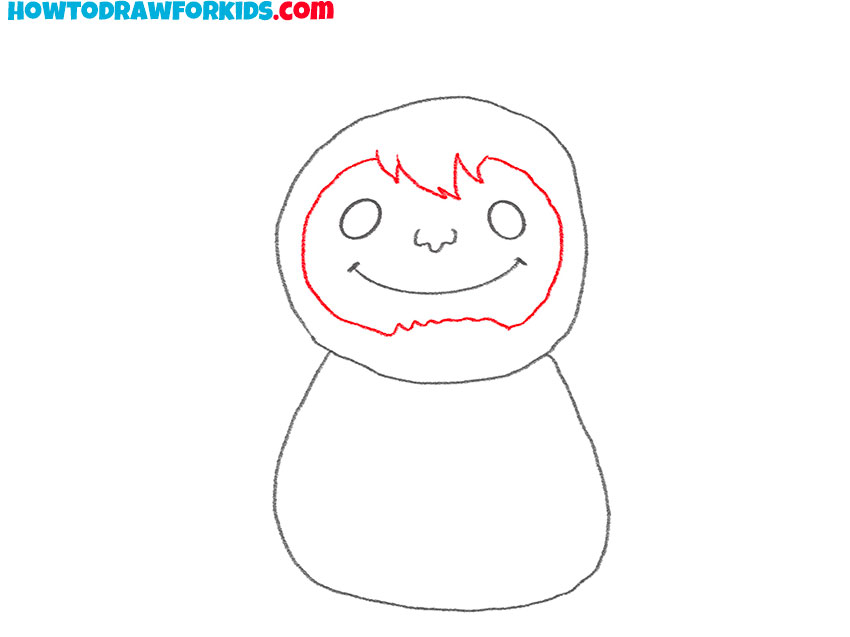
- Outline the face of Bigfoot.
Now, outline the hair around Bigfoot’s face. Draw a series of short, jagged lines around the top and sides of the head, resembling a fluffy mane. By the way, this is quite an interesting trick – drawing the texture of fur using the inner oval.
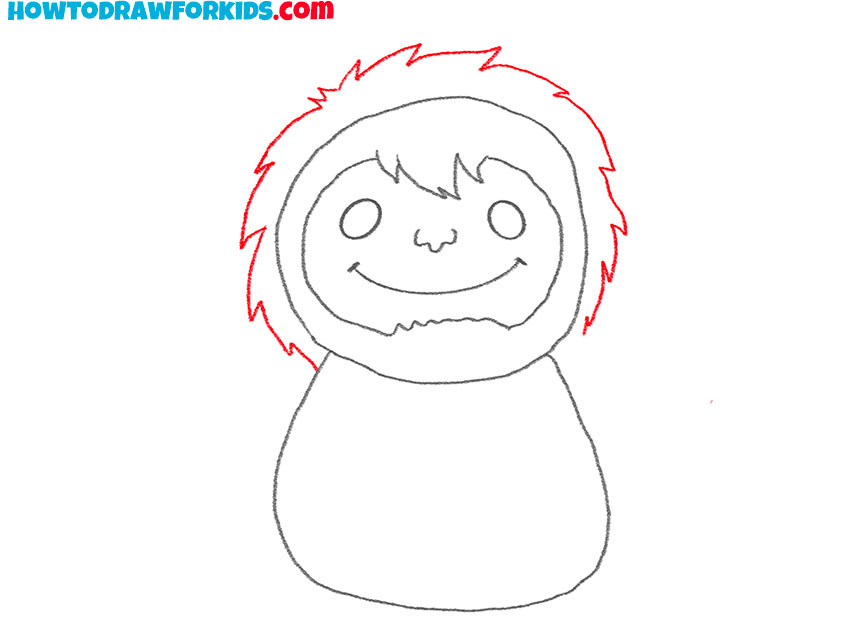
- Sketch the fur on the head.
Continue to refine Bigfoot’s hair, extending the jagged lines around the head to create a full, fluffy outline. This step adds more detail and definition to the character’s look. The hair should look more like a friendly halo around his head rather than a wild, untamed mane.
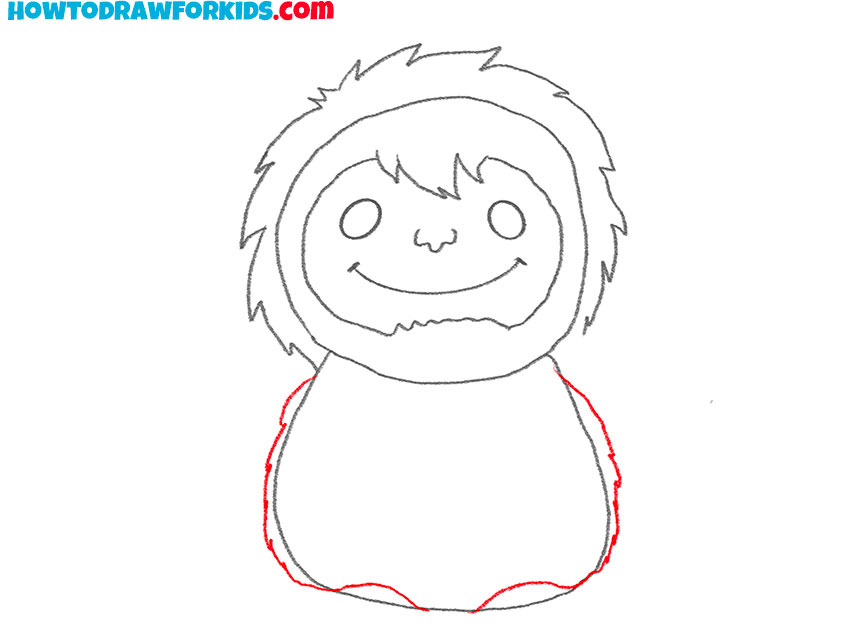
- Depict the fur on the torso.
So, add outlines of the torso that are more similar to the final result than the sketch in the first step. Mark the jagged contours on the sides, draw smooth curves in the center at the bottom. The slight lack of symmetry in this step is not a mistake.
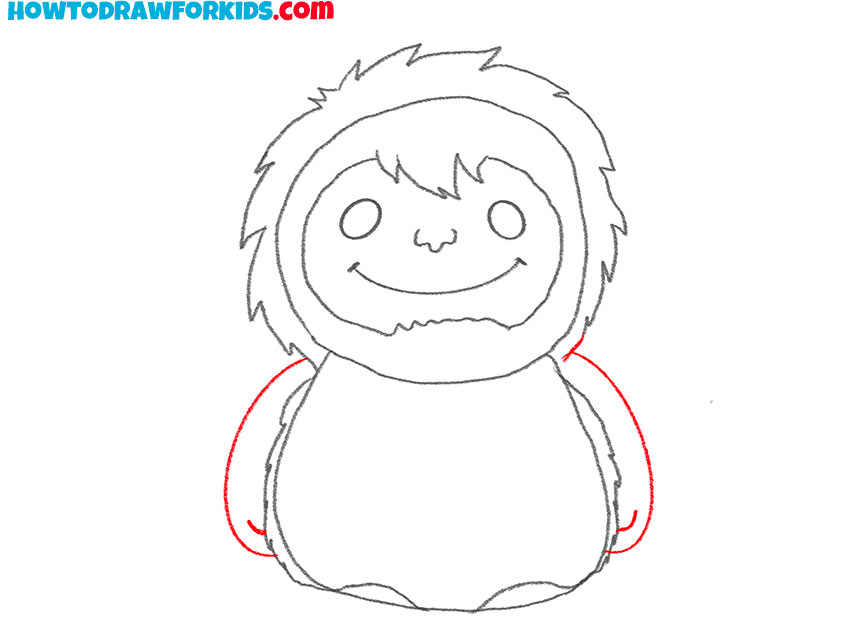
- Draw the arms of Bigfoot.
Draw two curved lines on each side of the body to represent the arms of Bigfoot, and at the ends, sketch small, rounded shapes for the hands. Keep the arms simple, without detailed fingers or complex parts, to match the cartoon style.
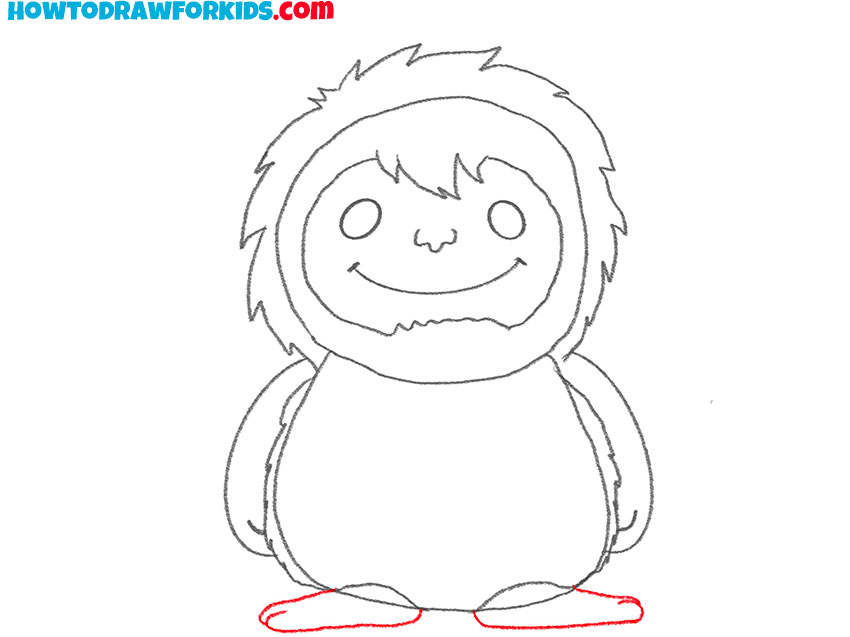
- Sketch the feet of Sasquatch.
Draw two small, rounded shapes at the bottom of the torso, with each foot positioned under the body. Outline the feet of Sasquatch more clearly, adding slight curves to define the toes if desired. Keeping the feet rounded and close together.
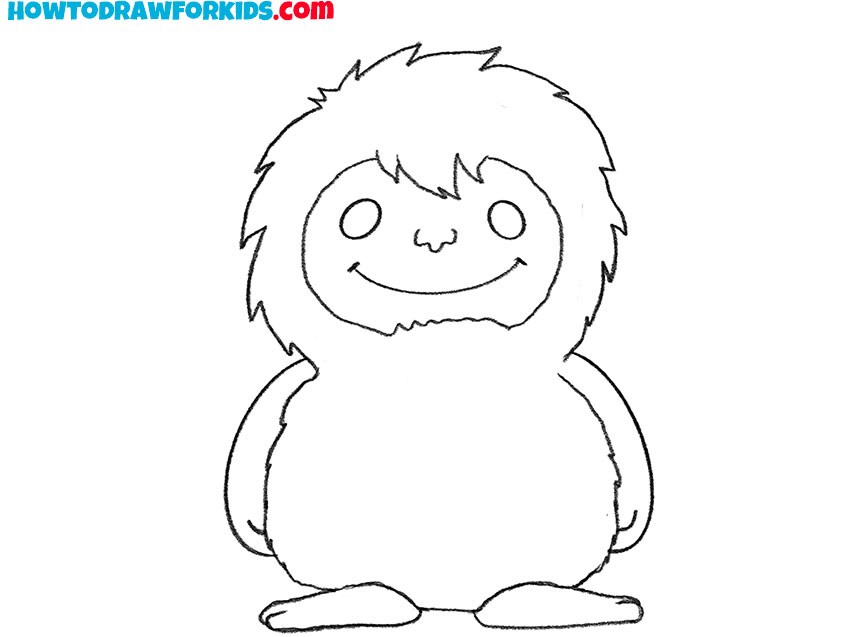
- Correct all inaccuracies.
Finalize the outlines of your Bigfoot drawing, ensuring all the lines are smooth and clean. Erase any unnecessary guidelines from earlier steps. A clean outline will help your Bigfoot drawing appear more professional and ready for coloring.
- Color the Bigfoot drawing.
Use a light brown or beige shade for the body and a slightly darker brown for the hair. To make your drawing of Bigfoot look more realistic, add highlights to the eyes. Make sure the colors are even and fill in all the outlined areas smoothly.

Additional Content
To support your learning, I’ve prepared a free, downloadable PDF that complements this Bigfoot drawing tutorial. This PDF provides a compact guide to the key steps, allowing you to practice drawing Bigfoot anywhere, even offline. Using this PDF with additional materials will strengthen your drawing skills and boost your confidence in illustrating Bigfoot’s unique appearance.
How to Draw Bigfoot: Alternative Technique
Alongside the main tutorial, I’ve developed an alternate approach to drawing Bigfoot. This method aims to improve your skills, and learn new drawing techniques and styles.
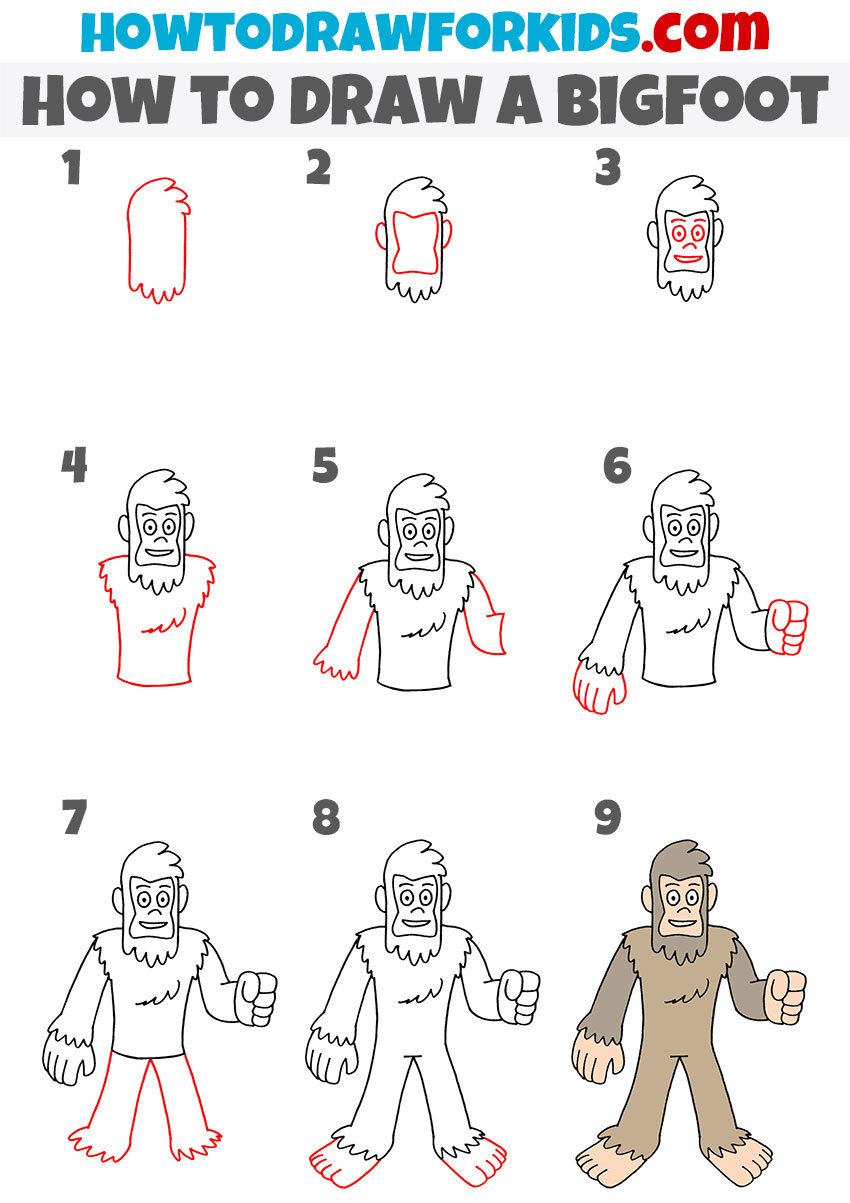
The primary difference between this Bigfoot drawing tutorial and the first one is in the style and structure of the character. This tutorial presents a more human-like Bigfoot with distinct body parts and facial features, including arms, hands, and legs that are more defined. Unlike the previous tutorial, which had a simpler and cuter design, this version shows sharper details like fur texture on the shoulders and arms, distinct facial features, and more pronounced hands and feet.
To draw Bigfoot in this style, start by sketching the outline of the head with simple curved lines. Add a rectangular outline in the center of the face for guidance, then draw the eyes, nose, and mouth within this shape to create Bigfoot’s facial features. Next, add the ears on both sides. Move on to the torso, drawing a slightly wavy outline to represent fur along the shoulders and add arms on each side, using jagged lines for texture.
Draw hands with simple finger shapes, and then add the lower body and legs with fur details on the bottom. Erase any unnecessary lines, then add toes to complete the feet. Finally, color Bigfoot with a soft brown tone for a finished look. This step-by-step guide will help you create a cartoon Bigfoot drawing with a slightly more detailed, human-like appearance.
Conclusion
I hope my guide on how to draw Bigfoot was cool and useful. So, keep practicing your drawing skills to improve and create even more charming characters. If you enjoyed this lesson, be sure to subscribe to our YouTube channel and follow me on TikTok for more fun and easy drawing tutorials.
If you want to further practice your drawing skills of different mythical characters or monsters, try my tutorial on how to draw a zombie or my guide on how to draw a mummy. Also, visit the category called Fantasy on my website to learn how to draw other mythical creatures.