How to Draw a Bunny Face
With this very simple tutorial and additional PDF printables I will show you how to draw a bunny face using 6 elementary steps.
How to Draw a Bunny Face: Introduction
This tutorial on how to draw a bunny face will be very useful for those who want to learn how to draw this cute animal in more detail.
Let me remind you that I already have a lesson on how to draw a bunny, but there I did not detail the head of this animal so much. Using this instruction and the aforementioned bunny tutorial, you should be able to draw a fairly detailed bunny.
As you can see, I decided to draw a bunny in a very cartoonish and simplified style. This is done so that the young artist does not face difficulties in the process of work.
So let’s get down to the tutorial!
Bunny Face Drawing Tutorial
Materials
- Pencil
- Paper
- Eraser
- Coloring supplies
Time needed: 30 minutes
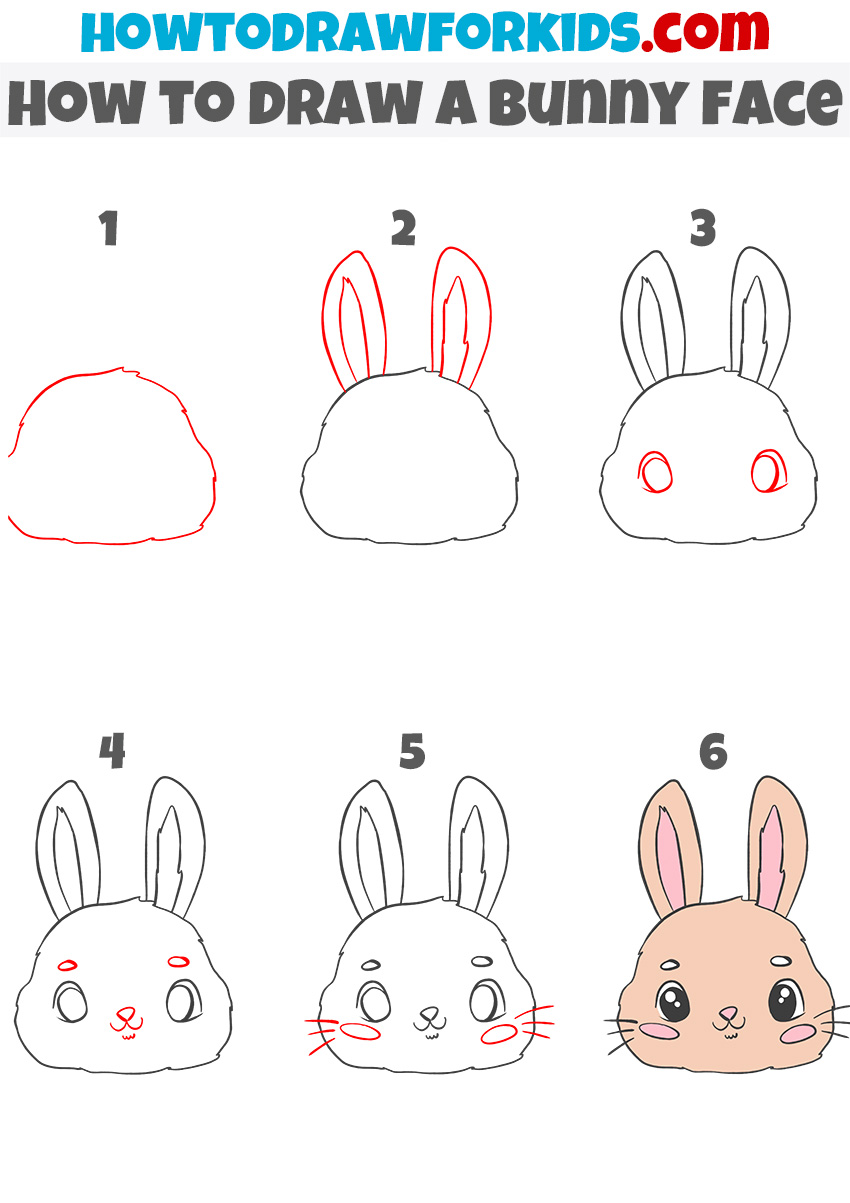
How to Draw a Bunny Face
- Draw the outline of the head.
Start by drawing a simple, rounded shape for the bunny’s head. It should resemble a slightly flattened circle or oval, with a bit of unevenness to suggest fur. The shape doesn’t need to be perfectly symmetrical, and it’s okay if the lines are a little jagged to give the head a soft, fluffy appearance.

- Add the bunny’s ears.
Next, draw two tall, slightly curved ears at the top of the head. The ears should taper toward the top and have a bit of natural bend to them. Inside each ear, draw a second, smaller shape to represent the inner ear texture of this part. These inner shapes should roughly follow the contours of the outer lines.

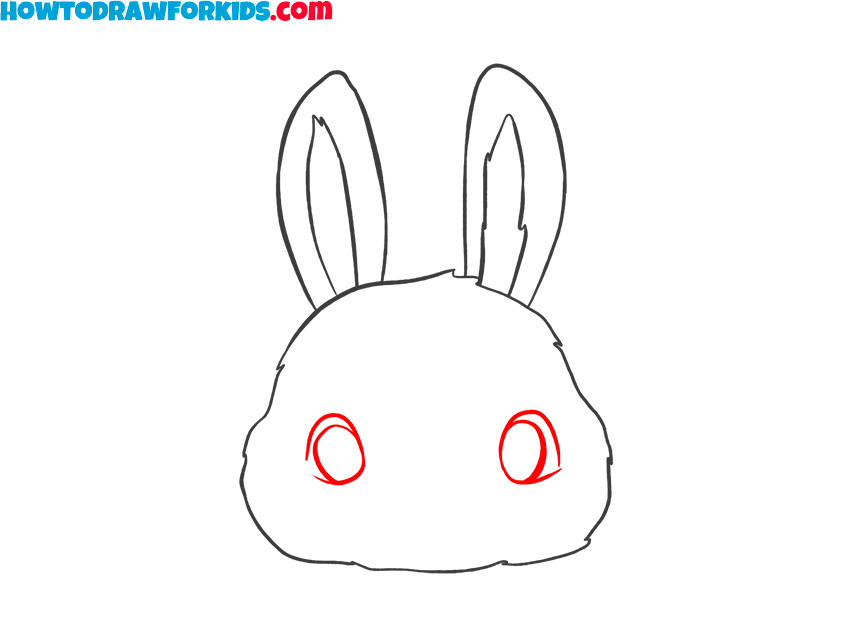
- Draw the bunny’s eyes.
In this step, sketch the bunny’s large, rounded eyes. Place them towards the middle of the face, leaving enough space for the nose and mouth underneath. The eyes should be circular and relatively large to give the bunny a cute, cartoon appearance.
- Detail the bunny face.
Now it’s time to add more features and details. Begin by drawing small oval eyebrows above each eye, which will help give the bunny more cute appearance. Below the eyes, draw the small triangular nose at the center of the face, and beneath it, sketch the simple mouth using two small curves.

- Add whiskers and more details.
The bunny’s whiskers should look like three lines extending from each side of the face. These should be drawn with soft, flowing lines. Next, add small ovals for the bunny’s cheeks near the mouth and whiskers. These shapes will make your bunny face drawing look more cute and cartoon.

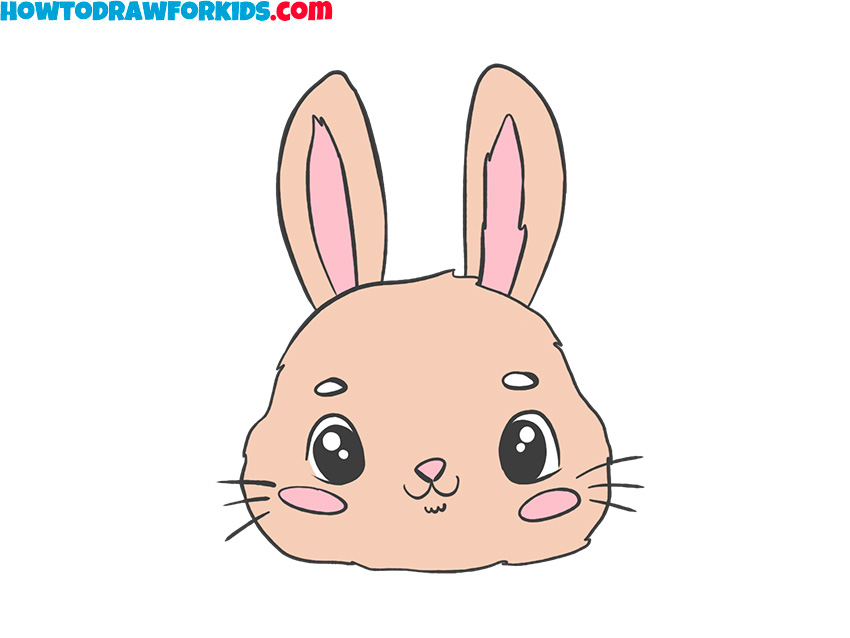
- Color the bunny.
Use light shades for the bunny’s fur, typically soft browns or grays. For the inner parts of the ears, use a soft pink to contrast with the fur color. Add black for the eyes, leaving small white areas to create a reflection effect and make the eyes look shiny. The nose can also be colored in pink or a similar shade.

Additional Content
This instruction on drawing a bunny face is now almost complete. It was created to offer guidance for you, your children, or students, and I hope it met your needs. If you wish to continue practicing or need additional resources, there is a PDF version of the guide available for download.
The PDF includes a detailed breakdown of the drawing steps, along with useful materials such as a coloring page, a tracing worksheet, and a grid drawing worksheet. These resources are created to give you further practice and aid in improving drawing skills.
How to Draw a Bunny Face: Additional Method
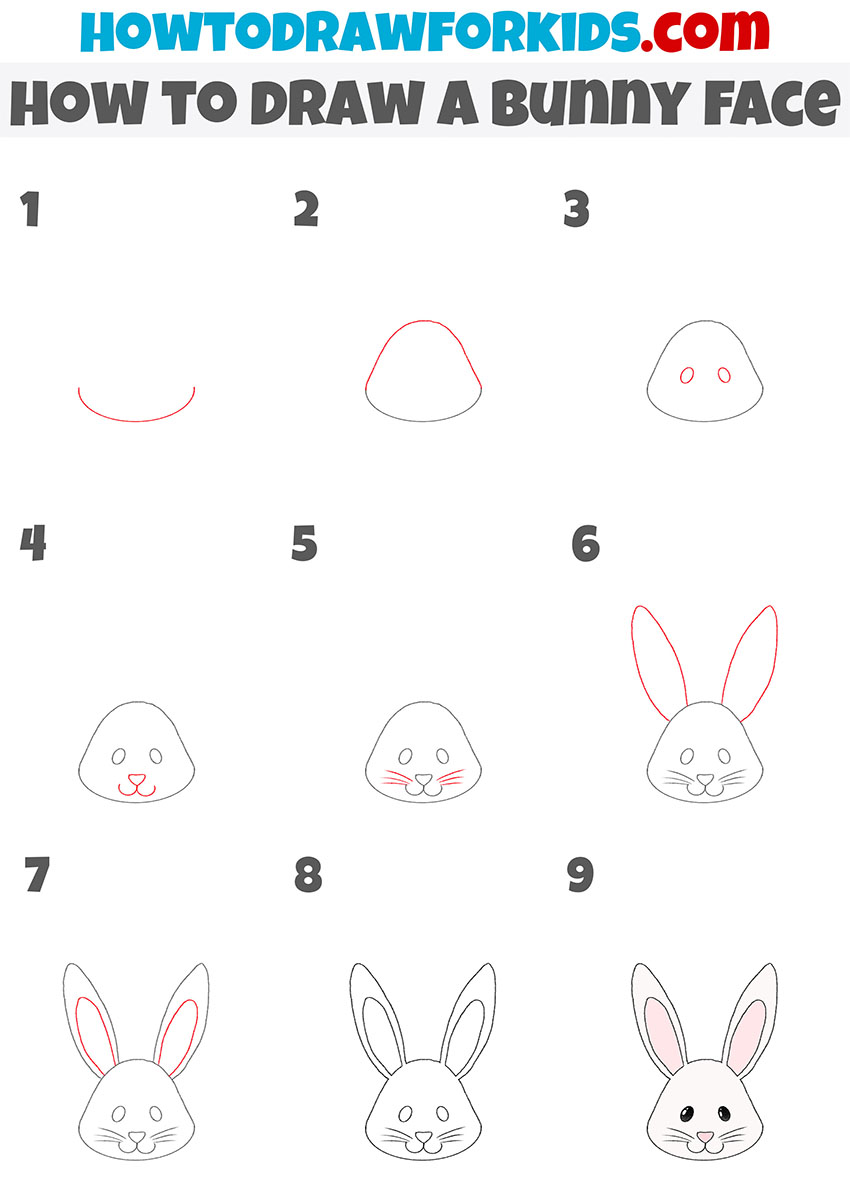
This is an additional tutorial that complements the earlier bunny face drawing guide. While the first tutorial provides six steps, this one will show you how to draw a bunny face in nine steps. Also, the sequence of steps is different, so you can choose the method you like.
In this simplified version, the tutorial begins by drawing the lower part of the bunny’s face, starting with a curved line. The next step is completing the shape of the head, followed by adding two simple oval eyes. The bunny’s nose and mouth are added next, with a small, rounded triangle for the nose and a gentle curve for the mouth.
Whiskers are drawn on both sides, using simple lines. The ears are added afterward, long and tapered at the top, followed by an inner ear outline. The tutorial ends by adding color, highlighting the pink inside the ears and a soft color for the face.
hi this is noah